review: Westcott 7′ Parabolic Umbrella
Continuing the photo session with Ulorin Vex in the studio, I decided to swap out the big Profoto 4×3 softbox, for an even larger (but very affordable) light modifier – the Westcott 7′ Parabolic Umbrella – white (B&H / Amazon).
Two things that immediately struck me about the Westcot Parabolic Umbrella … it’s sheer size when folder open. It is 7 feet if measured across the span of the umbrella’s arc. And when it is folded up, it is surprisingly compact and light-weight. It collapses to a 43.6″ size, and fits snugly into a 3″ diameter carry bag.
The idea behind a parabolic reflector, is that the rays of light coming from it, are parallel. This makes the umbrella very efficient in directing the light to your subject. There are other parabolic reflectors which are actually focusable, but they are very spendy. Thousands of dollars spendy. This makes the parabolic umbrellas like the Westcott really good value for money at only $100, if you’re looking for a large light modifier in the studio. (I’m not sure how practical it would be on location.) The Westcott 7′ Parabolic Umbrella (affiliate) appears to be quite sturdy. The ribs are made of fiberglass. It elegantly folds open and closes as easily.
I chose the white/black umbrella over the silver Parabolic Umbrella, because I wanted a light that would be less specular and contrasty than the silver umbrella was designed to be. Since the white material scatters light more than the silver umbrella, the White umbrella doesn’t really offer any advantage over a non-parabolic reflector. Still, it is a huge light modifier at an affordable price, and light to carry.
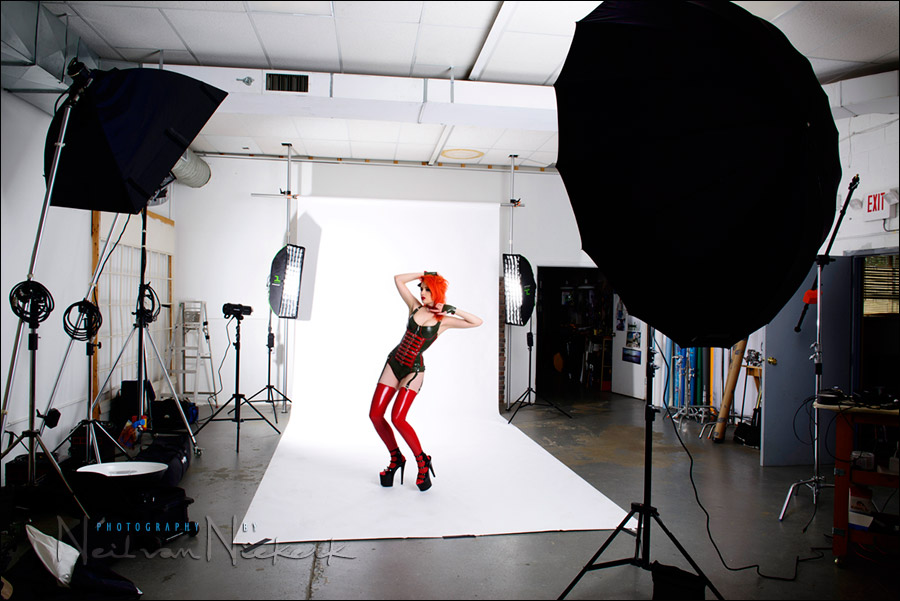
The lighting setup is exactly as was used in this article: high-key studio lighting, except that the Profoto softbox was replaced with the Parabolic Umbrella.
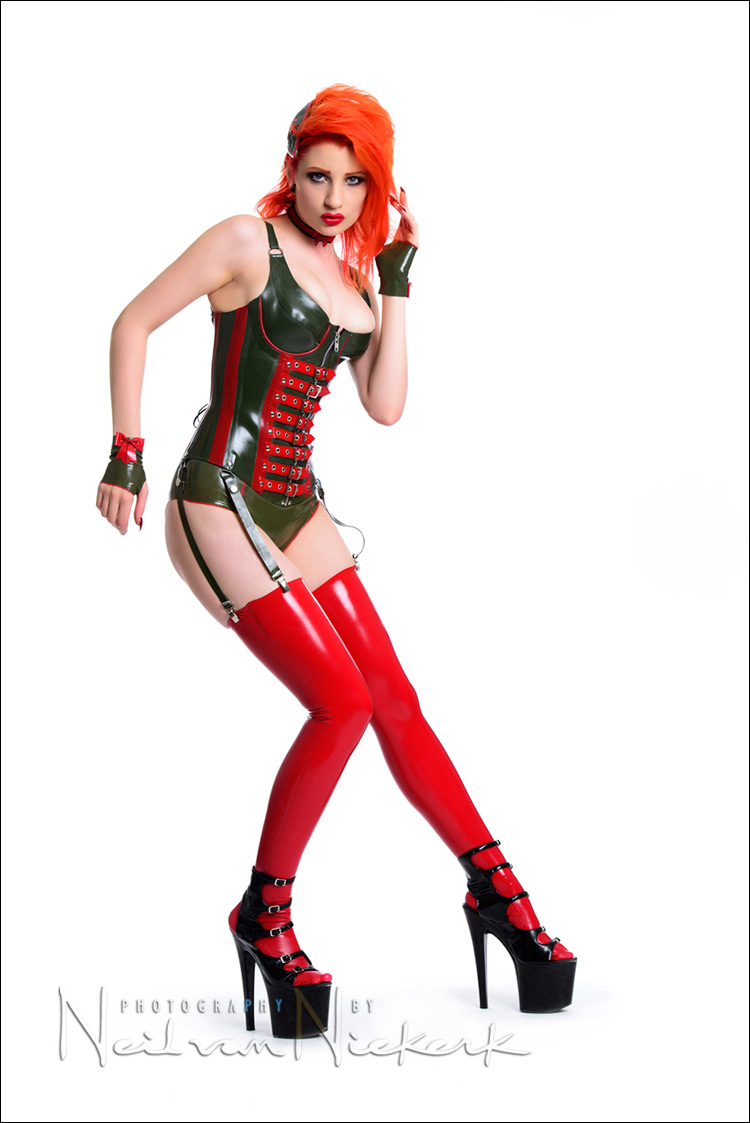
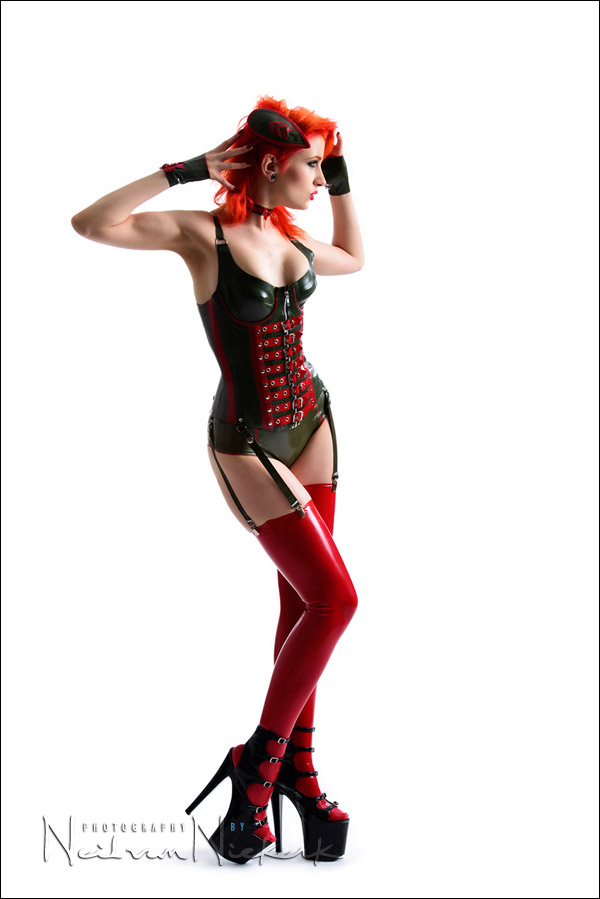
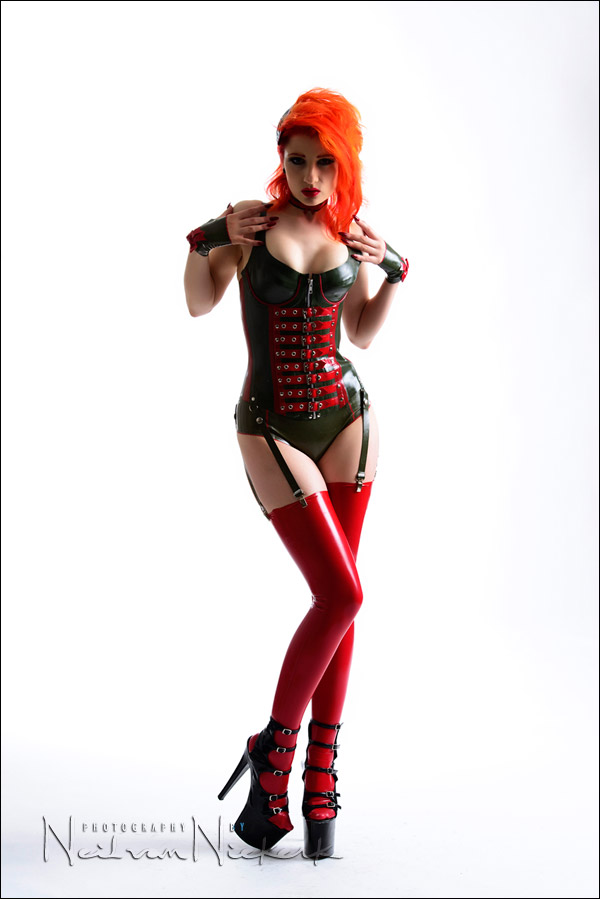
For more directional light, I placed the main light (the parabolic umbrella), directly to my right. It was at nearly a 90 degree angle from me. For this part of the session, I asked Ulorin Vex to pose towards the light to make best use of the direction the light fell towards her.

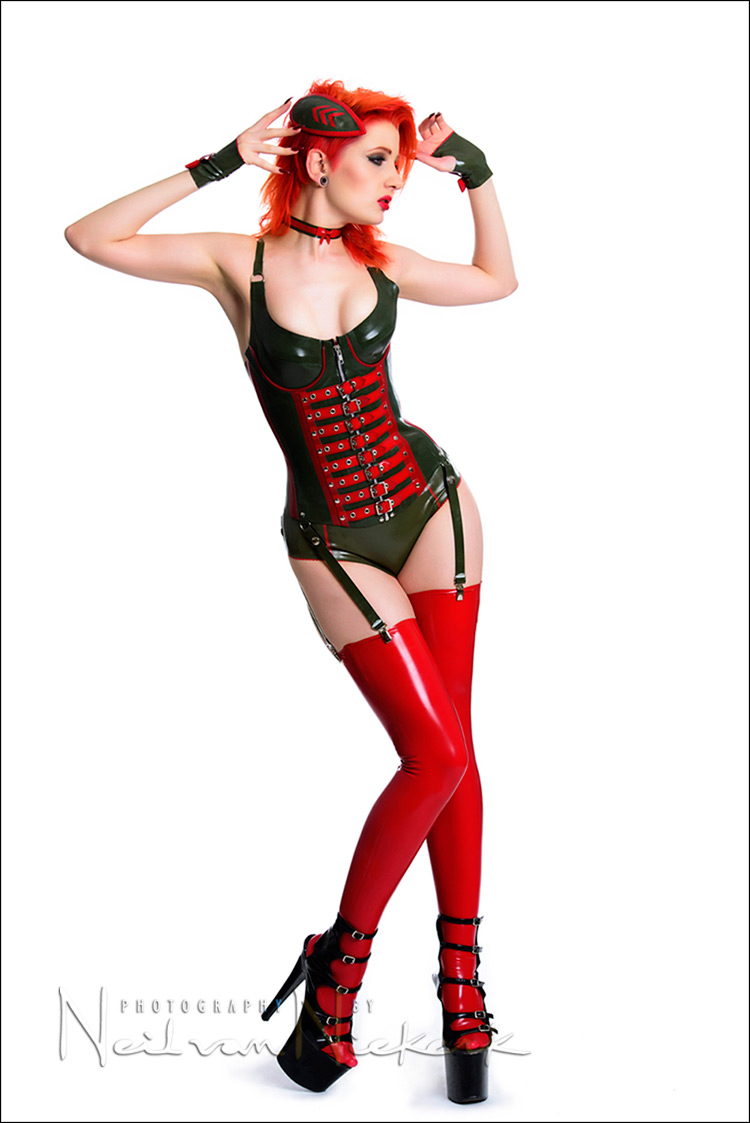
Just for comparison, a photo where I asked her to turn towards the camera. Without any care how light and subject are placed in relation to each other, the image just falls apart. (I didn’t edit the white background here like I did for the other images.)
- camera settings for all images: 1/125 @ f/8 @ 100 ISO
Related articles
- High-key studio lighting for portraits
- High-key studio lighting (part 2)
- Studio photography: low key lighting variations
- Behind-the-scenes video clip of the photo session
Photo gear (or equivalents) used during this photo session
- Nikon D800
- Nikon 70-200mm f2.8 AF-S VR II / Canon EF 70-200mm f/2.8L IS II
- Westcott 7′ Parabolic Umbrella – white (B&H / Amazon)
- Profoto D1 studio light (500 Ws)
- Profoto RFi 1’×3′ softbox with the Profoto 50 degree 1×3 soft-grid
- (2x) Nikon SB-910 Speedlight / Canon 600EX-RT Speedlite
Studio lighting workshops
If you are interested in learning more about studio lighting, including lighting for headshots, I offer workshops on studio lighting. The workshops will be held at my studio space in NJ, and it has a wide range of studio lighting gear to play with!
Hi Neil, love the photos with the new d800, just got mine next on the shopping list d4. Will you be posting settings guide for the d800 like you did for the d700.
All the best Brendan[ wicklow Ireland]
I guess you can’t light these with a speedlight?
Hi Ted… Yes you can! Actually tha is the only artificial light source I use… other than ambient light or a combination of each.
Yeah, I want to know that too. I only own speedlights, no studio strobes– would one of these be worth it for me?
I have the black/silver and the translucent 7′ by Westcott and love both. The translucent I actually use as a scrim outdoors and the black/silver is great for lighting 3-5 people. I’ve used both outdoors but it requires some ballast (sandbags) if there’s any wind at all. Big light for the money spent. By the way Great Photos Neil and I always look forward to your Tangents posts.
A 7 footer can light so much more than 3 to 5 people.
You can light these with speedlights. One will actually do it BUT it is best to use multiple speedlights by using one or two triflash bracket(s). Also, use the wide angle adapter on the speedlight if you have it to spread the light into the umbrella.
rc
thanks for sharing the meaning/purpose of “parabolic” even though I already own one, smaller than this one, I don’t remember knowing that part, my parabolic umbrella is my favorite umbrella, it makes my images look the way I want them to.
Great review of the 7′ Parabolic!! Big thank you! I’d love to post this on our website featuring the images & blog if that is okay? Please let me know.
Awesome Neil. What are your thoughts on the D800?
Jason, my first impression of the Nikon D800 was very favorable.
Just came across your blog. This is my exact setup, and I find it bulletproof for this style of portrait.
Profoto 500s, 7 foot Westcott, D800. For me, a killer setup that is portable and extremely hard to screw up.
I like that.
Way late, but with the front diffuser available, would you still go for the white over the silver? I guess both will be very soft.
I only have the white umbrella, and without a front diffuser.
With all the softboxes and stuff that I have in the studio, I didn’t feel like I needed more!