Sequence of photos in posing a model
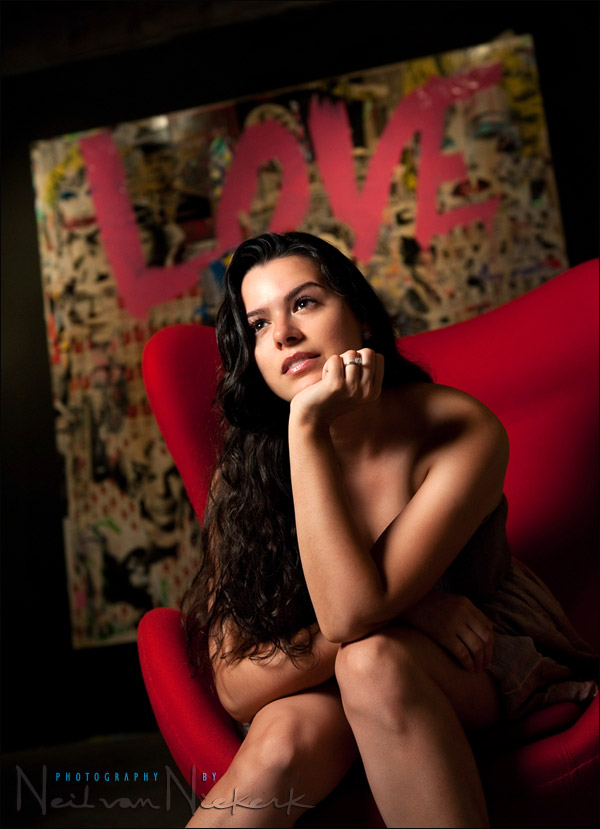
The photo above is one of my favorite images. It was also subsequently chosen as the cover image for my book about off-camera flash photography. Oktavia is a professional dancer and we both wanted some photos to extend our portfolios. Of the number of places we used as a backdrop, I really liked this place – an art gallery in Manhattan where we were kindly allowed to use as a setting. What I’d like to show, is some of the images leading up to this final choice – how a combination of positioning Oktavia and changing the light, culminated in this photograph.
The lighting was once again very simple – a speedlight in a softbox, wirelessly controlled by the on-camera Master flash. The slaved flash was set to Manual output.
camera settings: 1/60 @ f3.5 @ 640 ISO
The settings were chosen such that the background would register – incandescent lighting on an art piece.
Here are 8 other images – picked to show some of the changes in posing; and positioning of her hands; body posture … and changes in the position of the softbox. Click on the image for a larger version.
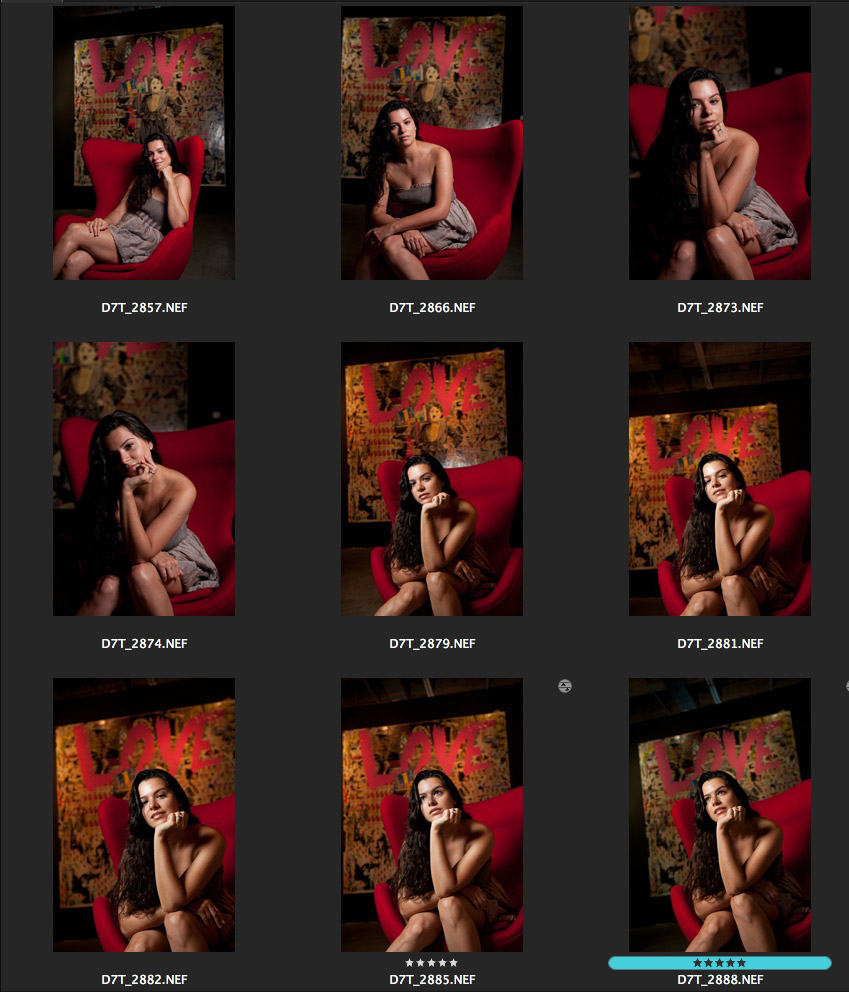
You can also see how I changed my own position to hide the flash glare on the background. By dipping lower, I was able to hide the glare spot behind the chair. But this caused her gaze to the camera to cause heavy shadows under her eyes. I therefore asked her to look up towards the light. This immediately gave clearer more ‘open’ light on her features.
With the initial images, I had the softbox on my right-hand side, but I didn’t like how that caused her body to be cast in shadow. By changing the light to the other side (camera-left), and directing her gaze towards the light, the lighting pattern on her body changed completely.
I also asked Oktavia to move her hand resting on her lap slightly so that her fingers are slightly more hidden from view. A subtle change, but an important one.
I started this session with the flash gelled with a full CTS gel. I took it off to see how that would change the background .. and I didn’t like the deep orange tones of the background now. So for the final choice, I had placed the CTS gel back on the speedlight in the softbox.
Finally, the image I chose as my favorite is a culmination of having a patient and cooperative subject; an interesting background; how my model was posed; the lighting; and other choices of equipment used. With portraits it is most often a case of a number of adjustments that are made until everything falls into place.
More articles on off-camera flash …
Equipment used during this photo session:
Nikon D3; Nikon 24-70mm f2.8 AF-S (B&H); Nikon SB-900 (B&H)
Lastolite EZYBOX 24×24 softbox (B&H)
Manfrotto 680B monopod (B&H);
brass stud to attach softbox to monopod (B&H)
I think I first noticed this picture a few weeks back when surfing your Facebook page, it really is a fantastic shoot. When you look at it your writing immediately comes to mind as it very clear how much thought went in placing the subject and background.
It’s intriguing how you progressed toward a shot with real spark.
As I’m thinking that location work might be my way into portrait photography, that EZYBOX looks good to me. I just wonder how it will accomodate my flexTT5 plus 580ex ii. Will they fit?
I agree with your pick, lovely portrait. I’m nervous about shooting women from down low in fear I might make them look “big”. But you certainly don’t have that problem here, lovely work!
Great piece typical of your style: succinct, informative accessible. Much appreciated.
Two question about the choice of Ezybox 24 inch. If you were to buy one of these to be the most versatile as well as manageable to start you off for location work, which size would you go for?
Sizes available seem to be:
Medium Square* 60cm x 60cm (24″x24″) 2460
Large Square* 90cm x 90cm (36″x36″) 2490
Medium Rectangular* 90cm x 45cm (36″x18″) 2495
Large Rectangular* 90cm x 60cm (36″x24″)
And would you say that sb800 are powerful enough for this use (esp in the larger ones)?
Cheers
David
David, I’d just use the 24×24 unless you really need those larger softboxes. The spread of light out of the 24×24 is pretty remarkable.
I recently shot the wedding formals with just one of those, held up on a monopod by my assistant, at two weddings.
Even with groups of 12 people, the light was very good with no fall off to the sides. But I did have my assistant stand back appropriately.
In other words, if you’re not sure which one to get, then the 24×24 is most likely the one for you.
Great informative post as usual Neil. Just wondered what the CTS is usually CTO so what is the S and what was your reason for using it.
John
John, the S is for Color Temperature Straw. (Instead of O for Orange.)
More about the choice of gels here and here.
Neil, I’m curious if you shoot tethered to a laptop. I find it difficult to notice all the things you mention here when simply viewing through my camera’s LCD screen and am trying to do more tethered setups to catch all these little things.
Scott, I don’t shoot tethered out on location like this. In this instance, it would’ve meant too complex a setup within the art gallery. It was best that we shoot with as little disturbance as possible, and be on our merry way.
Also check my comment #8 in this post on the sequence in setting up lighting at a photo shoot.
LOVE this!! I can see why it is a favorite of yours. It’s wonderful to visual see the changes that were made to the 1st shot you took. I love the lower POV and the lighting is spectacular! Seeing the sequence is a great teaching tool.
So, the flash glare on the painting from D7T_2857.NEF is from a softbox to your right? The glare looks like a point source. I thought a softbox would not give out a point source pattern like that.
I love your work! I’ve learn so much just by reading all the articles that you post. Thank you
This series of photos really hit a chord with me. I love the way the image progressed not just with the pose but with the background. By changing the angle and moving back you created a frame for her that helped focus the eye on the model. Love it.