analysis of the lighting setup during a photo shoot
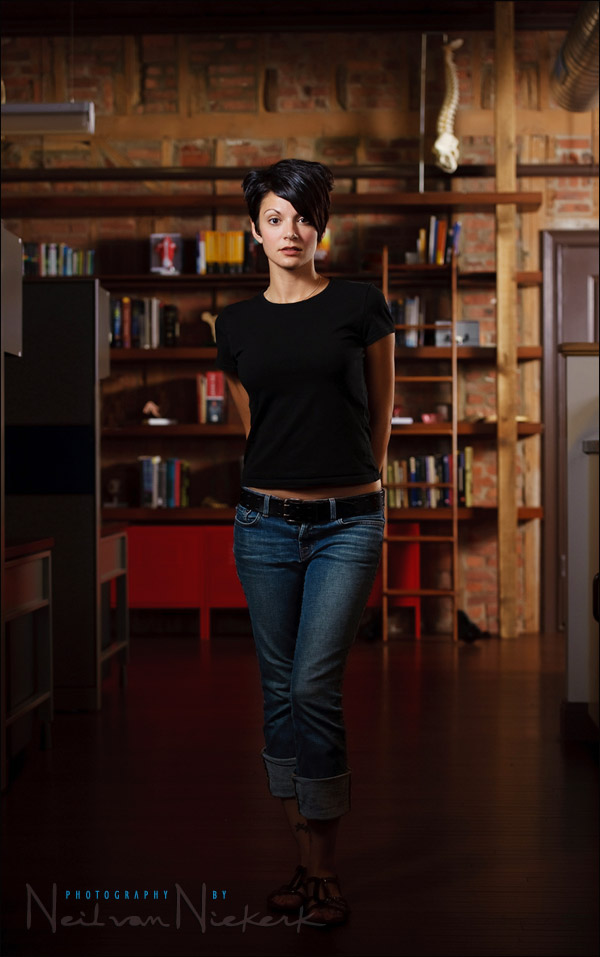
The photo above of Jessica, my assistant, shows the final lighting setup during a recent commercial shoot. I had to photograph various people at a medical technology imaging company for use on their website and promotional material. I had to show some of the workplace, but put the accent on the person I am photographing.
Of course, it is much easier to work with my assistant, and do test shots and changes in the setup beforehand. Then we can change the lights and anything else we need to, until we’re happy with the results. Then only do we call in the people we are actually photographing, and place them in position.
With this post I want to show the thought process in setting up the lighting for this photo. There were a couple of dead ends, and a couple of adjustments as we went along …
For the final setup shown above, there were two flashes used. One to camera-left, lighting up our subject. Another light on camera-right, much further to the back, lighting up the background.
settings: 1/160 @ f3.5 @ 250 ISO
Two flashes set up with light modifiers (which we will describe later on) – both set to manual output.
Why 250 ISO? At some point it is easier to adjust my ISO incrementally to change my depth-of-field, than adjust both flashes’ output to give me the DoF I need, for a particular round number ISO.
I wanted the relatively shallow depth-of-field that f3.5 provides; and I also needed the ‘snap’ that f3.5 provides compared to full aperture.
I started off with the flashgun in the background, set up to the left. But the proximity of desks and tables meant there wasn’t enough distance between the light and the bookshelf. Hence the fall-off in light is too drastic. In other words, I wanted a more even spread of light on the background. Here is what the background light looked like initially. The speedlight in the background was used with a white shoot-through umbrella.
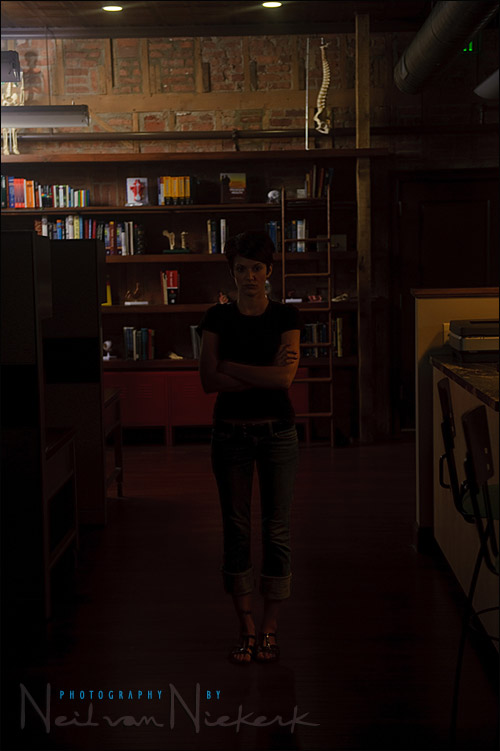
It didn’t look like I intended. Moving the flash to camera-right, meant I could place it in an open space of the office area. This gave me more leeway in positioning the light so that I got a more even spread on the bookshelf and wall in the background.
I also liked how the background light – the speedlight with the white shoot-through umbrella – now gave a rim light on our subject.
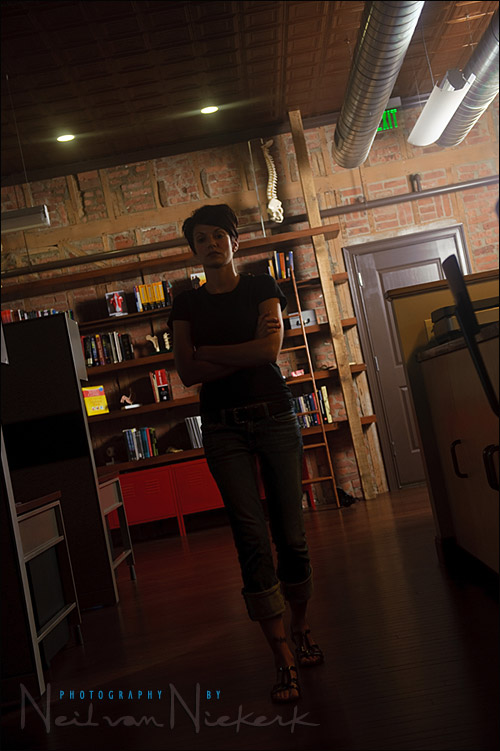
In the photo above, we can see a little bit of flare as the light from the flash hit the front of the lens. I removed the filter, and moved the speedlight & umbrella deeper into the office area, just out of sight of the camera. This got rid of the flare from the flash in the background.
Now we add the second flash to the mix. I added a speedlight, with a white shoot-through umbrella, to camera-left.
It is starting to come together, but we can see flare in the image to the left.

I changed the white shoot-through umbrella out for a black-backing bounce umbrella. This got rid of the flare on the right-hand side of the photo, by containing the light thrown towards the camera.

The light is starting to look pretty good, except for the amount of light hitting Jessica from behind. It creates an odd shaped high-light on her neck. I moved the background light even further back, so it acts even more as a rim light, and I pulled its exposure down a touch so that the background is a little more subdued.
There was still one more thing I wanted to change. If you look at the full-length image above, you will see that the office furniture and dividers are lit up. I wanted the light more contained than that … I wanted our subject to be illuminated against the background. I didn’t want the dividers and furniture to the left so well exposed.
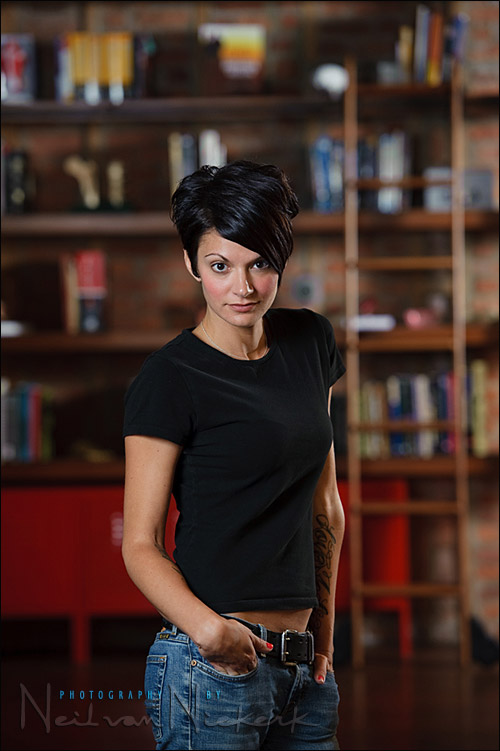
Umbrellas really scatter light widely. A softbox helps a little better, but still scatters the light around. What we needed here – and used eventually for this shot above – is a gridded softbox. The grid on the front of a softbox will turn the soft light form the softbox, into soft directional light. Now we have control. (More details about gridded softboxes at the end.)
By containing the light even more, I can accentuate our intended subjects, and have them stand out even more. Here are two final images, and I quite like them. Our subjects will stand out from the background, but the background still provides context. A fine balance.

(Unfortunately I didn’t take a pull-back shot to show everything in relation to each other. However, it should be easy enough to visualize since the setup is very simple.)
![]()
Lighting equipment used with this photo session:
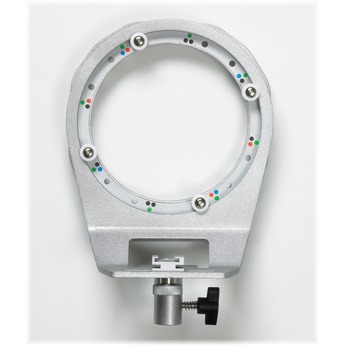
Here is what the gridded softbox looks like that were used:

the Creative Light 1×3′ Recessed Softbox (B&H),
with the Creative Light 1×3′ Softgrid (B&H), attached to it.
|
The softbox does need a speedring to attach it to the speedlight or other flashgun. The speedring I used here is the one made by Creative Light (B&H), which is specifically made for speedlights. It also rotates, which is helpful if you use it with other softboxes as well. Other accessories used can be seen on my equipment page. |
You get different types of grids – ‘eggcrate’ and ‘honeycomb’. The actual construction and look of the grid will tell you which name is applicable. The Softgrid shown above is of the eggcrate type. A search on B&H’s website will show you numerous options and possibilities.
Brilliant article. The visuals make learning this process so much easier. Great thanks for this Neil.
Very nice photo, the rim light does help separate the subject from the back ground, I wonder how an added hair light on Jessica would have looked?
Very helpful behind-the-scenes post, Thanks, Neil.
About how long did it take you to run through these iterations in setting up the shot? Do you shoot tethered to see the details? (I’m not sure that I could catch those details on the camera LCD.)
What lens did you use for this photo?
Thanks again Neil!! I am wondering the same as Stakx…were you tethered to a computer? How were you able to catch the flare and shadow on Jessica’s neck on a tiny LCD screen? Those details would have been completely lost on me. Thanks for taking the time to go through your thought process. It is incredibly helpful!!
Neil, first: another great post. And, great book on off camera lighting too!
Second, Do you have a preferred zoom setting on the speedlights when mounting them into softboxes (whether these Creative Light boxes or the EZYBOX you’ve used in earlier posts)? Or is the zoom setting only a concern when the baffles are removed?
Fantastic post! I love the break down of all the steps. It was especially helpful to see the different light modifiers.
Fantastic article! Thanks for the step by step process. Is it at all possible to get this kind of background lighting with umbrellas, because that is all I have in my arsenal :-)
Excellent as usual Neil. Thanks!
Very helpful tutorial and great results. Out of curiosity, if you had a beauty dish on hand would that have been an option to use in a situation like this? Cumbersome for travelling I realize but would that lighting have been a help or hindrance?
Best, -r
Hi Neil,
Great post, as usual. The explanation is once again clear and fun to read.
There is one sentence I didn’t follow, i.e: “Why 250 ISO? At some point it is easier to adjust my ISO incrementally to change my depth-of-field, than adjust both flashes’ output to give me the DoF I need, for a particular round number ISO.”
When I change ISO it will not change my depth-of-field…..or did I miss your point?
Kind regards, Jeroen
Hi Neil,
When you say “…we can see a little bit of flare as the light from the flash hit the front of the lens. I removed the filter, and moved the speedlight & umbrella deeper into the office area…”. What is the filter you are referring to? … is a filter on the lens or is a gel over the flash?
Thanks again,
Alfredo.
Obviously … what happens is that I thought you were using no filter on the lens, so that “lens hoods are the best protection for your lenses”.
Thanks again,
Alfredo.
Jessica is just so hot.
Also great post. Thanks Neil
I see when you changed to the “black-backing bounce umbrella” the light is hitting Jessica pretty evenly across her whole body (with only a slight falloff near her feet).
But the final image had a nice gradient from her head to feet (with her feet being darker) which looks fantastic. Was this done by further adjusting of the umbrella (collapsing perhaps?) or was it done in post?
Great article once again.
I am wondering Neil if for this type of work you are using a tripod? I know it is not a particularly slow shutter speed used here, but I have heard many photogs insist a tripod is a must for that extra sharpness it can give when big enlargements are a possibility for advertisement purposes. If not, are there situations where you do use one? Thanks as always!
Neil, what speedring do you recommend? I use Canon 580exII…
Masterful and insightful as always Neil. One of my favourite shots from your collection. Grid was spot on and great on location decision-making.
Thank you for this, Neil. I see you have already answered many questions, but I have one more for you. What was your consideration for the fill light? Did you meter for the ambient, or just let the light from the softbox bounce off of various surfaces in the small area for your fill?
Thanks
Hi, sorry for my bad english, i’m french… lol
Your pic is very beautyful and your explain details very precious for me.
You talk about grids, softbox etc…
But what sort of flash do u use?
Is it possible to make this sort of pic with Canon 580 EXII ?
Thks for all!
A goodbye from France!
Dear Neil,
I am not sure I understand the following phrase.
‘I wanted the relatively shallow depth-of-field that f3.5 provides; and I also needed the ‘snap’ that f3.5 provides compared to full aperture’.
Any link you can refer me to where you must have obviously already explained that to your fellow students?
Thanks so much for this blog. Your effort is more than one can thank you.
So does this mean that my 35mm 1.4 lens would be sharper at let’s say f/2.0 than f/1.4?
HI dear Neil,
I don’t understand what you writed in the post number 19:” So if I want to change my DoF, instead of running around changing power settings on the two flashes that are set up, I can just change my DoF from where I stand … by adjusting my ISO.
If I had used a TTL flash setup, I could simply have changed my aperture.”
I understood that Ap,Dis,Iso,pow control manual flash and that FEC control ttl flash but i don’t understand your reply to Jereone.
If you can explain better your writed in others words,thank you.
With TTL flash, the camera will control the power of the flash (i.e., the flash’s output), to give you enough light, regardless of your settings. (Within reason of course.)
With manual flash, YOU would have had to adjust the power as you change your aperture (or ISO). With TTL flash, the camera does it for you.
Sometimes I forget you’ve been teaching great techniques longer than most people have been photographing. I was searching for different lighting techniques and came across your blog (again). lol. . hope you are well my friend!