Controlling bright daylight with direct off-camera flash
Working with Molly K as our model during an personal photography workshop in New York, we put into action the thought-process when using flash in very bright light. There’s a specific algorithm that gets us to optimal settings.
But, as usual, there’s more to a final image than just the numerical settings on the camera …
Camera settings and decisions
When trying to over-power the sun with flash, the best algorithm is usually:
– maximum flash sync speed,
– lowest ISO,
– find the aperture for your brightest area that you want to expose correctly for,
at that specific shutter speed and ISO.
So that brings us to the central question … what should I be metering for?
Here is the test shot where I decided how I wanted to frame Molly K …
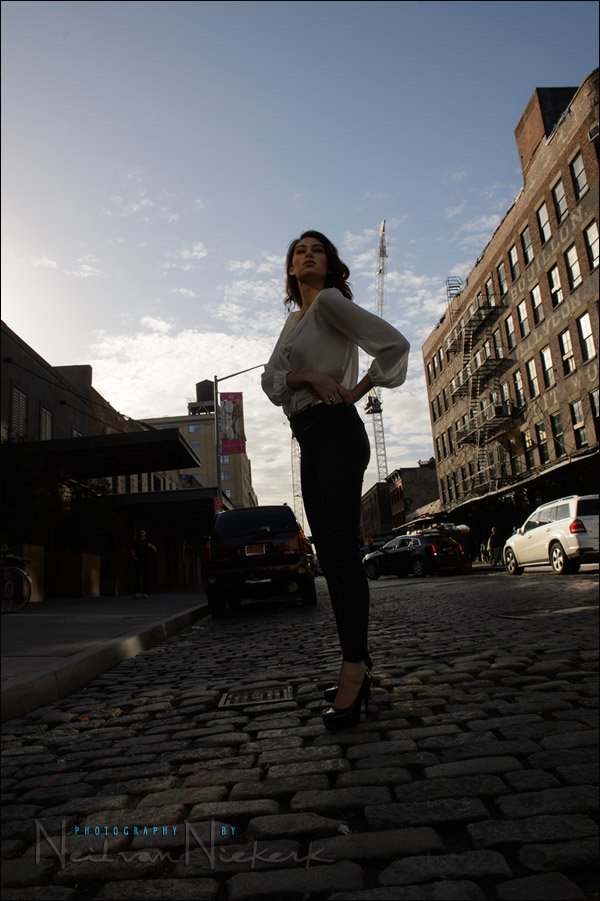
There are three broad areas here to consider in terms of the ambient exposure:
– the bright sky, (which is unevenly bright),
– the shadowed areas of the building on the left,
– the sunlit building on the right.
In this instance I wanted to frame her against the bright sky, and allow the exposure for the sun-lit building to fall where it may. That hot-spot where the sun reflected off a window, was a lucky accident in a few frames.
Metering for the sky, I got: 1/250 @ f8 @ 100 ISO
It made more sense though to get a bit more depth-of-field because of how I composed the shot.
So I settled on: 1/250 @ f11 @ 200 ISO
I wanted more depth of field because of my angle of view. I wanted that low view-point. So low that I couldn’t actually look through the camera’s viewfinder.
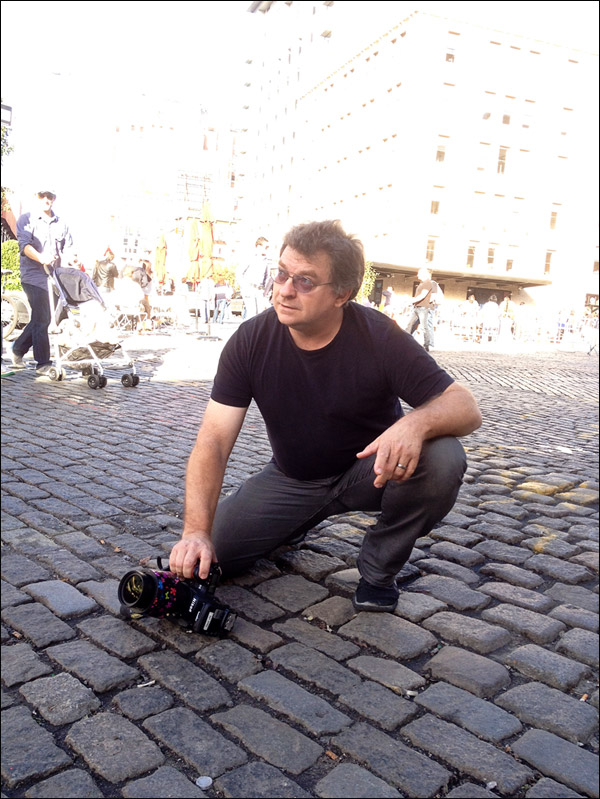
I pre-focused on Molly’s hands on her hips … and then held the camera to the ground.
I fired off several sequences of photos, changing the camera’s angle slightly with every shot … just to make sure that I do end up with a few good compositions. My success rate was surprisingly good because the wide-angle view was forgiving of slight framing errors. This is why the reflection of the sun in the windows was a lucky accident in a few frames. I couldn’t actually see it in my viewfinder at the time and make sure I got it every time.
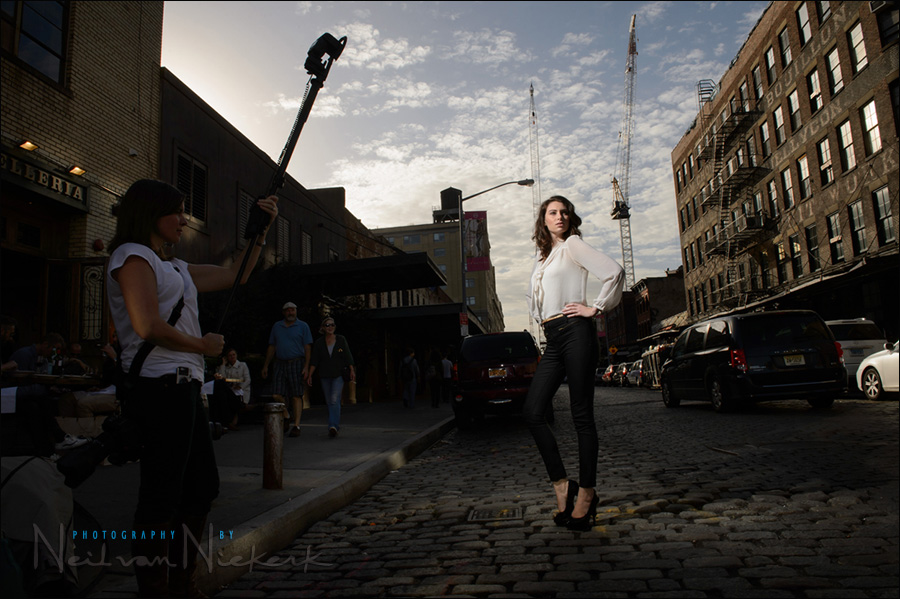
For the off-camera flash portion of the workshop, we had been working with my regular Lastolite EZYBOX 24×24″ softbox (affiliate). However, trying to match the bright sky with a speedlite, I knew that a softbox would just eat up too much of the light. Therefore I went with bare, un-diffused off-camera flash.
Bare flash is less forgiving of how you pose your subject and position your light. A softbox on the other hand, is quite forgiving in how you place the light.
The flip-side though, is that with bare flash, you can use simple methods of figuring out the flash exposure:
– you can use the guide number of your flash, or
– use the distance scale of your flash / speedlite / speedlight
The Nikon SB-910 and Canon 600EX-RT (affiliate) speedlites have a distance scale on the flash. This allows you to balance that equation for correct manual flash exposure – aperture / ISO / distance / flash power.
Since the aperture and ISO is given for us … and we have our speedlight to manual output, then the distance scale will tell us approximately how far to hold the flash from your subject. Of course, a few test shots will allow you to finesse this for better exposure. I worked with the flash at full output.
And there you have it: f11 at 200 ISO … for the distance shown in this pull-back shot. The speedlight’s head was zoomed to 28mm, if I recall correctly.
The important step here though, was deciding on a specific background. That’s one of the key elements with effective on-location portraits – what is our background, and how do we want to use it?
Photo gear (or equivalents) used during this photo session:
- Nikon D4
- Nikon 24-70mm f2.8G AF-S / Canon 24-70mm f/2.8L II
- Nikon SB-910 Speedlight controlled by PocketWizard FlexTT5 & AC3 Controller
or alternately, the Canon 600EX-RT Speedlite controlled by Canon ST-E3 Transmitter - Lastolite EZYBOX 24×24″ softbox
Post-processing the image
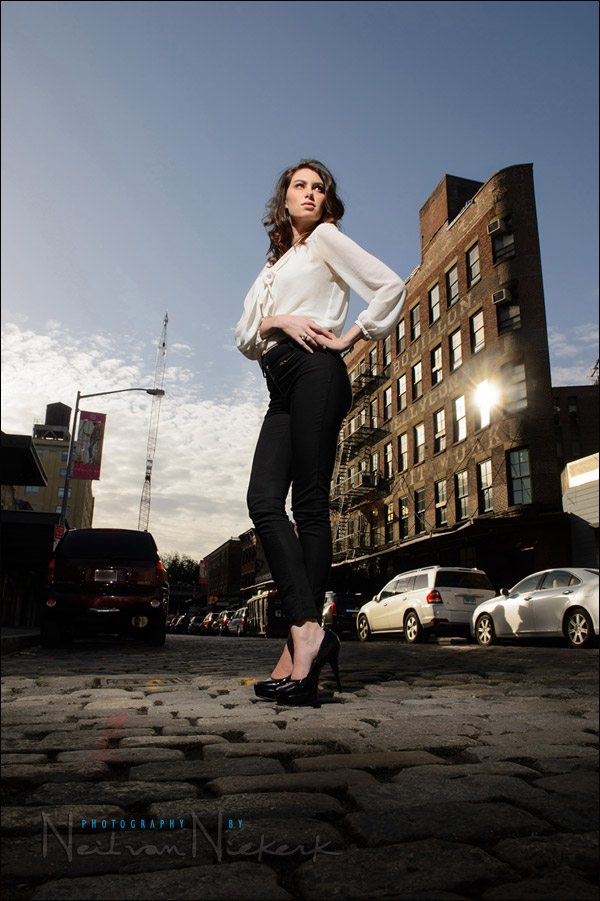
Retouching the image at the top, I started with the Healing Tool in Photoshop for any skin blemishes and marks. Then, as part of my usual post-processing workflow, I used two essential Photoshop plug-ins: Shine-Off and Imagenomic Portraiture – as described in this article: Photoshop filters – retouching for portraits. That gives me a basic file that looks good and I can work on a little bit.
For the final image, I did use the Clone Tool and Healing Brush to remove some clutter in the background, such as one of the construction cranes.
And this is how one of my favorite recent images came together. Oh, the pool of light at Molly’s feet really are from the flash, and not from post-processing.
Related articles
- Flash photography tutorial
- Camera & flash settings: What do you want to achieve? (model: Ulorin Vex)
- Understanding maximum flash sync speed
- What are your camera settings? – the thought-process
- Applying the Sunny 16 rule and the flash Guide Number (models: Yulia & Anelisa)
The flash was not on the camera but held on a stick by an assistant, right?
Yes, the flash was off-camera and was held aloft by someone else. You can see this in the pull-back shot.
awesome demonstration :) you rock!
What “stick” :) was being used to hold the flash? I’ve been looking for a decent one for both small flash and studio strobe.
Julian .. it could be any monpod really.
I use the Manfrotto 680B monopod, but there are other monopods which might be slightly lighter.
Then I also use a stud to attach the softbox to the monopod.
Thanks for your reply Neil. Appreciate the response, and most importantly your time on putting these type of things on your blog.
In the shot of you placing the camera to the ground, one can see how bright the day actually was (in the open street area). Using f11 made the sky look like sunset, adding to the photo appeal.
Hi Neil, I am learning so much from your blog, thank you.
Quick question – looks like there is some kind of additional device in front of the flash, what is that?
Thanks!
Michael
Michael,
That’s the speed ring for attaching a soft box, which the flash head pokes through, and Neil merely removed the softbox.
Trev
Hi Trev,
I just follow this website since last month. I have learn a lot as an amateur hobby. I just bought same softbox from B&H through your link. There are two peice of filter cloths in there but Lastolite doesn’t have instruction of how to use the small cloth piece. Do you and Neil even use this small cloth at all to soften the light?
Thanks,
-Dustin
Hi Dustin,
I presume you mean Neil’s link. :)
Both those cloths are the diffusers, you can use both for more softer light, or just use the one.
Now here is a link to a PDF file from Lastolite site on instructions [this is a small one, and different attachment to speedlite, but principle still the same with diffusers]
Look in the middle column, it’s the 9th item down, click on ‘Ezybox Speedlite’ and you will get a PDF download, just look at that.
I personally only use the larger outer diffuser myself, and don’t know what Neil does, up to you.
Also you can use no diffusers at all if you need the extra power in brighter sunlight, and Neil simply removed the softbox altogether in the above sample.
I use a Quantum and it has a bare bulb with it’s own metal diffuser removed, so when I put it into a softbox [not the Lastolite] it gives a lot of power since it bounces all around the inside of the silver lined softbox with no diffuser panels in place.
Trev.
Dustin, I often use the Lastolite without the inner diffuser. It depends on how bright the available light is, and whether I need a fast recycle time.
So for workshops, I don’t use the inner baffle.
wow, great shot — as always!
all the best from Germany, cheers, Tilo
Neil I love your blog, you give away so much information. Thank you so much! Now I just need to get off my butt and find a model to try this stuff.
Hello Neil,
a question!
You said that the sb910 flash can read the distance scale ……….. but with off-camera flash and placing the flash off the camera distance scale can not be read.
Right?
How do I regulate me?
How can I calculate the distance scale with off camera flash?
thanks Neil
You are always fantastic and I will follow you every day.
Edy Trigona
Genoa Italy
Your SB-910 most certainly does give you the distance (for specific power / aperture / ISO) on the display.
You can change the ISO setting in the menu.
Go through this article: tutorial on how to use the GN of your flash.
This photo is breathtakingly beautiful! Thanks for showing us how it’s done!
hi Neil. Love your outside the box suggestions.
My question is what time of the day are these taken?
It was 4pm in the afternoon, in October.
Why did you bump the ISO from the initial setting to 200? That’s something I get confused about. I know if I am outside and it’s mildly bright keep my shutter at its fastest. But for my ISO I should also keep this as low as possible too right?
It is in the text:
“So I settled on: 1/250 @ f11 @ 200 ISO
I wanted more depth of field because of my angle of view. I wanted that low view-point. So low that I couldn’t actually look through the camera’s viewfinder.”
Hi. What focal length was this shot at? I read you used a zoom but not sure. Sorry if it was in he text.. I didn’t see it.
Looks like I had to set to 24mm – the widest focal length on that lens.
If u keep the flash at around 6 to 10 ft away from the subject does it still have the power to reach the subject in harsh mid-day light @ full power ?
in your case i can see the subject is in shaded area and not directly in harsh sunlight..
can you do one blog on exposing the subject in harsh mid-day sun with no shade.. ?
Amy … could I leave it as a bit of homework for you to figure this one out?
Here are three related articles that will carefully explain this. Step through them and see if you get to the answer:
Getting the most power from your flash
How to use the guide number of your flash
Applying the Sunny 16 Rule, with the Flash Guide Number