
Off-camera flash – Change the light by changing your own position
Ulorin Vex was one of the two models that we used in the recent workshops in San Francisco. Having seen Ulorin Vex’s personal site and portfolio on Model Mayhem, I jumped at the chance of working with her again with a photo session the day after the workshops. Working with a model as professional and striking-looking as Ulorin, was an experience.
The photographs shown in this article was from a sequence we did in the passage outside my hotel room. The lighting was surprisingly simple, but I had to improvise with the limited space we had.
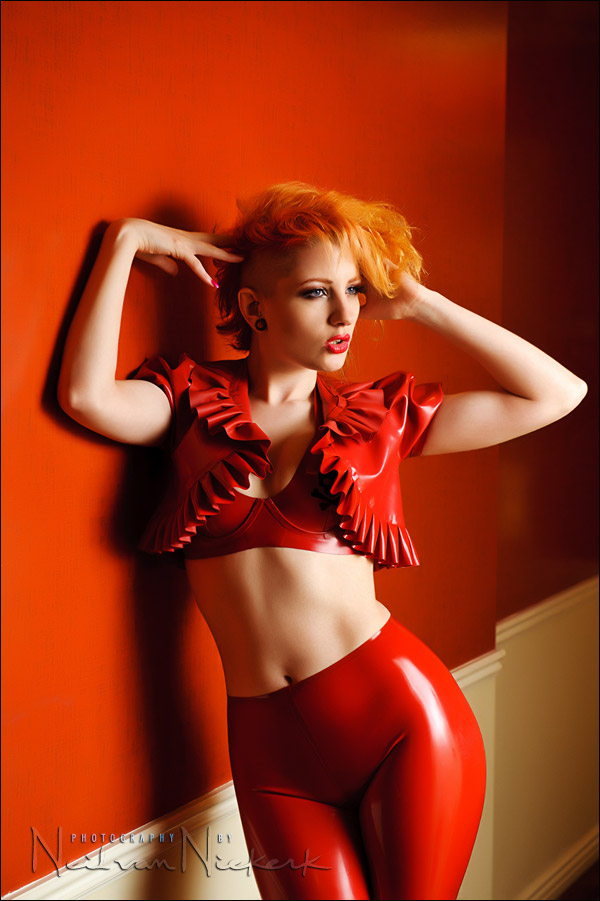
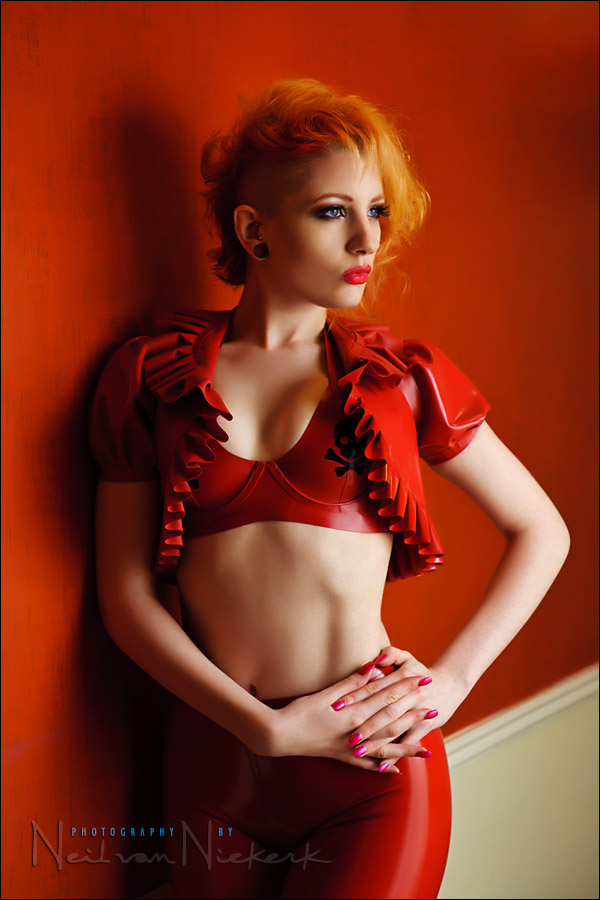
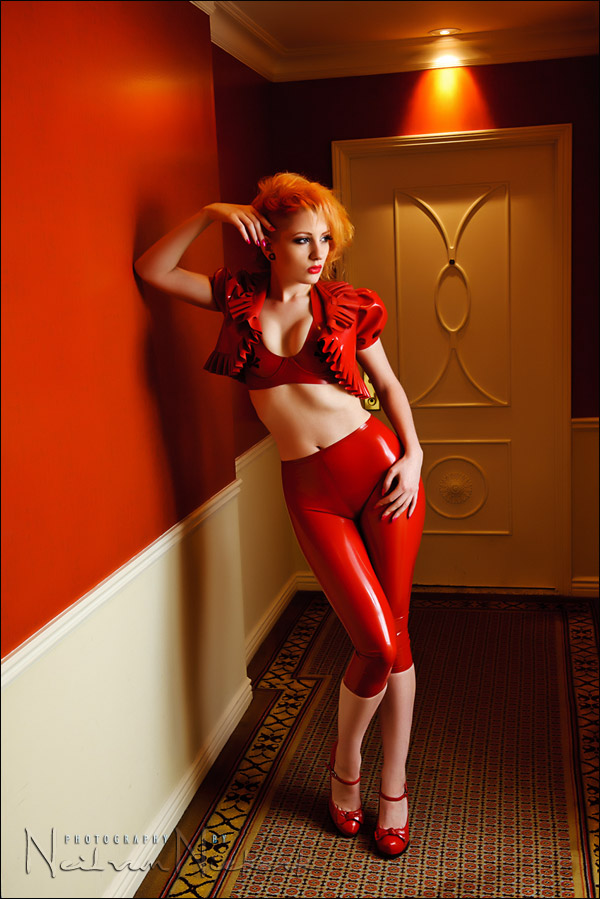
Interestingly enough, the two photos shown above had exactly the same lighting. And this brings us to a key concept with light. This idea is true whether you use available light or off-camera flash … or even when you control the direction of your bounce flash.
With those two photos, Ulorin remained in the same spot. But she did change her pose towards the camera as I moved. Why the light is so dramatically different, is that *I* changed my position … and that in turn, changed the direction of light entirely.
It seems obvious stated like that, but I think this idea is something that really is brought home again when two images can look so different. And all that changed was the photographer’s position.
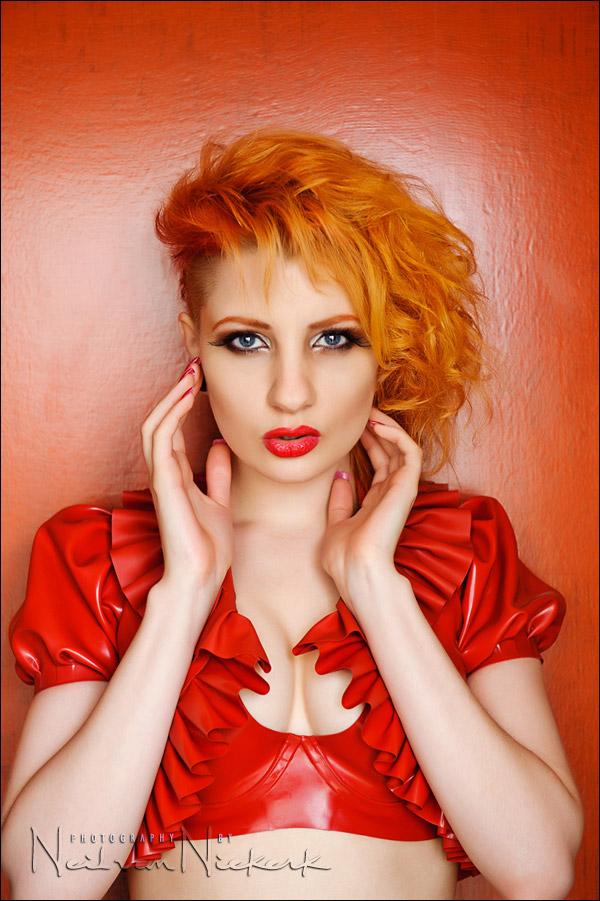
I loved the way the light glared off the wall-paper here, creating an effect that looks somewhat like ring-flash. For these images, I tried to position myself so that the glare spot was directly behind her, giving that kind of halo.
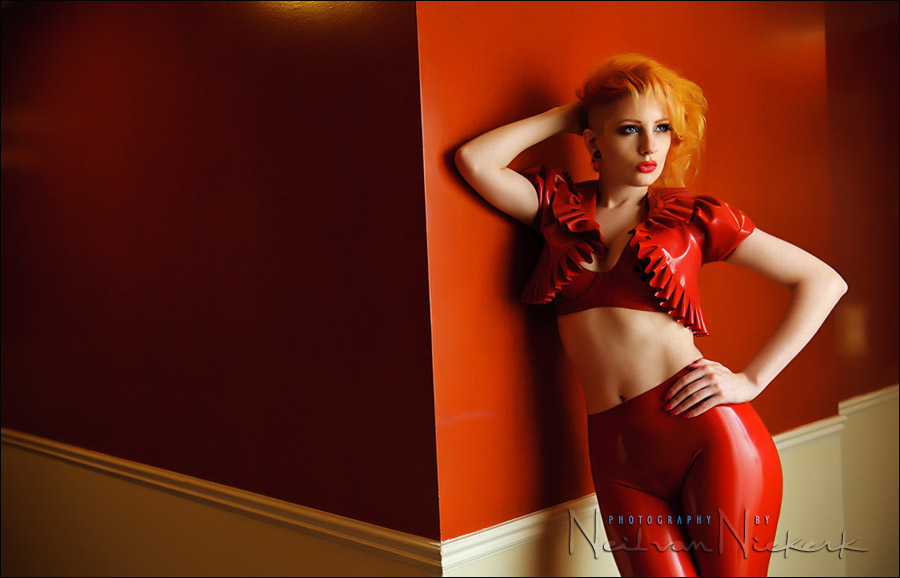
Using the shadowed area behind her as negative space in this composition. I like the balance of it.
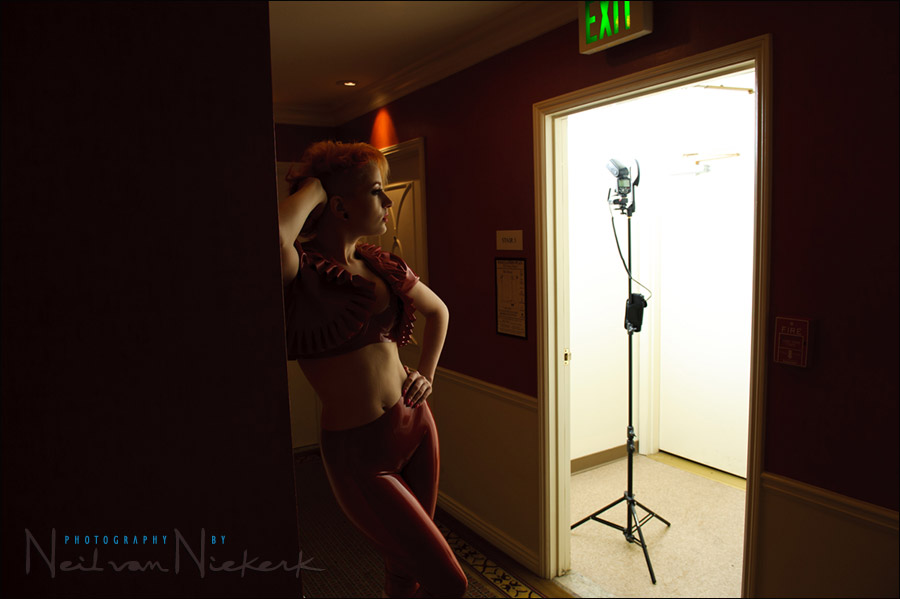
Here is the lighting set-up that I used. A single speedlight bounced into the exit stairwell on that floor. Since I had no room to set up the light or especially a softbox, I had to find this spot and prop the door open with my camera bag. I bounced my flash into the left of that area, behind the wall and out of Ulorin’s line-of-sight. I wanted to make the light streaming through that doorway as diffuse as possible, and minimize the chance of hot-spots.
The speedlight was controlled via a PocketWizard FlexTT5 on which the flash was mounted. The output of this flash could be controlled as manual flash via the FlexTT5 and AC3 ZoneController on the camera. Very simple.
Camera settings:
Apertures were either f4.0 or f5.0 @ 400 ISO @ shutter speeds around 1/80
I kept the flash to the same output, but had to change my aperture, depending on my position. The aperture for the ‘direct flash’ shots was f5 and the other images were all shot at f4.0

Direction & Quality of Light
I wanted to distill the essence of what we, as photographers, work with – light! Before we can truly grasp on-camera flash and off-camera flash, and really, any kind of photography, we have to be aware of the direction and quality of light. We need to observe the light that we have, and then decide how best to use it, or enhance it.
With this book, I try my best to share those “aha!” moments with you, and I do believe this book can make a difference to your photography.
The book is available on Amazon USA and Amazon UK, or can be ordered through Barnes & Nobles and other bookstores. The book is also available on the Apple iBook Store, as well as Amazon Kindle.
Hopefully this article will inspire the idea that you don’t need complex lighting to get striking results. The setting or place where you photograph can be quite simple. In this case, the place was the hotel corridor right outside my hotel room. The lighting needs to complement the idea behind the photographs. Then you just need an exceptional model …
Related articles
- Mimicking window light with off-camera bounce flash (Ulorin Vex in lace & latex corset)
- Directional light from off-camera bounce flash (Ulorin Vex, Monaco foyer)
- Other articles on Tangents featuring Ulorin Vex
Photo gear (or equivalents) used with this photo session
- Nikon D3;
- Nikon 24-70mm f2.8G AF-S / Canon 24-70mm f/2.8L II
- Nikon SB-910 Speedlight controlled by PocketWizard FlexTT5 Transceiver & AC3 Controller
or alternately, the Canon 600EX-RT Speedlite controlled by Canon ST-E3 Transmitter - Manfrotto 1051BAC light-stand (B&H)
Amazing photos . You are de man !!!
I notice that the flash head of the sb 900 in the area just off the hotel hallway is pointed to the LEFT Any reason why it was not directed against the wall directly opposite to your stunning model?
I am still getting used to my 2 Flex TT5 units. Hope your Vegas video of the pocket wizard units are out soon.
Greetings Neil,
Simply beautiful photographs and Stunning model. Great team work.
Blessings, Gregory
Hi Neil, with the colored background and model proximity to it, was color cast a concern ? Thank you for sharing with us again.
I really like the nice rhythm to the shadows and light, especially the final fuller length image. The color and texture is just stunning.
I just want to congratulate you on an excellent set of pictures. This model is STRIKING. Most importantly I want to thank you for writing a detailed and informative article on your process. It was really helpful!
Wow. These are eye-popping! How underexposed was the ambient lighting?
Thanks for another rivetting read.
Quite under-exposed.
You make it look so simple… because ultimately it can be. I’m not to the “simple” point yet, but I hope to be getting there. And, yes, the girl was beautiful, but this would have been flattering light on anyone. I can just easily see a Bride at a Motel 6 looking like she’s getting married at The Four Season’s just by using a hallway exit door to make a giant window/softbox. Great job! Great inspiration! Thanks. Do you remember the manual power that you set the speedlight?
Stunning Neil
So much RED! I really like how vibrant they came out. They pop! and the models skin is not affected by the red light bouncing around. Really nice!
Oops Next time at 5:30 in the morning I will open both eyes and read the complete text before embarassing myself. Thanks for the reply
Like the stairwell idea – love the way you look for simple answers to problems, very inventive
Ulorin’s one of my favourite models, would love to shoot her one day
Great stuff and Ulorin is so much fun to work with.
I once used one of those folding screens as a giant barndoor, with the speedlight on a tripod and the screen folded around it, only leaving a 10cm gap in the front for the light to spill out.
That first image is one of the most stunning portraits you have ever put up for us to see Neil! I just love the idea of using the one color throughout the entire image, for clothing and even the model’s hair – the red is exciting. Even the cream, color on the lower wall picks up on the tonal range in her skin and adds to the flow and drama of the composition.
You must be so pleased with these images – they are really inspiring!
Great images Neil! I wonder, if the ambient light (that light seen on the last image) had any afffect here and caused any problems, since I see you did not gelled your flash?
A stair-well soft-box . . . or is it a snooted stair-well?
Genius!
Fred
Wow Neil, I’m speechless great pics like always and a great idea placing the flash into the stairwell, thank you for sharing.
I’m loving this fashion posts. Also loving the post with your guests.
Thanks for your work!
Awesome and absolutly stunning.Its crazy to see how simple the lighting is.
Thanks once again
Beautiful images. Great captures and a great model. Love your explanation of how you created these…and it is interesting to see the difference your positioning made re: the light.
I must remember “I don’t need complex lighting to get striking results”, but my mind is seeing now Red and Sexy. And thinking I’m not a bull, I clicked ulorin-vex.livejournal…
Fantastic work!
Love it! Fantastic as usual! I can’t add to what has already been said! thanks so much for your posts!
She’s so incredible she should be illegal in most states.
WOW! Absolutely amazing! As others have said I’m always inspired by your ability to take your surroundings and use them to create beautiful (speed)light altering devices. Can you tell me if you used a light meter here to get the correct exposure or did you ‘trail ‘n error’ adjusting the manual exposure until you got the effect you liked?
Hi Neil, How did you process this image?
Wonderful pictures.
Thanks.
I’m asking because I thought it could be the same as here:”Ulorin Vex – Monaco foyer (photo session 4)”.
You set the bar high on these shots Neil.
I think this is your best work to date. Just stunning! And with one speedlight yet!!
For the shadow killers out there among us, I do think the shadows on the wall add tremendously to the appeal.
the color of her hair, the clothes, the wall – luck or “the devil’s in the details”? :)
very cool images and clever lighting!
Partially luck – an amazing model with a bright red outfit. Red wallpaper in the hotel hallway outside my room.
The rest … not luck!