why should you use a higher ISO?
The advice for optimal camera settings for best image quality are usually:
– use the lowest possible ISO:
– at an aperture about 3 stops down from maximum (the widest) aperture;
– at a shutter speed fast enough to avoid camera shake and unintentional subject movement.
Taking this general advice at face value, means using the camera at its base ISO, which would either be 100 ISO or 200 ISO. However, while this advice is sound in theory, in practice this doesn’t have direct consequence on my decision about my camera settings.
In terms of exposure settings, we obviously want correct exposure, even if ‘correct exposure’ is open to interpretation. Now if we are using only available light, then we have what we have for that specific scenario. If the ambient light is low, we would need a higher ISO / wider aperture / slower shutter speed. There’s no wriggle room here.
But if we’re using flash, why not use the flash to give us correct exposure at these optimal settings? Why would we even go to a higher ISO?
The reason: when using flash on location, I am mostly concerned about balancing my flash with the ambient light. Or somehow taking my ambient light into account to give some context. It just looks better!
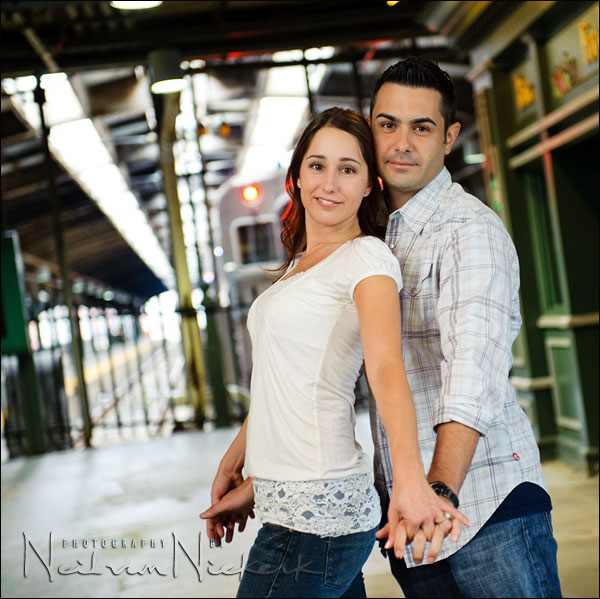
Let’s get back to the photograph at the top:
Looking at the photograph of this couple, Jessica and Michael, my camera settings were:
1/125 @ f3.2 @ 800 ISO
Two observations about the settings:
I bounced flash behind & above me into the area, so that I could have nice clean open light on them. My settings were chosen specifically so that the background detail is there. Not too dark. At the ‘optimal settings’ the background would’ve been pitch black for a hand-holdable shutter speed. Alternately, if I had somehow chosen the ‘optimal settings’ of f5.6 @ 200 ISO, then I would’ve been forced to use a tripod at slow shutter speeds. Tripods are an absolute no-no in a train station. The surest way of being escorted out by the cops. Besides, working with a tripod here would’ve killed the spontaneity of the photo session.
Also, in bouncing my flash behind me, I am losing a lot of power from my flash. It really isn’t the most efficient way of using the flash. But the light that returns is sweet. Therefore, in bouncing my flash like this, I wouldn’t have been able to get proper exposure on them at a proposed f5.6 @ 200 ISO.
So why was my ISO setting so high? Because that was the only practical way to get enough of my ambient light in, and enough of my flash to make a difference.
![]()
To recap: you would go to higher ISO for a variety reasons:
- Balancing flash with the ambient light.
Having the ambient light register to some extent, whether as:
– just some color and texture in the out of focus background, with flash dominating, or
– as the main source of light, with flash just being fill light;
my consideration is still the available light.So while I could get correct exposure for nearly any situation at 100 ISO or 200 ISO by using direct flash, and then still use a medium or small aperture .. the results just wouldn’t look good. The lighting would be harsh, and would be obviously flash.But most importantly, I would lose the available light entirely at low ISO settings, when I am working in less bright environments.
- Bumping up the ISO also means my flash works less hard, and can recycle faster.
- A higher ISO can mean a faster shutter speed, which would help with freezing subject movement or eliminate camera shake.
- Do keep in mind that not every photo will be used at full resolution. So you might not even need your image to be at the theoretical ‘optimal’ settings. Consider the final use of the image.
- I might need the extra ‘reach’ that the higher ISO gives to my flash’s output.
![]()
As an example of why I need that high ISO for that extra bit of ‘reach’ with my flash:
I recently met up again with a previous wedding couple of mine. They have featured on the Tangents blog before. For this simple impromptu portrait of them at the wedding reception, I bounced my flash behind me to get nice clean open light on them.
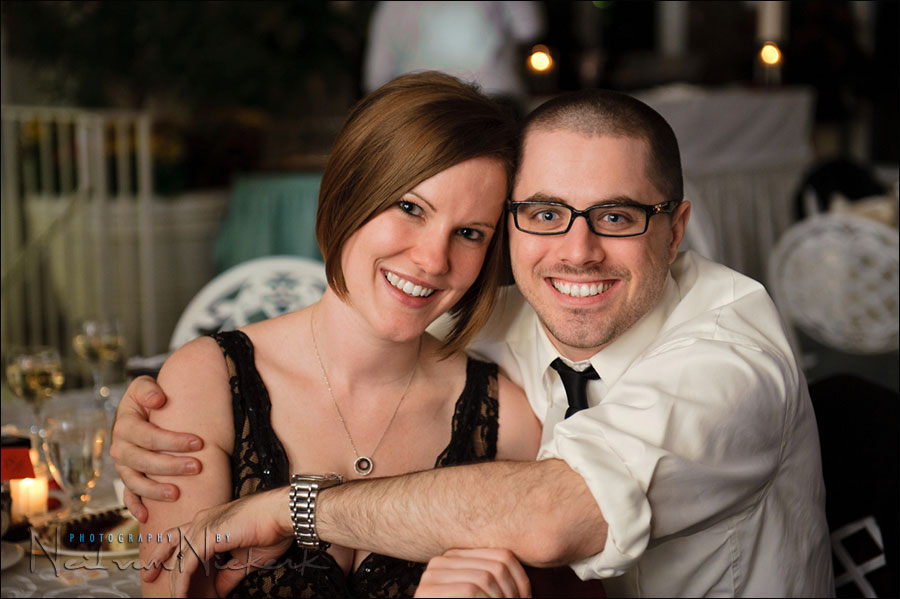
1/60 @ f3.5 @ 1600 ISO
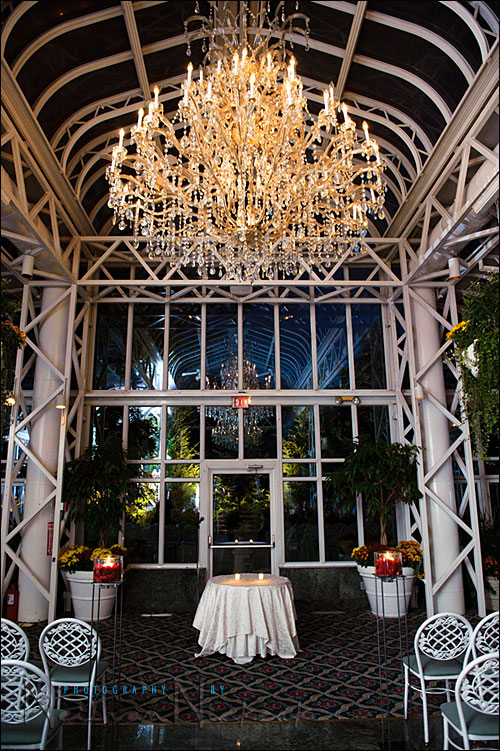
Here is the reception venue. It will give you an idea of the size of the place, and also that the entire room was a glass and white-painted metal structure. Not an obvious place to use bounce flash … but it works. It only works at higher ISO and wider aperture settings though.
![]()
Finally, about the composition of this image:
I know I will get comments about the angle. And while tilted compositions as a reflex is something I dislike, and have to actively concentrate on to make sure it doesn’t creep in due to sloppy camera work … I do think the tilted composition here works, with Jessica as the centered element in the frame. But as always, these decisions are up to individual taste and interpretation.
Related articles
- High-ISO bounce flash photography (bride: Gaby)
- Photographing the wedding processional with extreme bounce flash (Alli & Scott)
- Bouncing on-camera flash in manual mode (bride: Julie)
- Wedding reception lighting with one flash
- Tutorial: Bounce flash photography
Did you use ttl or manual flash? How did you adjust the power?
Aloha Neil,
Been following your blog all year, and just wanted to say thanks for all the useful information! Personally, I like the angle in the train station photo. I think it adds character,and works well.
Look forward to reading all about it in 2011.
Happy Holidays!
Thanks for taking the time you do to explain so much, your site is so calming when my 2 speedlights get scary! Will be buying your book very soon :) Slight tilts work for me, as long as people don’t look like they’re sliding over :)
Ahhh!! Thanks for the reminder! I sometimes overlook the ISO in situations like these. This is why I love reading your blog. Everyday something new! or something remembered :-)
Hi Neil:
I am new to photography and thanks for all the info you posted. They are excellent.
Do you use a light meter for your works?
Thx.. Andy
Andy … for studio type photography I do use a flashmeter. But for on-location work, and especially when I use TTL flash, I don’t use a flashmeter / lightmeter. Instead I rely on a variety of metering techniques.
Sometimes we need to shoot what feels right instead of for what others may think about the shot. Well done Neil!
I generally hate tilted compositions – I think that ‘technique’ has been done to death but your shot is perfect Neil because the couple are pretty well vertical and the angled background leads the eye nicely to them. It just gives a slightly abstract backdrop but there is still no mistaking the location.
Pat.
Neil, how was the area you bounced the flash in?
Thank you.
Neil, could you put a guess about what kind(s) of surface(s) could have possibly reflected the light back on the sitting couple (in the photograph with ISO 1600)?
Hi Neil,
I think one of the most interesting things about this composition is the way you made a good use of the red lights on the train. That is really a classy choice. I am curious to see if others agree on this aspect.
Regards!!
I am so, so glad to see someone else who bounces flash up and slightly back even when working outdoors with “nothing” to bounce off of. I’m pretty well a minimalist when it comes to the equipment that I WANT to be lugging around downtown with me, so this is the easiest and one of the best (IMO) ways to get a little extra light in there.
Love the shot!
Hi Neil:
It’s unbelievable how hard you work, even during the holidays you take the time to keep sharing your knowledge with us,thank you for all the information you gave us during this year and believe me you have made us better photographers.
Merry Christmas and happy new year.
Hanssel
You’re still my flash guru after all this time. Keep going!
I’m glad you mentioned how we should consider how the image will ultimately be used. I can readily see how using a higher ISO (e.g. 800) would be fine for the first photo, but not for one tightly focused or cropped upon their faces.
I need to tuck away this bit of useful information for in-the-field.
Thanks so much for this post. We have our first weddings coming up and trying to soak up as much about flash work as we can and this article helped a ton. I’ll be a future reader for sure!
Exactly! ;) That’s why I also put “nothing” in quotation marks. It’s not ever really nothing.
Thanks for the article. I enjoyed it and I really liked the photos posted. Beautiful and clean.
Thanks for this piece of info, Neil. It’s always great to see your photos. They have a typical, consistent style to them. I am still trying to develop my own style by trying out various things I read and see. Your style is definitely one of my examples.
And from a spectacle wearer’s viewpoint – how great to see a photo without a hint of a reflection on the lenses. I’m sure this doesn’t just happen – even with bounced flash. So it’s got to be another stunning example of your work, Neil.
Hey, just about to purchase my first off-camera flash. Found your site through forums.dpreview and I’m thankful SOMEBODY finally wrote and said it’s okay to bump up ISO! The way you write is also a practical “show me” way my wife can understand. Great practical help, thanks for the hard work!
Neil
Thanks for all your work in 2010 it has been of immense value to me i cant overstate the help you have given me only surpassed by being taught to read at an early age lol
would you advocate auto iso with the use of TTLBL with a nikon sb 800? for instance
best wishes for 2011
Jamie .. I am sure there are uses for Auto ISO, especially if you limit the ISO changes, and use it with certain aperture and shutter speed ranges. For myself, I mostly just shoot in manual exposure mode. Therefore Auto ISO for me would bejust one more automatic setting to make things more complicated.
Hello Neil:
thank you so much for sharing your experience about photography. It really helps me a lot. I was looking for this kind of specific information trough many websites without any results, until I got to your site.
Daniel from Peru
I can’t believe the amazing light you got in the photo of your couple at the reception.
Lovely, lovely, creamy light.
Perhaps I should get an assistant to hold a huge chandelier behind me to bounce off… ;-)
Thank you for sharing your skills, Master Neil.
Great post Neil. One question I have is what lens did you use for the couple at the train station. Im guessing a canon 85mm 1.2 / 1.8 The bokeh is stunning. Keep it up I love your blog.
Nope .. it was the spectacular Nikon 24-70mm f/2.8G
Good post! I was wondering though.. I don’t have a high ISO capable camera, but would I still be able to shoot behind me efficiently with say a 400 or 800 ISO?
Dani, you could, but you’d have to embrace fast prime lenses.
When you say “flash behind you”. I assume you had an external flash mounted as a slave on a light stand pointing backward? Can you clarify? Are there any drawbacks to using a higher ISO with flash? I know there is the noise factor, however today’s cameras have come a long way with noise.
Yes, in this example, I bounced the flash behind me, over my shoulder.Here are three articles (amongst several), which explain this clearly:
Have a look and see if it makes more sense now.
Bouncing flash behind you.
Tutorial: bounce flash photography.
How to bounce your flash.
I know this is an old thread but I had an interesting situation recently on a shoot. In order to capture any ambient light in the scene (it was VERY dark – candlelit only) I had to shoot at high ISO (6400) and wide open but I also wanted to use bounce flash to light the subject. The issue was that in order to have the flash strong enough to provide any kind of light on the subject the high ISO/wide open aperture just meant that the image was blown out. I then had to drop the ISO to balance the image, which in turn meant I had very little ambient light. Net result was a very average photo!
Is there a way to get around this?
Mark .. you don’t give us enough details here.
What mode was your flash in? TTL or manual?
What was your flash setting in terms of manual power or FEC for TTL?
Did you shoot direct flash or did you bounce it?