Photoshop tips – making your images pop – Topaz Adjust
I’d like to present another in the ongoing series on giving your images more ‘snap’ in Photoshop. This time, I’d like to specifically look at Topaz Adjust– a neat plug-in for Photoshop. What I like about Topaz, is its simplicity of use – but if you want to, you can delve much deeper into it. The possibilities are wide open. (Also nice is that it is relatively inexpensive as software goes.)
There are hundreds of ways you could use this program, because you can blend the different effects in different ways on a single image. So what we’re going to cover here is but one way of using this program to enhance an image in Photoshop.
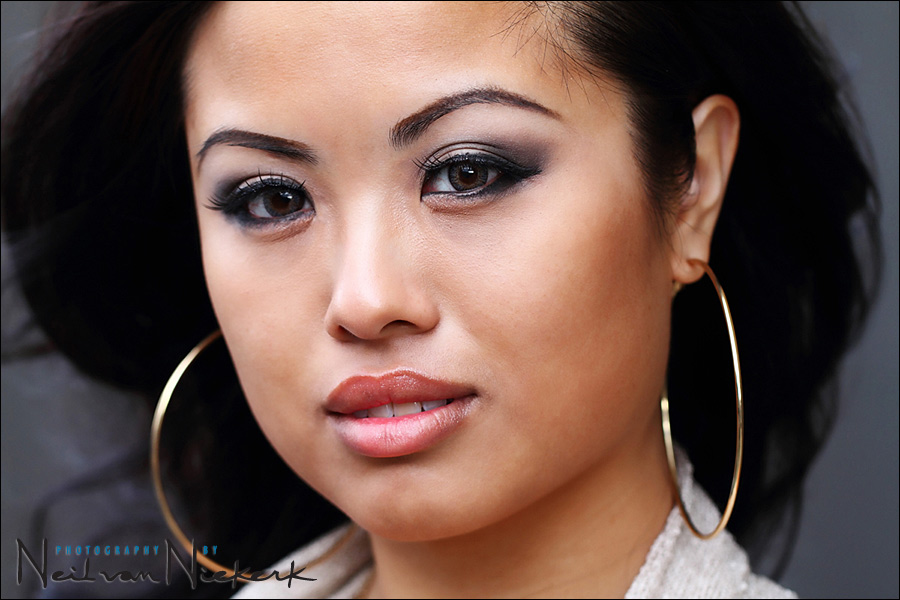
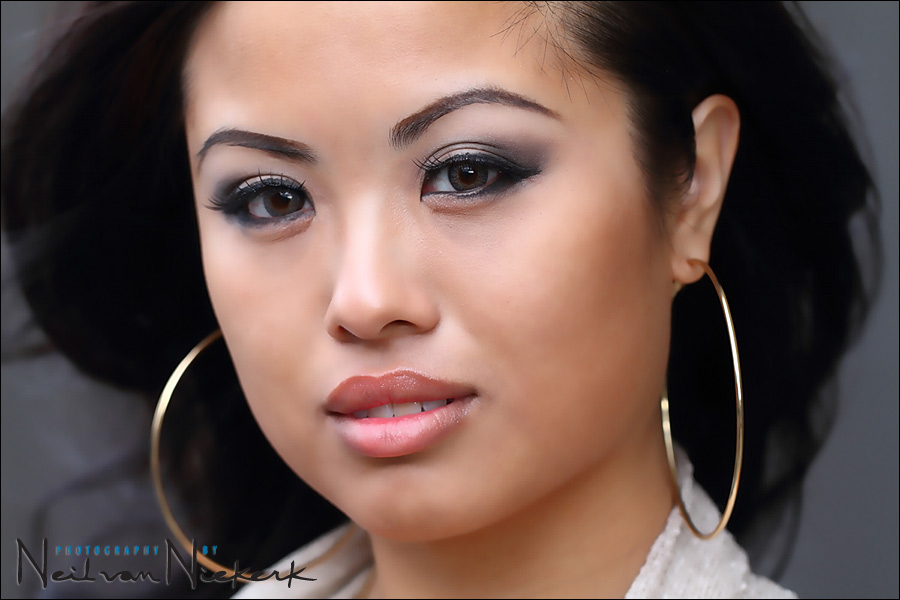
This image of our model, Anissa, is nearly straight out of the RAW converter. I did retouch a few skin blemishes and stray strands of hair. But the starting image here is essentially un-retouched. By the way, the lighting is entirely available light – the open shade behind a building.
Here’s the original image:

.. and with a sprinkling of some Photoshop fairy dust, we end up with this image above:
[ click on either photo for a larger image ]
The Photoshop fairy dust in this instance is a combination of different effects in Topaz Adjust,
and blending them in a specific way:
The effect in this instance was done by over-smoothing the image, and then running two effects on that over-smoothed layer which both accentuates the overall contrast and local contrast in some way. Even if you don’t use Topaz Adjust, it will be of interest to see how things are done, since you could try this combination with other Photoshop effects, with good results.
Let’s have a closer look …
Starting with our original image, we create a duplicate layer on which we’re going to run the Smooth & Flat effect in Topaz Adjust. For those who are unsure how to create a duplicate layer, we do it by dragging a layer to this point on the Layers palette, as marked in red. We then rename the duplicate layer, just to keep track of what we’re doing. This is the layer that we’re now going to run the Topaz effect on.
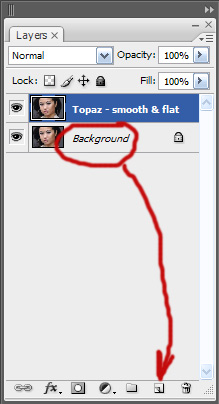
We now get an image that looks over-smoothed and ‘plastic’ ..
.. but this isn’t where we’re going to stop. It is merely an intermediary step.
We now create another duplicate layer, using that ‘smooth & flat’ layer We do this again by dragging the layer as marked here:
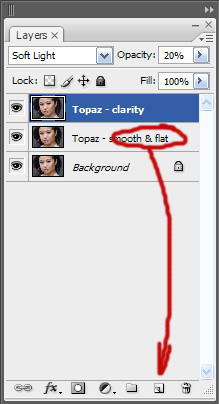
On this duplicate layer, we now run the Clarity effect in Topaz Adjust .. and we blend this as a Soft Light layer, and we adjust the opacity to taste. For me here, 20% looked good.
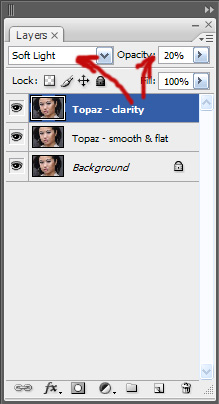
The image is now starting to look like this ..

The next step: We once again create a duplicate layer from the ‘Smooth & Flat’ layer (which is still at 100% opacity) .. and on this 4th layer, we run Portrait Drama in Topaz Adjust … and we change this to the Soft Light blending mode again, at a reduced opacity .. 30% in this case.
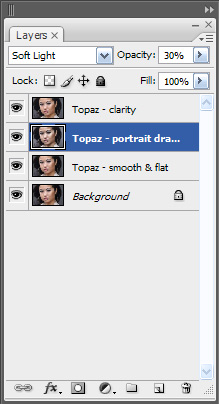
At this point, our image looks like this ..

.
We can now reduce the opacity of the ‘Smooth & Flat’ layer ..
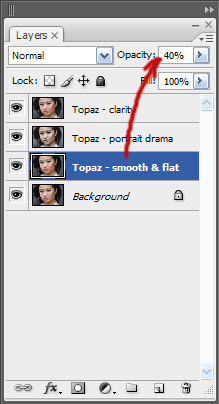
… and on the final image, with the layers flattened, I use the History Brush in ‘Screen’ mode at 10% opacity, and brush some brightness back into her eyes, and here we are – a final image that has an interesting air-brushed look to it, but has a nice ‘snap’ to the image.
Very interesting and helpful!
Thank you for sharing!
Neil, great tutorial. This is really a unique series — please keep ’em coming!
Neil:
Any reason why you don’t use Nikon Capture NX2 with the plug-in filters? I have heard that Nikon’s raw converter is superior to those by third parties. Thank you.
Here, I feel to ask you one question.
What is your opinion about Capture one pro? Now it is version 5.
I am a fan of it and I had it.
Of course I had to make this into an action
@SC Nikon Capture NX2 is OK, but DXO is a superior for fast quality raw workflow
I think I have seen the “plastic” photo way too often on magazine covers (not to mention too much Photoshop airbrushing). Now, I know one way those images are made.
After searching on Google, I am pretty sure that the Soft Light layer is not directly reproducible in Lightroom. I think Lightroom users will need to supplement with a Lightroom plug-in to expose that functionality. (no pun intended)
Hi Neil
Great info!
What settings do you set the filters within Tobaz: Smooth & Flat, Clarity & Portrait Drama.
Thom
great tutorial but if you use softlight layers I would recomend converting them to black and white or you get weird color.
Thanks for the tutorial.Ihave Topaz and found this tobe be very helpful. Many thanks
I have been using Topaz Clean2 and Topaz Detail for a short time now. Topaz Adjust joined the arsenal today (used the link and discount, thanks). Too soon to comment.
It’s a bonus to have a place to start with the software, thanks to your tutorial. Also took a little time to rummage through your extensive postings – good stuff!
Openly sharing your knowledge and techniques (and the time it takes to do so) is most generous of you, Neil.
Very helpful info with the Topaz Adjust! I had been struggling smoothing out a senior’s skin and was able to make all of her pictures look great using this formula. Thanks!!!
G’Day Neil
I have downloaded a trial version of Topaz Adjust, prior to purchasing.
I understand that it is a plug in for PS, and it does appear in my filter menu.
My question is though, when I use the smooth and flat, I cannot return to PS.
How are you making the adjustments via PS, which is what I see in the above tangent.
Cheers
Angelo
Hi Neil
Further to the above, and something I should of mentioned or better explained.
I have followed the above steps and get the achieved result as described.
In better detail, I should have asked, after every Topaz adjustment, you must hit the apply and ok buttons.
Can I short cut flicking between the two programmes and just access the Topaz actions within PS only.
Can I drag the plug ins, directly into PS and click an action just the same as the “tools for processing” and “shadow range” as downloaded in another of your tangents.
Cheers
Angelo
Great tutorial!