If you love music, then live concerts are particularly exhilirating. If ever you are fortunate enough to get to photograph a concert, you’d have to have your own act together. You get a limited time-frame to nail the shots – and the lighting and stage setup can be a challenge to get great photos.
Mark Tepsic is a concert photographer based in Denver, CO. He has advice on the camera settings that make most sense when shooting a live concert. You follow him on Instagram for a gallery of images and contact information.
Camera Settings for Concert Photography
a guest post by Mark Tepsic
Concert / Live Music photography is one of the most challenging specializations! Most of the elements cannot be controlled by the photographer: lighting, positioning, subject posing, etc. Although there is much more to successful concert photography than correct camera settings, it’s definitely a critical piece. As a concert photographer, you’ll hear the common venue restrictions: first three songs, no flash. You have to work quickly, and usually in low light. Here is my advice for camera settings that will increase the probability of great photos at concerts.
Red Rocks Amphitheater – Denver, CO
1/400 sec @ f/2.8, ISO 2000 – 70mm
Exposure Modes
For the shooting mode, I highly recommend shooting in Manual. If you are just starting out in concert photography and are nervous about getting all the settings correct, then start out in Aperture Priority mode, setting the aperture and ISO based on the advice below. Your camera can then calculate the appropriate shutter speed based on the metering mode you have configured (also noted below). Due to the dynamic nature of concerts, your camera will have a hard time constantly adjusting based on how it meters the light; you’ll have a much higher probability of getting great shots if you control all aspects of exposure.
For drive mode, you’ll want your camera in Continuous High / Burst. Depending on the frame rate and buffer capacity of your camera, you should be able to snap 5-10 shots at a time. Don’t get TOO trigger happy or you’ll have way too many photos to review and edit and you won’t develop good composition skills, however for a dynamic artist you’ll want to capture the subtle changes in expression and movement. Most DSLRs will shoot at 4-6 frames per second, the higher end cameras will push 12-14 fps.
For the file mode, I highly recommend shooting in RAW. If your camera supports two cards and you’re not quite ready to move to RAW editing, then have it save to RAW on one card and JPEG on the other. For me, I’m writing RAW files to both cards simultaneously in a backup configuration. The advantages to shooting RAW far outweigh the disadvantages, and given the complexity of concert photography you will likely need to make some adjustments to your images in post-production. Having the RAW data is a huge benefit.
ISO settings
One of the first things I think about when guessing my baseline settings for a show is ISO. Having the ISO correct will allow you to make slight changes in exposure as needed by simply varying the shutter speed. Most photographers will need to get out of their comfort zone with ISO for concert photography. For indoor concerts or outdoor concerts at night, ISO 100 will no longer cut it! For most concerts that I shoot, I am working in an ISO range of 1,000 to 6,400.
Smaller venues will typically be darker, and will have harsh red and blue lighting. This is where you will need to push your camera’s ISO range into the 3,200 – 6,400 range. Yes, this will introduce noise to the image, but that is easily corrected in post processing especially if you’re shooting RAW. A noisy picture is much better than a blurry or extremely underexposed one!
Larger venues (and bigger acts) will usually bring their own lighting, and there is generally a lot of white light on the artists. This is great! However, it’s still going to be much darker than daylight shooting. For these venues I’m usually in the 1,000 – 3,200 range for ISO. These ISO settings assume a fairly wide aperture on the lens, discussed in the next section.
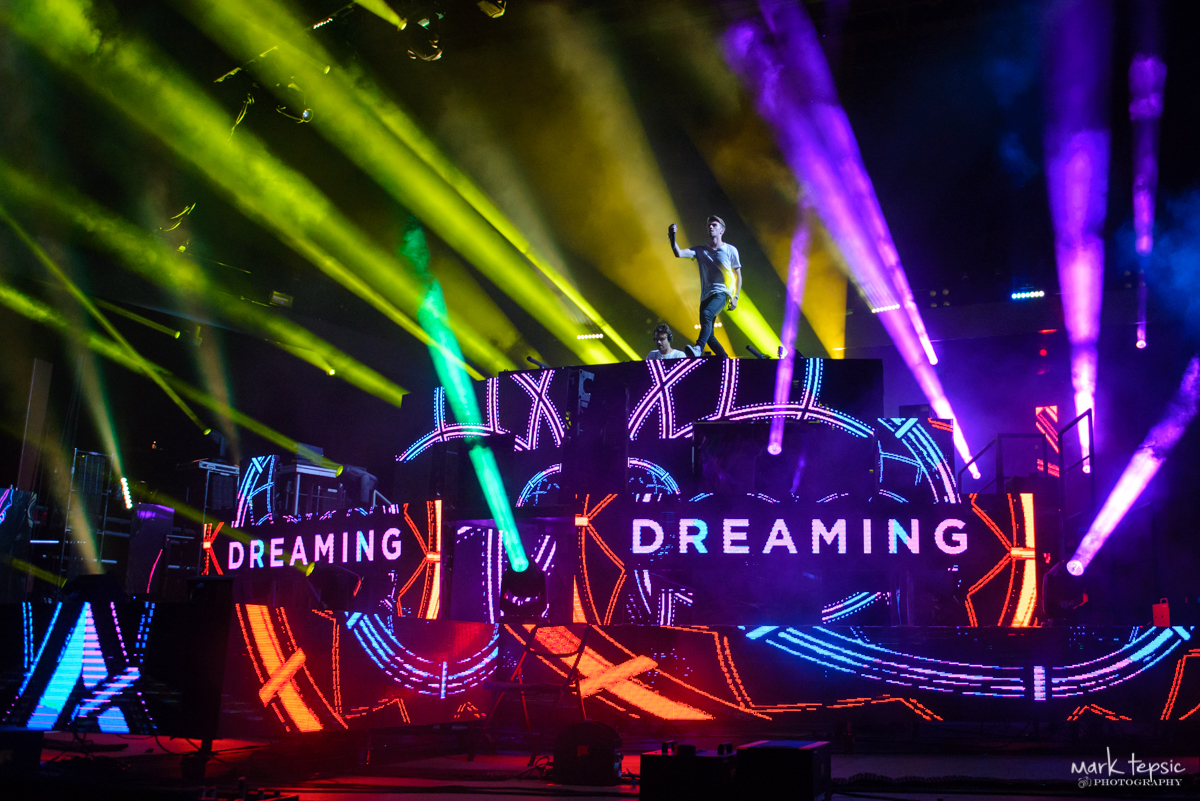
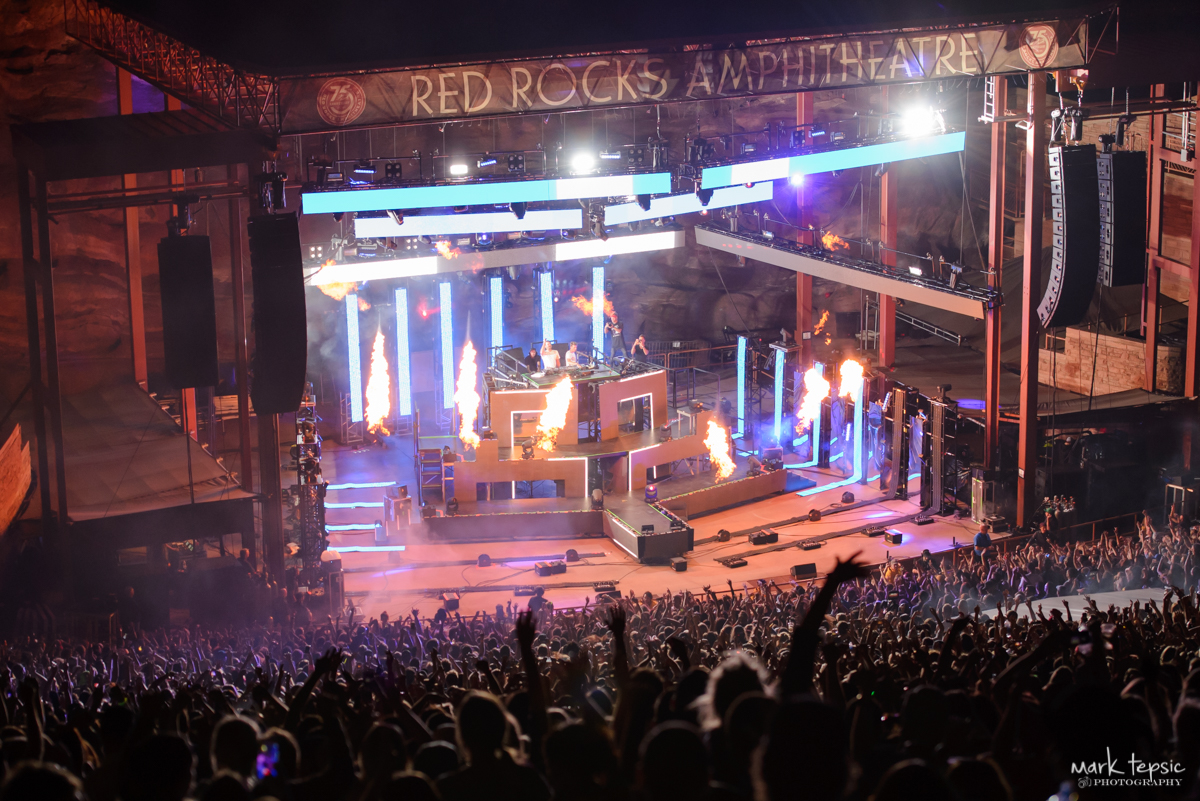
The Chainsmokers – Red Rocks – Denver, CO
1/500 sec @ f/2.8, ISO 2000 – 24mm
Outdoor concerts and festivals during the day are a lot less challenging, but you may not get the dynamic lighting effects that you find indoors. You can use very fast shutter speeds to freeze motion, and at a low ISO you won’t have any noise/grain. When the background is entirely a dark stage, you’ll have to go a little slower on the shutter; when sky and sunlight are added to the frame, however, you can quickly crank up the shutter speed. Sometimes you can use the sunlight to your advantage!
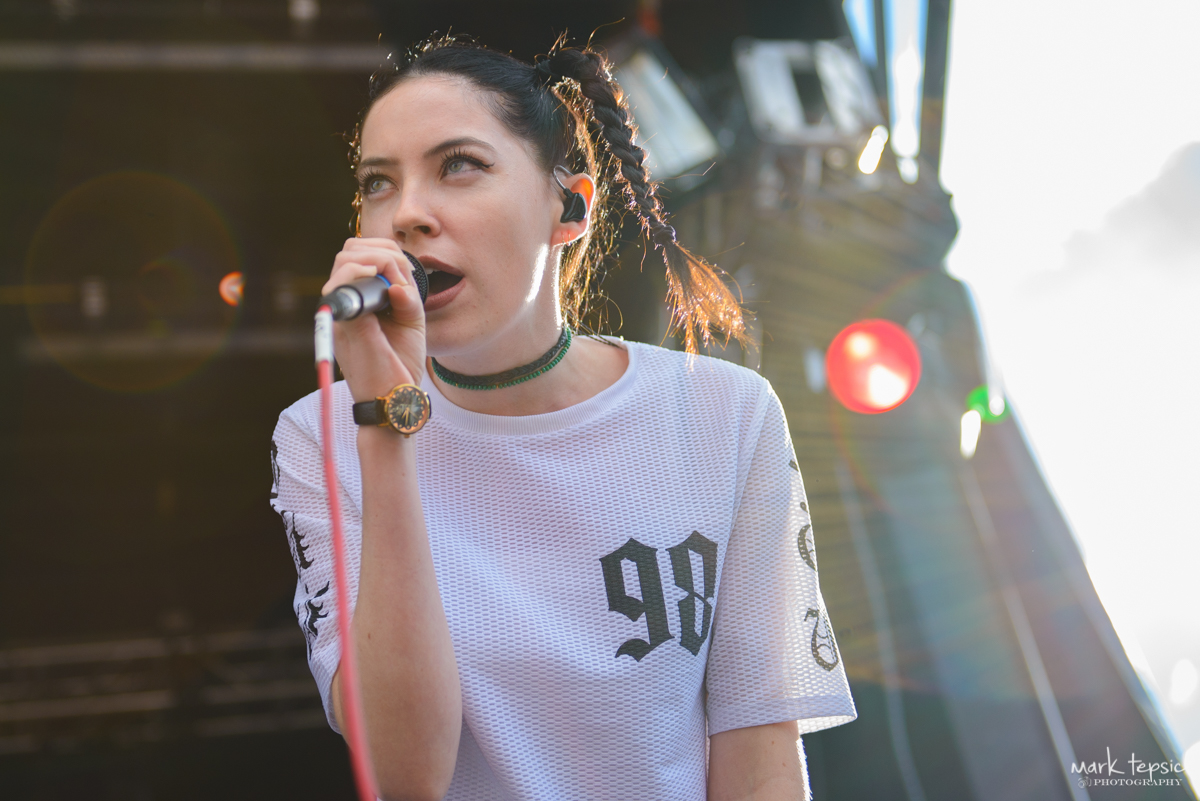
Bishop Briggs – RiNo Fest – Denver, CO
1/1000 sec @ f/2.8, ISO 400 – 55mm
Aperture settings
The aperture setting is one of the easier ones to set…shoot WIDE OPEN! I typically carry lenses capable of f/2.8 or wider at any given focal length. For most concerts that are indoors or in the evening, it will be difficult to capture good images at an aperture smaller than f/4. An investment in a couple quality lenses is key, otherwise you just won’t be able to capture the detail needed in darker light.

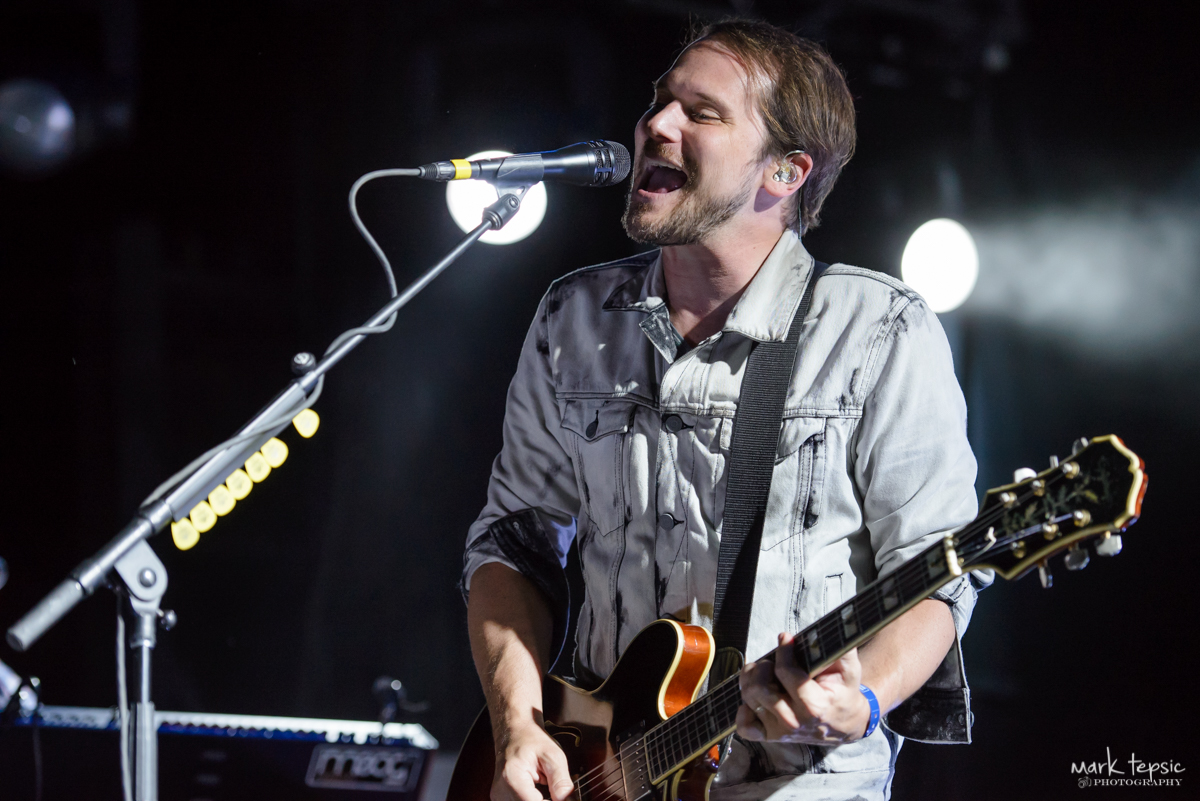
Red Jumpsuit Apparatus –Summit Music Hall – Denver, CO
1/250 sec @ f/2.8, ISO 3200 – 38mm
Outdoor concerts, especially during the middle of the day, are of course an exception. I still like having a relatively wide aperture for a shallow depth of field effect, but you can definitely go a little smaller to control the incoming bright light.
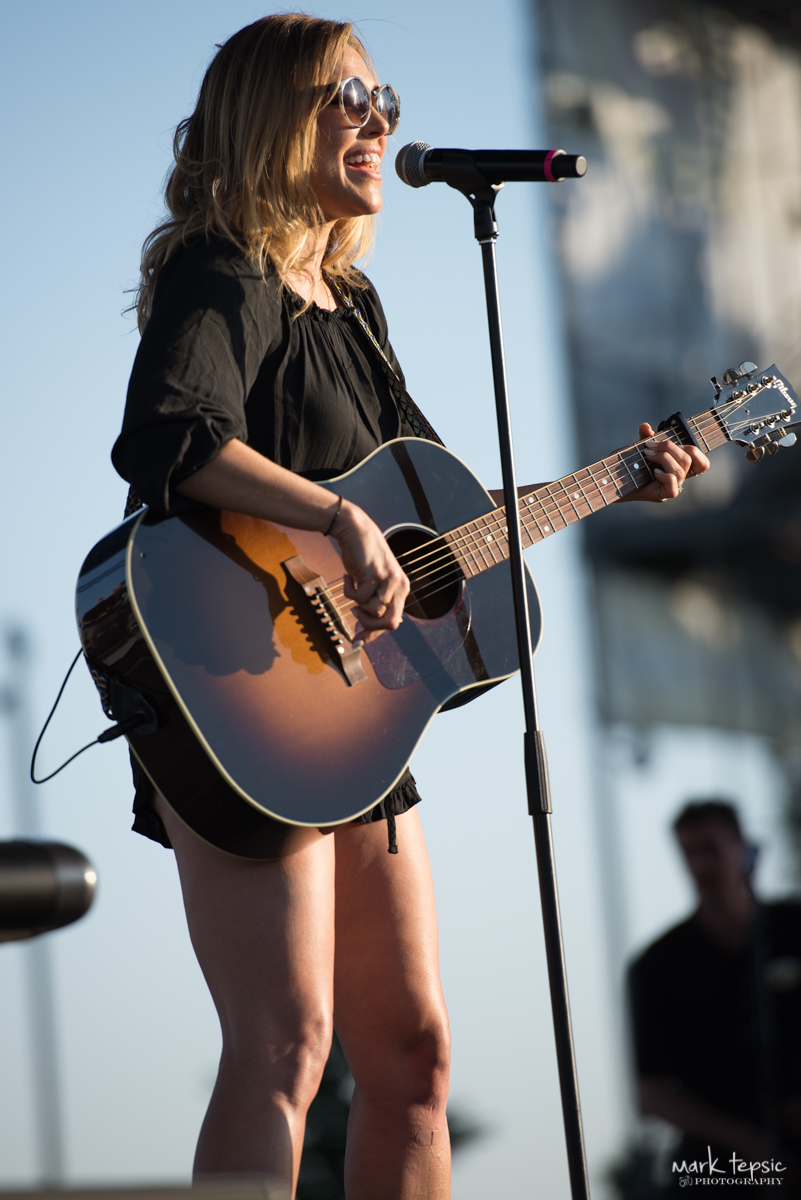
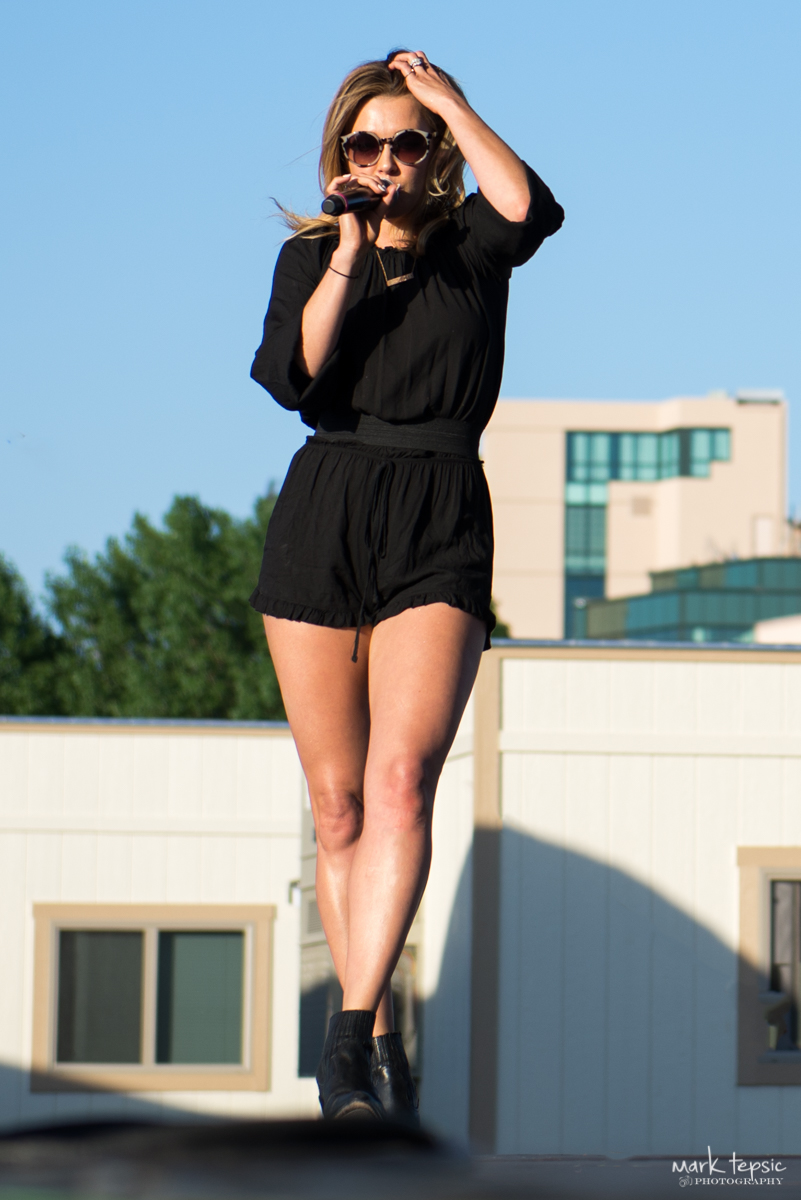
Rachel Platten – Elitch Gardens – Denver, CO
1/1000 sec @ f/4, ISO 100 – 70mm and 200mm
Shutter Speed
As a general rule, the faster the shutter speed the better, assuming you’re able to maintain the correct exposure. Unfortunately for most concerts, this isn’t going to be very fast. Generally, I prefer to be in the 1/500 – 1/1000 second for shutter speed, but I don’t always have that luxury! Smaller venues are really going to test your camera capabilities, and shutter speed is going to be lower than you’d prefer. At a minimum, I wouldn’t recommend slower than 1/100sec even in small venues with very low light. As your focal length increases, this baseline should also increase. Your shutter speed at focal lengths of 50mm or higher should be at least 1/2x, where x is your lens focal length.
For example, if you’re shooting at 85mm, your shutter speed should be at least 1/2×85 or 1/170 sec. Keep the focal lengths short if you’re pushing these baselines, and if you have vibration reduction or image stabilization on your lens you can cheat a little further. Small venues with low or poor light will likely require shutter speeds in the 1/100 – 1/250 sec range, where you’ll have to be extra careful to consider not only the motion of the subject but also the motion of your hands! (i.e.: camera shake).
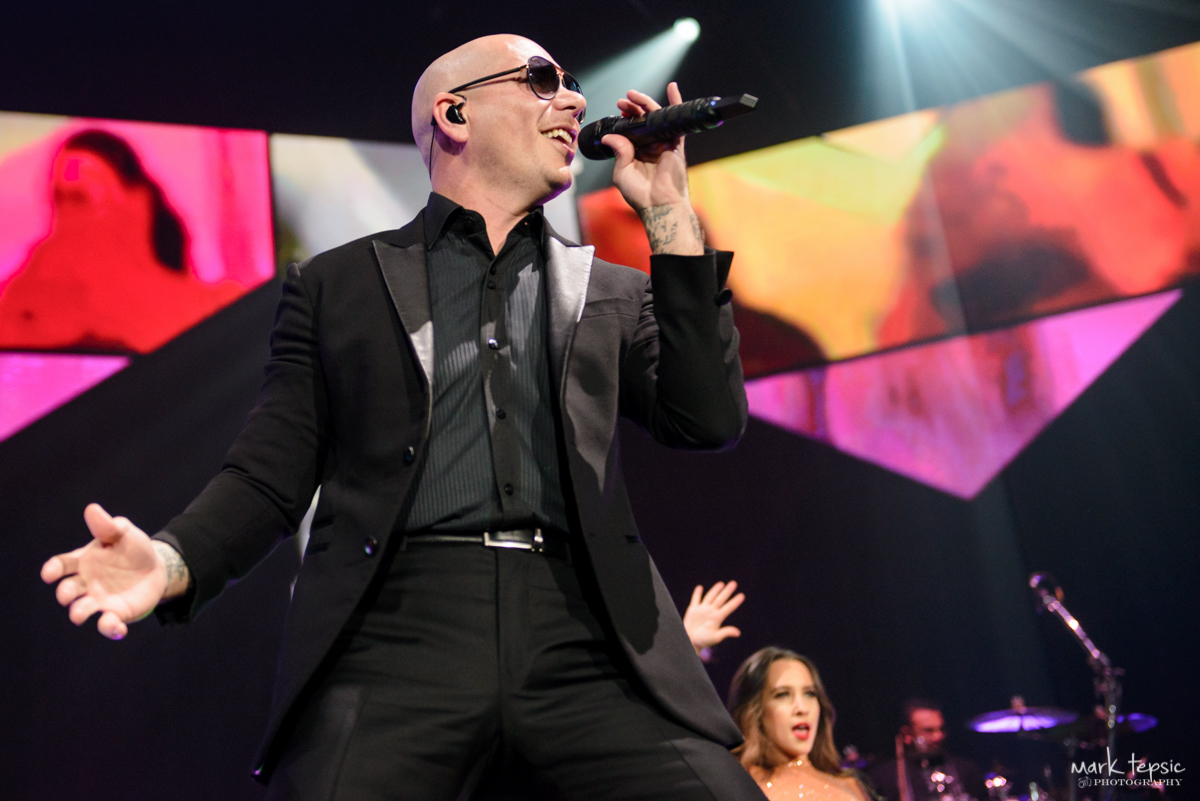
Pitbull – Pepsi Center – Denver, CO
1/800 sec @ f/2.8, ISO 1000 – 52mm
Also – pay attention to the type of act you are shooting. Is this an artist or band that is very active and there’s a lot of movement on stage, or will you be shooting a more mellow act or acoustic set? The less movement you expect on stage from the artists, the more you can work at a slower shutter speed.
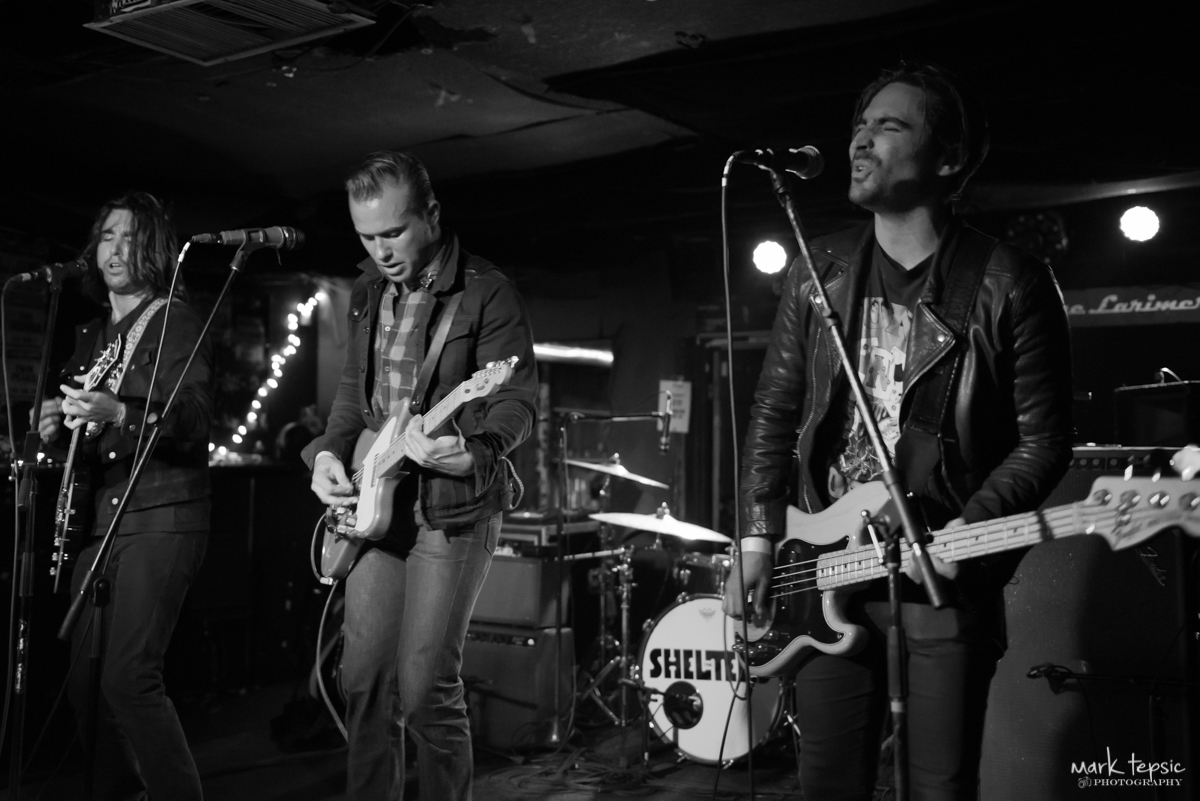
The Shelters – Larimer Lounge – Denver, CO
1/100 sec @ f/2.8, ISO 3200 – 38mm
Exposure Metering
The metering mode for the camera really depends on the type of venue and the lighting available. I tend to use Center-Weighted Metering the most, and it seems to give me the most flexibility in post-production to tweak the image closest to what I witnessed live. When shooting in Manual mode, your camera’s meter is only there as a reference for you. Ultimately, you’ll have to decide how much you’ll want to watch it and make the necessary adjustments. After you’ve taken a group of 5-10 photos, take a look at your images as well as the accompanying histogram, and make your adjustments from there as well. Here are some thoughts on the metering modes:
- Evaluative/Matrix Metering – Use when the lighting at the venue seems to place equal emphasis on the artists as well as the rest of the stage setup. I like this mode for big productions such as arena shows where there’s a lot going on in the background.
- Center Weighted Metering – The most important part of the image is your subject, so it’s critical to get the exposure correct independent of what’s going on in the rest of the shot. (There are many exceptions to this, including some edgy or artistic shots you may intentionally want to capture, but we’ll save that for a future post!). This metering mode will still consider the rest of the scene, but will place a priority on your subject for measuring the exposure.
- Spot Metering – Rarely used, but I like this when there is really nothing going on in the background and all emphasis is on your subject. Think of a single white spotlight on a solo artist, with a dark background.
Focus Mode
Focus mode decisions can get a little tricky, and are also dependent on camera capabilities and photographer preferences/styles. Generally speaking, I recommend shooting with a continuous focus option (AF-C on Nikon, AI-Servo on Canon, etc). What you have to be careful of, however, is that your camera doesn’t change the focus point when it sees either something else jump into the frame OR calculates a focal point closer than where you intended (like a mic stand or instrument). If this happens, your subject may be blurry and your shot is ruined. If you are shooting in a continuous mode, I highly recommend using a small number of focus points (or small ‘clusters’), and make sure they are on your subject. For example, a 9-point cluster that you can move to the general area of your subject relative to your composition usually works well.
The main benefit to this mode is that if your subject is within this AF area, and they move slightly or change their distance relative to where you are shooting, the continuous focus will pick it up and adjust. A downside, however, is that your subject may be outside of your camera’s AF area, and you’ll need to focus then recompose. In continuous mode, the re-composition will likely change where you just focused. In these cases, a single focus (AF-S, for example) may be a better option. While you’re shooting a burst of frames in single focus, you may end up with some frames a little out of focus if your subject moves too much after you locked-in the focus.
Changing between single and continuous focus modes isn’t ideal, and you may miss a shot going back and forth. An easy answer to this is back-button focus. I won’t go into too much detail here regarding back-button focus, but generally speaking this will separate the focus function from the shutter function. By default, your shutter button focuses when half-way depressed then activates the shutter when fully depressed. Once the focus is reassigned to another button on your camera, the shutter button will never adjust the focus. In practice, you can leave your camera in a continuous focus mode, but it will only operate that way when the newly assigned focus button is held down. Once you let go of the button, the camera will freeze that focus, which is exactly what the single focus mode would do as you shoot a burst of images. Your thumb now can completely control the focus mode on the fly!
Summary
Here’s a recap of my recommended camera settings:
Modes
Camera Mode: Manual
Drive Mode: Continuous High / Burst
File Mode: RAW
ISO: 1000-6400, based on available light. Error on the high side!
Aperture: Go as wide as you can. Adjust for outdoor sunlight.
Shutter Speed: Minimum of 1/100sec or 1/2x your focal length, whichever is greater. Use VR / IS when possible.
Metering: I generally prefer Center-Weighted, but adjust based on overall light/detail
Focus: Continuous focus, 9-point cluster. Back-button configuration if possible
Mark Tepsic is a concert photographer based in Denver, CO. Follow Mark on Instagram for a gallery of images and contact information.
Excellent article, advice and inspiring examples, Mark…you rock too!
Thanks Tim!! I appreciate it.
I also shoot bands, concerts and festivals. You gave great basic advice w/o giving too much to confuse.
The only thing I do different is shoot mostly in Matrix metering mode. Then in some instances I change up the white balance. Mostly leave in auto #1 unless I want a warming effect then auto #2.
I have had small venues where almost the only light was from the beer advertisment lights. I’d mess with the white balance until I got the look I wanted. The ISO is maxed out on those venues. 12,800 on the d810 and more grain than is really acceptable. Sometimes this makes for some cool pics though. I’ve actually had bands ask for the ” cool looking grainy pics”.
Great article, thank you
Thanks! I agree on the WB adjustments, and also the metering mode when appropriate. Some of those small venues are SO difficult to shoot, and it’s never ideal to push the ISO so high. But, you gotta do whatever it takes! Funny, I see a lot of bands pushing for the more ‘edgy’ shots as well. Sometimes it’s discouraging because a shot you feel is bad may end up being their favorite (or the publicist’s favorite), and your “best” shot isn’t used. Ugh!! That makes it fun though. I never delete a photo I initially feel is bad. I spend some time in Lightroom to see if I can walk the fine line between bad and edgy/artistic. Good luck!!
What about White Balance? I always have trouble with the mixed lighting sources used. Is it best to just stick with auto and change in post because of all the different sources? I don’t do concerts myself, but I’d still like to know.
Good question! I purposely left White Balance out of the blog post to not get too overwhelming with settings, and realizing that most will have White Balance set to Auto. I usually do as well… In my experience, the white balance is pretty close to correct and I usually only adjust temperature or tint to create an interesting effect (especially when converting to black and white) as opposed to make a correction to an obvious mistake. This is another huge benefit of shooting in RAW…getting WB correct in camera isn’t as critical.
The advice of using Manual or Aperture fot shooting night concerts is wrong! The best settings is Shutter sped at 1/ 320,Highlights focus,Auto iso,and the secret is to use Exposure compensation button