Tangents

photography tutorials, reviews & workshops

tangents photography blog
learn : discuss : share
subscribe today
  • Tangents
  • Tutorials
    • Flash Photography
    • Wedding Photography
    • Studio Photography
    • Posing People
    • Understanding Your Camera
    • Exposure metering
    • BFT
    • Best Photo Books
  • Workshops
    • Info: Workshops
    • In-person
      tutoring sessions
    • Online
      tutoring sessions
    • Video tutorials
    • Workshops in
      New Jersey (NJ)
    • Workshops in
      New York (NYC)
    • Studio Workshop
    • Workshop results
  • Books
    • On-Camera Flash (revised ed.)
    • Direction & Quality of Light
    • Off-Camera Flash Photography
    • Lighting & Design
    • On-Camera Flash (1st ed.)
  • Reviews
    • Nikon
    • Sony
    • Canon
    • Fuji
    • Profoto
    • lighting gear
  • Projects
    • Two Perspectives
    • B&W Infrared
    • Vintage lenses
    • Time-lapse photography
  • Info
    • About
    • Contact
    • My Photo Gear
    • Books by NvN
    • Newsletter
    • Join us on Facebook
    • Acclaim
    • Success Stories
    • Photoshop Actions
  • Forum

video light for photography – positioning the light

September 27, 2010 Neil vN 11 Comments

video light for photography – positioning the light

A light source like a video light is comparatively unforgiving when you look at how easy it is to get beautiful results with flash and a large soft box. The smaller light source (video light) needs to be positioned with more specific intent than the larger soft box.

My starting point in using a video light is in looking how the shadow falls under the nose of my subject. I usually direct the person holding the video light to follow the movements of my subject, and keep the nose’s shadow under the nose as much as possible.

This of course is only a starting point in placing the light, and you should look for interesting ways in using the light when combined with how your subject is posed. Then there is always serendipity coming in to play when your assistant’s inadvertent changing in position and your subject’s change in position, gives you that fortunate and unexpected great image.

In first switching on the light, I hold it so that the light points overhead and above my subject. This way I don’t blind them with the sudden direct light. I also warn them not to look at the light. Then from above, my assistant will slowly bring the light into position.

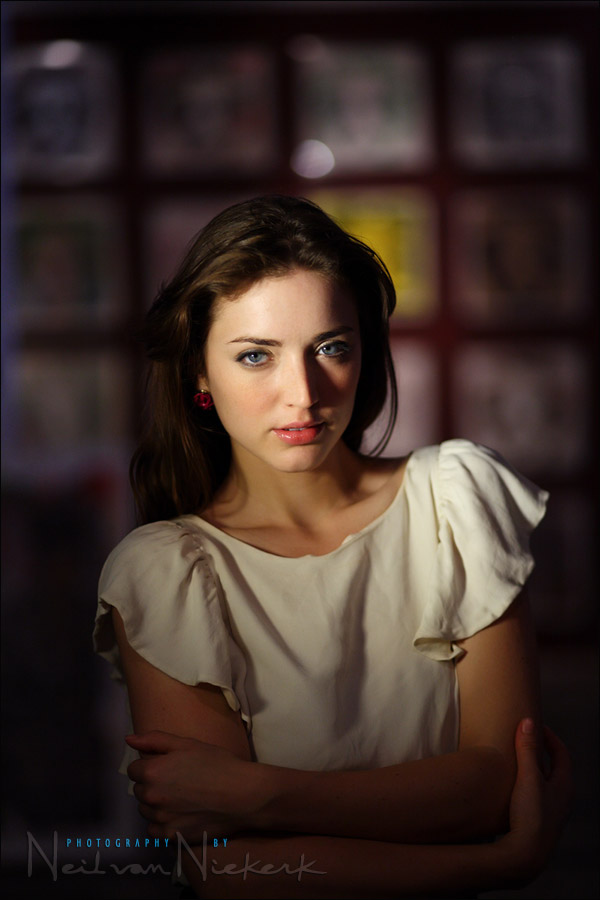
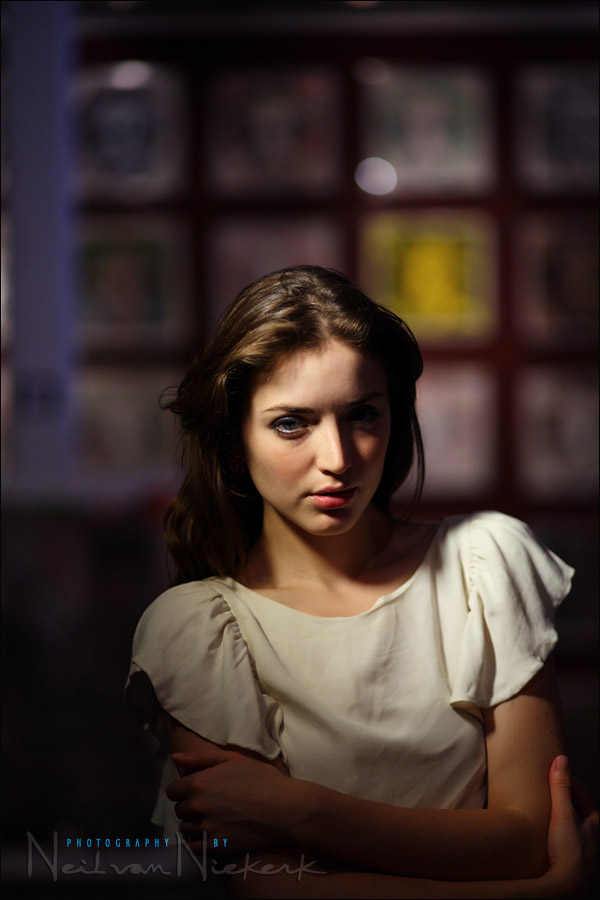
I want to show some examples here of lighting patterns that I normally would avoid:

Here the light comes in at too great an angle to her face, and the shadow of her nose falls across her cheek. The light here also creates a weird pattern on the side of her mouth. The light was also held too low, and needs to be held higher.

Here the light is at the correct height, but is aimed too low, lighting up her arms and chest more. The sweet spot of the light needs to be aimed at her face. If the intention is to have your subject’s face slightly darker, accentuating something else, then that’s great.

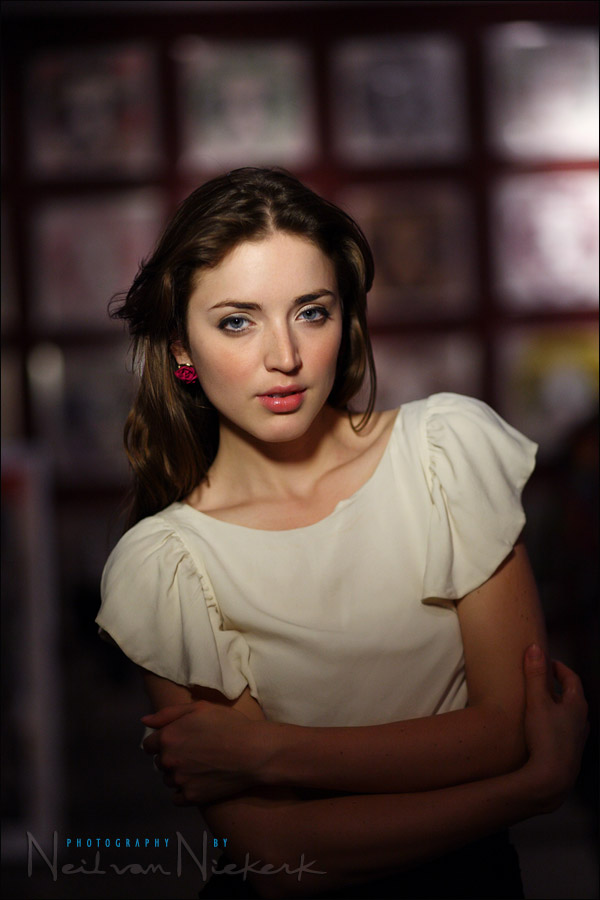
With this simple portrait of Anelisa right at the top, I ‘feathered’ the light a little higher up, forcing an even greater light fall-off on her arms. This way her face is accentuated even more.

Here I wanted to show an image with the video light held too high, creating a shadow under her eyebrows. It’s not flattering.

Ultimately, our consideration here is to create light that is flattering or interesting. Our direction of light is crucial then. In that, using video light is no different than our approach in using flash or great available light.

  • more articles on the use of video light for photography

Equipment used:

Camera: the classic 5D. The lens is the Canon EF 85mm f1.8 USM (B&H);
lighting with the Litepanels MicroPro LED video light (B&H)


Filed Under: Anelisa Durham, lighting, Uncategorized, video light Tagged With: video light for photography


Help support this website

If you find these articles of value, please help support this website by using these B&H and Amazon affiliate links to order your photo gear.

I also offer photography workshops and tutoring sessions, whether in person, or via online video tutoring sessions.

Stay informed via the monthly newsletter.

Please follow me on Instagram for more.

You can also join our thriving photo community in the Tangents group on Facebook, where we show our photos and discuss all things photography.

Thank you,

Neil vN

Books by Neil van Niekerk


11 Comments, Add Your Own

  1. 1Sean S says

    September 27, 2010 at 1:00 pm

    Ever clear with easy to follow iterations.

    Would be curious to see your CORRECTED version of the Rembrandt pattern in a final shot

    Reply
  2. 2Neil vN says

    September 27, 2010 at 1:57 pm

    Sean, with the video light, a Rembrandt light pattern isn’t something I’d purposely tried for on this occasion.

    Neil vN

    Reply
  3. 3Stephen says

    September 27, 2010 at 2:30 pm

    Those are very useful comparison photos about where not to shine the video light.

    Reply
  4. 4Neil Patel says

    September 27, 2010 at 3:01 pm

    Hey Neil, these are amazing images created with light.

    Reply
  5. 5Erik says

    September 27, 2010 at 4:57 pm

    Funny, I like #2 best…more drama in the lighting.

    Reply
  6. 6Sheri J says

    September 27, 2010 at 5:14 pm

    very good illustration…. now to see if hubby will let me play with his new video light :)

    Reply
  7. 7shahn says

    September 28, 2010 at 9:37 pm

    Neil,
    How does the brightness compare of this Litepanel -vs- Lowel iD?
    If you were to measure in f-stops…?

    Reply
  8. 8Neil vN says

    September 28, 2010 at 11:12 pm

    Shahn … I’m waiting for a Dedo LED-zilla to test against the Lowel ID-Light and LightPanels unit, and then I’ll post a proper comparative review. I hope to have that up in the next few weeks.

    Neil vN

    Reply
  9. 9MJ says

    October 3, 2010 at 3:56 pm

    Hi Neil,

    videolight is very better. I Order this one Video light 160LED in ebay. It`s cool to use. Very thanks for your tips.

    Reply
  10. 10Sean van Tonder says

    October 29, 2010 at 9:26 am

    Great work Neil. How do you correct the white balance of the LED lights

    Reply
  11. 11Neil vN says

    October 29, 2010 at 1:45 pm

    Sean … you absolutely have to shoot in RAW any way … and then WB correction becomes much easier.

    The LitePanels MicroPro comes with different gels .. so the WB correction depends on the gel you’ve added, and the color you’d like.

    Neil vN

    Reply

Leave a Reply Cancel reply

Your email address will not be published. Required fields are marked *

categories

Articles & Tutorials

  • • About myself & this site
    • Books by Neil vN
    • Best photography books
    • Black foamie thing
    • Spinlight 360
    • Photographers’ success stories
    • email newsletter
  • • Flash Photography Techniques
    • Natural looking flash
    • Flash + Ambient light
    • Dragging the shutter
    • Bouncing your flash
    • On-camera flash outdoors
    • Exposure metering
    • Flash exposure compensation
    • Bounce flash examples
    • Which is the best flashgun?
    • Flash brackets
    • Off-camera flash photography
    • Flash photography basics
    • Using video lights
    • Flash photography tips
    • Photography books
  • • Photography workshops NJ / NYC
    • Models @ photography workshops
tutorials:
flash photography
Photography
Workshops

Recent Comments

  • Pat: Right up front, I’ll say I would NEVER buy a Sigma lens. That out of the way, and referring to these...
  • Stuard Santana: Poor Garret Shaw! he should know better, lol I got another one today with the same exact wording and...
  • Mohd Zamri Mohd Zan: In my country are even worst, most guest asking professional photographer to take their photo...
  • HenkW: Thanks for this review – one of the very few I could find on this most interesting topic. So, the...
  • Rachel Abi: Thank you so much for this guide!! There are some many options and you made this really clear :D

All rights reserved. Copyright © Neil van Niekerk 2023 · Customization by The Traveling Designer

Copyright © 2023 · NvN on Genesis Framework · WordPress · Log in