Tilt-shift lens vs perspective correction in Photoshop / Lightroom
Using the Lens Correction / Transform tools in Lightroom and Photoshop, you can make quite radical changes to the perspective of a photo. You can change and skew the vertical and horizontal lines easily, and convincingly.
Since it is now much easier to to correct for leaning vertical lines when photographing buildings with a wide-angle lens, I thought it would be a good comparison to use a Tilt-Shift lens and optically correct for the verticals, versus doing so in Photoshop or Lightroom.
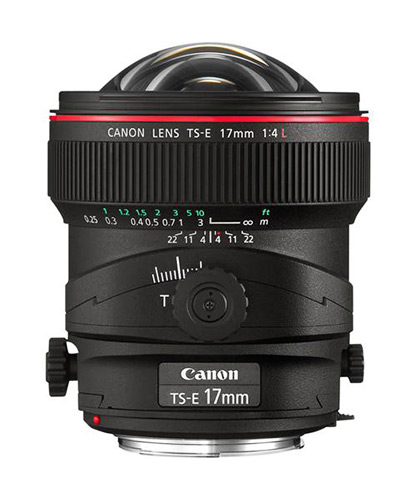
For comparison images, I used the super-awesome Canon TS-E 17mm f/4L tilt-shift lens (B&H / Amazon) to photograph some of the architecture around Times Square. Just shooting upwards, you get that typical vertical perspective with the buildings leaning back and becoming smaller and smaller towards the top. In the photo we’re going to look at here, I shot two versions – one with the leaning verticals (nearly completely) corrected with the tilt-shift lens, and the other, shot “straight” without the perspective correction, so that we can fix it in post-processing.
The summary to all this, is that I was quite surprised at how well even an extreme correction in post, holds up in the detail. The downside – you lose a lot of real estate in the resolution of the photo.
Correcting verticals with the tilt-shift lens
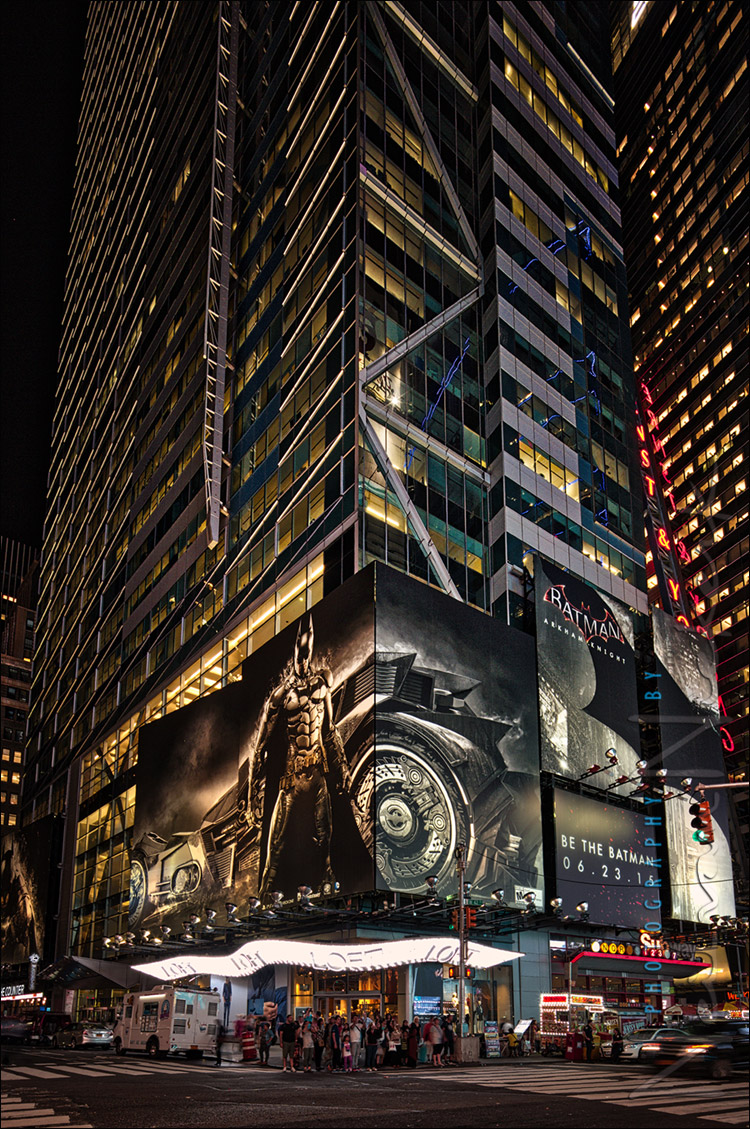
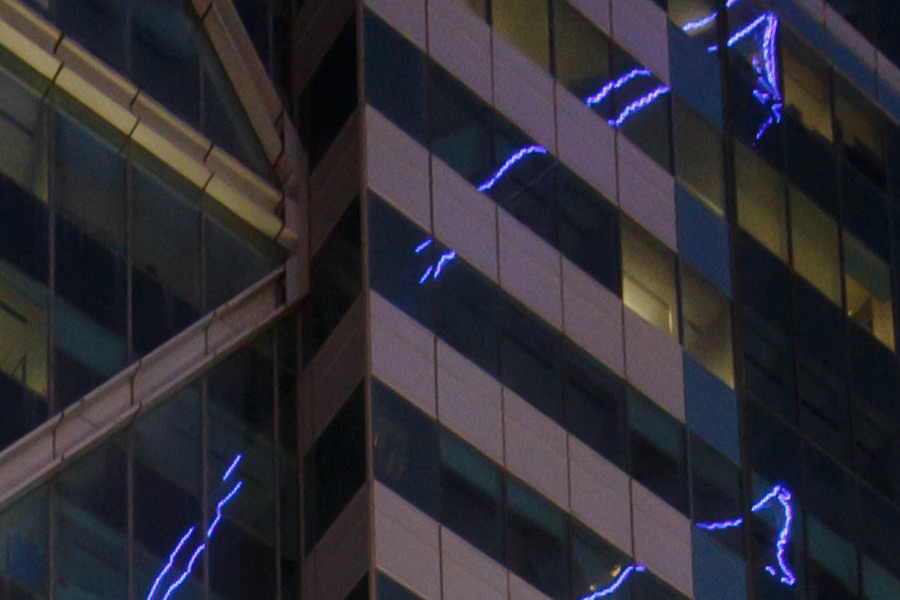
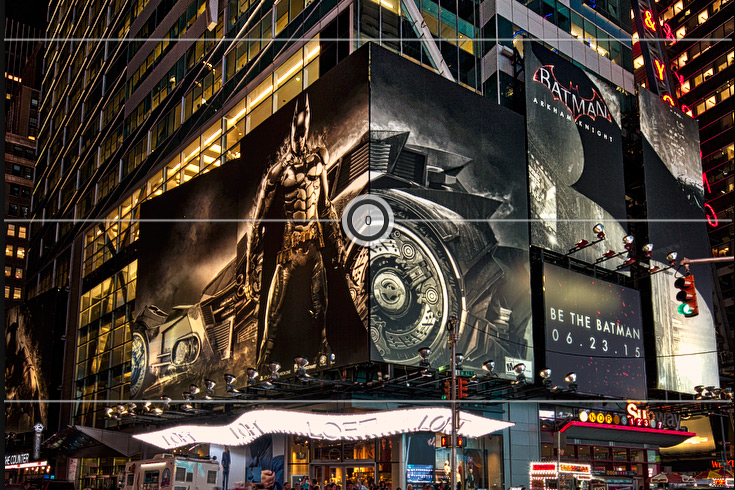
Here is the image (nearly) corrected optically (in other words, in camera) with the shift movement of the Canon TS-E 17mm f/4L tilt-shift lens (affiliate). I didn’t quite nail the correction movement of the lens – peering head-down into the viewfinder, with the top part of the buildings being so much darker, it was tough finessing the adjustments. But you get the idea.
This photo was adjusted as the RAW file, pulling down the exposure at the bottom with the local correction brush. The top-most part was also brought up slightly in exposure.
Correcting the converging verticals in post-production
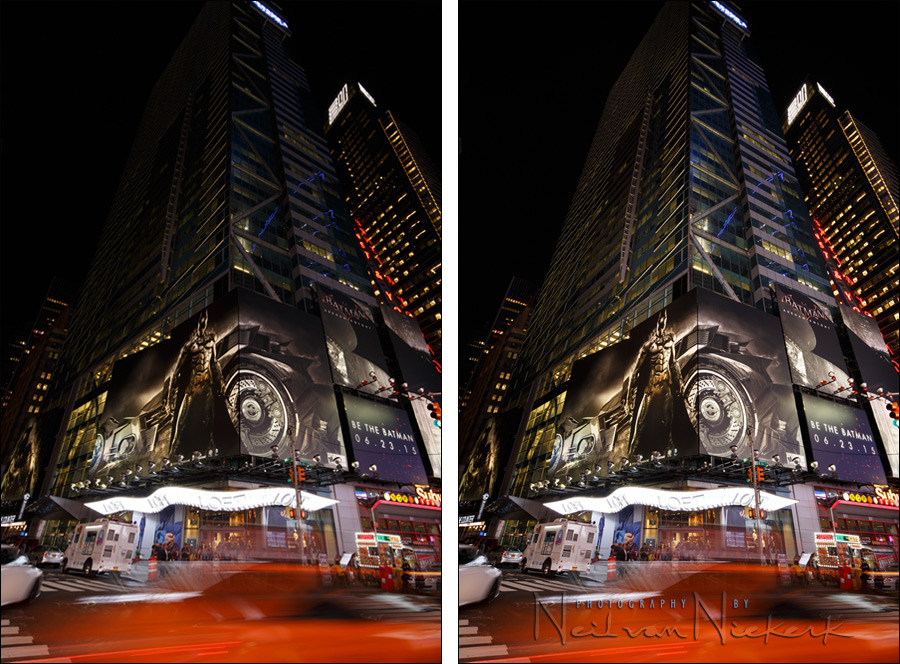
Left: the photograph, at the default RAW settings. (i.e., not adjusted)
Right: The exposure of the top-most part of the building pulled up by using the local correction brush.
Then, using the adjustments: Transform >> Lens Correction >> Vertical, the leaning verticals were corrected.
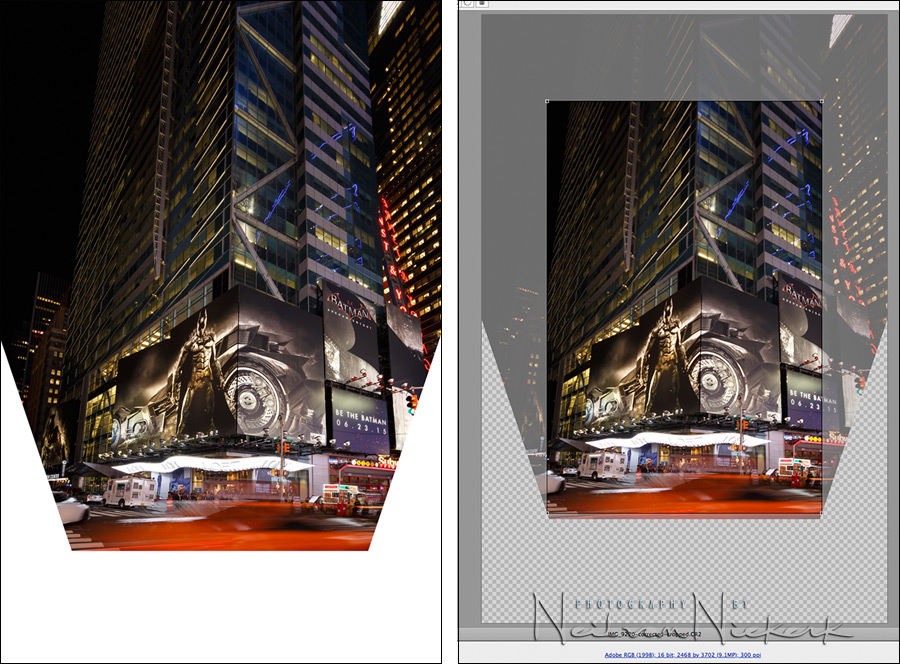
It is in the last step where you can see how much real estate we are losing to the correction and cropping. Using the tilt-shift lens, leaves us with the full 20 megapixel resolution that the Canon 6D offers us. But that crop in the post-processing correction, reduces the image size to 9.1 megapixels. This is where the tilt-shift lens come into its own, by retaining the original image resolution.
Whether this is important or not, will depend on the final use of the image. For web use, the 9 megapixel image will be more than sufficient.
Summary
How well does the version corrected with software, hold up against the optical correction?
Keeping in mind that we are comparing a 100% crop of a 9 megapixel image to that of a 20 megapixel image … let’s see if you can guess which version is which.
Depending on your needs and your final use of the image, the software corrected version “isn’t all that bad”. I was quite surprised at how well such an extreme correction (via software) holds up in the detail. The downside – you lose a lot of real estate in the resolution of the photo. And really, if you want critically sharp images, then you will have to invest in those tilt-shift optics!
The lens used here is the mighty Canon TS-E 17mm f/4L tilt-shift lens (B&H / Amazon) – it is an essential lens in architectural photography.
HDR processing
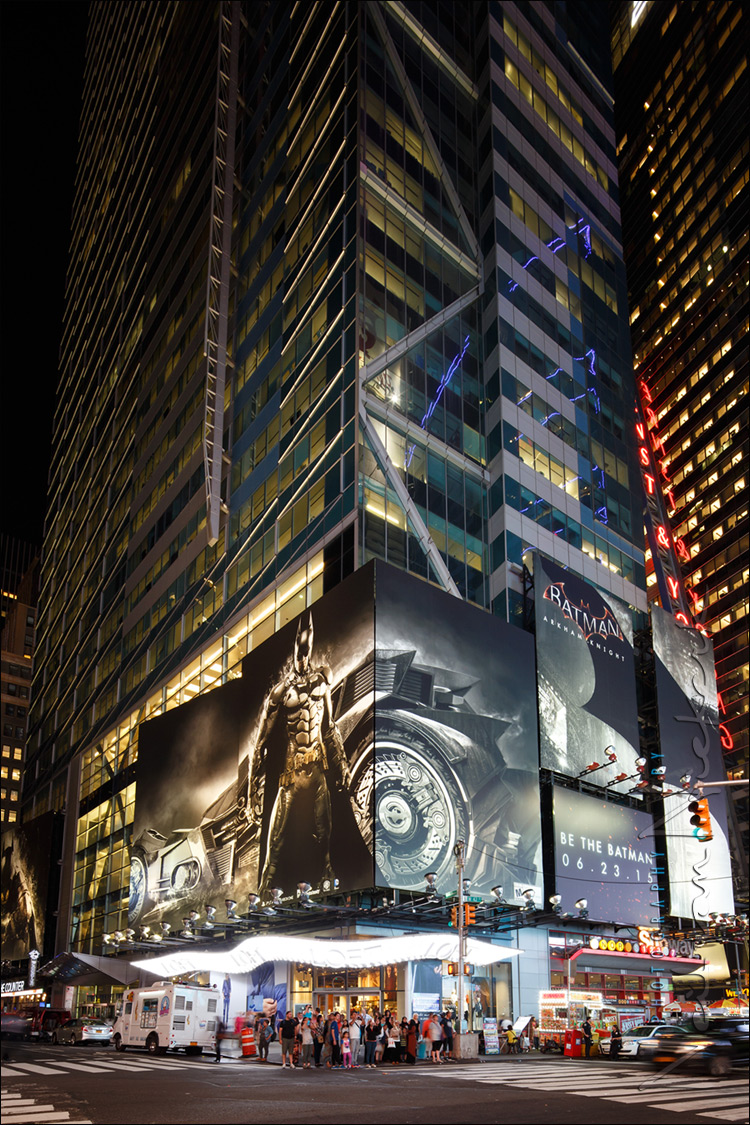
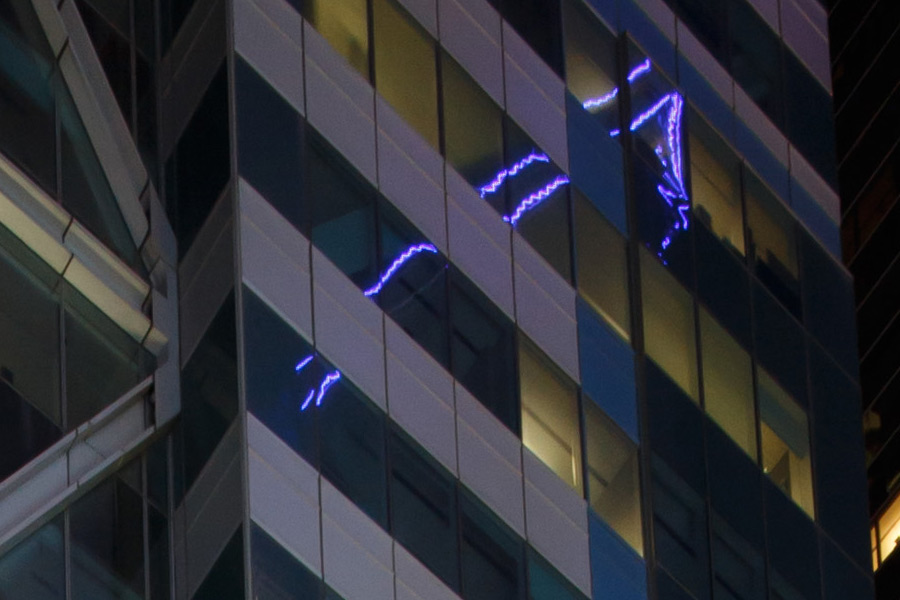
This photo (also shown at the top) where the verticals were optically corrected, was juiced up to be more colorful and punchy than the original photo. With the original photo, the buildings become darker to the top.
I used the new software by Trey Ratcliff, called Aurora HDR. Beautifully easy to use, it simplifies achieving a High Dynamic Range look, while also giving huge variety and possibilities.

Top + Bottom Lighting adjustment in Aurora HDR software
The RAW file had large areas at the top which were dark, and the bottom part of the image was bright. In this photo above I used the local correction brush in Lightroom / ACR to bring the brightness up / down as necessary. With the Aurora HDR software, you have even more adjustments available. One of them is the Top & Bottom Lighting pane, where you can shift a divider line up and down (and change its width), where the image will become progressively brighter or darker. This allowed me
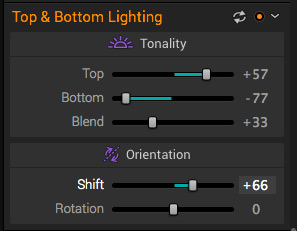
Using this, and other adjustments in Aurora, made the image really pop!
That was very enlightening! Thanks as usual. I picked up a copy of Aurora HDR a few weeks ago when they had the pre-release sale going. Have you tried it with multiple eposures yet or just single image HDR processing?
Just single image HDR, at this point.
There’s also the little matter of Scheimpflug-ing your way to sharpness.
With “fix it in post”, you’re much more reliant on depth of field, and once you’ve applied perspective correction, the circle of confusion in the expanded area gets a lot bigger as well. Things won’t fade off into dreamy creamy bokeh with a truly wide-angle lens, but they will still be distinctly less sharp than they could be – especially if you’re shooting a facade rather than a corner, where you only need enough critical DoF to cover the architectural details.
This is a very useful comparison Neil. Thank you. And thanks also to Stan for pointing out the issue with the potential loss of sharpness due to the expanding circle of confusion and subsequent loss of DoF. The differences between using a TS lens and software corrections now make a lot more sense to me.
I use image stitching for buildings, I stitch 2-6 (depending on the building and needs) vertically (for narrow tal buildings), horizontally (for wide buildings) or even on both axes (when I need very high res) and I get 40-60mpx images from a 24mpx sensor, then I correct the 40-60mpx image no matter how aggressively, and I then still get an ultra-sharp 25-30mpx corrected image. So tilt-shift is useless for me, especially when they’re fixed focal. I can get better results with a normal lens with a bit of work.