I met German photographer, Tilo Gockel / fotopraxis, during one of his visits to New York. Seeing this photo on his blog recently, immediately reminded me of my recent first attempt at playing with colored gels and flash .. except that he did it better!
So I asked Tilo if he’d translate his article for us into English. It’s always good to get another angle on doing something. There are a couple of good tips and ideas in there. Thanks Tilo!
Flash photography tips and ideas
a guest post by Tilo Gockel
Hi everyone, I feel very honored that Neil invited me to write a guest post for the famous Tangents blog. So here we go, I hope you’ll enjoy it!
As probably most of you, I am a big fan of Neil’s work, of the Black Foamie Thing and of other concepts, and so I am trying to adapt these new techniques to my own lighting vocabulary and also to include these concepts in my workshops. So this is what we did on the last workshop here in Aschaffenburg / Germany.
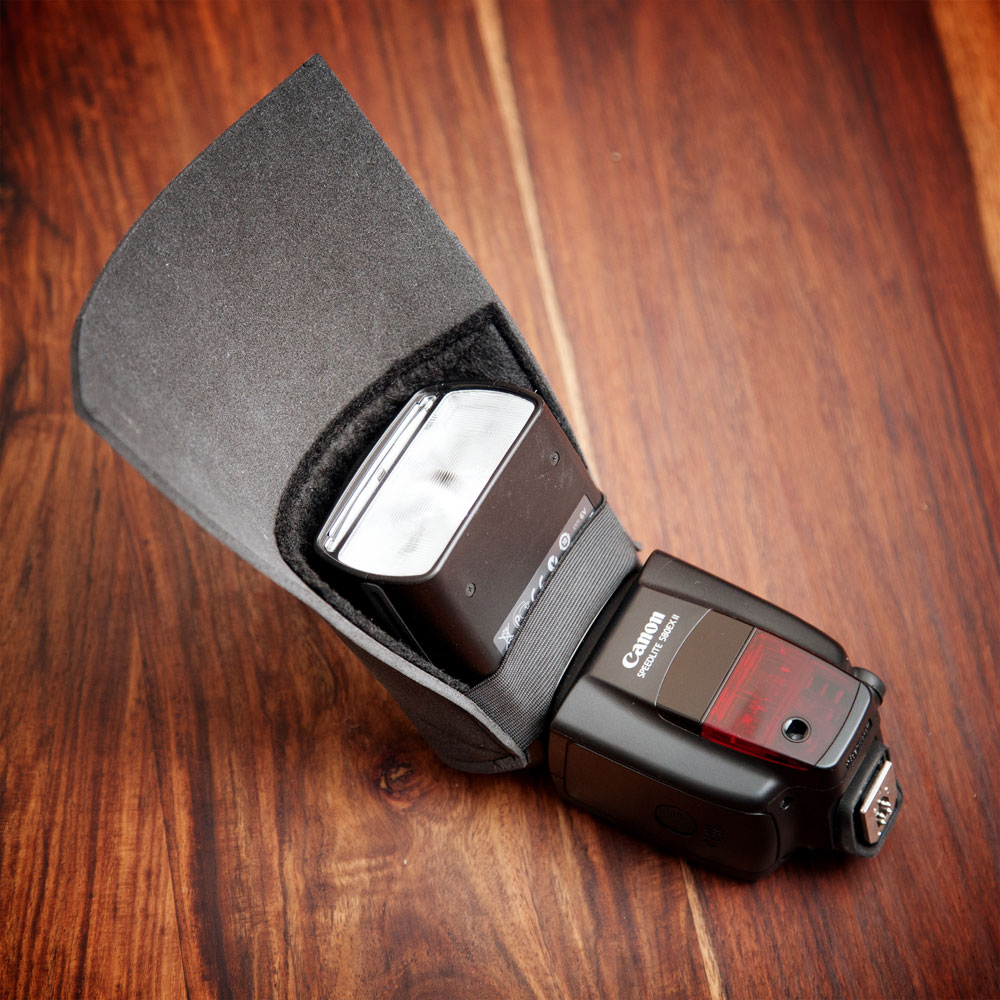
1. Bounce flash
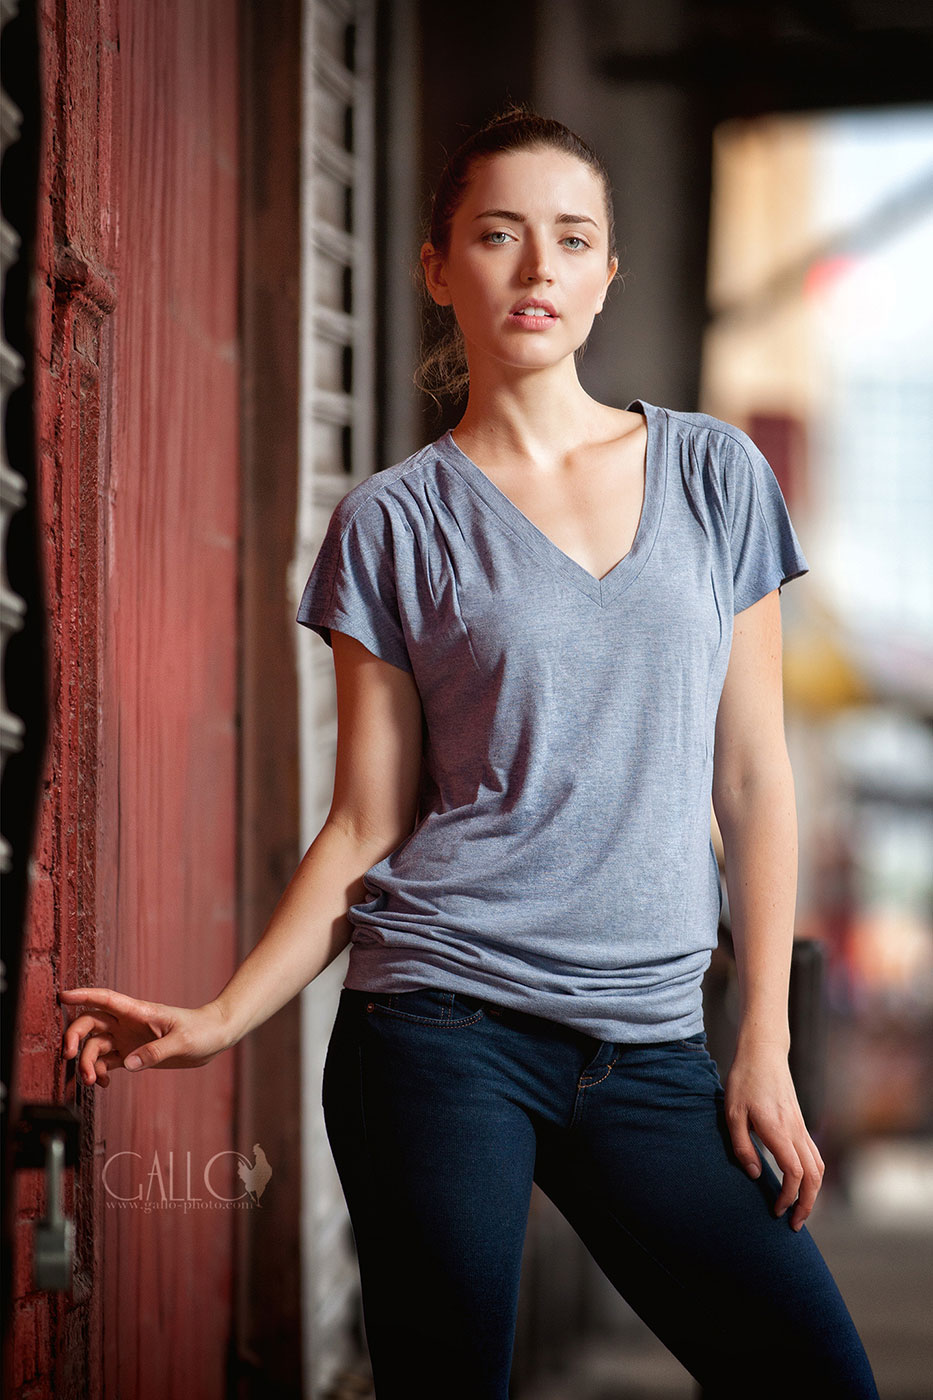
These are the tricks we used for the bounce shot. Camera on ‘M’ and with settings, that make the background darker and less prominent. White balance on ‘cloudy’ for a warmer look and nice skintones, flash on TTL and directed to the wall. And then we just had to direct the model also a bit towards the wall to get a nice short-light effect (please excuse the blur, Elvira just moved her hands a bit this moment.
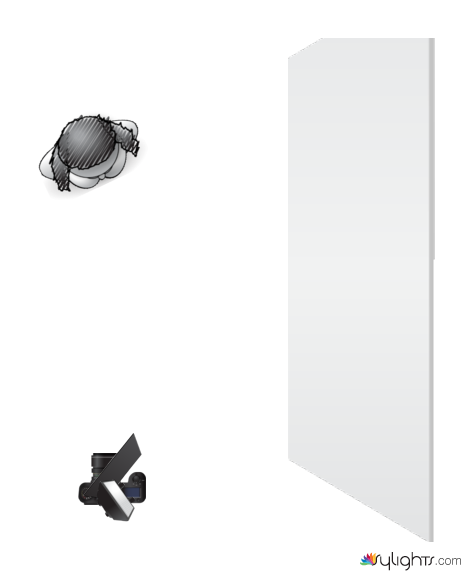
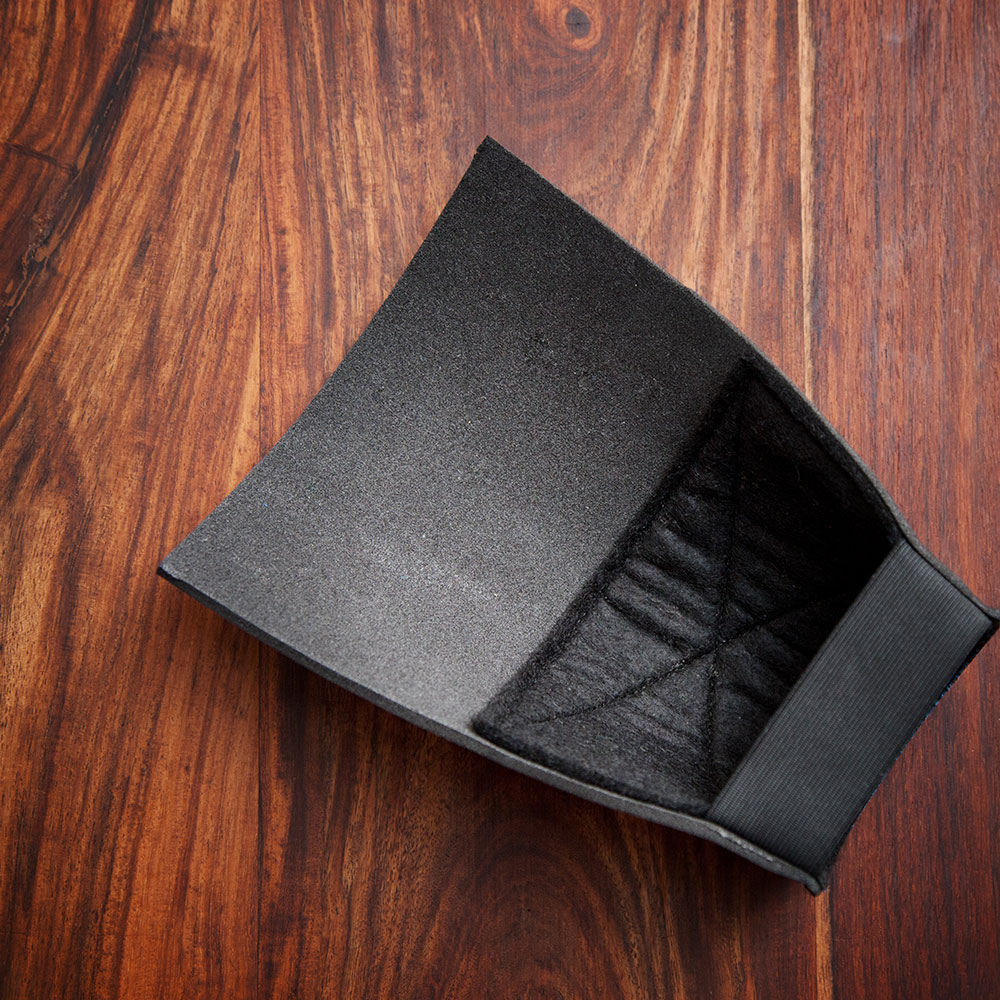
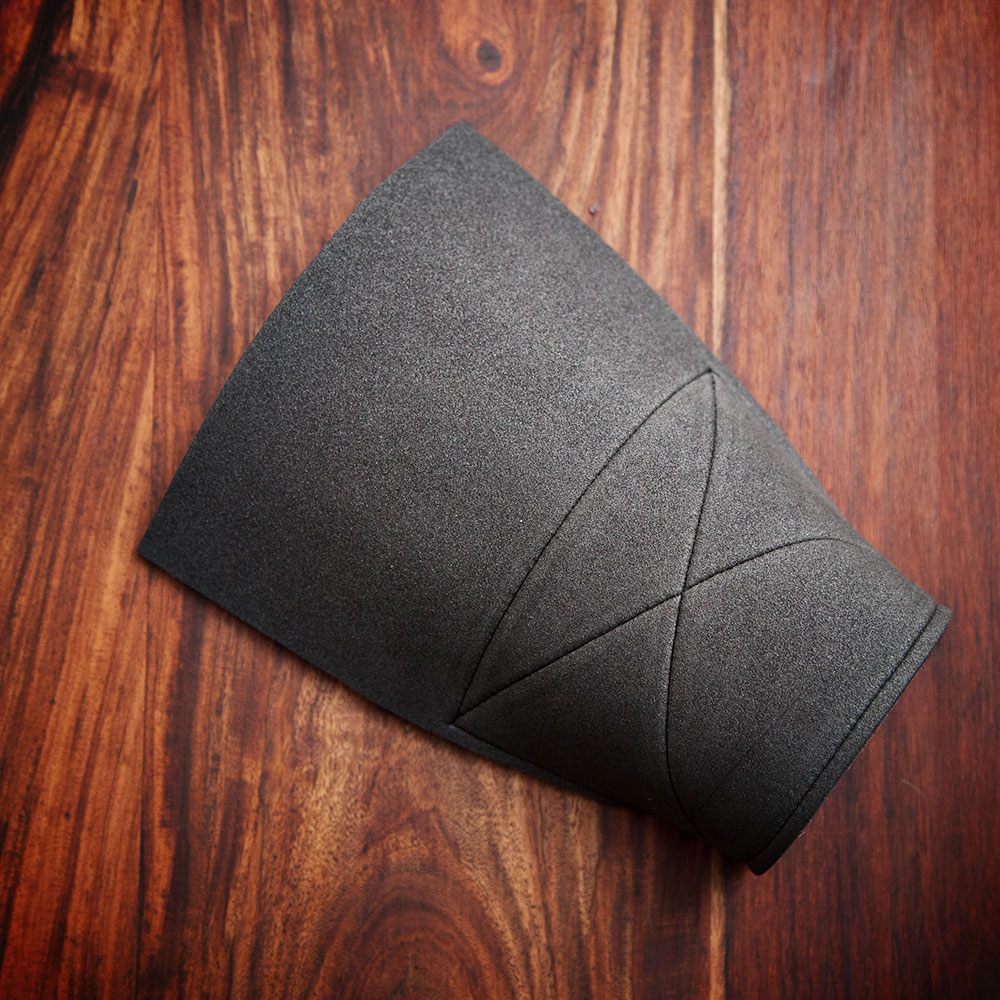
Yessss, it was lit with flash, using the famous BFT. So small, but so versatile – this is still my favorite light-former. As you can see, it got a little facelift to make it … well, not better, but perhaps more ‘elegant’. :-)
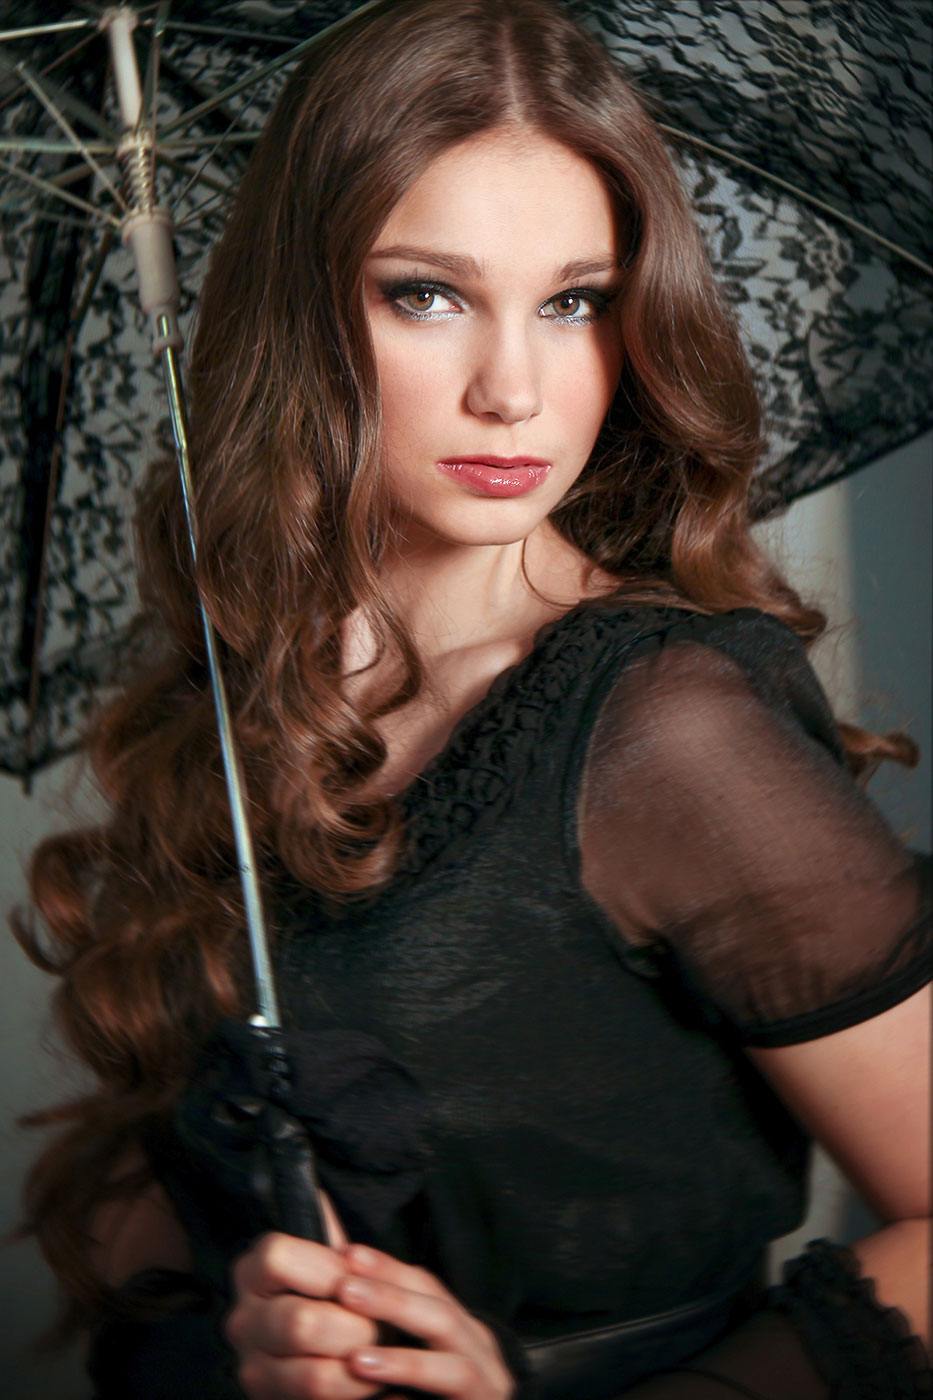
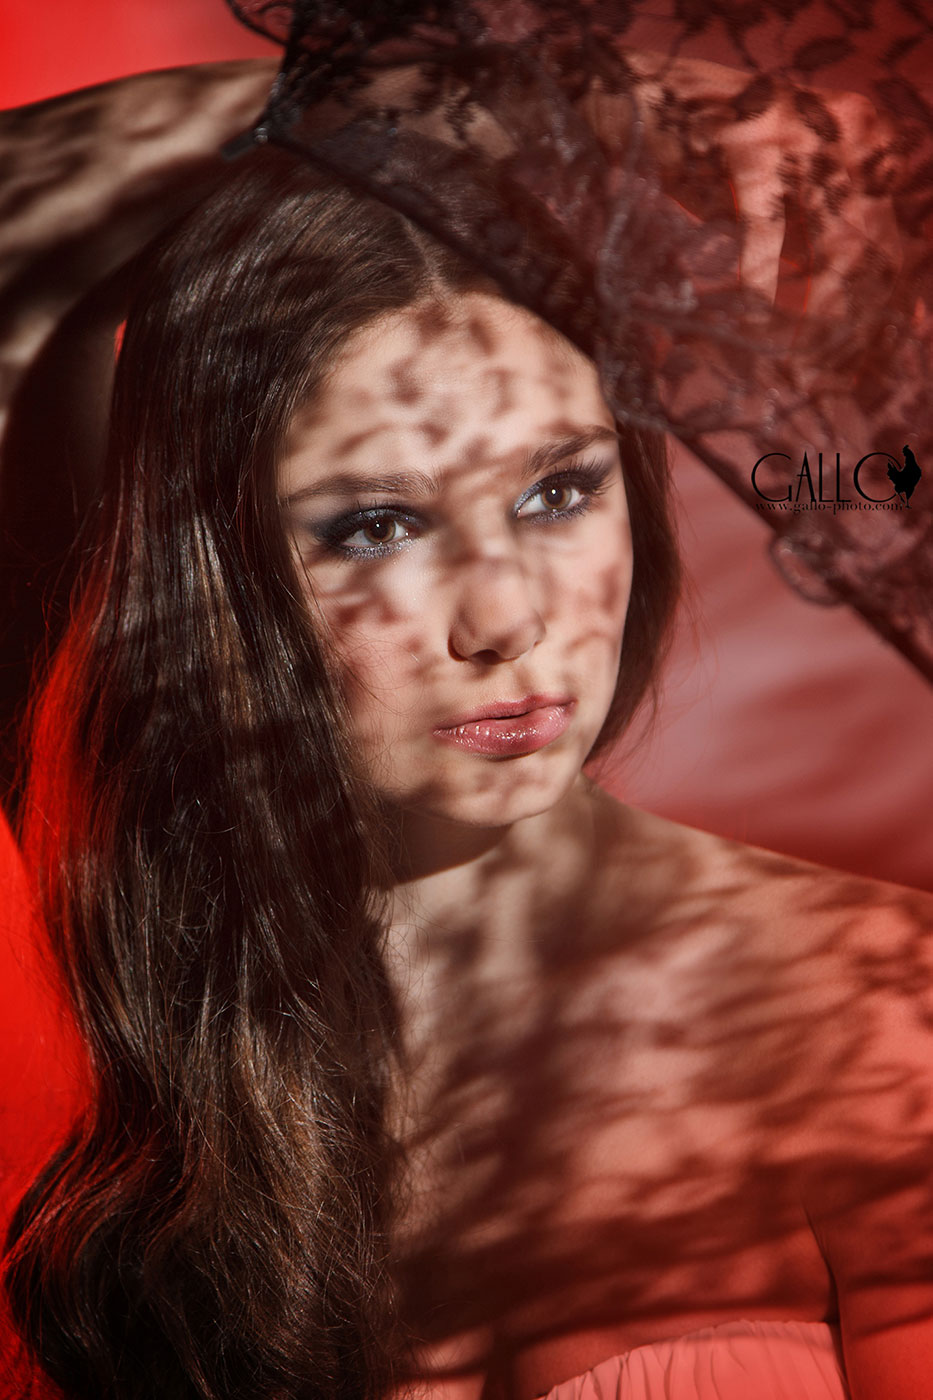
2. Light through lace
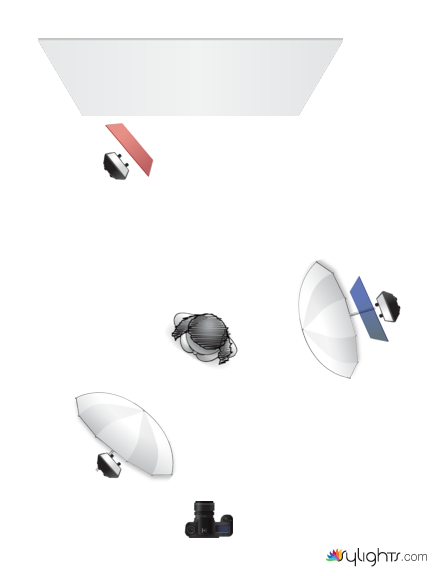
Now the next setup gives a bit of variety: We used bare flash through a lace umbrella. It is an easy setup, but it is full of possibilities. One bare flash on a distance to give that shadow pattern, a second bare flash with a red gel directed to the background wall, that’s it.
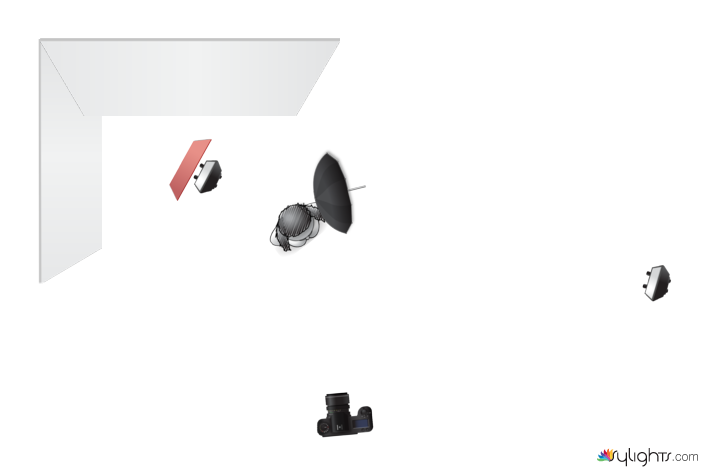
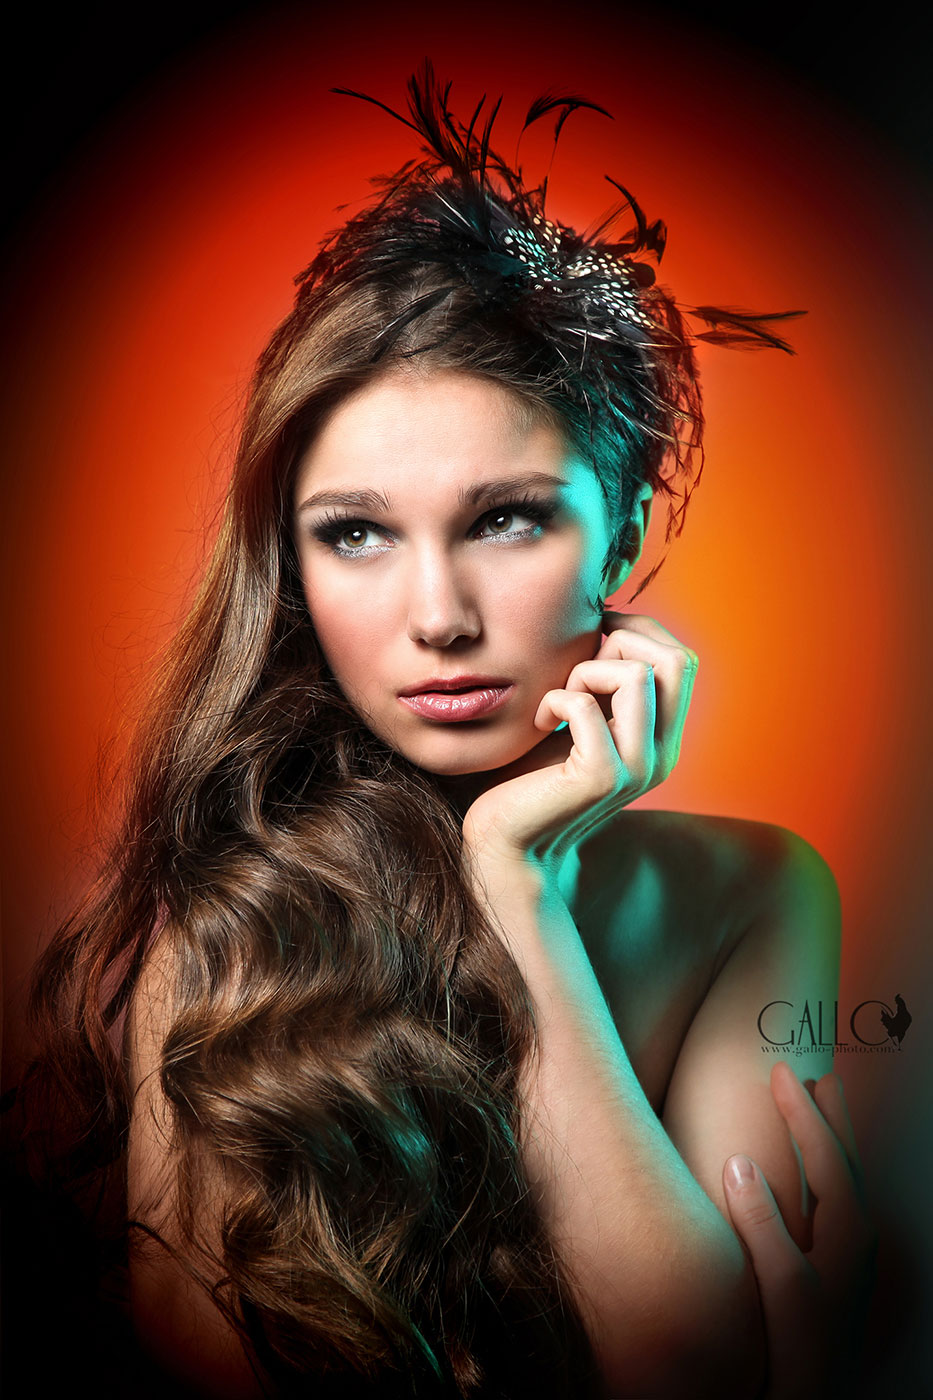
3. Colored gels and flash
The last setup from this workshop is directly inspired by one of the last blog postings from Neil (Neil, I hope you don’t mind :-). Neil created this setup with these fabulous colors and I just had to copy this. The gel colors stem from the “Honl Filter Kit Autumn” which is also available in Germany but (at least in my eyes) way to expensive. But, at least for usage with speedlites, you can use the corrresponding colored gels from the cheap “LEE Swatch Book”. These are the corresponding colors (we used blue-green and salmon):
• Honl Rust = LEE 777 Rust
• Honl Medium Blue-Green = LEE 116 Medium Blue-Green
• Honl Egg Yolk Yellow = LEE 768 Egg Yolk
• Honl Dark Salmon = LEE 008 Dark Salmon
• Honl Chocolate= LEE 156 Chocolate
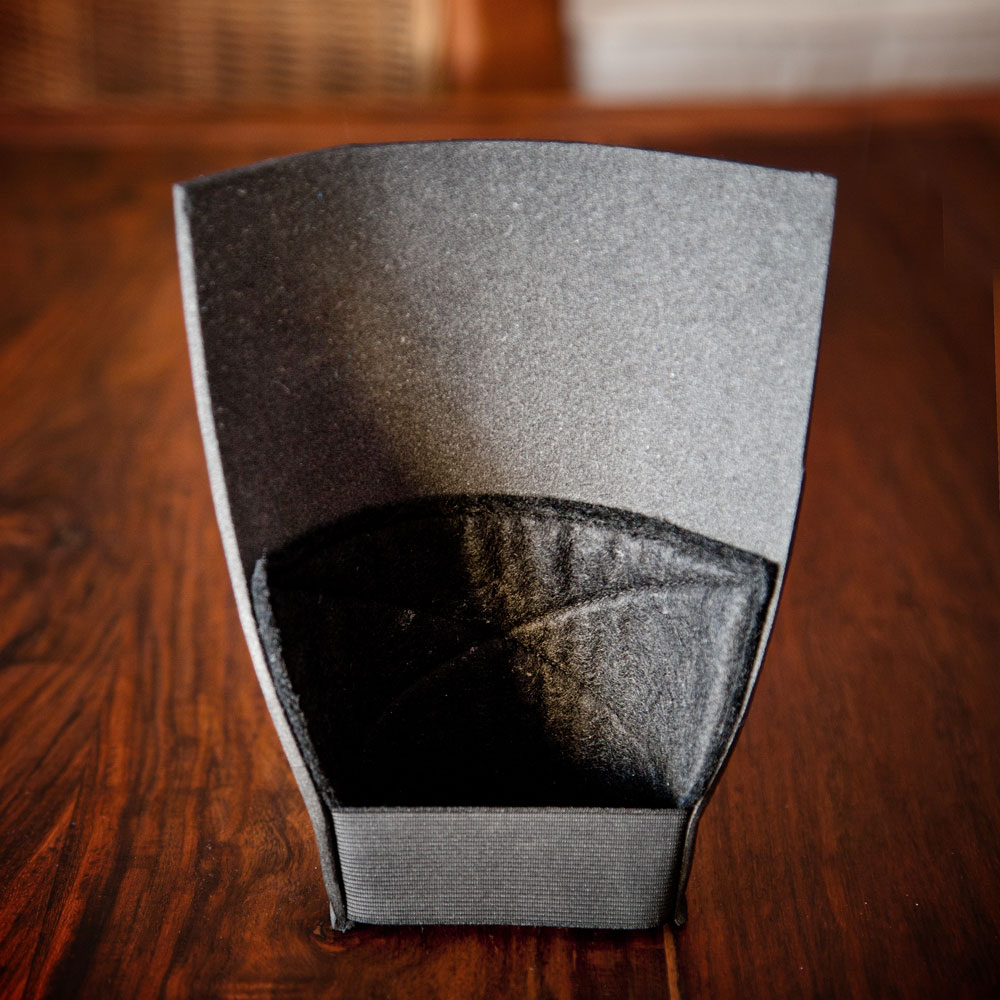
And this is a simple and cheap method for attaching the gels to your speedlite.
And this is how I learned this stuff. This is a snapshot and two results from my workshop with Neil in NYC, at the Meatpacking District. :-) That was very educational and fun, too. If you ever have the chance to do a workshop with Neil, go for it, it is definitly worth it!!

Great post! I love the idea of flash through a lace umbrella ;-)
I like what you did to the BFT :)
Niel, I like the BFT that is displayed, do you have any idea where you can purchase this one. thanks
Hi there Jerry,
sorry, but you cannot buy the BFT displayed — it’s just tailored according to Neil’s original version and modified a bit to my needs. Anyway, this is how you can get yourself one:
Get a mousepad, tear-off the colored textile and cut it to 15 x 18 cm
https://www.amazon.de/gp/product/B000FLPNNI/ref=wms_ohs_product_img
Get a piece of black felt (2 mm):
https://www.amazon.de/gp/product/B004QTTEOE/ref=wms_ohs_product_img
Make a print-out of the four photos,
Take all that and a speedlite (to try on) to your favorite tailor :-)
No big deal, I would guess: 5..10 bucks.
good luck,
Tilo
My 2 cents to the “BFT Next Generation”:
The light-blocking / flag effect is the same as with Neils original BFT, but I wanted this piece of felt inside, to make it easier to rotate and slide it on the flashhead. And then I always had problems with the hair ties… they just did not stay where I want.
Anyway … this is my 4th version, and at least for now, I am quite happy with it.
And remember, then carrying, put it around the speedlite, so that it keeps its shape.
best, Tilo
Hi Neil & Tilo
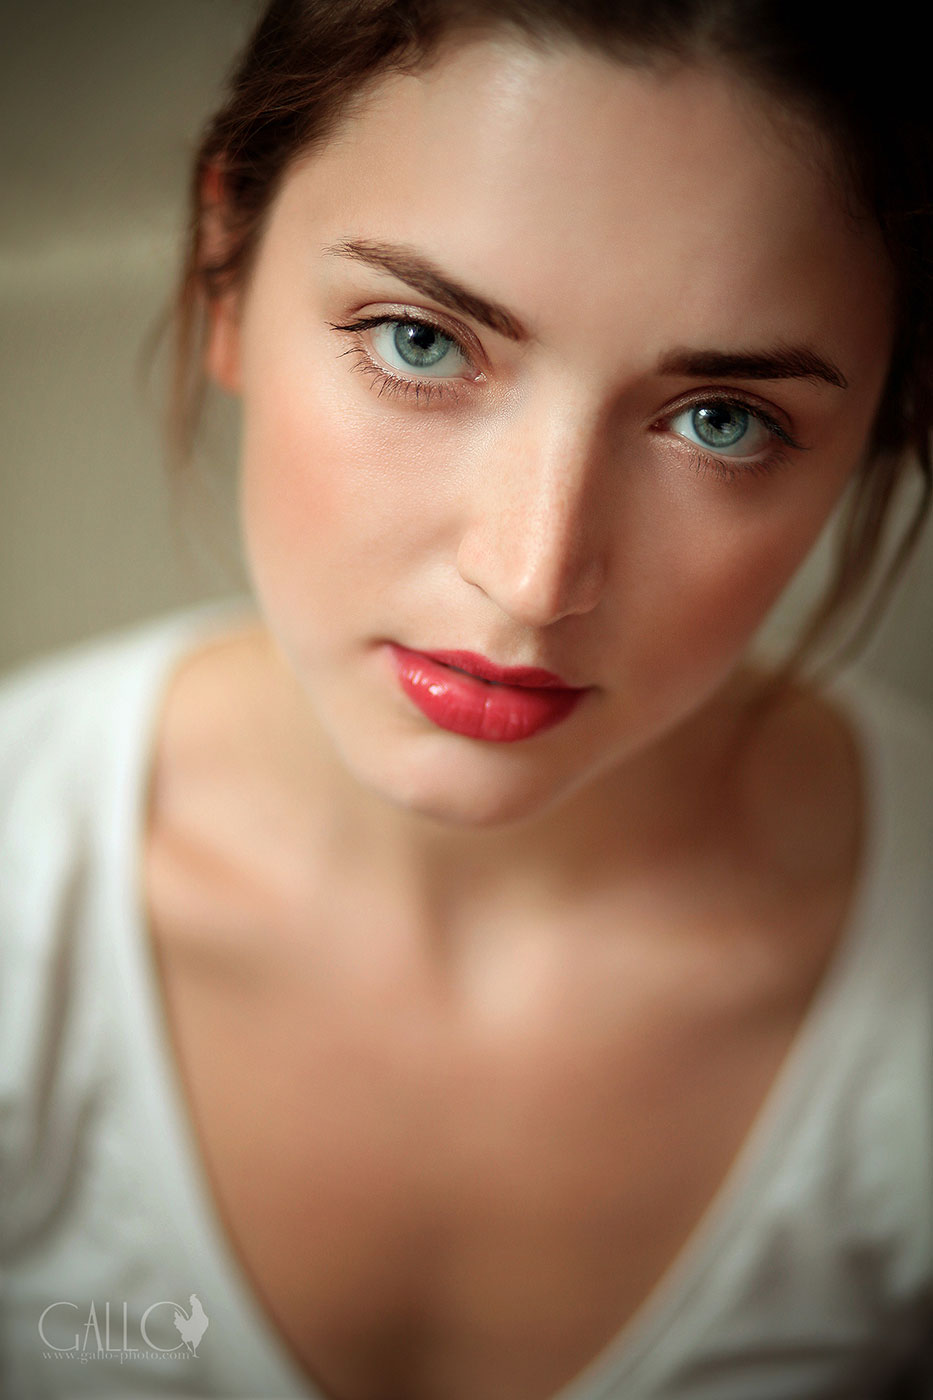
Great article and superb results – I’d very much like to know the EXIF’s of that stunning 5c.jpg with super shallow depth of field and tac sharp eyes :-)) Thanks and brgds, Michael
Very good idea to use gels! Thanks to Neil and Peter Greg (who invented ABBC card haha) I’m using BFT but not that often. :)
Here you go:
5DMk II, 85 f/1.8 @ f/1.8 (great lens, btw., if you find one without backfocus)
M-Mode, 1/100 sec, ISO 250,
On-camera TTL Flash with BFT
FEC + 1 EV (but I would not do that again, I would use FEL and perhaps FEC +1/3)
White Balance… hm, on cloudy, I think
RAW-Format
–
cheers, Tilo
For Michael: the large version of beautiful Anelisa (5c) :-)
https://fotopraxis.files.wordpress.com/2012/09/analisa1.jpg
Tilo,
On the last image posted, the closeup face shot. How did you get this done?
Is it just a small aperture for the blur to make the face really stand out or did you
enhance? This is truly an exceptional shot! Danke!
Troy
Great shots! On the second to last photo where it’s show 3/4 of Anelisa. Was the light set up to her left at 45 degree?
Thanks
@Troy: Thanks, it’s easy … Fullframe sensor + close distance + wide aperture + medium telephoto lens (85 mm). Regarding depth-of-field, this does need no enhancement later-on.
@William: hmm, a bit less, perhaps 35 degree, more like looplight … somewhere inbetween Rembrandt and Loop (you can see this at the nose shadow)
The second pic of the article – the one with the hand movement – beautiful!
The part I like best, in Tilo’s blog is, when he says……”Mit dem Black Foamie Thing von Neil!
You gotta say it out loud, for full impact, in your best German accent….Go on, do it!
– His photos are, of course, stunning.
Tilo –
I’ve just spent a long time, looking through your Fotopraxis blog, and your Flickr collection, especially your portraits.
You are the MAESTRO!!
Your blog has such impact, with your big format photographs, on my huge new 27″ NEC monitor.
One of the things I really admire, is your postprocessing, and especially the skin retouching you have done on Anelisa’s f1.8 portrait. Do you use Imagenomic Portraiture, or negative clarity, or what tips can you give me?
Excellent work, really. Congratulations, and thanks for linking up with Neil like this.
thanks a bunch, Jeremy. Actually, no, I don’t use plugins for the skin, tried it, did not like it … I use a quite simple method that is a bit similar to “frequency separation”. Here is a youtube clip, unfortunately in german, but I think you get the idea. https://www.youtube.com/watch?v=wRxBy7PtfSM
Rest is business as usual: colors, contrast, eyes …, a tiny bit of dodge and burn …
Hi, Tilo
Was der Jeremy wissen will interessiert mich auch. Die letzten beiden Bilder sehen original aus wie von Neil. Nur dass sie Dein Wasserzeichen haben. Also sind sie von Dir. Herzlichen Glückwunsch. Wahrscheinlich hat Neil Dir über die Schulter geschaut. Aber trotzdem muß man das erstmal hinkriegen. Ich hab auch die 5D MK2 und das 85er 1.8 (das letzte Foto ist ein Beweis für mich dass mann das 85er 1.2 eigentlich gar nicht mehr braucht). Ich krieg es nicht so hin. Die Bilder sehen zwar auch echt gut aus, wenn die Schärfe richtig sitzt, aber es sieht halt nicht so aus wie Neil (mein größtes Idol).Habt Ihr bei dem Workshop auch die Bildbearbeitung geübt? Kannst Du vielleicht stichpunkt artig die einzelnen Schritte von der Raw-Konvertierung nennen und welche Filter bzw. Plugins anschließendDu anschließend in Photoshop verwendet hast falls du welche verwandet hast?
Danke.
PS:
Sorry that I wrote in german. It was too exhausting to translate it in english.
// Florian asks about the 2nd shot of Anelisa.
// @Florian: you can also write in german to kontakt at fotopraxis dot net
Well, the 2nd shot is done with the Canon cream machine, with the 70-200 f/2.8 IS II, @ 200mm (Neils lens, but I use the same, for a good reason). The thing is: if you want an extreme background blur on close distance, 85 mm is just perfect (with a full-frame cam). But if you want that for a body shot (from a larger distance), you need more focal distance …
I know the 85 f/1.2 and I tried it, but I (and I can only speak for myself) would not buy it. I am perfectly fine with the 85 fixed-focus and the 70-200 zoom, for me it is a versatile and flexible combination, just perfect (although the 135 f/2.0 would be fine also, and a good 24-70 is a must-have ;-).
–
Speaking of image processing … no, we did not talk about that, and I think it’s not a thing for this small message box here. There’s just too much to say, but I have covered some topics in this book (in german): http://www.galileo-design.de/2874 . And the rest is–as always–just practising, I fear. :-) cheers Tilo
Wowzer! That last photo is mind blowing. I have the Canon 85mm 1.8 and its an amazing lens but I find I need to stop it down ever so slightly to get maximum sharpness. How much post processing did you do to the eyes? Thanks and keep up the great work.
Hi there, Taz …
the thing with this lens is, that it is really sharp, also wide-open, but **only** if it is perfectly adjusted. This cheap type of lens is not manufactured with the tight tolerances like the L series, and because of the very thin dof you will see any front or backfocus. My suggestion would be (don’t tell anyone): order three from Amazon, check and compare these three using the online available “focus testchart” and send back the lesser two…
Eyes / Post proc? not that much..
best, Tilo
Nice modification to the bft. I like the original’s ability to store flat in my bag, but have also had issues with the bands not holding in place well. I think a good alternative to your elastic band would be to sew two strips of velcro, which would thus allow storing flat.
Hi Colleen,
the trick is to wrap the “BFT next generation” around the flash while traveling…
Velcro? Tried it, not my taste at all, … I cannot explain that, but for me, it does not really stick when I want it to and it does not come loose either … Another aspect is: I wanted a realization of the BFT, that is totally easy to turn and swivel. Anyway, I think everyone has to do his/her own realization. So it fits best. All the best, Tilo
Hi Tilo
In the image which you replicated from Neil (coloured gels and flash), was a light modifier used for the gel on the background.
It appears to be in a circular pattern, or was this achieved via photoshop.
Thanks
Angelo
Australia
Hi Angelo, there was no light modifier on the flash, and – yes, there was a tiny little help from Photoshop to get that nice oval shape. :-) all the best, Tilo ~gallo~
I like the BFT :)
great shots…superb