available light photography – dealing with high ISO noise
Most times when you read about dealing with high-ISO noise, the information is about how to use noise-reduction software to minimize noise. This time however, when I say “dealing with high-ISO noise”, I meant in the sense of just dealing with it / accepting it. I do have Noise Ninja and Neat Image, and would recommend them if you have an image suffering from excess noise. However, often times, it might just not be necessary.
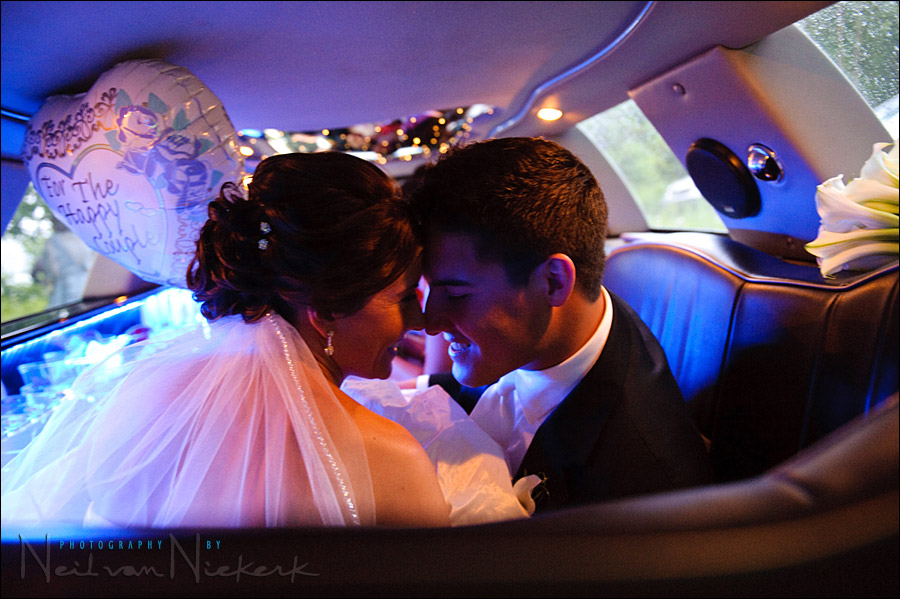
The image above was shot with the Nikon D3 (and Nikon 24-70mm f2.8 lens), late afternoon on a rainy day as I was leaning in from the driver’s rear window looking into the limo. I asked the couple to lean forward and snuggle in .. and grabbed a few frames. The light was pretty dark .. but flash would’ve spoiled the ambiance and neon colors. So I exposed for the existing light at 1/15th @ f2.8 @ 3200 ISO
As you can see from those settings, there isn’t much headroom either way. I am wide-open on the zoom, and at the maximum recommended ISO .. and a pretty slow shutter speed to handhold the camera. This means I *had* to be at that very high ISO to ensure a usable image at all.
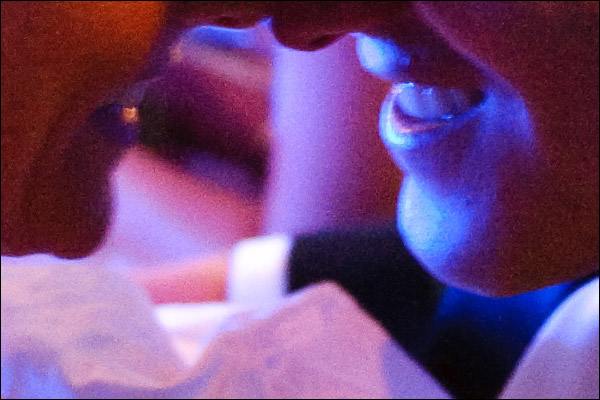
How does it look? I think that overall it looks fantastic. When you do you go to the 100% view of the image …
.. you can see some image softness from subject movement and camera shake. The digital noise also becomes noticeable… but in my opinion, not objectionable. I should mention that the image was bumped up by 1/2 stop when I edited the RAW file, making the digital noise slightly more apparent.
The impact of an image, and how it imparts a sense of place and mood, and shows something of value .. all of that trumps the concerns for pristine image quality.
Back to the high-ISO noise there – if you consider how the image might be used, it is usually less noticeable than you may think from the 100% view on your screen. High-ISO noise appears to print differently than it usually looks on the computer screen. On top of that, the image size when you print it, also has an influence.
In this instance, I had a 24×36 inch canvas print made of this photograph, with no noise reduction added. Just the image as it is.
From normal viewing distance, it looks just great. With your nose closer to the canvas, you can see the noise … but that would be just silly in my opinion. The print is meant to be viewed from a proper distance. And the high-ISO noise just doesn’t come into account then. Even more so since the canvas print does give a more painterly quality to it.
I’ve shown this large canvas print to my client, and she loved it. I love it, she loves it … and that’s as far as I need to get involved in the finer details of processing the image.
Personally I think pixel peeping is just a tad foolish. Its getting printable images that counts. looking at your noisy image, I would guess that at A1 you will have some artifacts but at anything less than that you’ll have great images.
I’ve had a 30″x40″ canvas print made from an 8MP image shot at 400 ISO. Once I had enlarged it to that size on my computer I gave up all hope of the image ever making a good print at that size, but something prompted me to go ahead and get it printed anyway. I was very surprised when I got the finished canvas as it surpassed all my expectations. Needless to say, the client loved it too. I haven’t tried anything at a really high ISO yet, but given my recent experiences I am now more inclined to do so now than I would have been in the past.
– Thorsten.
Fantastic post – I’ve battled for years against the noise-police – “Looks grainy” “Have you tried Noise Ninja”, etc… are the comments you see all the time. I have no qualms using ISO3200 on a 20D or 30D because in a print (either in an album or print) just isn’t noticeable. Even if it is… grain can look cool!
– Matt
Neil even taking a few paces back from the screen and viewing the 100% image there is not much hint of noise. The problem with the computer is that we are just too close. Sometimes we don’t see the wood fro the trees.
– John
Hi neil,
Nikon D3 & D700 has a build-in noise reduction software! do you use it? I’ve this option set to ‘Normal’ on my D700, it works good for me.
– Gracious
If the image is going to print, I agree that the noise doesn’t matter very much. However, the noise might be noticeable if the image is a large size for web use only. I’ve had people in costume (cosplayers) ask for 1024×768 images of themselves (for desktop wallpaper, maybe?). At that resolution, I begin to notice problems or mistakes in my photos (noise, softness, mis-focus). Because of this, I’m hesitant to give larger image resolutions until I get better at shooting pictures.
Thanks for the entry, Neil.
I’m going off topic, but reading Stephen’s comment above prompts me to ask this question: how big a file size should you give a client?
I haven’t gone for a paid job (as yet) and so far, all my (unpaid) clients always get a DVD with full size JPGs (3872 x 2592) with my watermark (it’s tiny on the left hand corner) unless they request for images without watermark.
I’m wondering if it would be better to give a smaller resolution, say 1680 x 1050, 1024 x 1200 or 1024 x 768?
Great post! Sometimes we just need to “embrace the noise”!
Thanks for the prompt reply, Neil! Looking forward to your next entry!
Hello Neil —
Your advise has gotten my through three weddings as a 2nd shooter. Thank you, thank you! One day, I hope to progress to the point where I can handle (with confidence) the responsibility of being the main photographer.
In this regard, I am wondering what your lighting approach is with taking the formal portraits of the bride, groom and the rest of the wedding part in the church and/or at the reception. Do you still only use the now famous “black foamie thing” or do you set up a softbox or umbrella for the formals?
Neil, please do let me know if you covered this elsewhere in your blog. I try to read every post but might have missed it.
Hi Neil,
I checked out your enlarged image, and I agree that it doesn’t show much noise. I am probably being much harder on my photographs, since I am not completely comfortable with my images. I think I’m long over the ISO issue. For example, I took this photo at a very high ISO on my D700 (2000+). However, I think I messed up my focus point, because the person’s eyes are not sharp. It is mistakes in other photography aspects that make me hesitant to provide larger resolutions.
As long as it is noise from high ISOs, rather than severe underexposure, I love digital noise. I liked grainy film shots as well. And yes, they are not the same, but so what? embrace the technology. :)
As someone who shoots endless available light photos, I wholeheartedly agree. I’d also add this. If you are willing to shoot RAW, and depending on your specific camera and RAW files and RAW conversion software (you need to find your own limits here), there’s a lot to be said for attempting to expose as far to the right as possible in these situations, even if that means blowing some things out. Now, of course, you don’t want to blow out your subject, but I’m constantly amazed by how much highlight detail I can pull back from my 5D2 files with the right kind of finesse. Why this matters is this, if you really can take it as far to the right as absolutely possible, and the margin of error here is obviously razor thin at 3200 ISO, with experience, you can pull that back in post down to a more “proper” exposure, and pull back some of the highlights, you can have an incredibly powerful impact on lowering the noise of the image. This technique is obviously not for the faint of heart or for those without the experience to walk that fine line, but for those who can pull it off, the rewards are well worth it (and you’d be surprised how much you can salvage if you don’t completely blow out everything). If you can expose for pulling back one or two stops from the highlights, the noise gets soooooooo much better (as opposed to the opposite of having to push it up a stop like in your example here). Anyway, just a thought worth considering…
Shooting at high ISO’s is great and all, if you have equipment that does it well. For those of us on a super-tight budget (think consumer-level cameras/lenses), shooting at anything above and beyond 400-800 is often not even worth the effort, if you’re shooting something relatively important.
Neil, I know you’re a proponent of manual shooting. Just wondering if you’ve explored the Auto ISO setting. I’ve been getting good results with it at weddings, mainly as a result of letting go of high ISO concerns. With exposure mode on M, and AE/AF button set to lock exposure, it’s very similar to manual – just use the exposure compensation button to adjust from locked setting. Except it’s faster than adjusting ISO manually, and – added bonus – there’s less chance of accidentally spinning the command dials and screwing up your manual setting without knowing it (which I’ve done too often).
The rationale is that with D3/D700/5DmkII you don’t really need manual control of ISO. You choose a shutter speed and aperture that guarantee a sharp image, and let ISO go where it may, and the results are likely to be good. No more fiddling with the ISO button.
Having said all that, you’re a far more experienced photographer than I am. I’ll be interested in your views.
God question Steve, I think Auto ISO its the way to go now days.
Please Mr Neil what its your point of view
Thank You
When you think about it, Auto-ISO is no different to one or other of the two auto-exposure modes, Aperture Priority or Shutter Priority. In order to get correct exposure, there are three variables to work with – Aperture, Shutter Speed and ISO. With any of the auto modes, we determine two of the variables whilst the camera determines the third.
We all know that if you photograph a scene containing predominantly black or predominantly white using Aperture Priority or Shutter Priority, then we’re going to get an overexposed or underexposed image respectively. That’s because we are leaving the camera’s built in meter take control of the final exposure and it thinks everything should be 18% grey and will expose accordingly. I can’t see this being any different using Auto-ISO. It’s still the same meter and it’s still trying to produce an exposure for 18% grey only instead of varying either the shutter speed or the aperture, it is now varying the ISO.
That’s a rather long winded explanation as to why fully manual exposure control, where the photographer determines the working ISO, is the only way to go, IMHO.
– Thorsten.
How did you keep the light on the outside of the car exposed properly with those settings?
Neil, this is one of the highlights in your workshop. It’s “aaah,Now I get it!”. I always skeptical on using high ISO even though my camera able to do that.I always concern on the noise but somehow it make sense to focus on creating the impact on the image. When printing the high ISO picture I can see difference between glossy and matte finish. The grainy texture of the matte prints ‘hide’ the noise better than glossy. What would you recommend on printing method of this kind of picture?
Last week I took some pictures with a D300 at very high ISOs and was very surprised with the result. I used ACR to remove some of the noise.
I tried the same on a D70, but it was a disaster.
I love your photo. I agree using the flash would have ruined the image. I am a proponent of using Auto-ISO setting and letting the camera make the image usable. Of course, this doesn’t always make for a usable photo, but in most cases it is acceptable.
I’ve never had alot of interest in weddings or portraits, but I do most of my work in concert photography where flash is seldom if ever allowed. So pumping up the ISO is just part of the game and the stage lighting will determine just how far I have to go. While I realize there are those purists that go off the dial when they see any noise, I’m not going to fret it, one run through Ninja and some sharpening keeps the fans happy and ultimately its their opinion that matters most to me.
Good article.