Lighting styles in wedding photography
Two interesting questions came up in the Tangents FB group – both posted by Matthew Ciscart, one of the regulars: The first question was whether a client had ever asked for a specific lighting? Such, hard light, soft light, natural, or ocf? The other question was whether any of the photographers had a specific go-to style of using lighting. That one thing they do. My reply to this, relating it to lighting styles in wedding photography, was I haven’t had a client ask for any specific lighting.
However, I do believe my website shows a consistent style. Therefore, when they book me, they do indirectly ask for that. So I need to be consistent in the look I give them, even if I use a variety of lighting sources and types. Similarly, I don’t think I have one specific way of using lighting. But for all the variety, the images need to mesh as a combination, without anything jarring about the specific lighting or look.
With that in mind, I would like to show these 6 images from the portrait session of a wedding – time that I had with the bride and groom – and show that even with a diversity in lighting that was used, these and all the other images, are still part of a coherent style. Of course, it has more to do than just the lighting – other things come into play as well – framing, composition and posing, as well as the post-processing. Still, just looking at the lighting and the color and skin tones – there is a consistency in the style.
- 1/160 @ f/3.5 @ 1600 ISO
- Nikon D4
- Nikon 70-200mm f2.8 AF-S VR II @ 120mm
- Off-camera flash: Profoto B1 flash (B&H / Amazon),
with a Westcott 45″ white satin umbrella (B&H / Amazon) as shoot-through
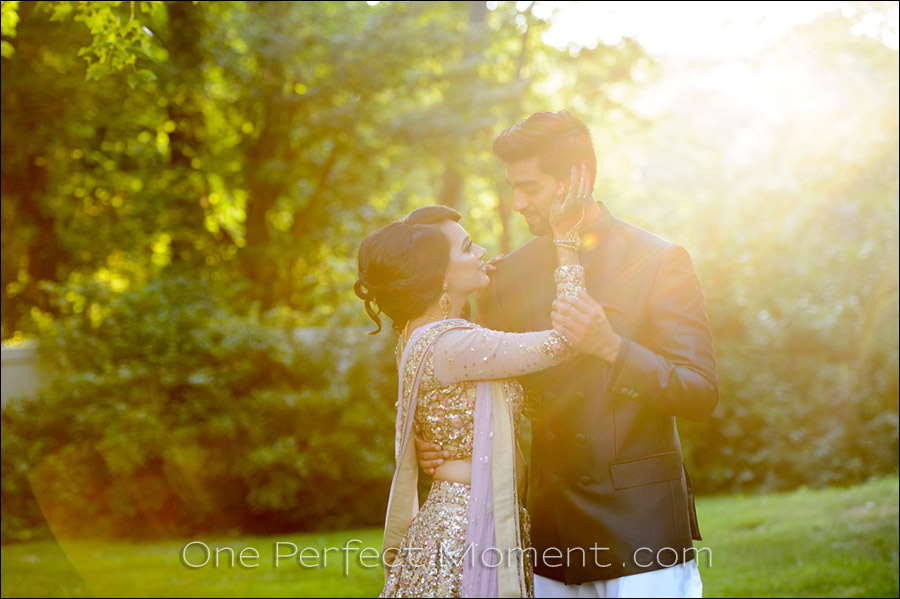
This image and the one below are connected in that they both have the same camera settings, and were taken in more or less the same spot. In the image below, I let the sun flare out and this created a more ethereal look with muted contrast. It was just a small shift in position, I switched the flash off, and the resulting image looks congruent with the previous sequence (of which the photo above is one.)
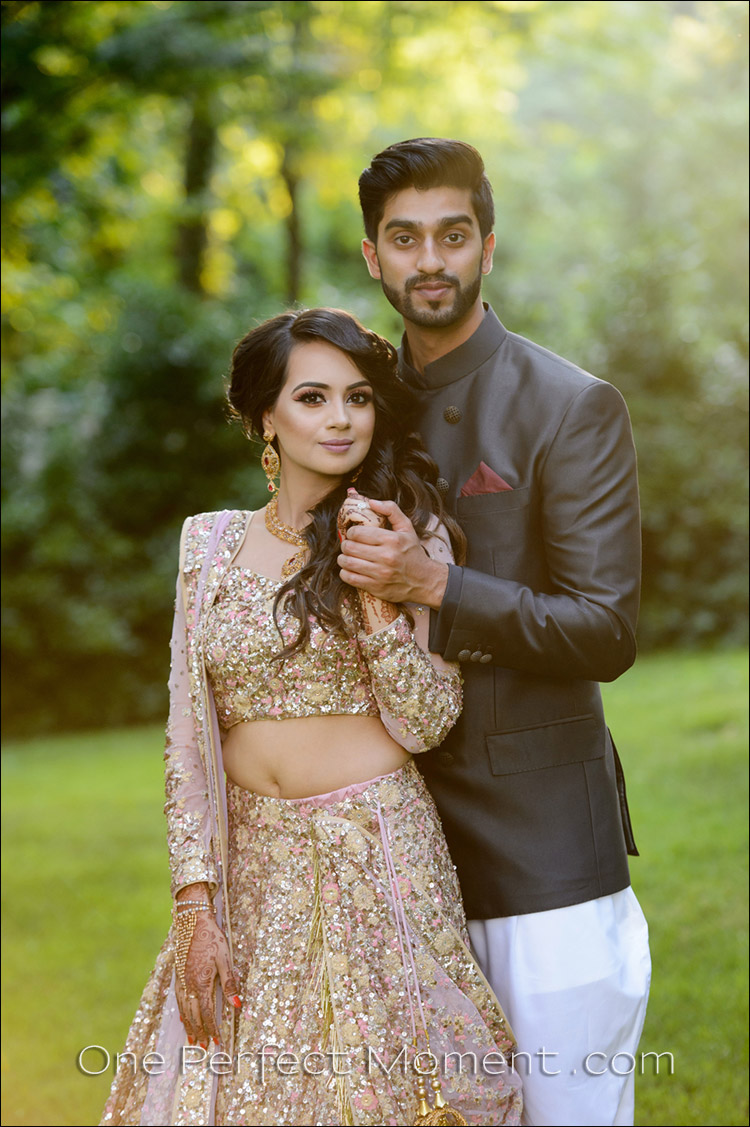
In the image above, taken before the flared image, I took care to not have any flare from the late afternoon sun. But since this photo is more a portrait than the flared photo (which is all about the mood), I used off-camera lighting to show detail. I used the Profoto B1 flash (affiliate), with a white shoot-through umbrella, but at these camera settings, any speedlight with an umbrella would’ve given similar results.
Note the high ISO and wide aperture – this is so that the background exposure looks natural. Of course, the shallow depth-of-field helps defocus the background.
How much was added flash? I don’t quite know – it’s just enough. I let the Profoto give me an initial TTL exposure, and then locked it as a manual flash exposure for consistency. The pressure is on, there is no time to walk through the flash-to-ambient ratios in a technical way, so I will happily rely on the technology.
So there it is then – two photos, taken in the same scenario, but with a different approach to either, to give me variety in the final selection.
- 1/160 @ f/3.5 @ 1600 ISO
- Nikon D4
- Nikon 70-200mm f2.8 AF-S VR II /equivalent Canon EF 70-200mm f/2.8L IS II
- Available light only
- 1/80 @ f/6.3 @ 1600 ISO
- Nikon D5
- Nikon 24-70mm f/2.8E VR (B&H / Amazon)
- Off-camera flash: Profoto Profoto B1 flash (B&H / Amazon),
with a Westcott 45″ white satin umbrella (B&H / Amazon) as shoot-through
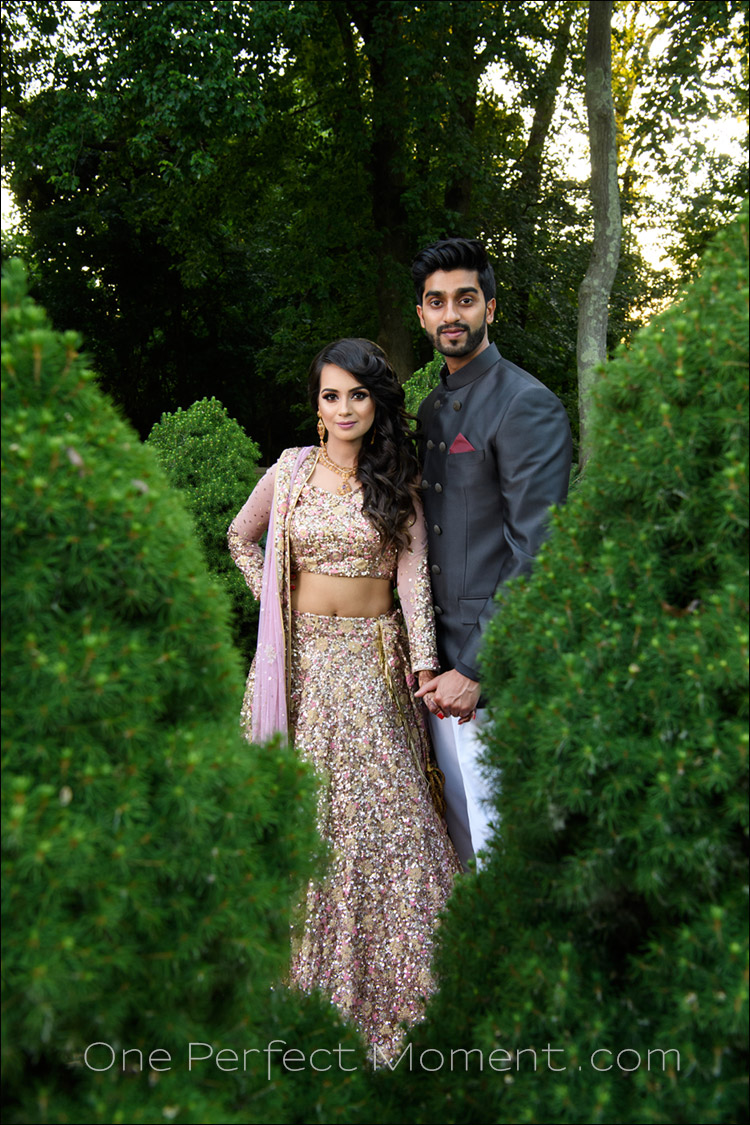
These two photos share the similarity of both having off-camera flash to make the colors and skin tones pop. In the photo above, the off-camera flash setup was behind the bushes, to camera left. This way I could light the couple, without lighting the foliage nearly as much. (In other words, the lighting is on the other side of the shrubbery.)
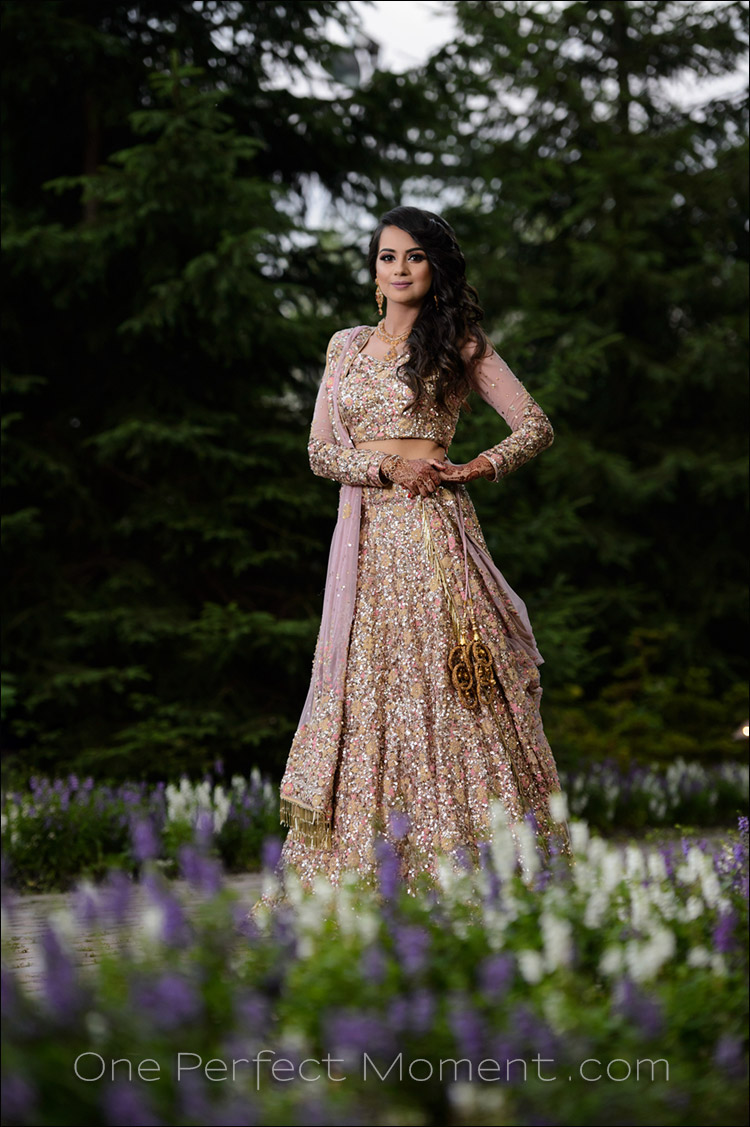
With the photo below, it was a similar line of thought – I didn’t want to over-light the flowers which were closer to me. My position was lower down on the grass bank so that I could make the flowers part of the composition. This was also so that I could lose much of the brick paving, which would have been a boring element in the photograph’s composition.
With the photo below, some back-lighting would have been ideal, but the families were already gathering for the family photos, so I had to move quickly – no time to set up a 2nd light behind her.
- 1/200 @ f/3.2 @ 1000 ISO
- Nikon D4
- Nikon 70-200mm f2.8 AF-S VR II /equivalent Canon EF 70-200mm f/2.8L IS II
- Off-camera flash: Profoto Profoto B1 flash (B&H / Amazon),
with a Westcott 45″ white satin umbrella (B&H / Amazon) as shoot-through

Direction & Quality of Light
I wanted to distill the essence of what we, as photographers, work with – light! Before we can truly grasp on-camera flash and off-camera flash, and really, any kind of photography, we have to be aware of the direction and quality of light. We need to observe the light that we have, and then decide how best to use it, or enhance it.
With this book, I try my best to share those “aha!” moments with you, and I do believe this book can make a difference to your photography.
The book is available on Amazon USA and Amazon UK, or can be ordered through Barnes & Nobles and other bookstores. The book is also available on the Apple iBook Store, as well as Amazon Kindle.

- 1/160 @ f/3.5 @ 1600 ISO
- Nikon D5
- Nikon 24-70mm f/2.8E VR (B&H / Amazon)
- Nikon SB-5000 flash (B&H / Amazon)
- On-camera bounce flash. No BFT necessary.
I was asked to take photos of the bride where they would be seated on the chair on the raised platform in the reception room. Since there was already somewhat enough light from the house lights, I wanted to just clean it all up with some bounce flash. The ceiling was high and uneven, and not white. Even then, I had enough light from the bounce flash to provide flattering light on her face. I bounced the flash up and behind me. No need for my usual BFT since there was no need to flag my flash. Also, note that I had no diffuser or white cup or some kind of plastic on my flash. Just the bare flash bounced up, and behind me. Simple. It works.
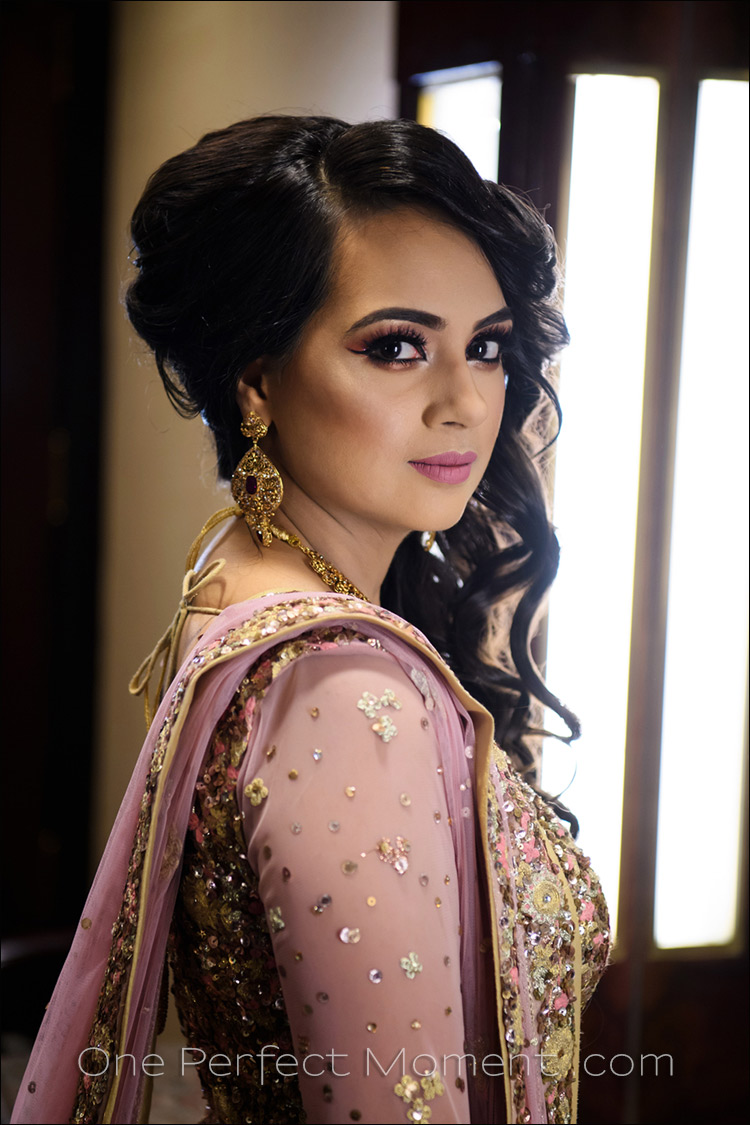
Finally, the photograph shown at the start of the article. In the room where the bride was getting ready, the huge mirror at the dresser had these light panels on every side. Beautiful soft light if you pose your subject into the light. It took careful note of how the light fell on her, to make sure the light was flattering. Using available light, or any other light source, for that matter, isn’t just an arbitrary decision. It is always best done with specific intent.
- 1/100 @ f/3.2 @ 2000 ISO
- Nikon D5
- Nikon 24-70mm f/2.8E VR (B&H / Amazon)
- Available light only – the panels of light built into the dresser mirror
Related articles
- Developing a personal style in wedding photography
- Photo-journalistic style, or more posed?
- More Wedding Photography Tutorials
- More articles on Wedding Photography
Neil, I marvel at the results you produce every time I open up the Tangents site. In this case you created four different images using the D4 and D5, available light, Profoto B1, Nikon SB5000 on camera bounce flash and an umbrella. Each image required different settings including high ISO settings. Why two different cameras, how many shots were taken to get the final result on each image? How did you determine the camera settings? How do you meter for each shot? Do you use the built in camera meter, handheld meter, strictly your experience or all of the above? Are these straight out of the camera or is a little more work required in post? How much time did this session require and did you use an assistant?
I know these are a lot of questions and some are sort of obvious, however I’m looking for a better understanding. I truly admire your work and if I could produce 1/4th the results you get I’d be very happy.
Thanking you in advance,
Delbert
Delbert .. thank you for the compliments.
Let me start with the easiest question – why a D5 and a D4? Because I can’t afford another D5.
Trying to match the colors is a bit of a pain. I don’t like swapping lenses out, so I keep the 24-70 fixed on my D5 to avoid dust on the sensor of the camera with my workhorse lens – the Nikon D5.
Exposure metering:
How did I determine exposure – often times just by guesstimating correctly from experience. I also use the camera’s built-in meter a lot. I have one of the function buttons set to be the spot-meter which I occasionally use.
I usually shot a test shot or two. Not many. Just enough to nail the exposure. I am usually quite close.
This session lasted about 90 minutes … but I was there with a 3-person videographer team. One of who operated a drone. So I had to work around them as well. We handed off to one another in a tag-team kind of way. Being an Indian wedding, there were lots of interruptions from people helping to arrange the wedding, as well as family members who stopped by. Oh, I didn’t have an assistant. It’s a long story. My total time with the couple was therefore much less than 90 minutes.
These photos are not quite straight out of the camera. They nearly are, but I had to do some skin retouching. But other than that, the colors and contrast are what I got out of the RAW file. That’s always the ideal.
Thank you for your reply! I would have thought I would have used the 810 and D5 rather then the D4. Maybe you didn’t have it at the time. Otherwise great results and a logical response.
Thank you.
I don’t often need the D810 resolution for weddings. A camera with resolution in the 20-24mpx range is perfect. So using the Nikon D5 instead of the D810 was a specific choice. Also, the D5 has better high-ISO noise performance.
Neil – I hope you are continuing to recover well from your recent adventure in Italy.
So I typically shoot wedding receptions With about 4 off-camera speed lights/pocket wizards, as well as on camera flash bounce. Depending on the venue I usually like to aim all my OCF lights into the ceiling and bounce for a really bright overall airy feel. When the venue makes that impossible, I will instead use them as kickers for BG light.
So I’ve been following you for a long time and I’ve read your books. And thanks to you I’m inspired to try the BFT at my next wedding as my primary lighting strategy. Wish me luck!
Regards,
Dave
Thank you Neil for your continue education to young photographers!
I learn something new everytime I visit your site! Kevin
Another great article!