Studio photography – Lingerie photo shoot
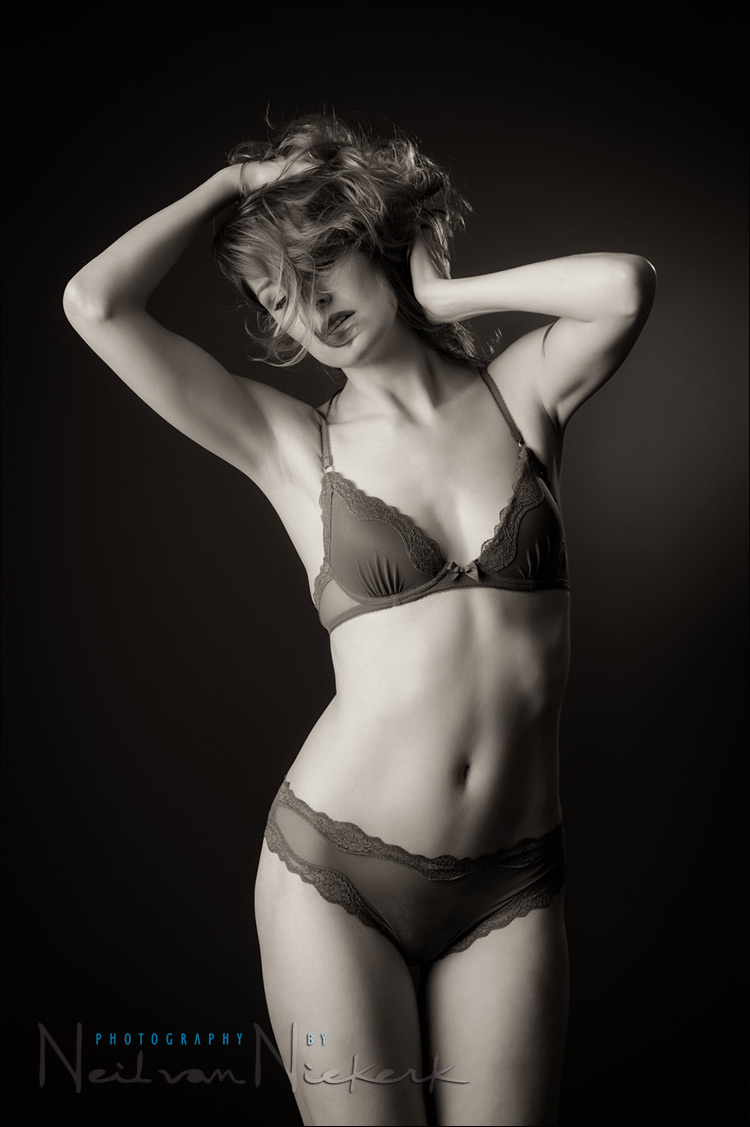
Aiming for a sensual mood somewhere between Lingerie, Fashion and Art, I tried various lighting setups in the studio to get to the feel and look that I envisioned. I’ve worked with Carly Erin on other personal photo shoots before, and knew her playful and bold personality would help a lot with this photo session.
I ended up with a large light modifier for my main light – the Westcott 7′ Parabolic Umbrella (B&H / Amazon). The advantage of using a large light source, is that your subject has more freedom to move – you can be less specific about the posing than you’d need to be with a smaller, harder light source.
Camera settings & photo gear (or equivalents) used in this photo session
- 1/160 @ f/10 @ 100 ISO
- Nikon D4
- Nikon 70-200mm f2.8 AF-S VR II /equivalent Canon EF 70-200mm f/2.8L IS II
- Westcott 7′ Parabolic Umbrella
- Profoto D1 studio light (500 Ws)
- Profoto 7″ Grid Reflector with a Profoto 10-degree Honeycomb Grid
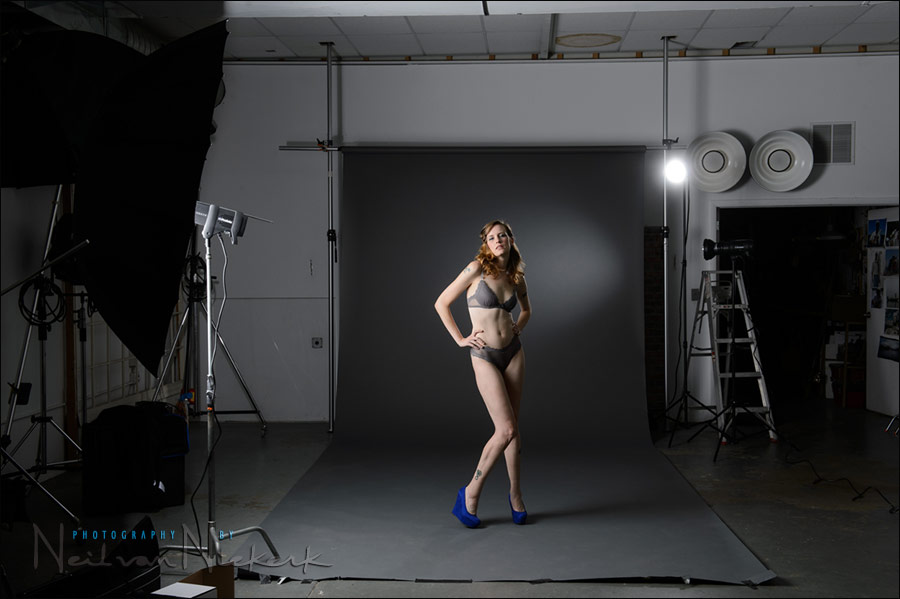
The lighting set-up is straight-forward. The main light is the Westcott 7′ Parabolic Umbrella (affiliate), which I also used in the recent photo session with Ulorin Vex. I scalloped the Parabolic reflector away from the background, to minimize the amount of light falling on the background.
I used the other Profoto D1 head as a background light to give that slight gradient there to the background. This light wasn’t diffused, but had a Profoto 7″ Grid Reflector (affiliate) with a Profoto 10-degree Honeycomb Grid (affiliate) to control the light from this flash-head.
Similarly, I used my Profoto 600R kit as a third light, which acted as the rim-light on her. This too had a 10 degree grid on it to minimize spill light.
And there you have it. A straight-forward setup that gives interesting, slightly moody light on Carly Erin.
Related articles
- Other photo sessions with Carly Erin
- review: Westcott 7′ Parabolic Umbrella (model: Ulorin Vex)
- Lingerie photo session in the studio (model: Olena)
- Lingerie photo session – light, lighting & textures (model: Melanie S.)
Studio lighting workshops
If you are interested in learning more about studio lighting, including lighting for headshots, I offer workshops on studio lighting. The workshops will be held at my studio space in NJ, and it has a wide range of studio lighting gear to play with!
I like how soft the lighting is, especially the hair light. I don’t do studio portraits because of the “look” of strobes (especially the hair light can look so fake), but this lighting you did here is making me want to try it. Thank you so much for this post!
Yup, that parabolic umbrella is huge! And that creates nice soft light. And as a single main light-source, it has a nice way that it wraps around the contours of your subject. Such an easy way to light.
hi, good stuff!!!
could i ask what background was used?
thanks
The background was just a roll of dark grey seamless paper.
Beautiful image Neil.
I love the way you’ve achieved such subtle results with your hard lights with just a splash of highlights in her hair and a hint on the background.
Her pose is spot on but it’s the lighting that makes the image pop.