Wedding photography: 3 tips to speed up your editing workflow
One of the questions that came up during the Q&A at my presentation at B&H, was how long does it take me to edit a wedding. Well, the ideal is that it takes me less than a day. During the peak wedding season around September and October, it is easy to slip behind, but that still remains my goal – to edit a wedding during the week right after the wedding took place.
There are several things motivating this idea:
- I am more likely to get print orders from the guests at a wedding if the event is still fresh in their memory.
- In terms of your workflow as a photographer, it is imperative that you don’t fall behind. If you don’t edit a wedding *this* week, then you’re behind because you’re shooting further events.
The best idea then is to edit the wedding in the day or two directly after. Cull, edit, upload, and then you’re done with the immediate workflow. Keep things rolling.
Here are my 3 best tips for a faster workflow. Of course, this doesn’t just relate to weddings, but also to any event where a high volume of images need to be dealt with.
1. Edit in! Don’t edit out.
What does it exactly mean, to “edit in”?
Let’s look at an example. You have a groom that looks like a movie star and knows how to present himself and isn’t shy. So you shoot 100 portraits of him. Awesome images. Great! You nailed it! But now, on the Monday morning, you have to select the images you want to present to the client.
The usual way to cull the images would be to look at all 100 images, and then try to choose between the images. There will be obvious ones you can immediately delete, such as blinks. But you will end up with pretty much the same number of images. And now the difficult task is to choose between the images. This one? Or that one? Does *this* one look better?
It is a really becomes a difficult process to make these decisions, and it is easy to get bogged down. The trouble starts here because you’re choosing between a huge number of awesome images, slowly whittling them down. It’s a slow process because you’re editing out.
The best advice here … edit in.
Here is how it works. Decide how many images of any particular sequence or part of the day, you need to give your client.
So you have 100 awesome images of the groom. How many do you need to give a representative selection to your client? As an example, let’s say you need 8 awesome portraits of the groom.
You need to pick 8 images out of a 100.
- pick two full-length images. Pick two of the best. *This* one. Oh, and *that* one. You’re done.
- pick two half-length images where the groom is looking at the camera. Yup, *that* one, and *that* one. You’re done.
- pick two half-lengh images where the groom is perhaps looking away, or has an interesting animated expression. Yup, the bride would love *that* photo, and oh, *this* one looks great. You’re done!
- pick two close-up portraits. A slightly serious portrait, and one with a smile. You’re done!
So in this way, by deciding how many images you need, you can be strict with yourself – pick a representative mix of the images, and be done. Move on to the next set of images.
With this example, it should take you less than 30 seconds to pick the 8 images, instead of the drawn-out anguished process of whittling down those 100 images.
You would then move the images you didn’t select, into a different folder. You’re only going to edit the images that were selected, for color and contrast and saturation and such.
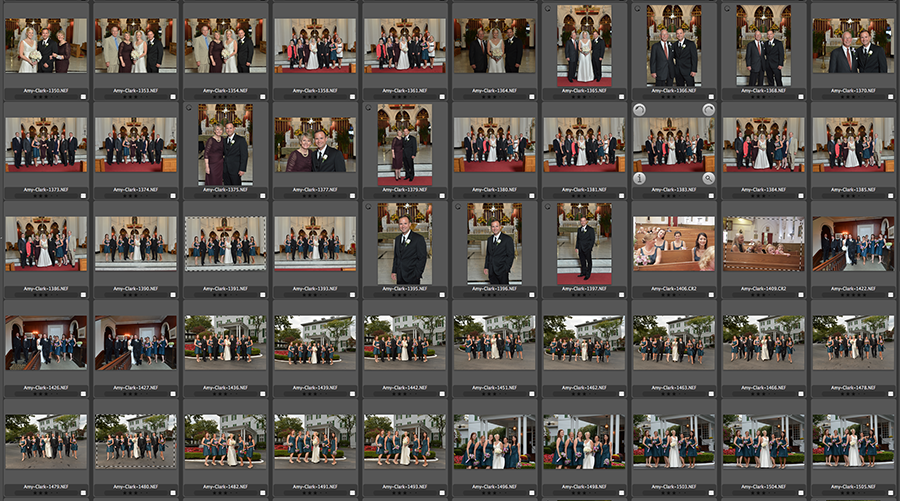
2. Use a super-fast image browser to cull the images
In my experience, there is nothing faster than Photo Mechanic for the culling process. It’s a breeze as you zip through the images, giving them a star rating or color code. The star rating even propagates through to Lightroom and Bridge.
You may well be very familiar and happy with your post-processing workflow based around Lightroom or Aperture or similar. But I am still convinced that it is a faster process to do the initial culling of images with Photo Mechanic. Selecting the 750 (or whatever your specific choice may be) of the thousands of images you shot, is best done with a dedicated image browser. And Photo Mechanic is it!
Let’s say I shot 3,000 images and need to bring them down to 500 images for my client. I would download all the images into a folder, and sort them according to time-stamp in Photo Mechanic. Then I would rename them. (You may choose to do so later on in your workflow.) Then, using the star rating, select your keepers. Move the not–selected images into a “discarded” folder.
Now, use Lightroom or Aperture to edit, correct and process your images.
Go head, give Photo Mechanic a try. They allow a 30 day trial. I think you’ll be impressed.
3. Don’t pull images into Photoshop unless you really have to
With software programs like Aperture and Lightroom and Capture One, that offer an all-in-one solution, you really don’t need to do much in Photoshop.
The thing is, the moment you pull images into Photoshop, you’re considerably slowing down your high-volume workflow. With that idea in mind, I only pull images into Photoshop when they are going to appear in an album on Facebook or appear on Pinterest, (or your choice of social media wagon), or on your blog.
All the other edits you do on your RAW files, such as exposure, contrast, color balance, saturation, B&W, can be done in Aperture / Lightroom / Capture One / Bridge. No need for Photoshop yet.
Even if you use Bridge and ACR to edit your images, don’t open the RAW files in Photoshop. Open the images (via ACR) in Bridge. Not using Photoshop, will mean your computer’s resources won’t be burdened. You can do these edits on the RAW files via ACR, hosted in Bridge. No sight yet of Photoshop.
And when you do use Photoshop as part of your initial workflow, then it should be via scripts or batches that you run.
Yes, I do use Photoshop but mostly only for removal of exit signs and skin retouching and such … and only on images that will appear on social media or on the blog. Definitely not for the 500+ images you deliver to the client.
Therefore, limiting the number of times you open Photoshop as part of your initial workflow, will help speed your workflow up. Considerably.
In the same vein, don’t anguish over the editing of the images yet. Do so for the albums and for print orders. But not for the overall workflow.
Summary
With these three ideas incorporated in your workflow, I have little doubt that your post-wedding workflow will be much faster. You’ll have more time to spend on your business and photography.
Related articles
- More wedding photography tutorials
- Lightroom tutorial – local adjustments
- Photoshop tips – retouching for portraits
- Image size & resolution – 72dpi or 300dpi
Great tips. The Edit in/edit out philosophy is good for popping less pills.
Never tried Photo Mechanic, definitely gonna give it a whirl. I do believe that LR is slow for the first objective of just ‘sorting’ photos.
I do try to avoid the Photoshop trap, it can be a time burner when your caught!!
Thx Neil
Edit in ! That could be indeed a solution as I’m the world’s absolute WORST procrastinator. And I tend to like most of my pictures, which only makes it worse. Solid piece of advice, thanks Neil!
What do you use for managing print orders? Thanks.
Zenfolio … who also stores the high-res JPGs which then becomes a convenient way of having an on-line off-site backup of all the important images.
The first item here will help me tremendously with my workflow for the Army, as the Public Affairs guy at my unit I’m shooting a a few hundred photos over the course of a normal weekend, let alone when we have bigger events. Picking in like this will cut my processing and submission time down to about an hour from the 1-3 days after, and with being news items immediacy is paramount.
Eric .. exactly! Pick how ever many awesome shots you need. You’re done!
The simplicity of this is so beautifully effective.
The problem with a week turnaround is that it risks devaluing the amount and skill of work done. It’s already hard to get clients to see how time and skill intensive good wedding photography is. If you start delivering a full gallery of images in a week, many clients will feel like, “hey, it’s easy and quick, so why am I paying all this money?” More efficient, yes, but cheapens the brand and wedding photography as a whole. Big mistake.
Faith … I entirely disagree on the motive there.
I honestly do not believe clients reason like that. They really just want to see their images.
Also, by delaying posting images, you lose traction. The couple WILL post crappy images shot with phones and P&S cameras on their Facebook walls. And those images will be the couple’s new FB profile photos.
How much better would it be, if the bride had *your* awesome photo as her profile photo on FB?
In every respect, it would count in your favor as the photographer, to have a fast turn-around time.
Neil is absolutely right about Photo Mechanic’s fast ingestion speed. I tried the demo, and the program reads the images from the CF card reader much faster than Lightroom. Whatever secret sauce they are using, it works. At a $150 price tag, it’s a bit much for a hobbyist like me to spend at the moment, but working photographers definitely need to try that program.
One question, if the Photoshop is needed, do you export into PSD format from lightroom? Or what is your preferred way?
JP, since I’ve done the brute corrections – exposure and WB – on the RAW file, I export to JPG. I like JPG for the smaller file size and faster loading times. At this point in my workflow, I don’t think there is that much benefit in using PSD or TIFF …. with one exception – color banding. This is a topic for a future blog post. How had to deal with color banding.
Thanks for the tips, I will definetly give Photo Mechanic a go, if it helps speed up my workflow, then I’m up for it. Less time spent on pp, means more time shooting and spending time with the family :)
Neil,
Agree entirely with your comments, My workflow is photomechanic -> lightroom > photoshop (if and only if required)
You say that star ratings propagate to LR – implying perhaps that color ratings do not. They do IF you se the labels in PM and LR to match; eg # 1 Red is named Red
Graham .. thank you for the tip. There’s always something to learn.
Photo Mechanic is excellent software but its somewhat limited by the fact that it is only a file browser; which means that it can only display the the JPEG preview embedded in each raw file (assuming you’re a raw shooter).
Instead I use BreezeBrowser from Breeze Systems for culling my photos: https://www.breezesys.com/solutions/breeze-browser-pro/. It is equally as fast as Photo Mechanic, and its based on Canon’s SDK which means that it automatically reads and interprets all the in-camera settings. It also has several other features not present it Photo Mechanic and the picks/ratings made there can also be transferred to Lightroom or Adobe Bridge. And then if need by there’s a simple keyboard command to display the raw file instead.
Neil, what do you do with the 2,500 images out of 3,000 that didn’t get selected? Do you literally delete them permanently? I’m thinking about a scenario where the client later requests a shot that you may not have initially selected.
Frank … I have two Drobos with a total capacity of 16 Tb. I keep the discarded RAW files for a year, and then delete them completely. My reasoning is that if the client hasn’t queried anything in the past year about me possibly having missed selecting an important image, then I’m safe.
I use Nikon’s ViewNX for culling. I’ve never used Photomechanic, but ViewNX is very fast at this process, and it’s free.
HI Neil
When your doing the picking of the 8 images , are you doing it in full frame mode or Contact sheet mode.
Lou Recine
I skip through the images in full-frame mode, because I need to see whether the image is sharp or anyone is blinking. Stuff like that.
I use LR and if needed Photoshop. The single greatest improvement to my work flow was buying the new imac with SSD. It has even made me stop complaining about how slow my Drobo is (or was rather). Even going to PS is a dream now compared to my 2009 imac. All my programs open with one bounce and there is no delay in going from LR to PS or saving from PS to LR. It all happens instantly. In fact, its so fast that there is a bit of a learning curve simply to get use to the instant action as I became used to waiting!
Thanks Neil
I just tried Edit in on a recent event that I shot, and wow it was so much faster. Great article.
Lou Recine
Hi Neil,
Did it ever happen to you that your client wants all the images you took on a wedding, i mean even the trash ones? I told the couple that it would take 2 to 4 weeks for the images to be done because i need to go through 2500 images! They were fine with that and after giving 1500 edited images(!!!) they wanted me to give them the rest 1000 unedited images too…
I was really upset with that, but didnt wanted to disappoint them and ended up giving the “ugly” images too. But the worse is still to come! All the new events i get through this couple(their family and friends) they all ask me to give them the trash images too, i hate to give them that but i’m kind of stuck in it!
Do you have any experience like this? What would you do in these situations.
Thanks for your posts und sharing your knowledge with us.
Regards,
Gracious
I have had clients request all the photos taken. The wording in the contract they sign and the information given to them during the face to face meetings has to be redundant and over simplified to explain that you maintain creative and quality control. The images they receive are the best photographer selected images. They seem to understand when I tell them that they are also paying me to review and reject unflattering images. I want my work and their event to be represented in the best possible way.
This is a tough one to balance – that desire to please your client, and knowing that it is a lot of work that will go unrewarded.
The one compromise I easily make, is if my client is a photographer – and due to the nature of the Tangents blog, I do have clients that follow my blog – I do give them the unedited RAW files if they want. Then I don’t have to spend time editing any further images.
The one thing I tell clients is that they don’t want to see all the images. It’s not as if I am going to keep the good stuff for myself. And I explain that I take a lot more images, but only select a few.
An example would be photos of the bridal couple (or bridal party) as they are walking towards the camera and talking. There will be blinks. There will be strange shapes to their mouth. There will be photos where my timing was off. They really don’t want to see those. So I do explain and stress that point.
On rare occasion, I have a client that ask to see more. Here is my standard reply:
I do take more photographs than I eventually show, because I have to cull for blinks, people looking away, test shots and just redundant or repetitive shots. As such, everything is there in the final selection. It is a thorough and representative selection of images of the day. i.e. .. there isn’t “more” than I’ve shown in the gallery.
So far I have only had one client that was insistent enough to see the rest. I had her and her husband come in, and I set up a screen in the meeting area, and gave her all the time she needed with Photo Mechanic and ALL the images. (Around 4,500 images.) I had placed all the images in a folder away from the main hard drive so that there wouldn’t be any “accidents” as I allowed the client the time to click through the images on her own. In this instance, she selected an additional 27 images, of which a few were definite duplicates of images already given. The other images were unremarkable. But … it seemed to keep her happy.
But it really is a situation I try to avoid as far as I can.
Hi Neil, Great post. When you say..”download all the images into a folder, and sort them according to time-stamp in Photo Mechanic.” They are probably coming from two different bodies, yes? Do you run into duplicate names? Will PM auto correct? While we are on the workflow theme, do you initially download all photos from the day into one folder or various folders for each card? I am a Canon shooter and from what I’ve heard one can rename the default capture ID on Nikon systems, is that true? Thanks for your help!
Jorge
My cameras have different naming for the files, so there is no over-lap.
If you have an older cameras such as one of the Canons that don’t allow you to name your files differently in-camera, then just pull the files into the same folder anyway. It’s not that likely that you’ll get file names that will overlap.
If the file names do overlap, pull the one camera’s files into a different folder, and rename them to something else. Anything else. With a sequential number of course!
Then pull all the files into the same folder, and rename them according to time-stamp.
You can do all this in Photo Mechanic.
Neil:
Since your presentation at B & H, I have been using Photo Mechanic for culling my photos and editing in, before working in Lightroom. Your method has streamlined my work flow; the whole editing process is quicker and less painful.
Thanks for the great tip.
Quin
Hi Neil, Always wondered, do you get involved in the printing of albums side of things? Or do you pass on the images and let your clients arrange for their own printing? Perhaps using printers of your suggestion? Regards, John
I use PictoBooks for my wedding albums. They do the printing and binding.
So I am playing with Photo Mechanic, and found something I could not do and would like to do.
I import files, comes up with thumbnails of course and you can selectively select or group and easily delete it/them from the import/ingest window, which is fine but if I want to view it larger to select better I need to go to Preview window.
When I then double click a file it opens in a preview window, with the thumbs below, and although you can delete an individual image, cannot seem to ‘highlight’ several, no shift/clicking a group if I wanted to delete several in a row.
Can this be done in that preview window, or can it be made to preview in the main window.
One thing I notice is that when previewing, the images are super sharp, unlike Bridge/ACR/LR, and of course it loads quickly, so I think I figured out why?
It’s not actually rendering a RAW file like Bridge/ACR/LR, etc. it’s previewing the in-built jpegs hence the loading almost instantly, and no ‘rendering a preview’ and since it’s that jpeg, the sharpening is applied in camera to the jpeg defaults.
Anyhow, it does seem very good.
One other thing though, I cannot swap [or at least at this stage figured it out] images into position I want them. In Bridge once you manually drag an image it then changes to ‘Sort Manually’, but I cannot seem to click/drag into position before renaming. Can this be done?
I have seen the different ‘Sorting’ options of course, just not seemingly at this stage, manually. Unless I am missing something basic which I probably am, as my wife tells me after I look in the fridge and cannot see something and ask her where it is, she tells me I did a ‘man look’.
Yup … you have it correct.
You can’t do multiple selects in that viewing mode.
And yes, it uses the embedded JPG. (Unless there is a JPG + RAW in the same folder.) (I think)
One thing I like is that if I rename images and there are JPGs and RAW in the same folder, it will give the same JPG and RAW, the same file name. (Unlike bridge that gives increasing numbers to the same images if they are JPG + RAW)
And that is the one weak point for me with Photo Mechanic … I can’t manually sort the images.
Thank you for your response and help!
Great tips! I’ve been disappointed with the speed of LR in culling (a typical cull will take my wife and me about 2-3 hrs for ~2000 pictures), but really like some of the features of it. For example, the “Survey mode” for previewing the images is terrific. Having quick adjustments (such as temp and brightness) right in the library module really helps show a quick fix when an image is pretty far off. I also like that I can apply an initial preset (my basic .jpg conversion) before culling. It just helps make the pictures look a touch better even before culling.
But now I’ll definitely have to look into photomechanic. I’ve heard a lot about it, but just haven’t been disappointed enough to make the jump.
I shoot continuously via a point and shoot camera (Fuji F30) on a R/C airplane. I get 500-600 shots per flight, so I’m often exhausted deciding which are the “best”.
Half of them are terrible – easy choice to delete. Deciding which of the final 10 are the best is hard, so what I often do to “break the tie” is to simply select the images with the largest file sizes.
I’ve been doing the same thing with my SLR too – keeping the largest image when I have multiple that are basically the same (the same thing as a camera with the “best shot selector” feature).
I haven’t tried Photomechanic but I don’t know how going through the images twice can actually save time? I understand that LR is a bit slower due to preview rendering, but I’m taking care of both culling and editing at the same time. I edit & star rate/reject each image simultaneously..then filter according to rating. If there are a bunch of similar images, then I use survey mode and weed a little bit and export.
Sam … using Photo Mechanic will speed up your workflow, because you’re systematically and very speedily doing *one* task. It becomes mechanical and super-fast because your fingers do limited work. You can kick into over-drive, and just give star ratings to the images that make it.
With the way you’re doing it – which is the regular way, your hands are all over the keyboard with short-cuts, or your hand is reaching for the mouse. This delays you. Sure, only a fraction of a second. But multiply those fractions of a second by 3,000 (or however many images you shot, then you’re looking at a huge amount of time where your fingers are just reaching for the mouse, or reaching for other keys.
No matter how you discuss this, it is faster doing it this way – culling first with a very fast browser. Especially when the culling process is based on the “edit in” approach.
The program Capture One is it easy to use. To purchase it, I have been putting the idea off for many years. Now i want to use it
Thanks
Great article! You said;”Yes, I do use Photoshop but mostly only for removal of exit signs and skin retouching and such … and only on images that will appear on social media or on the blog. Definitely not for the 500+ images you deliver to the client.” I’m wanting to understand this correctly. The 500+ images or so images you deliver to the client are not edited for skin touch up in PS at all? With the exception of the images that are posted to your blog. When you say delivered to the client do mean on a disk given to the client or delivered meaning uploaded to a gallery so they can purchase pics?
Overwhelmingly clients now want the files. So yes, they get the files as part of a package, and others can order the photos.
And as I mentioned there, those photos aren’t retouched to album level or print order level. It would be a huge task to do that kind of retouching on so many images.
Wow thanks! I always thought it was every photo gets PS no matter what whether its a digital file or print.
You saved me so much time in PS! You also said You may shoot 1500 images and give the client 500 or so that’s probably on a disk or a digital download. I’m sure that it varies with each photographer but with an album or print level order, how many prints usually go into creating an album?
Thanks for this article, Neil. I read it when it first came out and have re-read it many times. Your #1 tip is where I think a lot of us struggle. In this digital age, its easy to over shoot. Digital film may be inexpensive, but time is not. Learning and remembering to “Edit IN” is key to saving time.
Thanks again!
Troy
Yup, Photo mechanic is a game changer. I’ve hear people talk about other things it does but I basically stick to culling for now. But especially during busy season it saves a lot of time.
Hi Neil I know this is an old article but I have a question for you about this I know you said ” Yes, I do use Photoshop but mostly only for removal of exit signs and skin retouching and such … and only on images that will appear on social media or on the blog. Definitely not for the 500+ images you deliver to the client. ” Im confused about one thing My question is do the clients not complain about the not receiving the retouched that you show on line .
Lou
Lou, I have never had a client complain about the quality of the photos, that the color and contrast and exposures are wrong. I take care of that in processing the RAW images to JPGs.
I also make sure that I talk about the images that I deliver as “proofs” and not as final retouched images. Those I do for albums and print re-orders.
As part of the information package I send to them, there is this webpage where I explain the difference between editing and retouching. I am sure that all helps manage expectations.
Hi Neil
Thank you so much for the answer.That clarifies everything a lot.
Lou