Changing the default settings for RAW files
If you are new to processing RAW files, you might be slightly disappointed that the images look more flat than what you saw on the back of your camera. This is because the original default in how the RAW file is views in Lightroom (or Bridge), is “flat”. No adjustments applied. If you want your images to have more pop to them when you first view then in LR or Bridge, you need to apply different defaults for your RAW files.
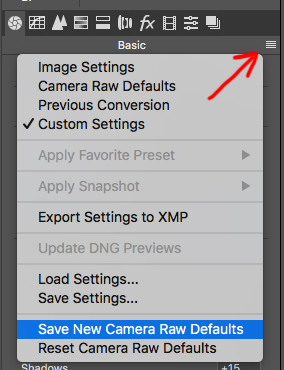
Here is how I set up my new baseline for RAW images, so that for a volume workflow, I start off with an image which has more punch to it already than the original default with all the values zero’d out. (See the first screen capture below of the tab in Bridge). For me it is an iterative process then where over a period of time, I slightly adjust the defaults of my RAW files to that which I generally like.
Of course, you aren’t just limited to Lightroom (or ACR in Bridge) – there are other options too in processing RTAW files – the foremost of which is Capture One Pro. I don’t use Capture One, primarily because I have a workflow in place that I am familiar with. There is that inertia to change a workflow that I am fairly efficient with.
One of the comments to the article, photographing with available light, asked how I processed the Sony RAW files. I still use ACR (via Bridge), which is the same engine as Lightroom – and is very similar to how I described it in this article: So I shot in RAW format, now what?
Below are screen captures of how I have set it up for my Sony A9 and Sony A7 III at the moment. This is quite similar to how I have it set up for my Nikon and Canon cameras.
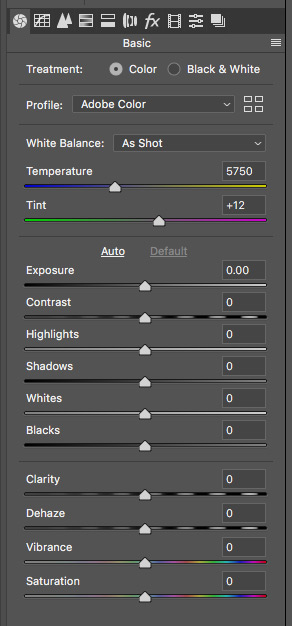
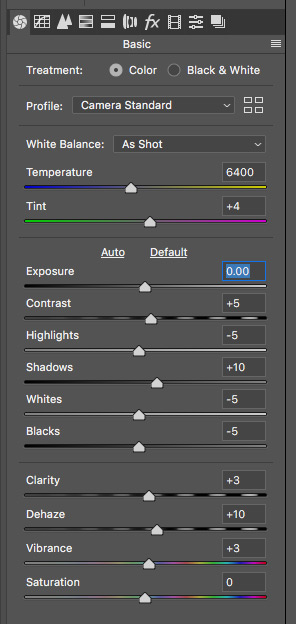
You can swipe between the two versions of the images – with the defaults all set to zero as it would appear if you ingested images from a camera you haven’t set up before. The next version of the image is with my current defaults – you can see the colors are a little more vibrant, and the contrast is slightly higher. This would be my defaults to which the RAW files are pulled when they are first ingested … and then I can always edit the files as part of my usual workflow.

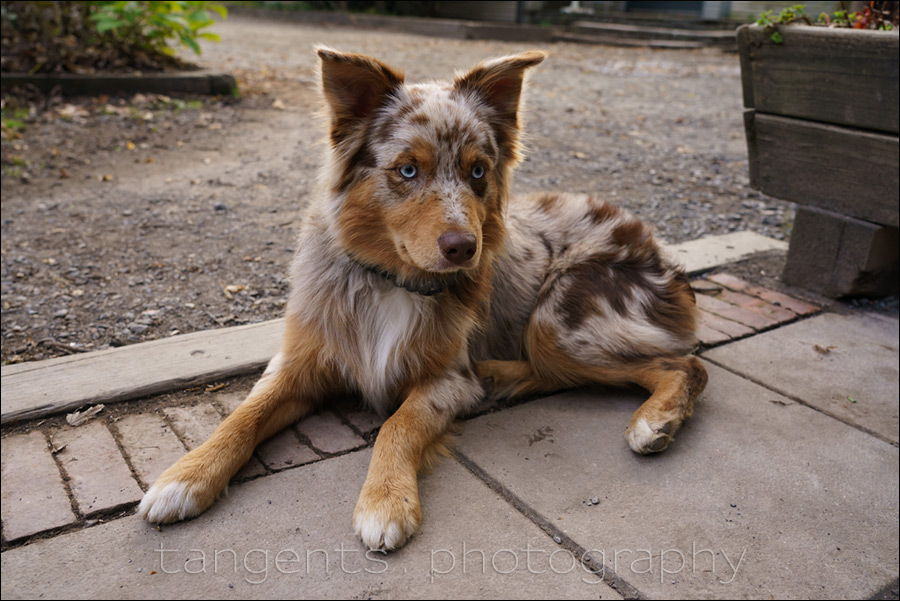
While visiting Woodstock, NY, we chanced upon this well-known local personality at the one store – an Australian Shepherd who clearly was used to being photographed, and just ignored the camera.
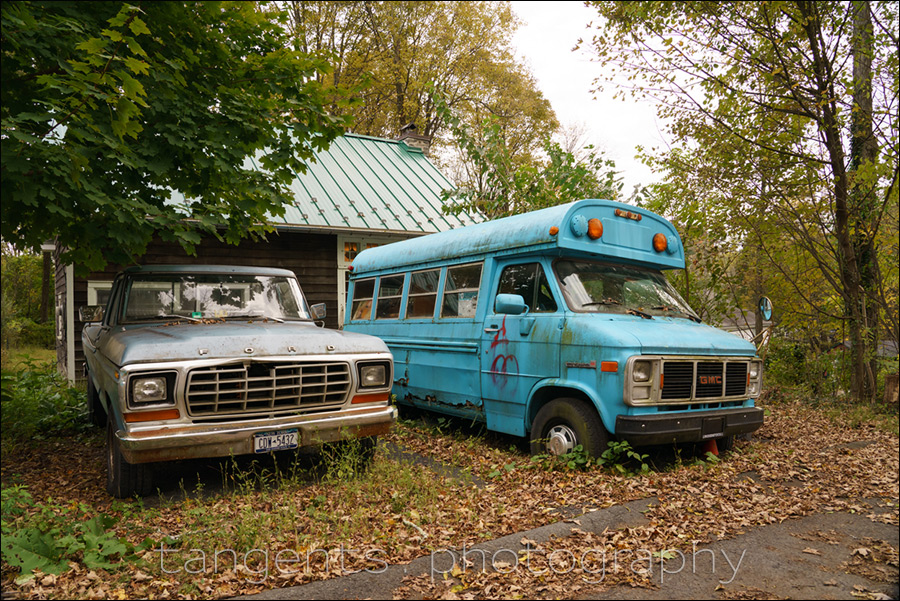
This truck and bus were also in Woodstock. The change in the vibrancy of the colors is subtle. I don’t want to start with a new general default for my RAW files which are too wild – I want a look which works for most images as part of my general post-processing workflow.

RAW settings for new defaults
These are screen captures for the various settings with Bridge, editing the RAW files with ACR. You have exactly the same settings in Lightroom, since Bridge and Lightroom both run on the same engine – ACR. While it might look a little different in Lightroom, the actual settings are identical to Bridge / ACR.

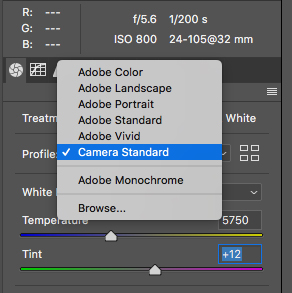
You can access the other Profiles by selecting ‘browse’.
With a previous version of ACR, there was a weird green-magenta posterization of the shadow areas when I used the Adobe Portrait profile. So in playing it safe, I keep to “Camera Standard”. I like the results with that.
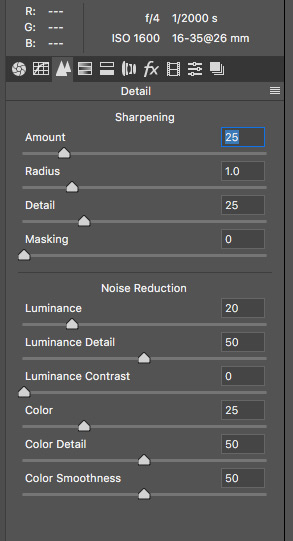
I keep Sharpening to 25.
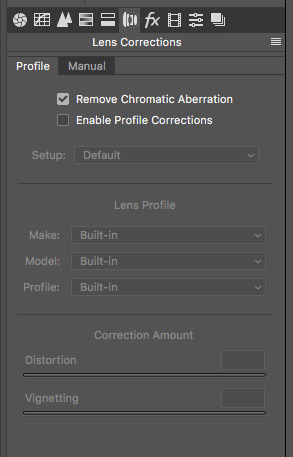
- Remove Chromatic Abberation – I enable this as a default.
- Enable Profile Corrections – this is a powerful correction tool. It corrects for vignetting and pincushion & barrel distortion.If you shoot a lot of Real Estate and Architecture, it makes a lot of sense to enable this setting as a default. Straight lines become straight again, instead of curving.I found that I don’t like this correction when there are people near the edges of the frame – this lens correction tool will then stretch people too much. Therefore I don’t enable this setting as a default, but will enable it when editing images where I need straight lines to appear straight.
Summary
This then covers the ways in which my RAW files are automatically adjusted to my preferred settings … and from here on, I can edit the images further to my taste as part of my usual RAW workflow. But it isn’t fixed – I am continually tweaking my settings, especially with new updates to ACR that affect the look of the RAW file.
Hi Neil,thanks for the great artickle. What is your thought about using colorchecker passport for creating profiles for certain camera and lens combinations. Is it worth to do it in your opinion?
Pawel – I have the Colorchecker Passport, and I use it in the studio as a help to getting a good color balance in post-processing. But I haven’t gone as far as creating Profiles yet. I should, and I have no excuse why I haven’t done so yet, other than the inertia of being too busy with so many other things. But really, I have no excuse.
This is interesting. I have recently purchased a Sony A9 and am having a hard time trying to make the skin tones look natural in LR.. I am used to using Canon and their skin tones are superb but I certainly can not get the sony skin tones to match them. Any advice would be most welcome
Thanks for the info. I never thought about changing the ACR settings, I just put them in manually…everytime.
This will help a lot.
Great information and quite helpful. I always appreciate clear,concise instruction on how to shorten my workflow. I made the changes (and saved) today. Thank you.