Photography composition: Working toward the final image
When I first immersed myself in photography way way back, it took me a while to realize that what I see in a magazine or book, isn’t necessarily the first image. Those incredible images that can inspire us, (or even make us just want to give up photography), most often are not fully-formed masterpieces. Most often, the photograph that we as the viewer are presented with, are but one of a series. One photograph that stood out, or where the elements in the photograph were controlled by the photographer. And even with the work of hardcore photo-journalists, what we see, have been “controlled” and “adjusted”, even if only in terms of lens choice and composition.
With that realization, I felt less intimidated by the great photographs that I saw. They had become more accessible in a way, and more attainable to me as a new photographer.
Photographs with impact or appeal could come to be because of serendipity or foresight and careful planning by the photographer. Quite often it’s just recognizing the potential of a scene, and working with it to finesse the elements, such as the composition or lighting or, with portraits, the pose.
So it is with this photograph of Jessica Joy, taken just before we started the photo-shoot mentioned in the article, colored gels with flash photography. The final result shown here, is a little bit of everything – a wonderful subject, an opportunity, and then over the course of several photographs, finessing it.
While I really like this image, and think of this as the final image that I want to present, it didn’t just “happen” as the first and only image. There was an entire sequence leading up to it. It is this first recognition of a potentially good photograph, and then the thought-process in the sequence, that I want to show here.
This photograph is one of the last photographs in the series, and another that I really like.
But this is where we started – the first image. In the dressing area of the studio, there was this usual mirror with the lightbulbs around it. I asked Jessica to turn to her side so I could see her profile. Since I didn’t intend using any other light, other than the bunch of lights behind her, I thought this would probably be more of a sillhouette than a well-lit nuanced portrait where she is looking towards the camera.
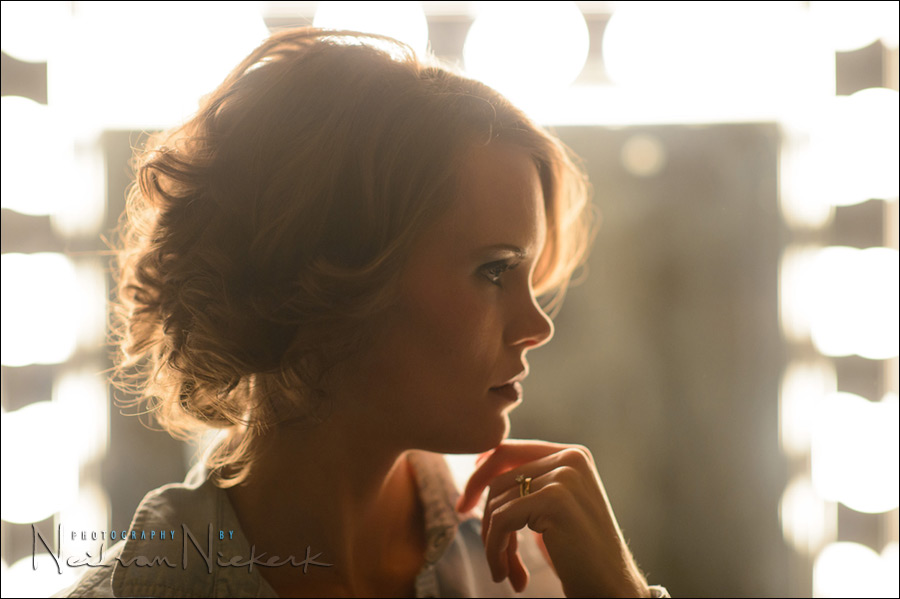
So that’s the first test shot with her jacket still on. The jacket was too bulky and too noticeable. I wanted the portrait to be about her.
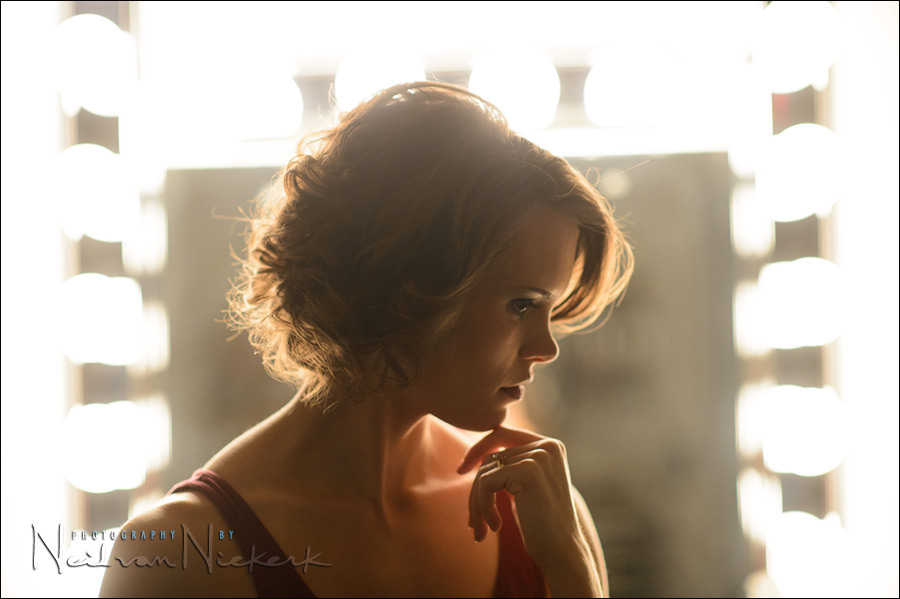
With the jacket off, I thought we could simplify it even more by slipping the straps off her shoulders.

I really like this photo, but I can see her brightly lit arm reflected in the mirror … as well as myself. Moving to my left would’ve solved that.
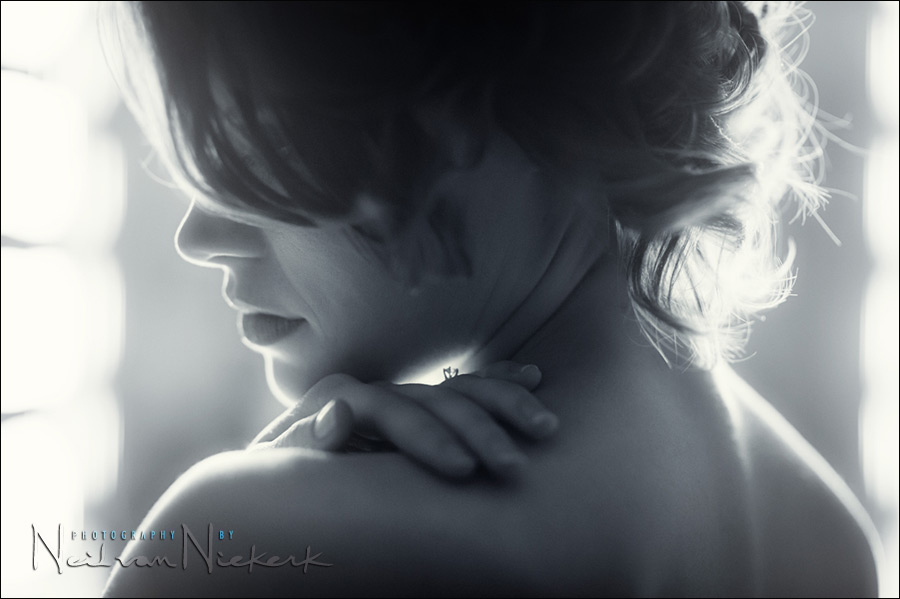
What was missing though was a certain mood. The photo lacked a sense of mystery. I asked Jessica to turn around, and look to her left. I had her bring her hand into the frame, to add more of that sensuality to the image.


However, her reflection in the mirror was too distracting. It was just too bright, even with the abstraction that a black and white image brings.
Lighting & Design for Portrait Photography
Lighting & Design is a follow-up of sorts to Direction & Quality of Light. It’s a slightly eclectic mix, discussing the thought-process with various scenarios shooting portraits. The examples use available light, bounce flash, off-camera flash as well as studio lighting.
The idea is that in every one of the 60 sections, there is something to be learnt and applied, regardless of your level as a photographer or where you shoot – all shaped to form a cohesive narrative arc throughout the book.
You can either purchase a copy via Amazon USA or Amazon UK. The book will also available on the Apple iBook Store, and Amazon Kindle.
Here’s a series of three images as I tried to hide the reflections. The hot-spots in the mirror were distracting in two of the images.
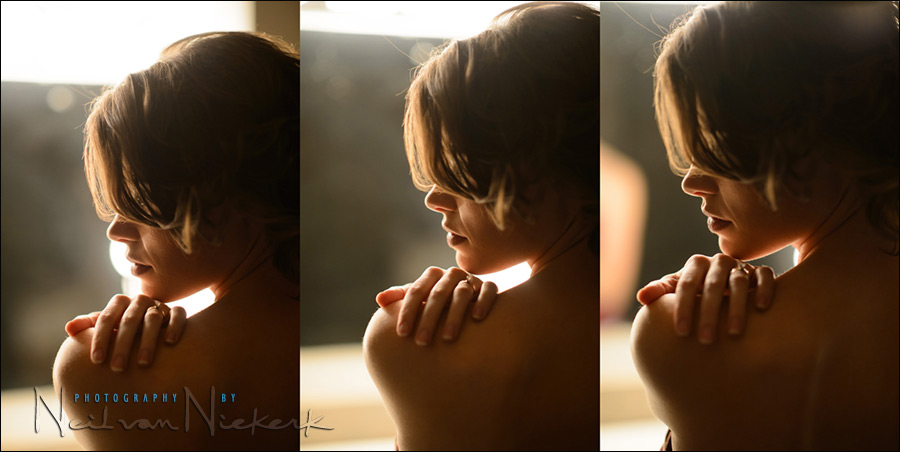
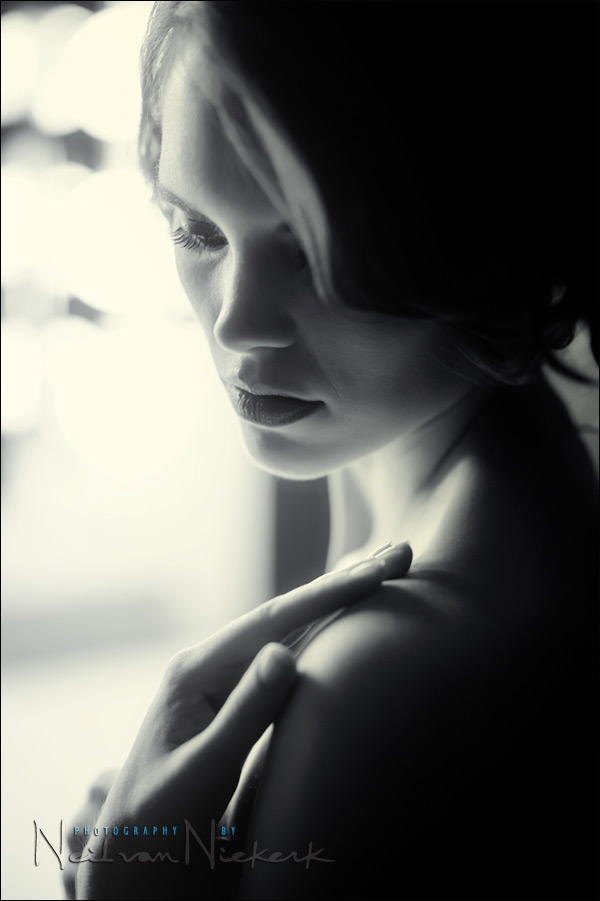
It needed me to move subtly to the side, and also have Jessica rotate ever so slightly towards the camera … and there we have it!

The photo above still had that reflection of her in the mirror that was distracting. A slight change in pose hid that … and there is the final image.

Paradoxically enough, I ended up liking the cooler, blue-tinted B&W version better. It just had that appealing air of sensual mystery about it.
With this I wanted to show that when you recognize the potential in a scene or the potential with a certain subject – whether a landscape, or architecture, or a portrait – that we shouldn’t just be happy with the first few images. Often enough, we can easily finesse the image until we have something that *really* works. Just don’t give up too early.
Camera settings & photo gear (or equivalents) used during this photo session
- 1/200 @ f/1.8 @ 1600 ISO
- And since I shot these images at f/1.8 these more affordable optics would’ve worked just as well:
Nikon AF-S 85mm f/1.8G / Canon EF 85mm f/1.8 USM
Neil, another great tangent. I really like the second image down. I beleive there is potential in almost every scene, and that is the secret, to move around or move the subject, and lighting has a massive effect. When I was a young lad, I would happily snap away with my olympus om10 that my father gave to me at the same thing at different positions at different settings to which my EX wife would say “Why are you photographing the same damn thing?”, my reply was always “To learn”! I still dont think I move around enough, especially when shooting weddings. I, like you believed when I was younger that a photographer was so good he just simply arrived at that shot and it was awesome, not anymore, awesomeness comes not only with time and experience, but also with adjustments.
A great read, Neil. This awareness of the little details like the tweaking the hand and pose to hide her reflection is something I lack and am focusing on this year… Thanks for the example.
Stunning image Neil – The smooth skin tones are quite special. Your comments on moving to find the shot, and thinking/reviewing as you shoot are crucial (and difficult to do in the heat of the moment). Again, thanks for sharing. :)
Beautiful compositions once again. I am having difficulty deciding on your focus points since you are at f1.8 the depth of field is critical. Were you focussing on the far eye or the lips for these shots? If the eyes are not visible what other considerations do you use for focus to create the proper mood in the photo?
For the images where her eye wasn’t visible to the camera, I focused on her lips.
Aloha Neil,
Not just another shot of a beautiful woman in a mirror. Well conceived and executed.
When shooting I often find myself working very fast in order to document every aspect of the session, so that I can create a varied set of images for the client. Before each shoot I remind myself to “slow down”, so I can see things. It’s just too hard to focus when you’re driving ninety miles an hour. Thanks for another great post.
Quite interesting, even for a rank amateur such as myself. Coincidentally just last night I saw a youtube video of Joe McNally doing something very much like this while taking a portrait of someone in an old saloon. In both cases it is quite interesting to see the progression of images from the first test shots to the final image (or images). And how the images can move from being acceptable, or just “nice”, to being stunning, under a skilled and practiced eye.
A very interesting lesson, well explained. Thanks.
Excellent composition. You must have had an idea in your head of what you wanted the final image to look like as you adjusted your position as well as the model to get the desired result. I do prefer the black and white to the color.
Really interesting post. It is often easy to see why your final shots work so well but it is very helpful to hear what you think is wrong with the initial ones. As the other Ian says, learning what it takes to move from acceptable to stunning is fascinating.
Hi, Neil,
It is so refreshingly honest to see the “out-takes”–not many photographers would “expose” themselves like that! Your explanations & thought process of why they didn’t work and what you did to resolve it are extremely helpful. Please consider doing more posts like this from time to time.
Thanks again for another exemplary post!
Neil: this is a very interesting examination of the difference between “taking” a shot and “making” a shot. Richard
Love this! So encouraging. Looking at images like this make me want to throw in the towel, thanks for showing the process! http://Www.daniellegeriphotography.com