Solar Eclipse 2017 – New York
A time-lapse clip of … well, the clouds on the day of the 2017 solar eclipse, where we had 71% partial eclipse viewable from New York City. My initial intention with this time-lapse clip was to show how the environment became darker, but the continuous cloud cover made it something different.
I did have another camera for close-up photos of the solar eclipse. (The photos are shown lower down here.) There were short moments when the sun did peek out, so that we could see the progression of the eclipse. Even then, it was magical to see.
Here is my camera set-up for the time-lapse video – a Nikon D810 with a Nikon 14-24mm f/2.8 lens (affiliate), and a Lee 10-stop Neutral Density filter (Amazon) to bring the exposure down to 4 seconds @ f/8 @ 64 ISO. The interval was 6 seconds, for reasons described in this article on the general camera settings for Time-lapse photography.

Camera settings & photo gear used with this Time-Lapse shoot
- 4 seconds @ f/8 @ 64 ISO, with an interval of 6 seconds.
- Nikon D810 (B&H / Amazon)
- Nikon 14-24mm f/2.8 (B&H / Amazon)
- with Lee 10-stop Neutral Density filter (Amazon)
- Manfrotto 057 Carbon Fiber Tripod (B&H / Amazon), with the Manfrotto 057 Magnesium Ball Head (Amazon)
Because the time of the maximum eclipse (at 71% of totality), was at 2:44pm, the camera was at that steep angle to get some of the tall buildings at the bottom of the frame.
Unfortunately, you can’t see the sun being eclipsed in that video because my exposure settings (which was set for the sky and clouds), let the sun blow out to a blob. The camera settings for the time-lapse video, were a compromise to show something at least. If I had exposed for the sun, the rest would’ve been black.
You can see little lens / filter flare spots appear every now and then towards the bottom right of the frame, but that’s what will happen if you shoot directly into the sun.
Related articles
- Camera settings for Time-lapse photography
- Other articles on Time-lapse photography
- Everything you want to know about Time-Lapse Photography, an E-book by Ryan Chilinski
- Time-lapse photography NYC
Solar Eclipse photos – New York
Originally, our plans were to make a trip out to Kentucky, to be in the path of the totality to see the full solar eclipse. However, my adventures in Italy scuppered those plans, so we decided that New York might be the more accessible and less strenuous place to see the solar eclipse from. At 71% of a complete eclipse (at 2:44pm), it would appear to still be an experience!
On the day itself – August 21, 2017 – there were continually clouds moving across the sky. This actually made for interesting photographs too, like the image below, shot at 2:05pm.

The sun at maximum eclipse, as seen from New York at 2:44pm … with clouds moving across.

For the magnificent images you’ve seen of the eclipse, you would definitely have to plan the place and position carefully. We are already making plans for the 2024 eclipse! I want to be there for the totality.
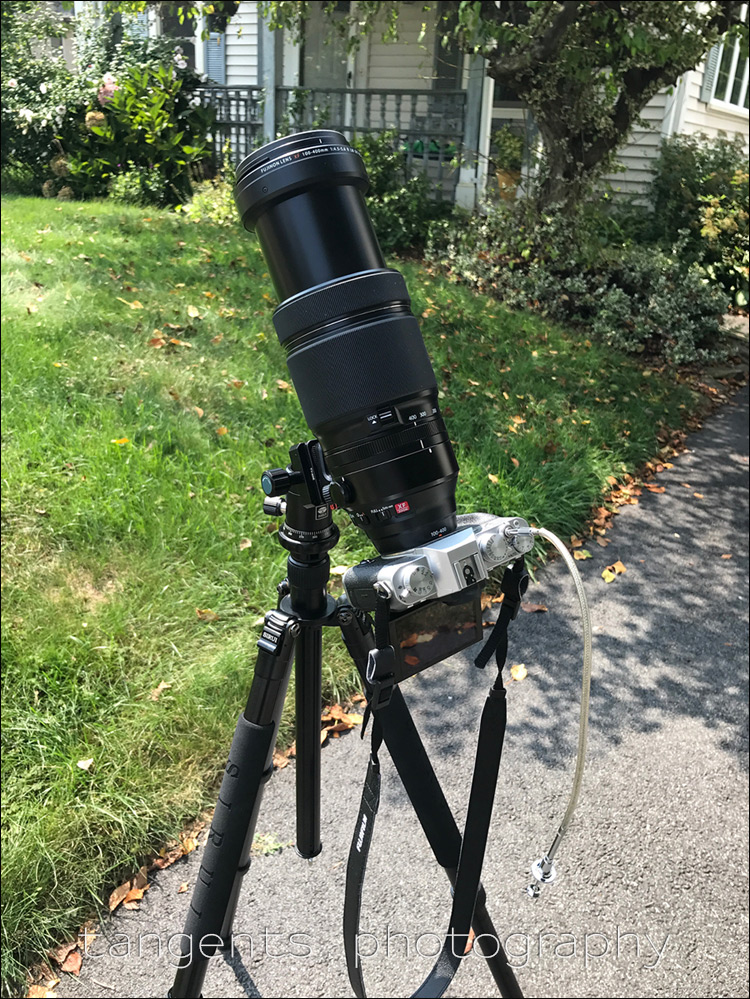
The camera setup I used for the close-up photos of the sun – my little travel camera, the Fuji X-T20 (affiliate), with this beast of a lens: Fuji XF 100-400mm f/4.5-5.6 lens (affiliate). The long focal length – 400mm on a crop-sensor camera – was essential in getting a close-up view. Even then, the 24 megapixel image was cropped to 7.5 megapixel size to show here. You’re definitely going to need a long lens, or crop heavily.
The most important element in this setup though, is the 18 stop Solar Filter (B&H / Amazon). A solar filter blocks the infrared and ultra-violet rays that a Neutral Density filter doesn’t. This helps protect your eyes. However, I used a mirrorless camera, and the electronic display would protect your eyes from that kind of potential damage anyway, since it isn’t optical. Still, a proper solar filter made sense.
The reason for the Fuji lens and camera, is that I had a 77mm filter. So that guided my choice of lens. I had bought the Nikon 300mm f/4E PF lens (B&H / Amazon) to use with a teleconverter, to have a compact, light-weight option that takes a 77mm thread solar filter. That would have been mounted on a Nikon D810, allowing me freedom to crop the image.
In the end, I went with the Fuji because of the EVF and the tilt-able LCD screen. Imagine trying to continually monitor the LCD screen at that neck-breaking angle with a DSLR without a tilt-able screen!
One thing that I will definitely change for another time – I would use a geared tripod head for fine adjustments to the angle. The tripods I have are very sturdy, and the ball-heads easily adjustable … for specific needs. I use these heavy tripods for the time-lapse dollies that I use. The ball-heads make it really easy to single-handedly mount a dolly or other devices … but they were a pain for shooting the solar eclipse and adjusting the angle of the camera every so often. A geared tripod head would solve all that.

Photo gear used for the photos of the solar eclipse
- exposure settings: 1/250 @ f/8 @ 400 ISO
- Fuji X-T20 (B&H / Amazon)
- Fujifilm XF 100-400mm f/4.5-5.6 lens (B&H / Amazon)
- with an 18 stop Solar Filter (B&H / Amazon)
- Manfrotto 057 Carbon Fiber Tripod (B&H / Amazon), with the Manfrotto 057 Magnesium Ball Head (Amazon)
I did some testing beforehand to make sure the setup would work. Here is the same setup in my driveway with a smaller tripod I keep at home.
To get the sun in the viewfinder with such a long focal length, was best done by zooming to 100mm and finding that spot of brightness in the black frame. Then I zoomed in steadily to finally have the sun centered as well as possible in the frame.

Summary
Hats off & much respect to those photographers who pulled off magical images of the solar eclipse that you see posted everywhere. It took effort and careful planning to get that.
I’m happy with the limited results I got, but I take this as a test run for 2024 … if the weather plays along. We’ll do this again!
Another way to get the sun in the image that worked quite well was to adjust camera position to minimize the shadow of the lens on the camera body. Came up with that out of necessity as the standard strategy of finding the moon was only going to blow out the eyes!
Hey Neil! Thanks for the solar eclipse background. I also shot it but with my Canon 5d mk2 – an older beast so that if something would damage the sensor, would not make me sad… it went well. I was not blessed with a solar filter but I managed to grab a #10 welding glass filter and it worked just fine. Just had to adjust the white balance in post processing. We had no clouds but you know what, the clear skies made the partial eclipse here in the greater Toronto area in Canada less interesting than your clouded close-ups.
I am happy that you mention the mirrorless. I was too scared to use it apart from the maximum eclipse. Not too much sun and doable out of hand with my 10 stop ND filter. But I never got a clear response to know whether mirrorless would have a greater risk for my eyes and the sensor or not. Clearly you make a good point about the EVF which I love on my Fuji. So with your experience in the bag, I will make sure I am ready for 2024 by the Grace of God! I will definitely try and invest in that gadget that is able to follow the movement of the planet because like you, I had to adjust many many times to keep the sun in my image. Amazing how fast it moves. It costs 500 dollars or so and with the money for a proper solar filter I need the coming years to save for that!
greetz from Canada!
Nicky
I agree – some kind of tracking device will be necessary.
Nice work with the eclipse images. Yes, I would definitely try to get to a good spot for the 2024 eclipse. I was in Hopkinsville, KY for this last one; it is just a terrifically unique experience to see this for yourself. The 2024 eclipse will have a longer totality (on the order of 4 minutes or more), but it is in early April, which may prove difficult with early spring cloud cover. Find a good location and watch the weather forecast. You won’t regret it.