Tangents

photography tutorials, reviews & workshops

tangents photography blog
learn : discuss : share
subscribe today
  • Tangents
  • Tutorials
    • Flash Photography
    • Wedding Photography
    • Studio Photography
    • Posing People
    • Understanding Your Camera
    • Exposure metering
    • BFT
    • Best Photo Books
  • Workshops
    • Info: Workshops
    • In-person
      tutoring sessions
    • Online
      tutoring sessions
    • Video tutorials
    • Workshops in
      New Jersey (NJ)
    • Workshops in
      New York (NYC)
    • Studio Workshop
    • Workshop results
  • Books
    • On-Camera Flash (revised ed.)
    • Direction & Quality of Light
    • Off-Camera Flash Photography
    • Lighting & Design
    • On-Camera Flash (1st ed.)
  • Reviews
    • Nikon
    • Sony
    • Canon
    • Fuji
    • Profoto
    • lighting gear
  • Projects
    • Two Perspectives
    • B&W Infrared
    • Vintage lenses
    • Time-lapse photography
  • Info
    • About
    • Contact
    • My Photo Gear
    • Books by NvN
    • Newsletter
    • Join us on Facebook
    • Acclaim
    • Success Stories
    • Photoshop Actions
  • Forum

Studio lighting: harder light = dramatic light

March 29, 2013 Neil vN 3 Comments

Studio lighting: harder light = dramatic light

When I first started exploring bounce flash, and then off-camera flash and then progressing towards studio photography, my tendency was also instinctively towards softer light. A large light source gives you softer light, which is also more forgiving in terms of how you position your subject and yourself in relation to the light. A large light source is easy to work with because it creates softer light that easily wraps around your subject.

Soft light is flattering. But it soon became obvious that I was missing out on that dramatic element that attracted me to other images, and what I saw in movies. While soft light is flattering, it tends not to give dramatic results. (Of course, this depends on how you position your light.)

Working with video light in photography, I quickly got to love the light fall-off and the way that you only light a specific part of your subject, instead of just flooding your subject with light.

Working with just a speedlight in bright sunlight, we mostly have to get used to working with a harder / smaller light source … and make it look good! As an example, here is the photo of Molly K, our model during a personal photography workshop in New York, where we worked with direct off-camera flash.

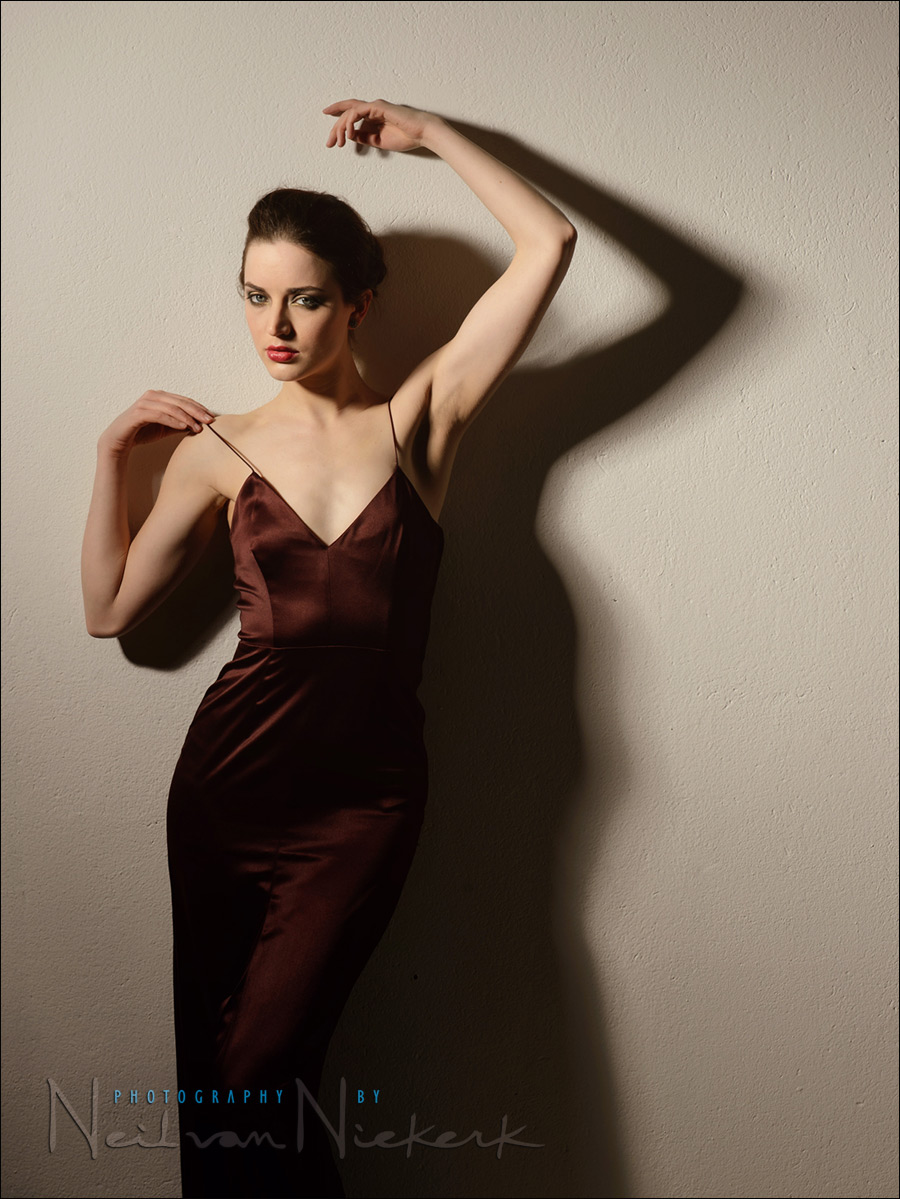
In the studio as well, selectively lighting part of your subject, or just using a smaller harder light source as a single light, gives you more opportunity for different looks than just using one large light source. In photographing Anelisa recently for the promotional video clip for my studio, I used smaller light sources for several of the setups. This image above then, is from one of those setups. Here I used the Profoto 50 degree Magnum Reflector (affiliate) to concentrate the light, but still give a wide enough beam.


There are multiple edges to the shadows. The monolight itself will give the harder shadow, while the reflector’s sides will create the secondary softer shadows. I like it.

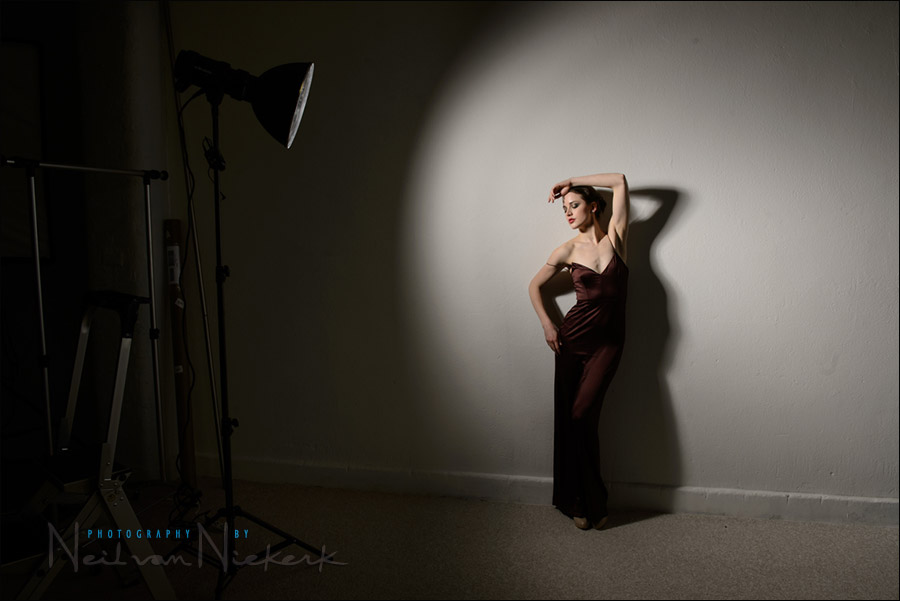
Here is the pull-back shot to show where the light was placed, and to see the spread of light.


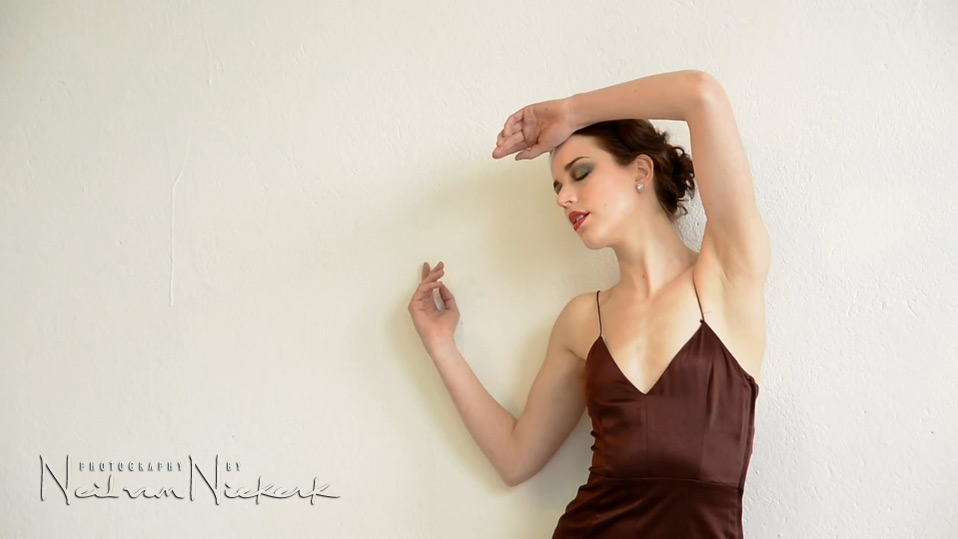
Just for comparison, the available light shot which is a screengrab from the video. But by completely pulling the ambient exposure down with the settings chosen for the studio flash, the ambient light doesn’t register at all … and all that is left is the dramatic lighting.


Camera settings & photo gear (or equivalents) used during this shoot

  • 1/200 @ f/8 @ 100 ISO
  • Nikon D4
  • Nikon 24-120mm f/4 VR  /  Canon EF 24-105mm f/4L IS
  • Profoto 50 degree Magnum Reflector
  • Profoto D1 Air 500 Ws studio light


Related articles

  • Video clip: Photo session in the studio
  • Anelisa – studio photo session
  • Lingerie photo session in the studio – model: Olena
  • Lingerie photo session: video light & studio flash – model: Olena
  • Lingerie photo shoot in the studio – model: Carly Erin


Filed Under: Anelisa Durham, lighting, Profoto, studio photography Tagged With: hard light in the studio, Profoto 50 degree reflector, Profoto magnum reflector


Help support this website

If you find these articles of value, please help support this website by using these B&H and Amazon affiliate links to order your photo gear.

I also offer photography workshops and tutoring sessions, whether in person, or via online video tutoring sessions.

Stay informed via the monthly newsletter.

Please follow me on Instagram for more.

You can also join our thriving photo community in the Tangents group on Facebook, where we show our photos and discuss all things photography.

Thank you,

Neil vN

Books by Neil van Niekerk


3 Comments, Add Your Own

  1. 1Charisse says

    March 30, 2013 at 1:47 am

    Thanks for sharing. I have always been drawn to dramatic lighting in images including my own. However, while learning as a new beginner, I got the impression that the shadowing was just an image with poor lighting. I was not confident or experienced enough to ignore all of the “pro’s” and follow my own instincts. I believe this has inhibited me from really settling in on my own “style”. My goal for this year is to look at less images of other and just post with my gut my images that simply speak to me. Afterall, rules are meant to be broken.

    Thanks for sharing your thought process behind your images. It gives more of us rule breakers the ok to take more risks.

    Reply
  2. 2Phil says

    April 1, 2013 at 11:04 am

    A most interesting article. As always you are informative and easy to understand

    Reply
  3. 3antonio says

    April 1, 2013 at 12:29 pm

    great photos. Might be worth mentioning that in order to use hard light, you really do need a model with good skin and good bone structure. You can create really dramatic lighting with hard light but if your model isn’t right, it will make them look really bad.

    Reply

Leave a Reply Cancel reply

Your email address will not be published. Required fields are marked *

categories

Articles & Tutorials

  • • About myself & this site
    • Books by Neil vN
    • Best photography books
    • Black foamie thing
    • Spinlight 360
    • Photographers’ success stories
    • email newsletter
  • • Flash Photography Techniques
    • Natural looking flash
    • Flash + Ambient light
    • Dragging the shutter
    • Bouncing your flash
    • On-camera flash outdoors
    • Exposure metering
    • Flash exposure compensation
    • Bounce flash examples
    • Which is the best flashgun?
    • Flash brackets
    • Off-camera flash photography
    • Flash photography basics
    • Using video lights
    • Flash photography tips
    • Photography books
  • • Photography workshops NJ / NYC
    • Models @ photography workshops
tutorials:
flash photography
Photography
Workshops

Recent Comments

  • Pat: Right up front, I’ll say I would NEVER buy a Sigma lens. That out of the way, and referring to these...
  • Stuard Santana: Poor Garret Shaw! he should know better, lol I got another one today with the same exact wording and...
  • Mohd Zamri Mohd Zan: In my country are even worst, most guest asking professional photographer to take their photo...
  • HenkW: Thanks for this review – one of the very few I could find on this most interesting topic. So, the...
  • Rachel Abi: Thank you so much for this guide!! There are some many options and you made this really clear :D

All rights reserved. Copyright © Neil van Niekerk 2023 · Customization by The Traveling Designer

Copyright © 2023 · NvN on Genesis Framework · WordPress · Log in