Using a large gridded strip-box / soft-box for portraits
There seems to be a natural progression with photographers exploring off-camera flash and studio photography. After the initial umbrella and softbox, the next purchase is usually a beauty dish, and then other esoterica such as ring-flash.
Personally, I’d suggest that one of the first light modifiers anyone should get, is a small or medium sized gridded strip-box. A strip-box is narrower than the usual soft boxes, and the grid really helps contain the light spread. So you now have the ability to get relatively soft light, but also control it much better than a regular softbox or especially an umbrella. Most of the photos shot for the review of the Profoto B1 portable flash, was shot with a Profoto RFi 1’×3′ softbox (affiliate). It was just the right combination of portable & awesome light.
When I added some lighting gear to my studio space to make it attractive as a rental studio space, I decided to get three of these gridded stripboxes … 1×3 and 1×4 and 1×6 seemed liked a good progression. But the Profoto RFi 1’×6′ softbox (affiliate) turned out to be huge. Very tall. Six feet tall. This is the kind of light that you use to light the contours of cars in much larger studios. It’s pretty big.
So the softbox lay dormant in my studio, until this recent photo session with Anita De Bauch, a model from the UK who visited the New York area. And in figuring out a specific way to light her, I had an epiphany. A relegation in how this massive stripbox can be used for portraits. There’s a way the light can be controlled that is quite unique to it, I believe.
(Now, before clicking on the ‘more’ link, be aware that the rest of this post has images with some nudity.)
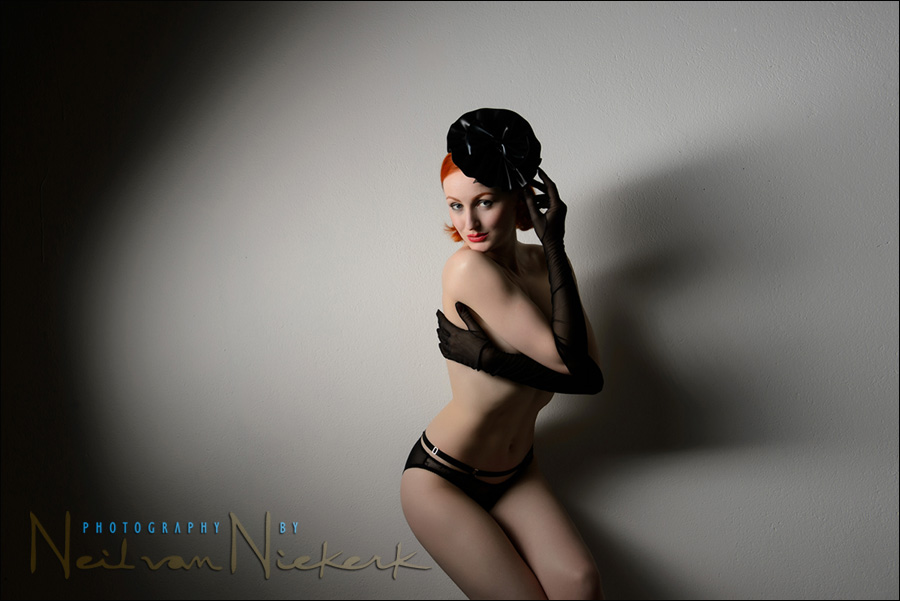
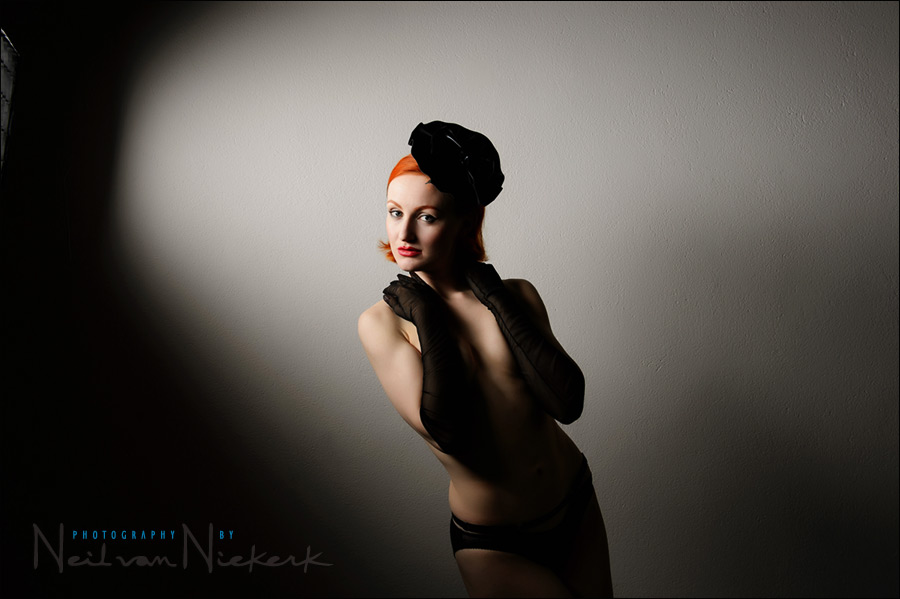
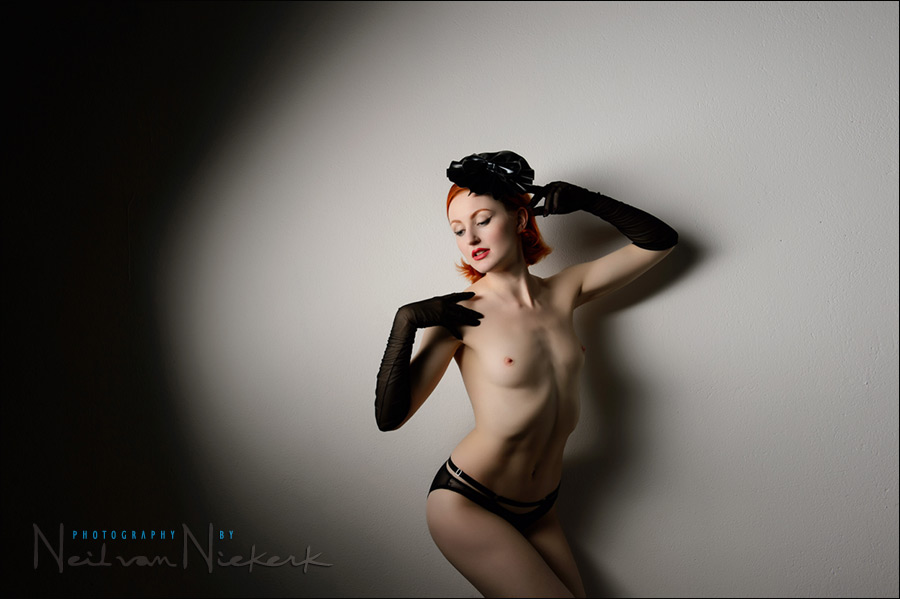
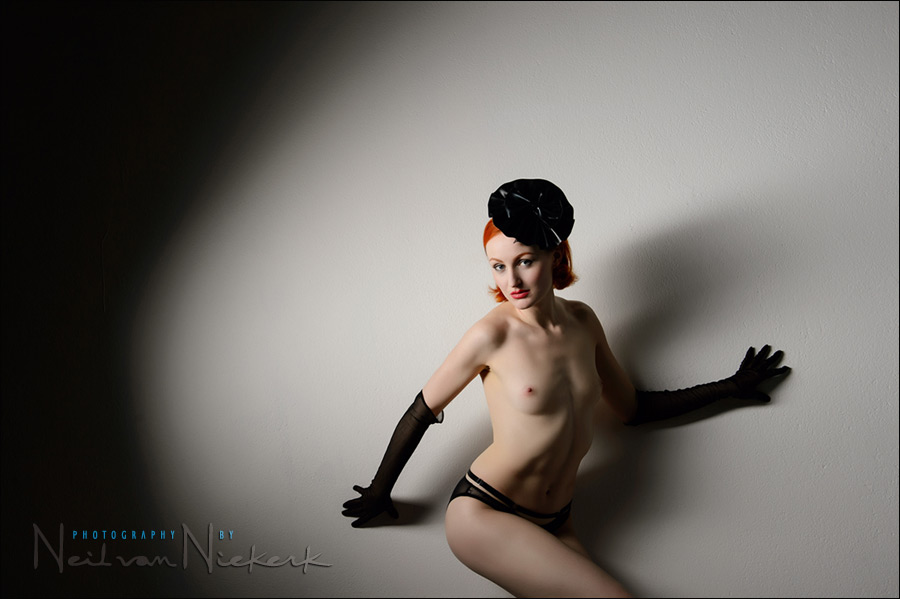
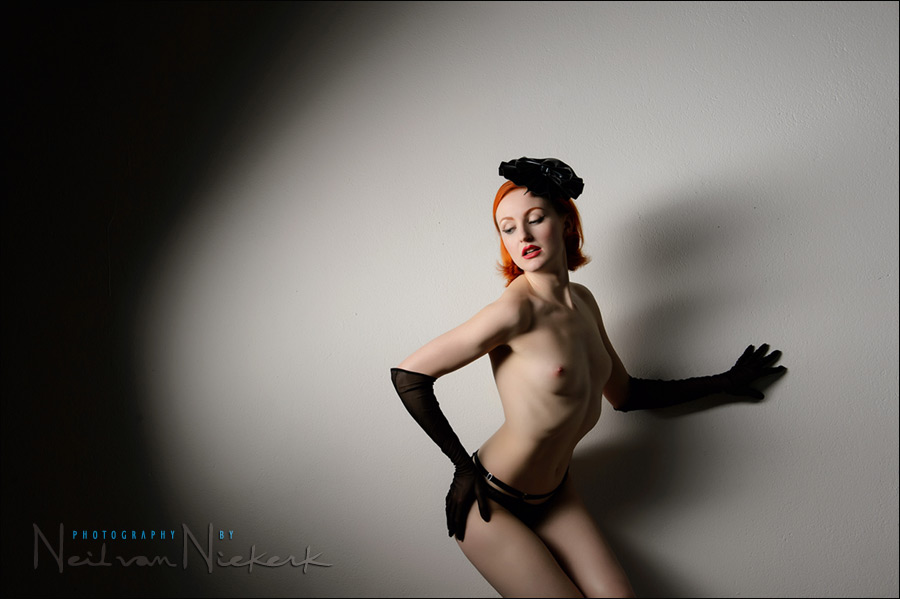
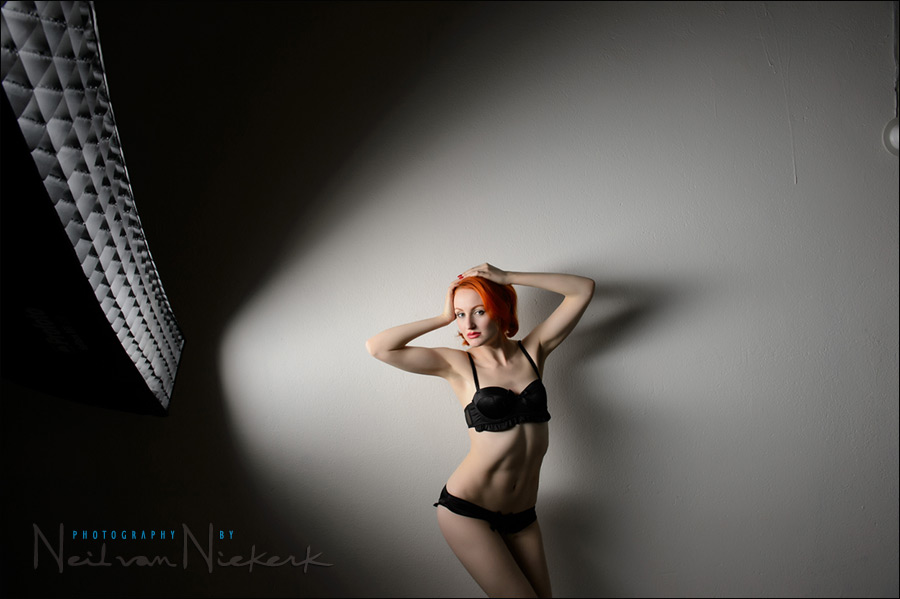
The result that I was after, is as shown in this image – that combination of dramatic lighting, but soft and flattering. And with real control over how the light is spread and where the light falls.
Let me explain how we got there. First of all, a few test shots with the Profoto RFi 1’×6′ softbox (affiliate) and a Profoto 50 degree 1×6 grid (affiliate). The initial shot (not shown here, had the light closer to me, and in a vertical orientation. It looked very good, but not that interesting. It looked like a regular softbox. I wanted more dramatic. So I shifted the light about 90 degrees to camera left. and flipped it horizontally to spread the light. Mmmm … this looked better.
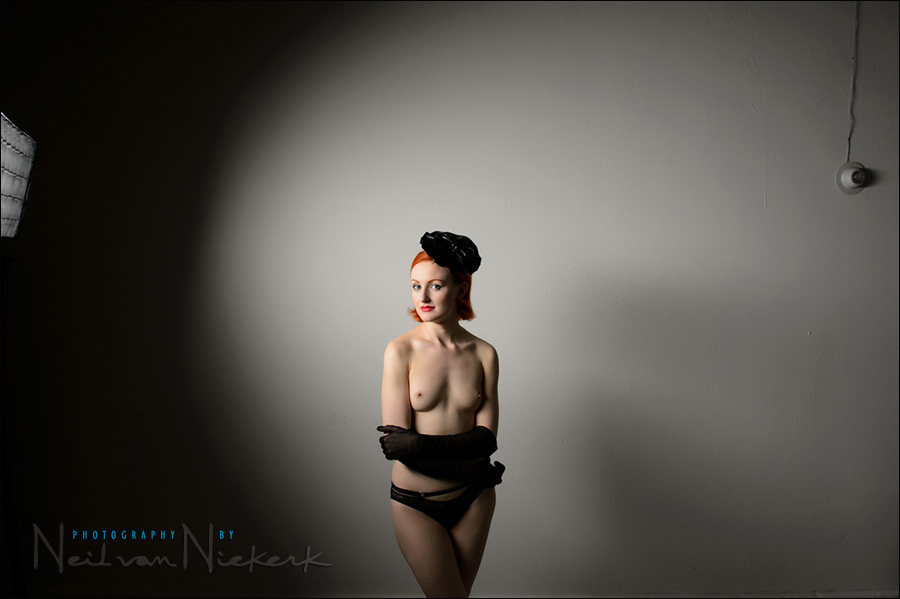
But there was still a strong fall-off to the light on the shadow side. I needed some more fill light there. I wanted to keep it very simple though and not bring in a secondary light or a reflector on camera right.
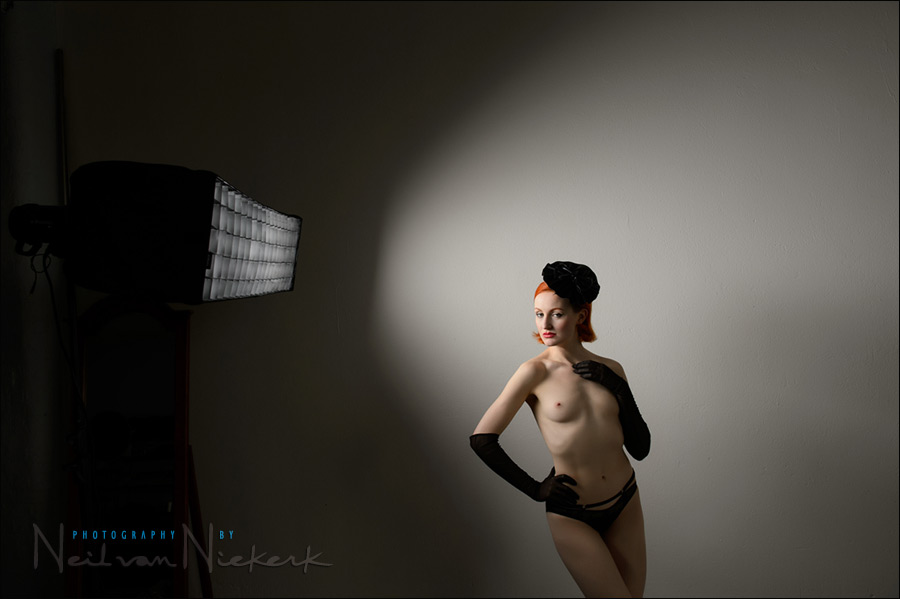
Then I decided to bring out the Profoto RFi 1’×6′ softbox (affiliate) with the Profoto 1×6 grid (affiliate) to see if I could somehow bring in more light to her shaded side, but without losing the dramatic quality to the light. And yes, models needs coffee too.
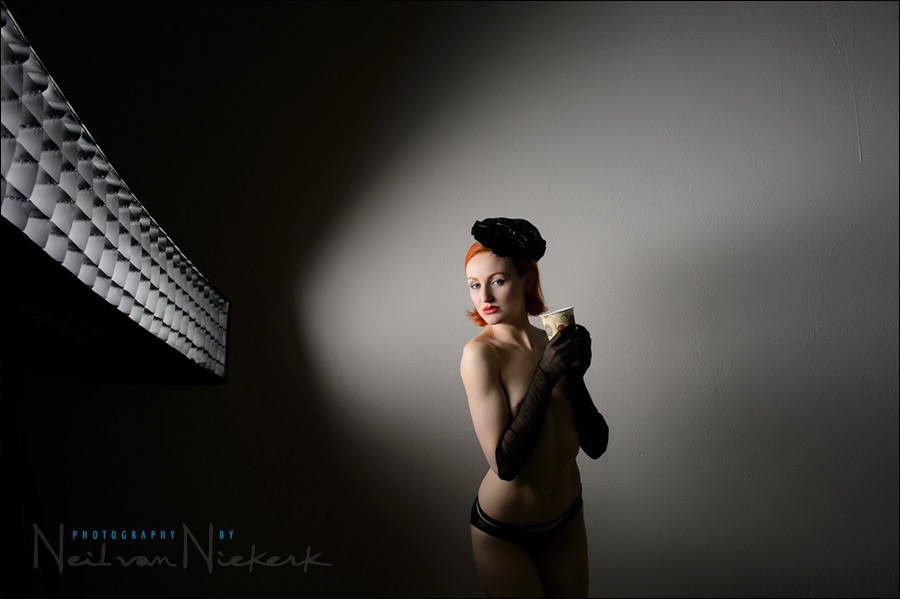
And then I progressively swung the further (left-hand side) of the stripbox lower, but the right-hand side, closer to me, up above her eye level.
With this tall (and now long) stripbox, there was enough light that reached her shadow side to give a gentle fill light there. This made the transition between light and shade more gentle. Even better, I could bring the stripbox really close to the wall, and low down so the light appeared to come from the center of the frame / center of the figure. But the light on her face, comes from a more natural position – higher than eye-level. Even though the stripbox is so close to the wall, it doesn’t blow out, because the egg-crate / grid throws the light forward, and it skims across the surface. In addition, the light on her has a more subtle gradient between light and shade, because the light wraps around from such a long / tall light source.
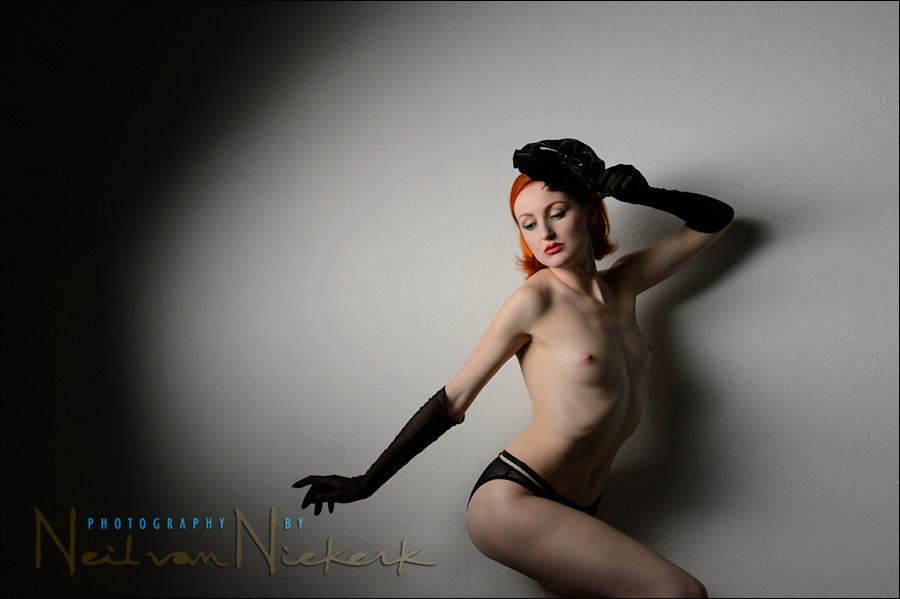
This was the epiphany – that with this single stripbox, I could light up various parts of the frame differently. All it depended on was how I swung the softbox around on its axis. I could have the two ends at different height, and at a different position in relation to my subject. A genius piece of lighting gear!
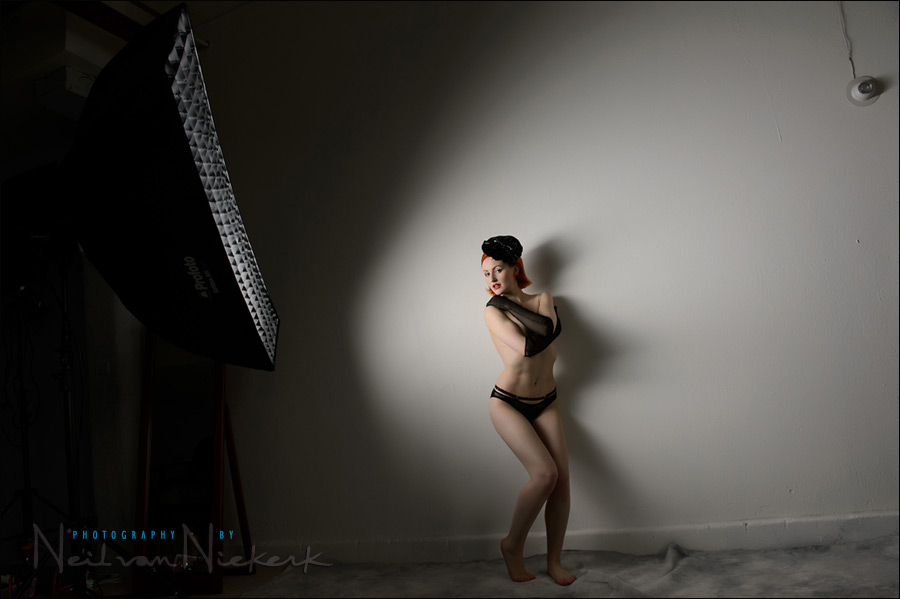
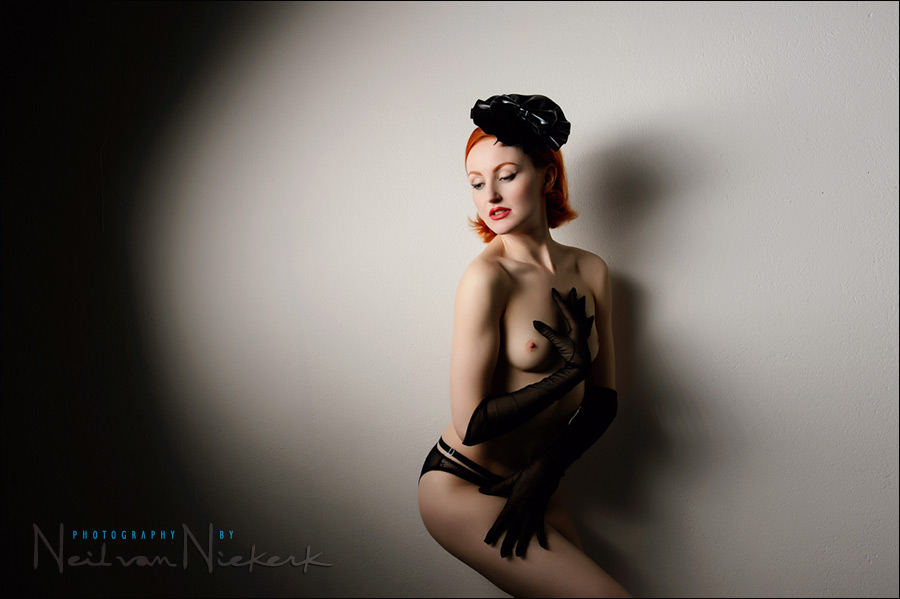
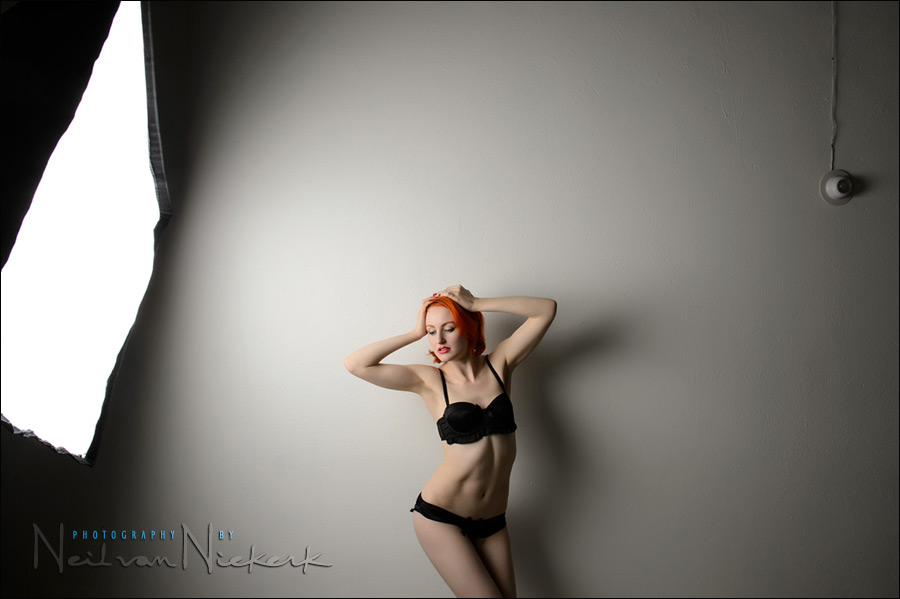
For this next frame, I left the softbox in as reference. But it would be easy to clone out for a final image.
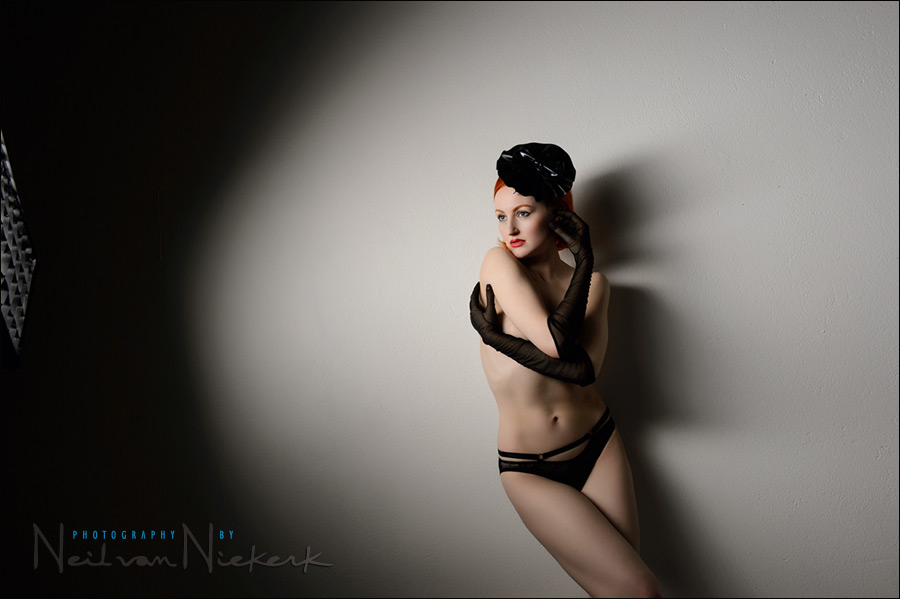
What further fascinated me with this light, was how the shadows appeared. There was a kind of smearing of the shadows that somehow looked like watercolors – that kind of smudging. Looking closer, you can see that there is a repetitive pattern to the shadows, as each “block” and series of “blocks” of light, as created by the grid, now has a shadow.

Finally, just for comparison, here is how the gridded Profoto RFi 1’×6′ softbox (affiliate) looks, compared to a similarly placed Profoto RFi 3’x4′ softbox (affiliate).
Summary
As mentioned, I had a bit of an epiphany about what is possible with this tall gridded stripbox . It allows me to spread the light across a larger / wider area, while still having the control that a gridded softbox gives. For portraits, I’m able to control the contrast and can shape the light in a subtly unique way. I’ll be using this puppy a lot more in the studio!
More info on the model, Anita de Bauch: Facebook page / website
Other posts featuring Anita
- Posing tips: pose the hands – asymmetry
- Photo session w/ model Anita DeBauch
- Post-processing workflow: how to deal with color banding in photographs
Camera gear (& equivalents), and lighting gear used
- 1/200 @ f/8 @ 200 ISO
- Nikon D4
- Nikon 24-70mm f2.8G AF-S / Canon 24-70mm f/2.8L II
- Profoto D1 Air 500 Ws studio light
- Profoto RFi 1’×6′ softbox and a Profoto 50 degree 1×6 soft-grid
Studio lighting workshops
If you are interested in learning more about studio lighting, including lighting for headshots, I offer workshops on studio lighting. The workshops will be held at my studio space in NJ, and it has a wide range of studio lighting gear to play with!
Love it !!!
Great to see one of Koos van Heerdens students doing so well.
You have come a long way and developed a great style.
Keep up the great work, from all the gang in Kempton Park South Africa.
When are you coming back to South Africa to do a Photography workshop.
Thank you! I am from South Africa and went to school in Kempton Park, but I have no idea who Koos van Heerden is? Jog my memory?
I’ll be visiting South Africa in August 2014.
Hi Neil,
Excellent visual explanation of your findings as always (and fantastic work, which goes without saying). Now that a lot of modifiers, including profoto can be used with speedlights, I often wonder whether they will have enough power to achieve the results you have shown here, especially when used with grids. How much power would you need to get f8 using a 1 x 6 softbox as shown in your pictures above? Many thanks, Adrian
Hi! Great info! I am curious, I have a 14×48 constant strip, that allows 1/3, 2/3 and Full Power. With it being this close to the subject, what do you recommend as ideal aperture/shutter speed/iso to avoid blowout camera left while still maintaining a good fill camera right? I’m on a Nikon D7000, so it’s a crop sensor that can’t handle ISO too high unfortunately. I don’t think I’ve pushed it much past 1000 that I can recall!! Thanks!
Angela … your light is a continuous light source?
Then the ideal settings are what your light meter (whether hand-held, or in your camera) dictates.
The light didn’t blow out the skin tones closest to the light source here because of the grid – it helps contain the light, and throws it more forward, and allows less scattering of light. Much more control than if I had not used a grid.
So the problem you have of blowing out areas, has more to do with your light not being gridded, would be my guess.
GREAT RESULTS!