Time-lapse photography tutorial
This video tutorial on timelapse photography covers a lot of ground, including the cameras and other gear I currently use. We cover an entire range of techniques you need to know to get started with time-lapse photography. Most importantly perhaps is the section on getting smooth motion in your timelapse videos. There’s a specific formula or algorithm in getting timelapse footage that is smooth, and not jittery. It’s all in the choice of Frame Interval.
This is covered thoroughly in the video, but it might help if it is written out where time can be taken reading and ingesting the info.
The Frame Interval is the time between photos being taken.
How many photos you need to take though, in turn depends on:
— how long your intended video should be,
— how long the event is that you are recording.
Choice of Frame Interval with time-lapse photography
When you have decided how long your intended video should be — (let’s say 30 seconds), and you have decided on your frame-rate of the video (let’s say 30 frames per second), then you know you need to take 30 x 30 = 900 photos. Very simple. You need to take 900 photos in this case.
And if your event takes place over 3 hours, then you have to chop that 3 hours into those 900 “pieces”.
In this example then, the event will be 3 x 60 minutes = 180 minutes; which is 180 x 60 seconds = 10,800 seconds.
Keeping with this example, you now have to “chop up” those 10,800 seconds into 900 “pieces”. 10,800 divided by 900 = 12 seconds. This is now your Frame Interval, as determined by the duration of the event, and how long your video needs to be. You will need to take a photo every 12 seconds to get 30 seconds of video, at 30fps, when the event is 3 hours long. (In the real world, I might just use 10 second intervals for simplicity, and also to over-shoot a bit.)
This choice of Frame Interval in turn then affects your choice of shutter speed … and of course your ISO and aperture, and whether you need a neutral density filter.
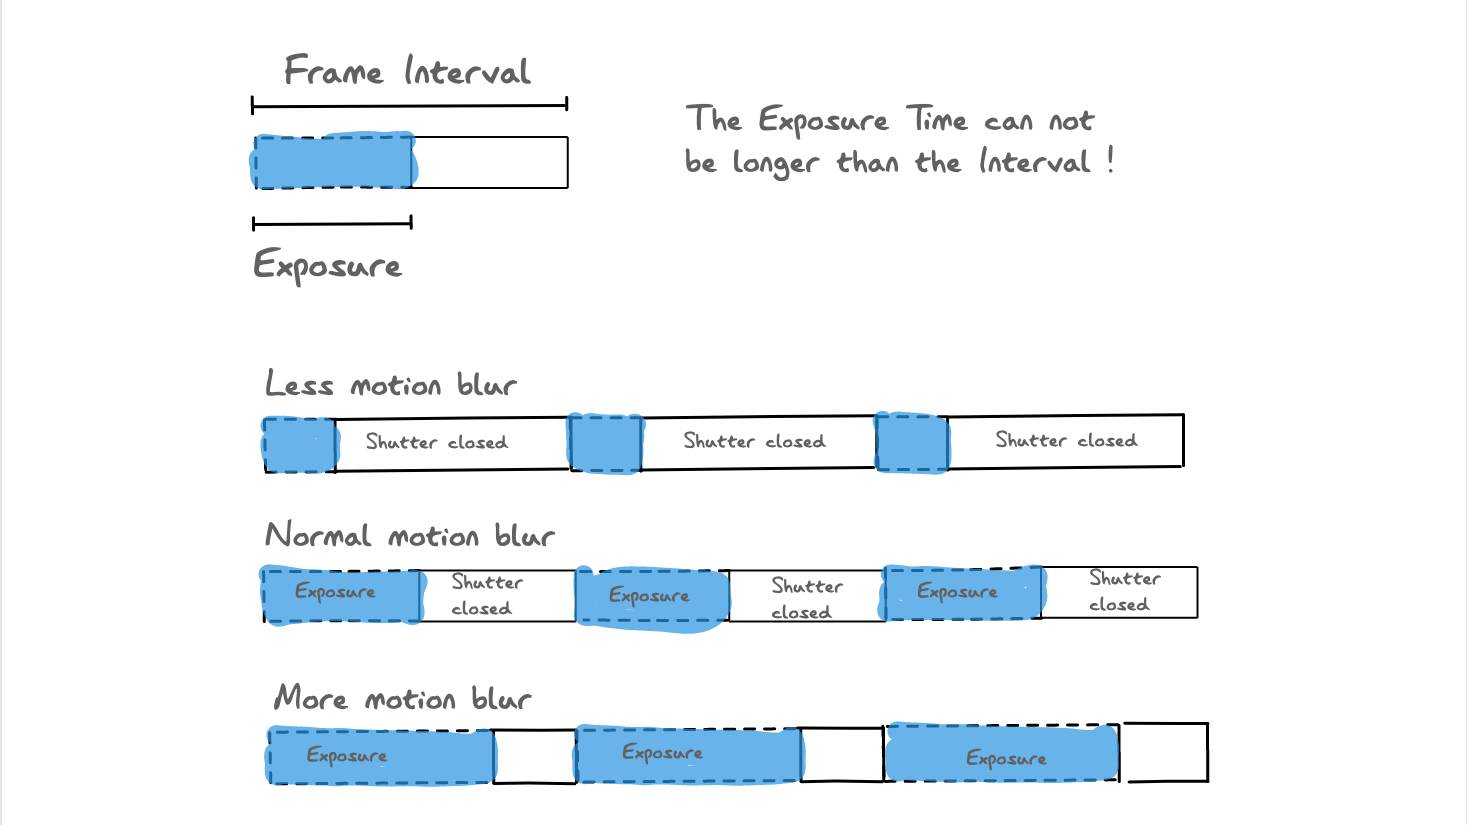
The usual advice to get smoother time-lapses, is that your shutter speed should half the time of your chosen Frame Interval … or even slower. In the example above, you have a frame interval of 12 seconds, and therefore your best choice for shutter speed would be 6 seconds, or even slower.
If your shutter speed is short, then your timelapse will tend to have a staccato feel to any movement.
There are other things to keep in mind as well — your camera will need time to write the data from the buffer to the memory card. So your Frame Interval should leave time for that still. Also, if you use motion dollies for dynamic moving time-lapses, then you also need to leave time for the motion of your dolly before the next shot is taken.
Summary
The above is just a section of the time-lapse photography tutorial video. There’s a lot more, and hopefully the video has some useful info, and hopefully might even inspire newcomers to time-lapse photography to try it out. Comments and questions are always welcome – either here in the comments or on the Youtube clip itself.
Related articles
- Camera settings for Time-lapse photography
- Time-lapse photography project with multiple cameras
- More articles about Time-lapse Photography
- For more videos, follow me on Vimeo / YouTube


Leave a Reply