choosing the necessary aperture for depth of field (DoF)
Depth of Field (DoF) is one of those elementary factors in photography which seem to mystify most (new) photographers. A question that I’m often asked is, “How do you know how much depth of field you need?” Now anyone who has delved into the topic and has done some research knows that you soon stagger back .. your head spinning trying to tie together all the concepts: circle of confusion, focal length, subject distance, size of enlargement, format size, hyper focal distance, and so on.
But a working approach might just be simpler than that …
Previously, lenses had DoF engravings on them, which gave you a visual clue as to what might appear sharp enough at specific focusing distances, for a specific aperture for a specific lens. You could carry DoF tables with you. You now even have applications for the iPhone which tell you how much DoF you will have for specific lenses and cameras.
As a portrait and wedding photographer, I don’t bother with that much any more. Partly experience (and that always helps), but partly because for myself, I’ve now reduced the question of “How much depth of field do you need?”, to this answer: just enough.
That might seem like a dismissive and facetious reply. However, how much depth of field do you really need? Just enough.
Now, depending on what field of photography you’re in, your requirements will be different. A portrait photographer has other criteria than a photographer that might primarily be dealing with landscapes or commercial work or architecture or sport or news. So do keep in mind that my answers here might not apply to you. I have to add that qualification before the rest gets shredded by the readers of this blog. ; )
I decide on depth of field by grouping my needs into three categories ..
– shallow depth of field (f1.4 to f2.8 .. or even f4)
– medium depth of field (around f4 – f8)
– lots of depth of field (f8 and deeper)
When I photograph a portrait, I am often just interested in getting the subject’s eyes in focus. So a shallow DoF would work. Therefore any aperture between f4.0 and f1.4 would work. The way the background renders, and how much of your subjects face is in focus will obviously vary. But the most important aspect of nearly any portrait – the eyes – will be in focus, and with that you’ll have captured the essential part.
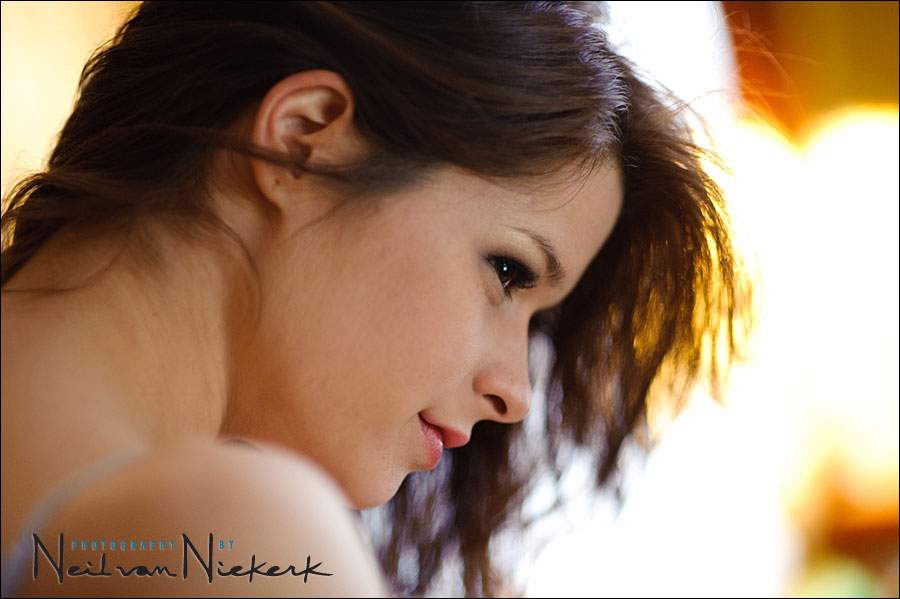
The images accompanying this post was taken during a photo session where the intention was to capture the mood and and a certain sexy allure. For this I wanted a very shallow depth of field.
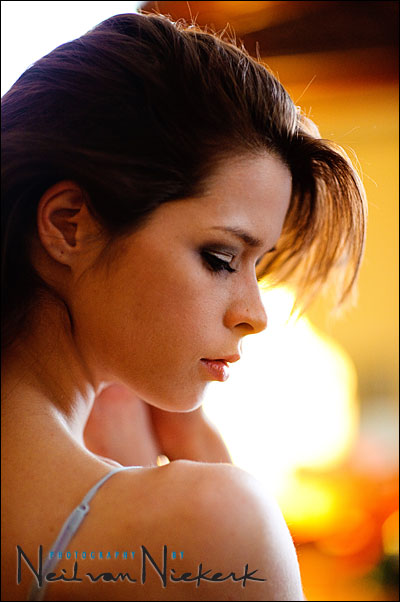
How much DoF did I need? Just enough. Meaning … f2.8 would’ve done it, as well as f2 or f1.4 or anywhere in-between. The way the photographs would’ve appeared would’ve changed a fair amount between f1.4 and f2.8 .. but neither would be incorrect for this scenario. I could’ve used any aperture there and still have been successful. But I wanted very shallow depth of field, so I settled on 1.4 which was especially helpful since I was shooting mostly around 1/30 – 1/160th at 1600 ISO during the entire session. All hand-held.
The point I am trying to make here is that with this scenario (and I’d happily wager that it is true for most shooting situations), I didn’t have to consult DoF tables. I just had to decide on a range of apertures that I should be working in. I wanted shallow depth-of-field, and would’ve achieved that effect with a fairly large range of apertures.
Also, keep in mind that DoF doesn’t have strictly definable edges. Meaning that if your DoF tables of DoF calculator tells you that at f5.6 you’ll have enough DoF between the range of (let’s say) 1.5 meters to 4 meters … that doesn’t mean that at 4 meters everything will be crisp, and at f4.5 it will be dreamily out of focus. It doesn’t work like that. It’s a gradual changing of how sharp something appears to be. This is important in understanding the effect of DoF and a change in apertures. It is gradual, and not step-like.
This implies that there is such a gradual change between adjacent 1/3 stop values for an aperture, that it becomes trivial to pursue the difference between f3.5 and f4 … it is a more practical method to decide on a range of apertures where you need to be, and find the appropriate shutter speed and ISO range … and then juggle those three balls (aperture, shutter speed, ISO), to give you practical and useful settings for your camera.
Obviously with a group you’re going to need more DoF, and then you’d most likely be working in the range of f4.0 to f8. If your subjects are standing (or sitting) in a way that their eyes are more or less on the same plane of focus, you could easily get away with an aperture of f4 on a full-frame D-SLR. But as soon as they are staggered, you’re going to need a smaller aperture. f8 .. or even smaller (which would mean a numerically larger number for the aperture)
With landscapes, photographers often need lots of DoF, but it depends on your artistic approach. You could as easily use a very wide aperture to isolate an element in that landscape. But, if you need greater DoF, you’ll be working in the f11 and f16 region. But at f22 and smaller you’re starting to hit a ceiling where diffraction starts to seriously degrade image quality. (But that’s another intense topic that you could investigate further with a Google search if need be.)
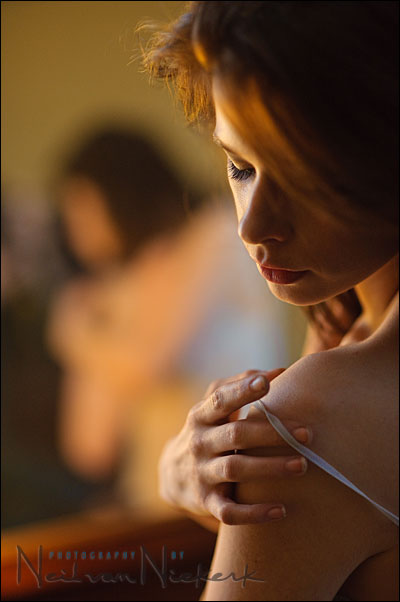
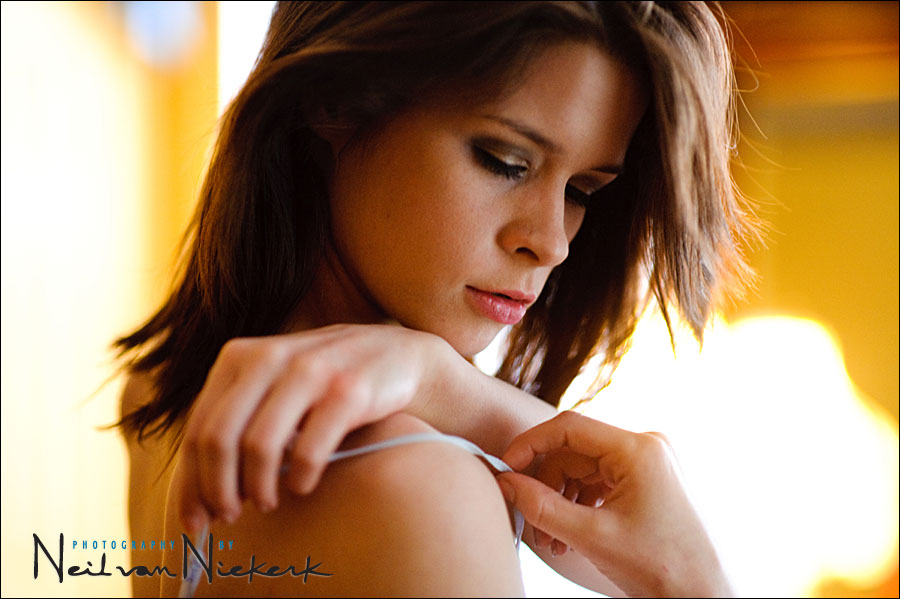
As a final aside, using shallow depth of field allows me to direct the viewer’s attention. Here are two images .. in the first image I focused on her eyes, and the second image I focused on her hands. For me, both images are equally successful.

Finally, to sum up this meandering post .. I wanted to indicate a way to free you up artistically from the anxiety of deciding on a specific aperture .. especially if you’ve been using DoF calculators. My working approach to decisions about DoF: Decide how much depth of field you approximately need, and then use an aperture in that range where you’ll have just enough depth of field. Self-apparent in its simplicity.
Great article.
I use the same approach and it works very well ;)
“Just Enough”
I like it!
Do you ever have to compromise your DOF with moving subjects? I find I like as little DOF as possible with most of my shots, but having to deletle so many good images due to focusing issues with moving subjects, I’ve started to stop down a bit. I’m still in the “range”, but not as much as I want. Does this ever happen to you?
With DoF, I shoot portraits at f4-5.6 on my D80, since that’s the about widest my lens goes. According to your post, this is “medium depth of field”. However I find I do get plenty shots where I thought I had focused on their face, recomposed, but found their face blurred.
Some of these are flash filled, using ISO 200 and 1/60 at 22-30mm. I assumed this was fast enough for handheld, so what am I doing wrong?
Wonderfully put Neil! This is a technique I”ve often wanted to explain to people but could never phrase right. Now I can just send them here.
Great post Neil, thanks.
I’ve been wrestling and exploring depth of field since I retired my slow do-everything zoom lens and moved to fast primes on my Nikon. Depth of field can be a pain as you’re trying to chase a fast moving toddler around and I find I need the fast shutter speed to stop the action so wide apertures are necessary.
As a bonus the wide apertures create images with much more zing as the subject is isolated from the (hopefully artfully blurred) background.
There’s also another issue in that depth of field increases as the subject’s distance from the camera increases (hyperfocal distance?). On more than one occasion I’ve taken a tightly cropped 2 or 3 person portrait, checked the playback and found that one of the faces is a bit soft. I find that if I take a couple of steps back I get more latitude in my depth of field even using f2.8. The 1:1 zoom on your LCD is your friend when it comes to portraits with shallow depth of field.
I’ve also found that turning the autofocus to single zone or going manual helps as well. You need to control what’s being focused on otherwise you get sharp ears or chins and blurry eyes.
To get a feel for how irrelevant (or arty) depth of field can be, just watch any prime time TV show and watch how the camera-person uses depth of field to assist with the storytelling. It’s especially apparent if there are 2 people talking at different distances from the camera. Only the person talking is ever in focus and it’s seamless the way the focus moves from one to the other in shot.
Understanding the limitations of shallow DoF is quite quick to learn and by regularly comparing the picture on the camera’s LCD to your downloaded pics you should have a grasp of it in no time. Don’t be afraid to experiment.
Very useful !! welldone i learn a lot more now. thanks!
Very pleasing images. I would love to know what prime you used, since you noted 1.4? The scene has a feel of tungsten lighting. Can you mention a little about the lights and the wattage that you coupled with ISO 1600 or was that day light?
Much appreciation,
John R
Hi Neil,
I recently shot a concert with a f1.8 85mm lens and i knew that typically has a very shallow DOF but I was at a distance of about ten feet which i assumed the distance to my subject would give me a greater DOF yet I would get the left eye camera side tack sharp whereas the right eye would be soft.
Course didn’t detect this until post…Moral – don’t assume distance from subject will give enought DOF needed…
Harry
Neil
Very nice work, I really like #2 from the top.
I was wondering how you metered with your focus on the eye?
Did you meter first then compose for your focal point.
I set up my focal point and look at my in camera meter!
most likely here I would have used spot.
any help on this would be helpful.
Thanks
John
Thanks for this post Neil, it’s an excellent way to work and one I implement myself. By the way, I love the first photo in this post! The sharpness in the eye combined with the extremely soft focus which falls off so quickly from that point is fantastic. Not to mention the warmth of the light and softness in her face. They all combine to give a fantastic result!
Cheers!
Trevor
very good lessons
Neil” Nice to have your expertise and more simplified way of describing things..
One question” Do you use manual focus more than automatic focus? reason i ask is; I find that the auto focus does let me down at times and am more incline to wnat to use manul so i am in controll in focusing where i want it to be as you said for example the Eyes.
….Thanks”
Ray
Thank you Neil”
I need to test my Tamron lenses out a little more. I find that especialy the longer focal Lense 70mm x 200 Tammy f2.8 tends to pick the wrong focus when subjects are very close together.
I do know that some Lenses are better at auto focus. Overshooting is a good tip. It wont go astray and it is better to have more than two shots to choose from.
Love your work and as such as inspires me to want to keep on improving and to keep on challenging myself.
Cheers’ Ray
Hi Neil, greeting from Argentina! Really like your articles, great info.
I have a question, in situations like the last two photos (where you changed the focus from the eyes to the hand) did you prefer tu focus and recompose or select a diferent focus point?
I’m struggling with a 50 1.8 wide open on my D200 and don’t know if it’s better to use the more sensitive center point and live with the recompose technique or use the outer sensors that are less sensitive and, at least for now more, it’s slower to change for me.
Thanks! nicolás.
(sorry if my english is not great :)
Neil,
Related to the previous question, how would you go about focussing a photo where you have a very shallow DOF and yet your main focal area is in a corner of the frame, and there’s a high probability that using centre-point focus (or occasionally even one of the other focus points) and recomposing would cause softness in the specific thing you wanted sharp?
Many thanks :)
Martin
First: thank you so very much for sharing your knowledge and your way of reasoning.
Then my question. You made 4 groups: f1.4-4 f4-8 f8-11 f11-16.
Is it right to think that the same groups for a cropped sensor camera are
f1-2.8 f2.8-5.6 f5.6-8 f8-11?
Thank you again.
Enrico
Neil….This is a great article…..I just waanted to say thanks….
Neil, thanks for all of the advice and great help. Of all the sites I’ve read from, you’re the first to mention, and point out, that the plane of focus is not flat but curved, and even more so with a wider lense. This certainly helps when you consider the focus and recompose technique.
Hi Neil,
Your work is exceptional. It gave me enormous amount of confidence that I will be a better photographer when I first stumbled on you website last year. I’m so grateful!
.
[b]”I decide on depth of field by grouping my needs into three categories ..
– shallow depth of field (f1.4 to f2.8 .. or even f4)
– medium depth of field (around f4 – f8)
– lots of depth of field (f8 and deeper)”[/b]
I tell you, those categories made no sense to me when I first read this article (I use APS-C sensor camera). I was surprised to see f4 being categorized as “shallow”.
It appears that the DoF attained using a lens at f/4.5 on a full frame sensor camera, one would need to use an aperture of roughly f/2.8 on a camera with a 1.6X crop factor to reproduce the same DoF (using the same lens).
Question 1:
I suppose camera distance to the subject will be longer when using APS-C camera or is it assumed to be the same as for FF?
(SOURCE:
.
So, medium depth of field:
f4.0 – 8.0 (FF sensor camera)
f2.5 – 5.0 (APS-C sensor camera)
Had I not known this, (though with some doubt) I was going to try f5.6 on a group portrait. In one of these articles, Neil referred f3.2 as being shallow; I understand now how that would be so.
Question 2:
While using 50mm 1.4 @ f1.8 on FF one may need to be careful so as not to mis-focus at an opportune moment, is it safe of me not to worry much when applying the same setting when using it on APS-C sensor camera? (Let’s assume that the light condition is favorable)
Thank you Neil!
Thank you for responding.
…yes, that is what I was trying to ask.
I’ve noticed that I got many keepers at f/2.0 with 50mm 1.8 on 40D while some people (FF users I suppose) seem to avoid it during opportune moments in the church.
Hi Neil,
What is the trick to get focus on the eyes when people are wearing glasses? The AF always seems to catch the glasses and not the eyes when using shallow DoF.