Fitness photo session in the studio
There are always many other ways to light your subject, whether on location or in the studio. With Fitness photography though, you do want to show off the physique of your subject – and this does mean strongly directional light. The main light can be a harder / smaller light source, or even a larger light source such as a softbox, but generally you do need to go for directional light that skims across the physique of your subject. Flat lighting is going to be a difficult approach here. This previous article – Chiaroscuro lighting – shows another lighting setup that works here.
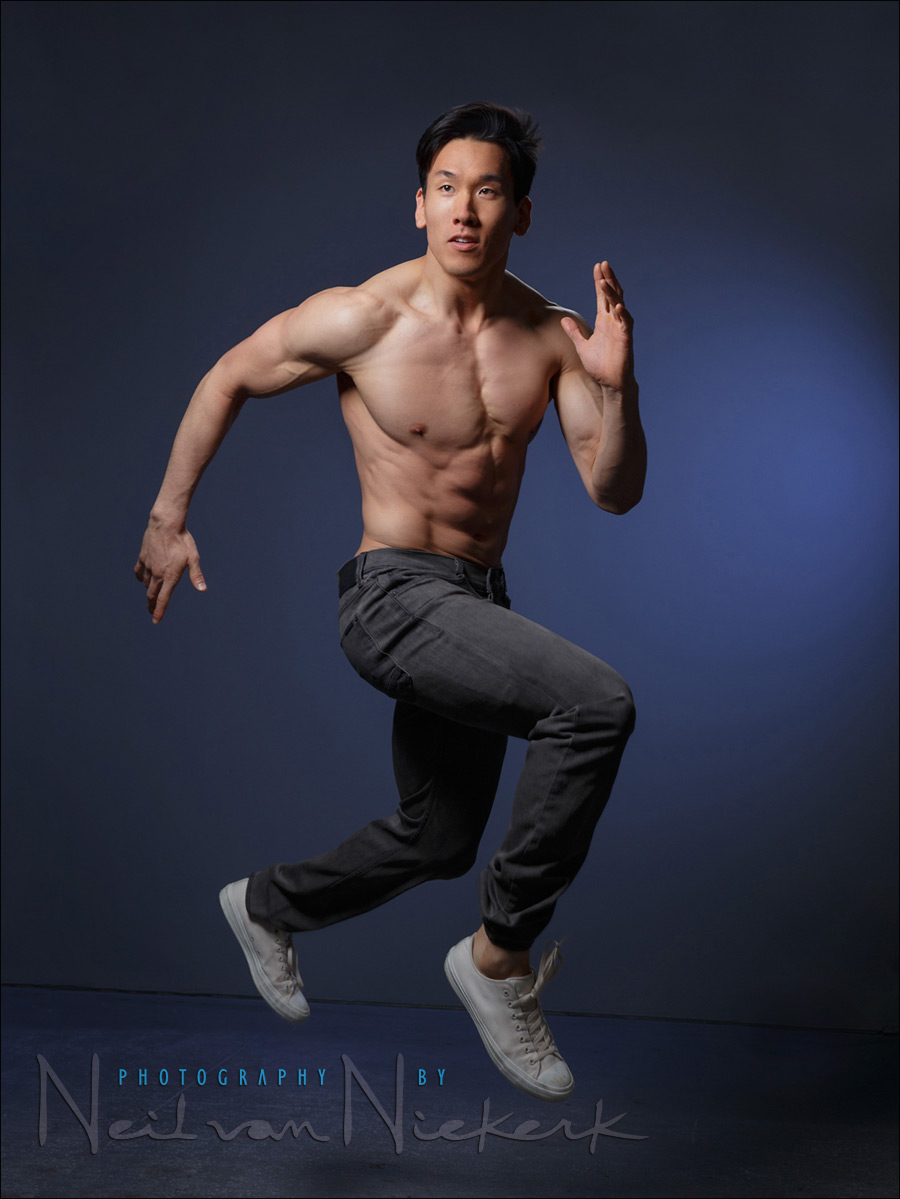
When photographing Matthew in the studio, we decided on a beauty dish with a sock (but same grid.) The beauty dish then effectively becomes a smallish round softbox. Then we added some other subtle lighting to have him pop out from the darker background. A rim-light helps etch him against the darker background.
But that’s just the basic approach on the lighting here – I think that as photographers, we always try and change things up, even if just a little bit. So what started as fairly straight-forward poses, turned into a series of photos where Matt jumped and leaped around, to bring in something more dynamic than just a posed portrait. Fitness photography needs that movement or implied movement – that tension in the photographs.
Lighting setup & gear used
- 1/160 @ f/8 @ 100 ISO
- Canon 6D
- Canon 24-70mm f/2.8L II (B&H / Amazon)
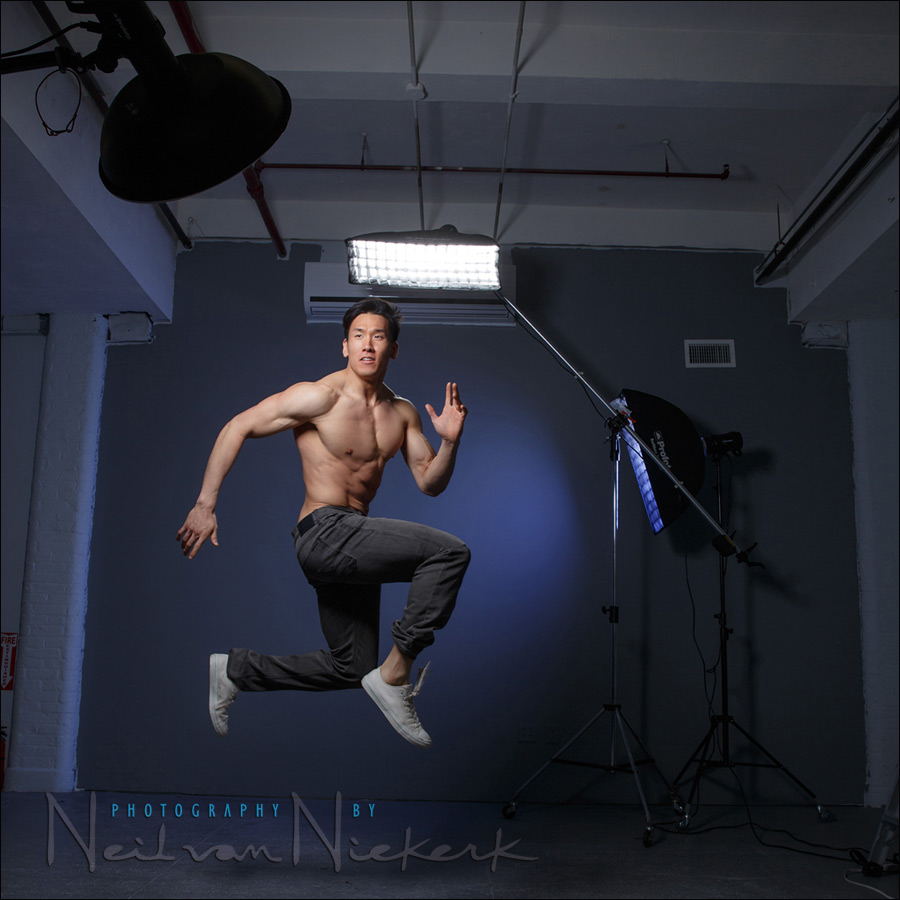
There were three studio flashes used – all Profoto D1 Air 500 Ws studio lights (affiliate).
The main light is the Profoto beauty dish with a 22″ sock (affiliate links), on a Manfrotto 025BS boom w/ stand & casters (affiliate). The boom helps in allowing a photographer free movement under the light without a light-stand blocking the way.
The rim-light from above was via a gridded Profoto 1’×3’ softbox (affiliate). Again, the boom is necessary to elevate the softbox and keep the light-stand out of the way.
For a splash of color on the grey wall, I added a blue gel to the studio flash in the gridded Profoto 1’×3’ softbox (affiliate) you can see on the right-hand side.
All this is then a fairly simple lighting setup, all with the idea in mind of showing off Matt’s physique.
But there is also a challenge in photographing a 6′ 2″ guy in the studio when he moves! We could use more space.
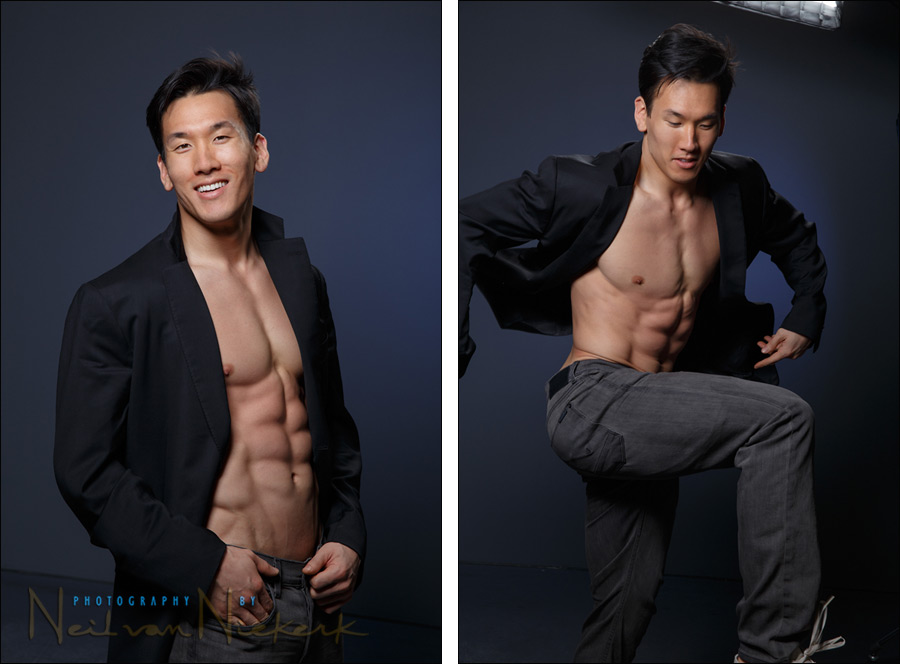
An example on the left-hand side of the previous sequence of photos, with Matt posing in a variety of outfits – at this point with just the jacket and jeans. Then on the right, the first jumping shot as a test – and then it was obvious we needed to get rid of the jacket. The jacket was just a distraction at this point from showing Matt at his best.
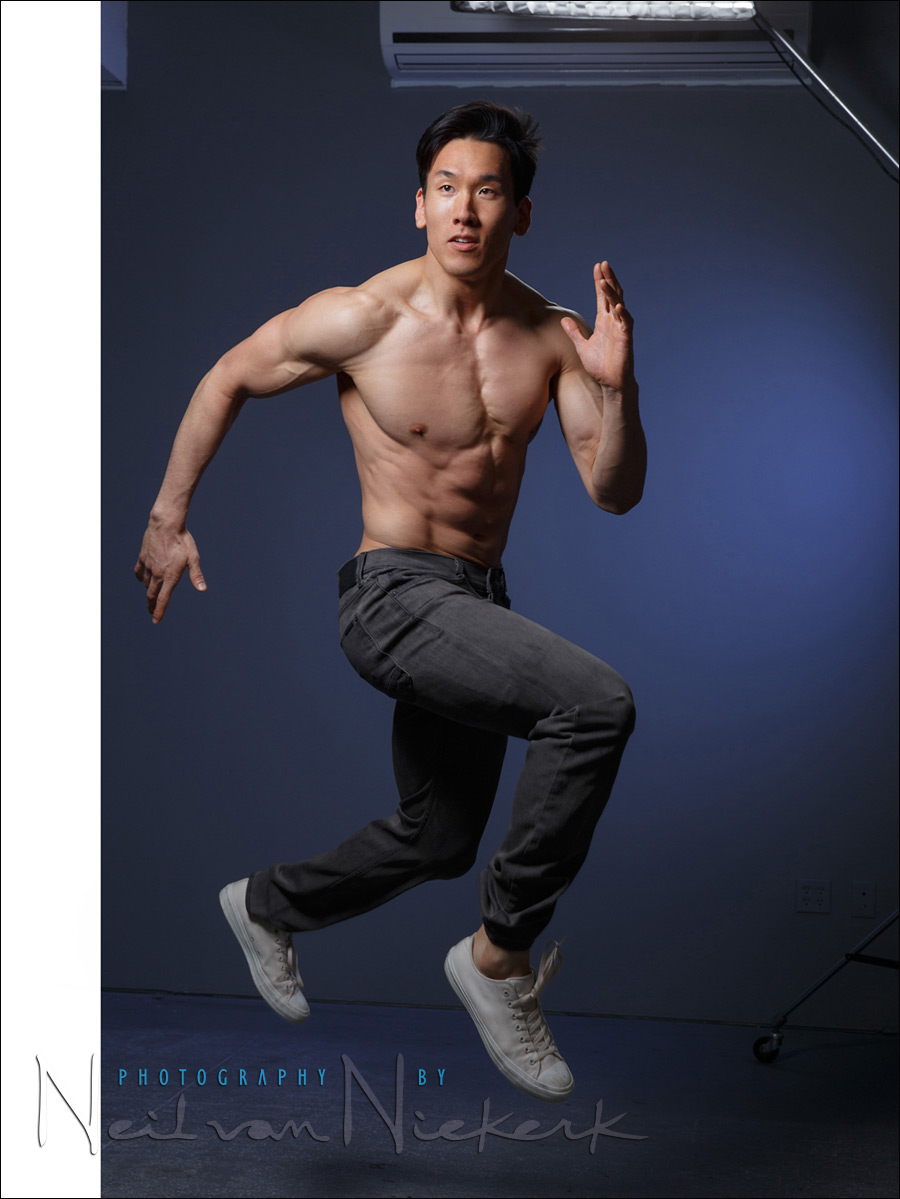
For the final selected images from this sequence of Matthew leaping, there had to be some tweaking in Photoshop though. I had to get rid of some of the clutter. It isn’t something I’d want to do on a regular basis – spending that much time cleaning up photos. I do prefer getting the images as close to perfect in camera, so this will mean a rethink on the lighting set up for the next time.
Studio lighting workshops
If you are interested in learning more about studio lighting, including lighting for headshots, I offer workshops on studio lighting. The workshops will be held at my studio space in NJ, and it has a wide range of studio lighting gear to play with!
Related links
- Portrait lighting setup – Chiaroscuro
- Dramatic portraits of kids – Lighting and intent
- Headshot photography – Clam-shell lighting setup
- Studio Photography Workshops
- More articles on Studio lighting and Photography
- Portrait photographer NJ / NYC
- NJ headshot photographer
A little bit of homework
How did I focus for a moving subject in the studio?
Hi Neil,
Any reason why you went with the 6D in this instance, given that you’re so fond of the D4s?
It is a quiet two-week period with less work, so I sent all my Nikon bodies in for CLA.
Thanks for reminding me…!
Thanks for sharing Neil, but can you let us know how you removed all the clutter in the background and expanded the background on the left-side? I’ve done this on a few occasions too, but had a real hard time because of the light on the background.
I expanded the canvas to make the composition more central. The blank area was filled in using the Content-Aware Fill tool in Photoshop.
The rest was achieved with a combination of the Clone Tool, the Healing Brush, and a little bit of Content-Aware Fill again,
No real Photoshop magic – just a few of the basic tools.
Hi Neil,
First excuse my English because I’m not English! Think you an Profoto Umbrella Small Deep can replace Profoto beauty dish? In many situations …
Mouricz … I don’t have the Small Deep Umbrella to make a comparison, but I suspect that even with the umbrella shaped like that, it would still spill light wider than a gridded beauty dish … but a beauty dish with a sock throws the light pretty wide. So I don’t know – it would have to be compared directly.
Thank you Neil,
I tend to believe that the answer is yes with sock throws! This may be easier to implement in some cases …
If not, what do you think of the performance of a Mola Demi 22 ” vs beauty dish profoto
Kindest regards
I don’t own a Mola Demi. I user what I have. I have what I use.
At some point we have to realize / decide we have enough equipment to do what we need to do the work. Ultimately it isn’t about chasing more gear, but using what we have. I have a big enough range of light modifiers in the studio that there are vastly more potential than I am capable of already. (But I wouldn’t say no to someone dropping off a freebie Mola for me.)
Regarding the homework: well, this is how I do it. No servo / AI stuff (too slow, too dark), just this:
– in a dark room / studio I use the YN-622 AF assist laser pattern
– I zoom out a bit and stop the aperture down a bit to get a safety DOF zone and space there she can jump in
– I prefocus while the model is still on the ground, using back-button focus, and then I take the thumb off of AF-ON
just my 2 $C :-)