Flash photography: applying the Sunny 16 Rule & Flash Guide Number
In essence, if you know the GN of your flash, then you could use (bare) off-camera flash to match the sunlight, without even metering!
There is a super-useful shortcut built into those two simple values: Sunny 16, and the Guide Number.
Now, I am pretty sure that when you hear mention of the Guide Number of a flash, you’re most likely switching off already, thinking that it is just an arcane list of numbers – different apertures against different power settings. But hang in there – this is very useful stuff to have a grip on.
And yes, since: GN = distance * f-stop
that is what the Guide Number tells you – the distance multiplied by the aperture is the GN.
But there is something immediately useful there in the Guide Number, which is hugely important. If you understand this, then you have an important key in your pocket about how to quickly match bright sunlight with your speedlight. It’s really simple:

How the Sunny 16 Rule and the Flash GN inter-lock
So let’s take this with an actual example (instead of just running tables of figures)
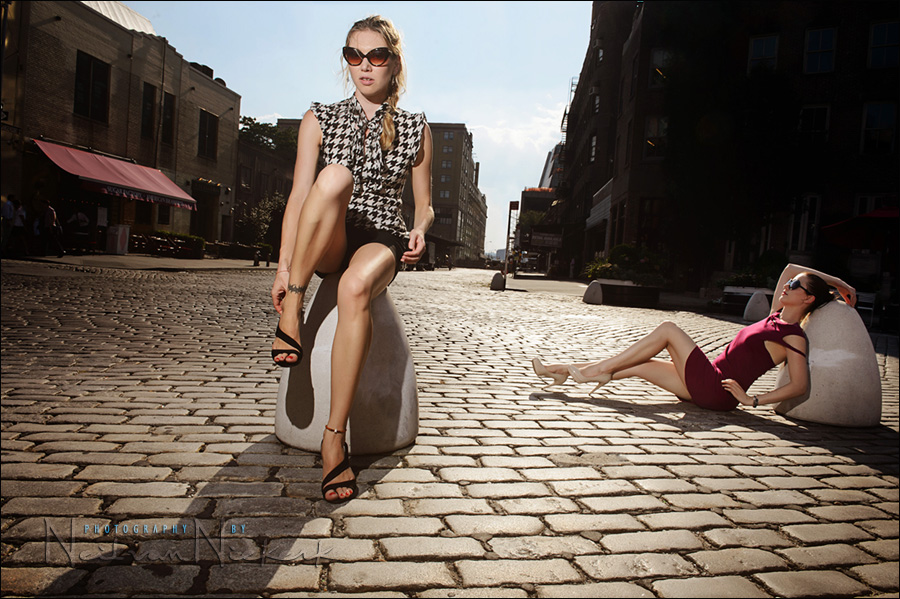
Let’s say you are photographing someone in shade – maybe standing under an arch or under trees. Let’s say the background is very bright – lit by bright sunlight. Or, as in the example at the top, two models backlit by strong sunlight.
You can use on-camera flash, or off-camera flash here. Same principle.
The background exposure would typically be: 1/200 @ f/11 @ 100 ISO. This is based on the Sunny 16 rule, where we shift the aperture and shutter speed up and down in correlation.
The Sunny 16 Rule says that for bright sunlight, our exposure would typically be: 1/100 @ f/16 @ 100 ISO OK … so now we have 1/200 @ f/11 @ 100 ISO. That’s the ambient exposure for the background. Your subject is shaded, or in the shade … and you need to dump f/11 amount of light on them from the flash.
We can put the flash in full manual output. This makes sense in bright light.
If the guide number is 110 … (which is very close for the Nikon SB-900 / SB-910 and Canon 580EX II and Canon 600EX-RT for the flash-head zoomed to 35mm.)
Now, with the GN = aperture x distance, then the Guide Number of 110 implies that at full power (with the flash-head zoomed to around 35mm), we need: 110 = 11 x distance
The 11 is the f/11 for the bright background, as implied by the Sunny 16 Rule. So now we see we have to hold the flash 10 feet away from our subject.
110 = 11 x 10
GN = f-stop * distance
The correlation is that straight-forward:
If your speedlight has a GN of (around) 110 when zoomed to 35mm,
then simply hold your off-camera speedlight at a distance of 10 feet to get an exposure of f/11 …
which in turn matches the exposure for the bright background.
This is a real world example. This is how it works, and how you can get to very good exposure for flash and ambient light, without even using a light-meter!
Summary
The beauty of all this is that you got to your camera and flash settings without even metering! You could of course finesse this – but you got to these setting which are pretty accurate, without metering. In other words, your first test shot should be on the money! No futzing around.
Related articles
- Getting the most out of your flash / speedlite / speedlight (model: Shawna)
- Tutorial: how to use the guide number of your flash (model: Shawna)
- Controlling bright daylight w/ direct off-camera flash (model: Molly K)
- Practical tutorial: controls for manual flash exposure (model: Hannah)
- Overpowering the sun with off-camera flash – what are my settings?
Photo gear (or equivalents) used in this photo session
- Nikon D4
- Nikon 24-70mm f2.8G AF-S /equivalent: Canon 24-70mm f/2.8L II
- Nikon SB-910 Speedlight /equivalent: Canon 600EX-RT Speedlite
- Nikon SD-9 battery pack /equivalent: Canon CP-E4 battery pack
A little bit of homework
If you take a test shot using this method, and your subject (lit by flash), is under- or over-exposed, what is your next step?

Improving the photograph by finessing it in post-processing
With the photograph at the top, it is obvious that the exposure for Anelisa wasn’t correct in-camera. She is a short distance away from Yulia – so she would’ve been under-exposed by the off-camera flash.
While I’m a strong supporter of the idea to get it right in camera (as far as possible), there are times when massaging a photograph in Photoshop, can greatly improve it. And ultimately, it really is the final image that counts.
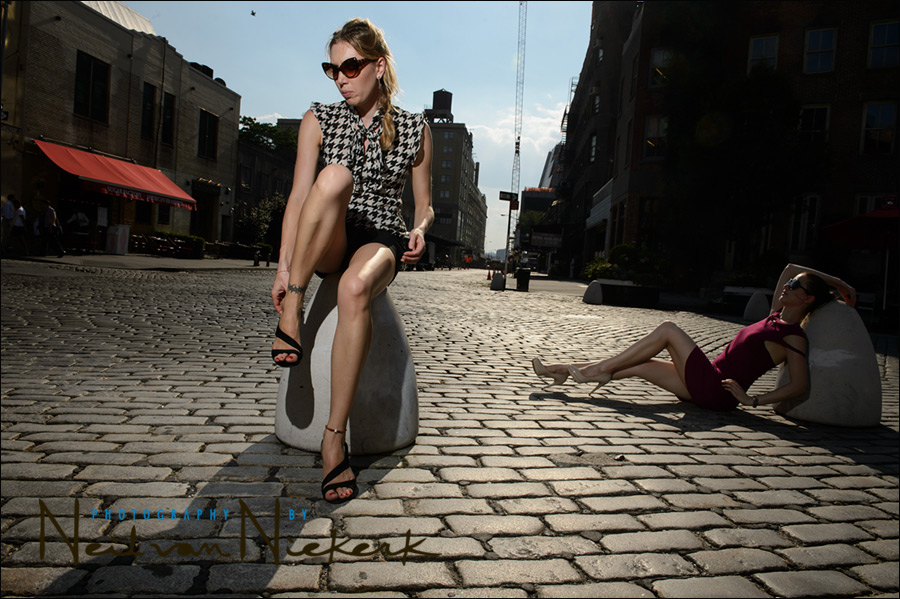
In deciphering how the photograph came about, let’s look at the straight-out-of-the-camera image:

camera settings: 1/250 @ f/11 @ 100 ISO
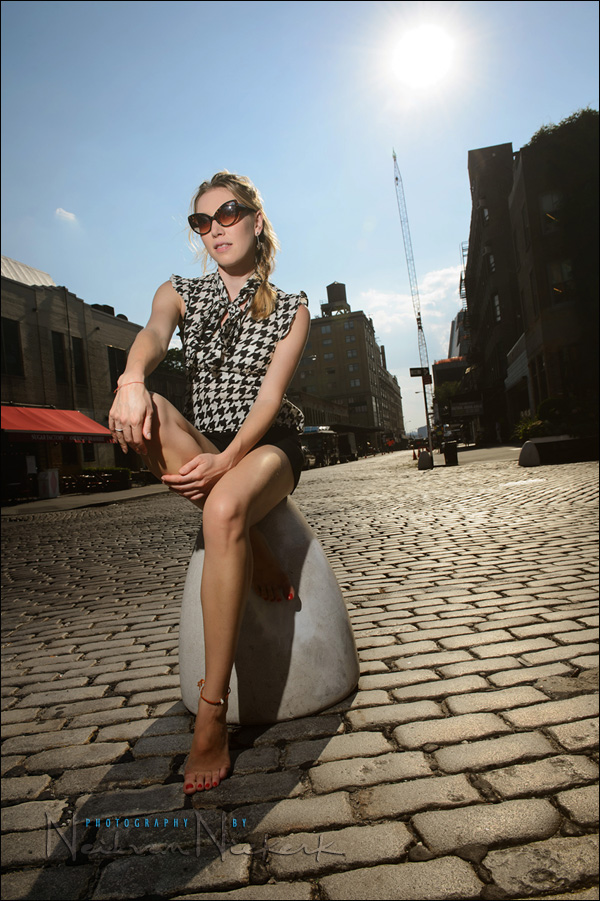
Here is the un-edited, un-adjusted image. It was one of my test shots during a photography lighting workshop in New York. I was still getting to my basic settings, and Yulia wasn’t quite ready yet – so her pose is not quite there, and her expression is unguarded. Yet, the image nearly hung together with Anelisa languishing in the background. But it needed some work in Photoshop.
But before finessing the image in Photoshop, I first had to do the major changes in the RAW file itself.
Counter-acting the strong sunlight with just one off-camera speedlight, we had to work with bare, un-diffused flash. So the lighting on Yulia was good. Anelisa though, was posing for another group of photographers in the workshop. But in zooming wide, and changing my composition, I could include both models. However, I didn’t want to disrupt everyone in the group for my own photographs, and have them now light my background subject. So, instead of using additional lighting on Anelisa, or just discarding the image, I used local corrections brush with the RAW image.
I pulled the Exposure up on Anelisa between 1 stop and 1.3 stops across her frame. Since I shot at 100 ISO, the increase in noise isn’t noticeable. It would be noticeable at 1600 ISO and higher, when viewing the image at 100% .. but at 100 ISO, the under-exposure has no impact at all on the noise possibly increasing.
You can see the effect that the flash, pointed at Yulia, still had on Anelisa, a bit further in the background – you can distinctly see the flash shadow on her legs.
So that took care of the brute adjustment – and the RAW file has better leeway for this kind of adjustment.
Then of course, I also did the usual changes in Exposure, Color Balance, Saturation and Contrast, in adjusting the RAW file.
Then, after generating a JPG from the edited RAW file, I pulled the JPG image into Photoshop:
– I swapped heads with another image; and
– removed clutter with the use of the Clone Tool and Healing Brush in Photoshop.
– I removed the crane, and the water-tower on top of the building.
– I desaturated the red of the awning on the left. The color was too strong and distracting.
– That pesky pigeon in the sky also had to go too!
that’s some awesome work. actually, both this post and the previous one (where you took a hand from another photo) have me wondering how much further do i have to go in my photoshop skills!
The result looks just great!!
So a little bit of LR and PS sturdust promoted the image from good to great, …. I dont know, why people sometimes only want sooc pictures. Well perhaps for the newspaper …
thanks for the making-of, all the best, Tilo
Anelisa’s pose is stunning and would love to see it as its own shot with some shallow dof…
It’s like magic! Great job Neil! I would love to do a video training session with you one day. – I will one day!
Hey Neil,
Great shot. Just wondering, if you were better prepared for this shot with the models, would you/should you, have used a CTO gel on the flash?
What’s your take on daylight flash fills against a more yellow/orange, sunlit background?
Regards,
M
In this instance there wasn’t a real need for the flash to be gelled for a warm available light. The sun was quite high up.
But yes, if you need to match the flash against the sunlight when the sun is much lower, then it makes sense. I’ve done so with a 1/2 CTS.
Neil,
This is a stunning photo. I wonder how long it took you to adjust the local exposure in LR? It would take me a good hour or two. PS is another order of magnitude more strenuous for me.
Homework:
If sunny 16 rule = ISO 100, f/16, 1/100, then in bright conditions you need max sync speed. So if MSS is 1/250 then you need to change other variables = ISO 100, 1/250, f/11
Well, yes and no. (And the modified Sunny 16 exposure would either be 1/200 at f/11 or 1/250 at f/10 at ISO 100.) It’s not so much about getting to the maximum sync speed, but about getting to a useful (effective) aperture, since the aperture, ISO and flash distance determines your flash exposure. At f/16, the flash needs to be closer than at f/11 — if your guide number tells you that the flash needs to be 10 feet away at f/11, it would need to be about 7 feet away at f/16 (110/16 = 6 ‘ 10-1/2″). That affects both flash spread/coverage and falloff. If your flash is fairly direct (within a few degrees) and you’re lighting a single subject, you may not care too much about the falloff, but you do care about the coverage. You can’t simply zoom your flash wider to make up the difference, since that reduces your flash’s guide number (the same amount of light needs to be spread over a larger area, so each point in the scene receives less light for the same flash power). (By the way, this was a lot easier in the cave man days when flashes didn’t zoom and you only had one guide number to think about.)
I say “effective” aperture because the T-stop (how much light is allowed through the lens) is more important than the actual f-stop. You could also take this picture with a 1/200 shutter speed at f/2.8 if you wanted shallow depth of field, but you’d need to use a 4-stop neutral density filter to do it. Your lens would be set to f/2.8, but the 4-stop filter means that you would have to use f/11 (2.8?4?5.6?8?11; four stops) in your flash distance calculation. (Of course, you would lose the environment, and Anelisa would have been rather fuzzier than normal.)
You’re correct – I should have more pertinently mentioned that the GN changes along with the flash spread, as you zoom wider or tighter.
But for a simpler explanation, and more easily remembered Go-To settings, this simpler version where you keep the flash zoomed to 35mm, works best.
Very simple and memorable explanation!
Really useful article. Is there a rule of thumb regarding how much light is lost from the flash when using colour correction gels?
Thanks Neil. I think I understand your thinking, and the math works out, but I feel I’m approaching this slightly differently. When you say:
110 = 11 x 10
GN = f-stop * distance
I would explain is as divide the guide number by the f-stop to get the best distance of the flash. The guide number doesn’t change, and once the ambient f-stop is established you’re left with distance, therefore I’d present the formula as such:
Distance = GN / f-stop
10 feet = 110 GN / 11 f-stop
I feel like this reworking of the formula is more intuitive based on what I’d need to work out in the situation. Agree or disagree…?
John .. *that* is the entire point of this tutorial.
This is probably the best “shortcut” using GN that Neil has produced thus far. GN has always been an abstract number for me, so I’ve avoided using it.
However, if anybody is still intimidated by the mathematics, Neil posted a different but equally useful shortcut for obtaining the distance value by letting the speedlight perform the calculation in an earlier blog entry. See the link “getting the most out of your flash / speedlite / speedlight” in his Related Articles section.
Great to see the extra info on the sooc and the processing to get the final image.
Great tip, and well illustrated.
Nitpicking a bit – those “conflicting” shadows of Yulia are a bit distracting to me :)
Great article. In answer to the homework: “If you take a test shot using this method, and your subject (lit by flash), is under- or over-exposed, what is your next step?
Move the flash nearer or farther in relation to your subject.
I use a 580ex ii speedlight and I understand the GN with flash head zoomed to 105mm at ISO 100 is 190. My question is how do I determine the GN for the other zoomed distances (24, 35, 50, 80)? In other words how did you know your 600ex-rt zoomed to 35mm has a GN of 110. Thank you for sharing such awesome information on this site.
Ray … it is in your flash’s manual!
I bought it used without a manual so I will download it. Thank you again for all you provide.
Here is: the Guide Numbers for the Canon 580EX II
Well, crap, Neil! I mean, yeah, the crane, the tower, the clutter…but the pigeon? I thought that was really the highlight of the shot, the reason for this tutorial, the existential…never mind. And what about Yulia’s other head? You do realize that it’s out there somewhere, thinking, “I’ve GOT to pull myself together!”
I’m just…well…I dont’ know what to say.
A great tutorial nonetheless!
The pigeon had to go! Sorry.
Useful stuff, thanks Neil. For those who hate maths! try the free ‘Photo Aide’ App for your iPhone v2.2 Mar 13 2015 simple yet powerful app that I stumbled across.
I’ve noticed that I’m using less flash since getting the D4 and D810 than on previous cameras. I’m happy bending the shadows more than before. The improvements in DR and colour depth on the recent cameras has truly allowed me to change the way I work, which is generally less disciplined and more fluent. This is great for fast flowing weddings. Add shots like the above for the odd set-piece and we can really cover it all now. Not a tripod in sight (part from the one holding the flash). :)
“The Sunny 16 Rule says that for bright sunlight, our exposure would typically be: 1/100 @ f/16 @ 100 ISO OK … so now we have 1/200 @ f/11 @ 100 ISO.”
2 Stops? ISO stays the same? Or is this supposed to be 1 Stop Shutter OR 1 Stop ISO changes?
Please disregard previous comment. I see what happened. We increased a stop then dropped a stop to match. Thanks.
Exactly .. and the higher shutter speed gives us more chance of stopping movement, and eliminating camera shake.
With the wider aperture, our flash also has more reach – i.e., more distance for the same power.