Flash Photography Techniques
The best flashgun? ~ Flash brackets ~ Off-camera flash
![]()
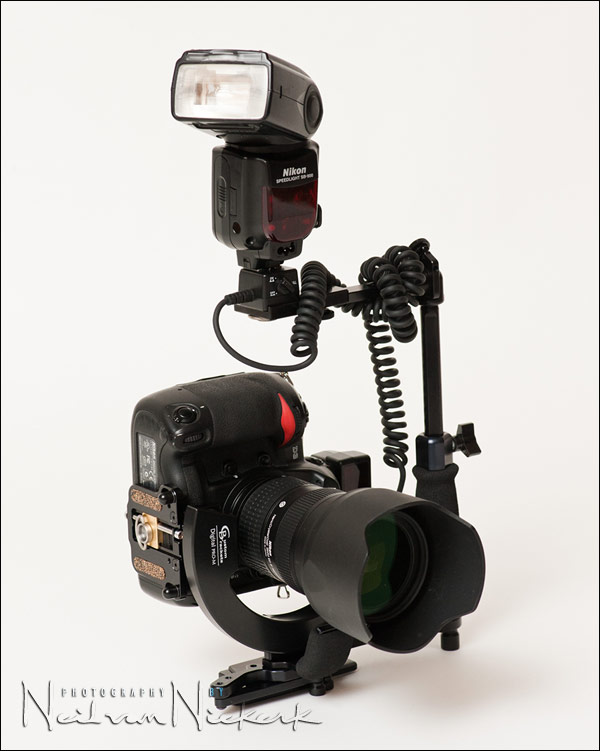
Using a rotating flash bracket
Rotating flash brackets are (cumbersome) devices attached between the camera and flash, which enables the flash to always be over the camera. Since the flash is always overhead of the camera with a flash bracket, regardless of whether you’re shooting horisontally or vertically, there is no sideways shadow. This is especially important if you use direct flash to some extent, or a flash modifier on your camera.
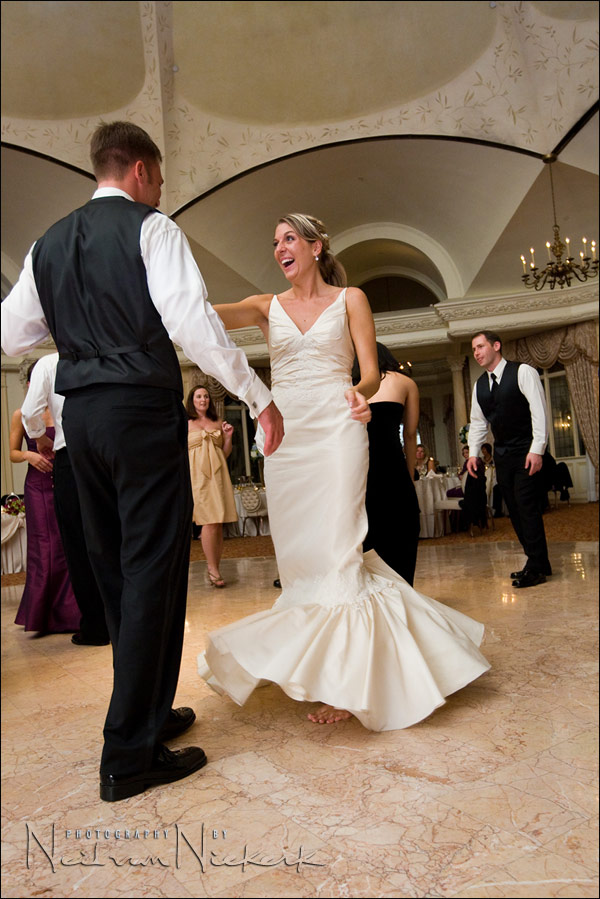
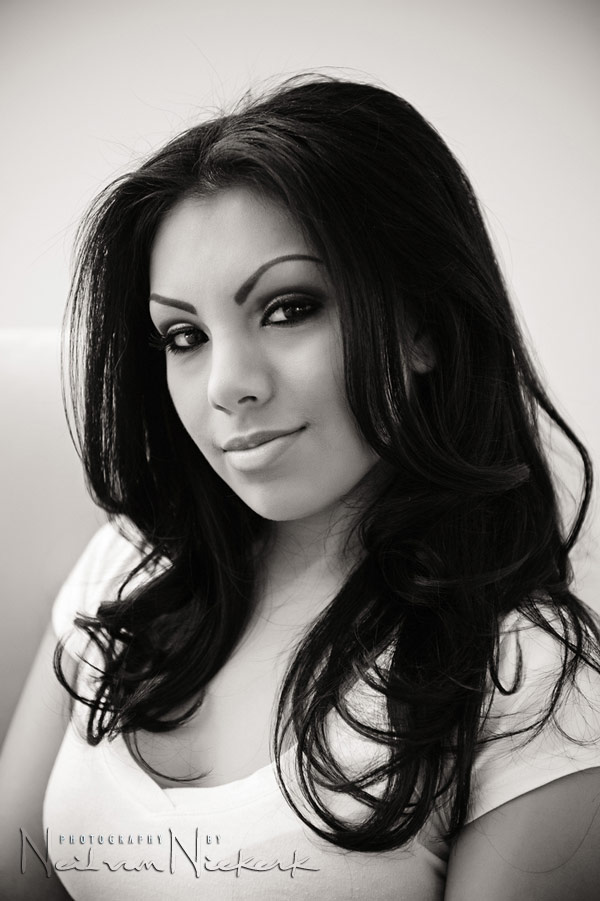
With most of my wedding photography indoors, I get by without a flash bracket. In carefully bouncing on-camera flash, I can get images such as this one below. No hard flash shadow detectable. Digital photography technology is steadily improving to the point where we now have cameras with fairly clean 1600 ISO settings, and very usable 3200 ISO. It is now ever more easy to get great results with bounce flash, and have all the light from the flash be indirect. With this, the need for me to use a flash bracket, has been greatly reduced. It is now possible for me to get vertical images like these, using on-camera flash, with no trace of sideways shadows …. because there is no light thrown directly forward from the flash itself. It is all indirect. This means there will be no noticeable flash shadow.
However, a flash bracket would still give you an advantage when you bounce flash such that all the light is indirect – and that is that the direction of your light source remainds the same between vertical and horizontal photos taken from the same position. This consistency in lighting can help.
The photo above is the Custom Brackets Pro-M rotating bracket (affiliate). Here is my review of this flash bracket.
Why use a flash bracket?
There are various makes of flash brackets with a variety of designs. With some you have to let go of the lens to flip the flash over with one hand. With other more elegant designs, you rotate the actual camera. I prefer the rotating flash brackets where the camera rotates with a deft flick of the hand holding the camera. There is a lot of variation between the different makes, that it is worth checking them out for yourself . For example, one of the other highly touted brackets by a different company, has such a clumsy design that it was near-impossible for me to use the zoom control on my lenses. So do check them out in person.
As mentioned, flash brackets are bulky and add extra weight to the camera, and these days I prefer to work without one. But they can help with the consistency of bouncing flash, and definitely do help in avoiding side-shadows when using direct on-camera flash is unavoidable.
Here is an example of what I mean by the side-ways shadow.
It is intentionally a snap-shot to illustrate this, so don’t judge me on this please! : )
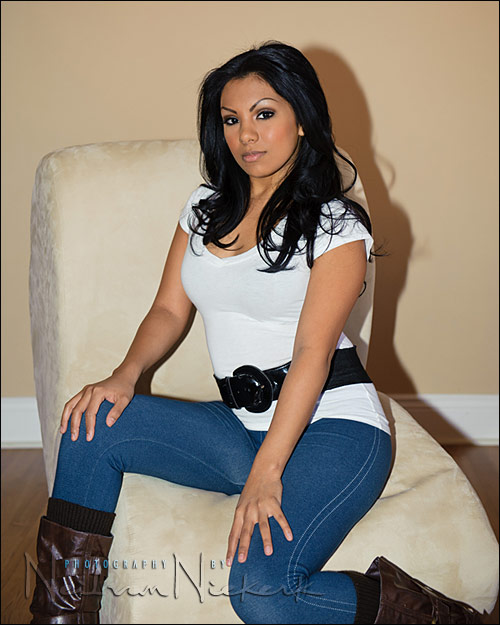
Now if you hold your camera horizontally, then the flash shadow will fall behind your subject, and would be less intrusive an element in the photograph.
A flash bracket isn’t entirely necessary in daylight, since flash will then mostly be used as fill-flash, and the direction of the flash is of less importance than when using bounce flash indoors. Besides, there is rarely anything to bounce flash off when working outside, and the loss in flash output because of bouncing would most likely render the flash light imperceptible compared to bright daylight.
Bouncing flash indoors vs. Using a flash bracket indoors
When I work indoors, I have in effect a large softbox with me wherever I go, by dint of the ability to bounce the flash behind me or to the side of me. My specific way of working with bounce flash, is most often with the black foamie thing with which I control the direction of my bounce flash. It works very well when shooting horizontally, or keep to a horizontal framing. But it can be awkward to change the position of the foam I am flagging my flash with, when I change the camera’s orientation. By now I am fairly agile with it, but you really are under pressure with a can’t-mess-this-up situation like the church processional at a wedding.
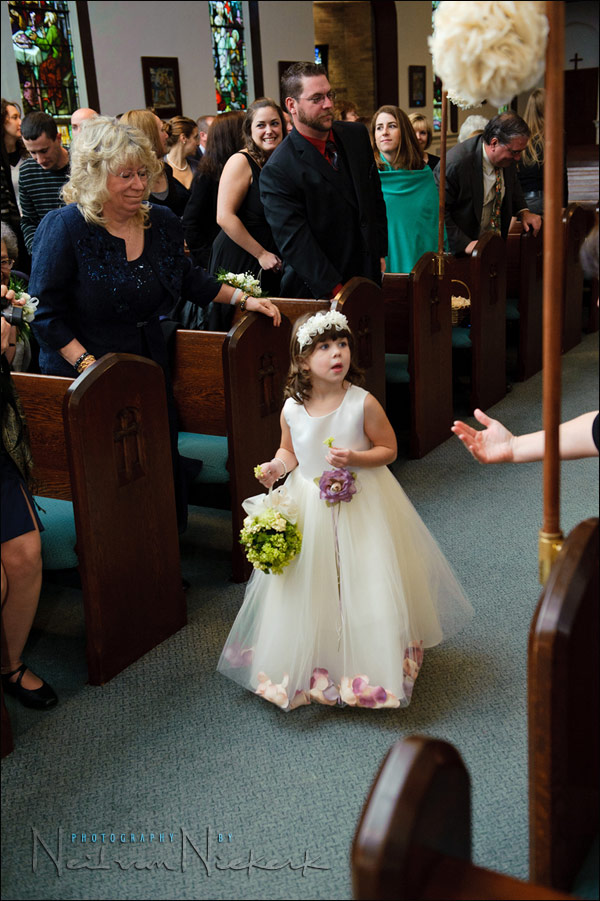
In this photo above, I wanted a vertical shot for this flowergirl coming down the aisle. The light on her looks fantastic in my opinion. The bounced flash appears as soft and directional light on her. Just beautiful. But if you look at the bottom left of the frame, you can see some direct flash shadow. Now, no one is likely to notice this unless closely scrutinizing the photograph for how it was lit. But for me … I know it should’ve looked just that touch better. The light should’ve been great over the entire frame.
I had fumbled the precise positioning of the black foam on my flash, and there is a small measure of direct flash to the edge of the frame. This is an example of where using a flash bracket would’ve made it easier to control the direction of light from my speedlight.
In the next two examples, the camera was rotated from horizontal position to a vertical position via a flash bracket. However, the direction of light remains exactly the same since the position of the speedlight, relative to the camera and subject, didn’t change.

Whether a flash bracket is necessary for your specific needs or style of photography … and whether the additional bulk and weight is something you’d be able to cope with, is something you have to decide on your own. There are advantages to using one that could help you.
Related articles
 next section: Off-camera flash photography
Help support this website
If you find these articles of value, please support this website by using these Amazon and B&H affiliate links to order your photo gear.
I also offer photography workshops and tutoring sessions. There are also video tutorials, which are online workshops on photography.
Join us on the Tangents Facebook group for further discussions.
Neil vN

Books by Neil van Niekerk

Just wanted to say this is a great site.
I purchased a flash bracket before I read your book and I find it cumbersome to use.
I have a few weddings coming up and I am trying to make some decisions. I am a supporter of bouncing but I think it is an acquired skill. I have all the technical information however just lacking experience. I don’t know how you always manage to find something to bounce off so effectively.
Horizontal bounce I’m comfortable with but vertical I’m struggling with. Tutorial 12 there is a couple dancing (1st image) and you took a vertical shot. Did you bounce that or did the high ISO and direct flash combo make this work for you? I know you try to avoid direct flash at all costs so I expect you bounced it. Where did you bounce it? I keep forgetting that higher ISO can be a saving grace as you stated here. Perhaps I should work with that and be less concerned about brackets, etc.
When available ceilings that are low enough to bounce i do. But my go to is ock with Flashpoint on camera flash as the control. Been using Stroboframe brackets for 40 years. Used them on my Pentax 645 and now on my r6 mk2 and 5dmk4. Natural light that makes a big difference. Shooting events in black ceiling convention centers means good consistent flattering lighting and the bracket helps.
Zenon, indeed, I bounced the flash into the open reception room behind me. Exactly like that. No bracket.
Neil, as a new wedding photographer (second shooter), this is such great info. I get good result with bounce flash when there is a ceiling or wall nearby. I’m sorry to be slow, but I’m a little confused. How did the light bounce back on the couple dancing if the light was sent behind you into the open room with nothing to bounce off of?
Pam … here are several links which explain it thoroughly.
Using flash whilst holding the camera in vertical position can be a nightmare equally using a bracket can be a pain. Sometimes I find it easier to keep the camera in a horizontal / landscape position and then just crop for the vertical / portrait picture. Providing you dont need to big an enlargement this works fine.
Been there. Don’t do that anymore because by doing this you cut away 55% of the pixels. Essentially turning an 18 mp camera into an 8 mp camera.
I want to buy a model Digital PRO-M, but I’m afraid that it will interfere with flash trigger.
Will it interfere with hood for canon ef 50 canon ef 85?
How it will work complete with flash trigger (eg Phottix Odin), they will not interfere with each other?
I’ve been using the custom bracket Pro-M for a few years now and absolutely love it.
It certainly is cumbersome, however when shooting with my Q-Flash Trio I really don’t like putting it on top of the cameras hotshoe because of it’s size.
I would agree with you that most photography (in terms of weddings) can be accomplished very well without a flash bracket, however when inside a brides home, perhaps dimly lit when your flash is providing most of the light….I would be lost without my bracket. Those side shadows can really creep in when you don’t have enough working distance from your subject to the wall behind them.
Bouncing for me requires something I do not have, faster than 2.8 lenses and a camera that gives little noise if any at 1600 ISO and above. I use a 50D so shooting horizontally then cropping is not an option and give good images so when there is nothing close to bounce from, a bracket is my only option with a modifier on my flash for consistency and keeping those nasty side shadows at bay.
I personally use my Newton brackets all the time. They are quite small and light, protect the camera and lens and are very easy to use.
Newton is an American brand, a small one. I’m Dutch (Netherlands, Europe) and got the brackets directly from Newton. His site is quite oldfashioned but he is a very helpful guy and he strives for the best results, since the 70’s!
Before 2010 I tried a large Stroboframe but found that bracket too heavy, too big and downright unstable. Sold it after one wedding and got the Newtons after some research on the net.