
Headshot Photography – securing the tethering cable
When shooting in the studio or a fixed location, it makes a lot of sense to shoot tethered if you want your client to give input on the photos. With headshots in the studio, I run a tethering cable between the camera and the computer. This makes it easier for the client to see the photos, and adjust what they need to. Of course, it is slightly redundant if you use WiFi to transfer the images from your camera to the computer. But for faster transfer of RAW files, shooting with a tethered cable still makes sense.
Keeping the cable secure on the camera can be a problem. It is easy to jerk the cable, or step on it. Worse of all are the USB3 cables which easily wiggle loose. The solutions such as the JerkStopper (affiliate) only helps slightly – and it doesn’t help for a USB3 cable where the connector is relatively shallow, and the cable can swing around the jerk-stopper. I have to add a piece of gaffer tape to keep the cable seated. Not ideal, and definitely not elegant. It’s somewhat embarrassing to think that on a professional shoot with clients, I am using expensive gear held together with a piece of tape.
Then my friend Zach Sutton mentioned a device which instantly made sense to me – the TetherBlock (Amazon). It’s a plate that fits to the bottom of the camera, holding the cable secure. No risk of damage to the camera if you step on the cable!
Before we have a closer look at the Tetherblock, here is the pull-back shot of the photo above, to show the lighting setup.
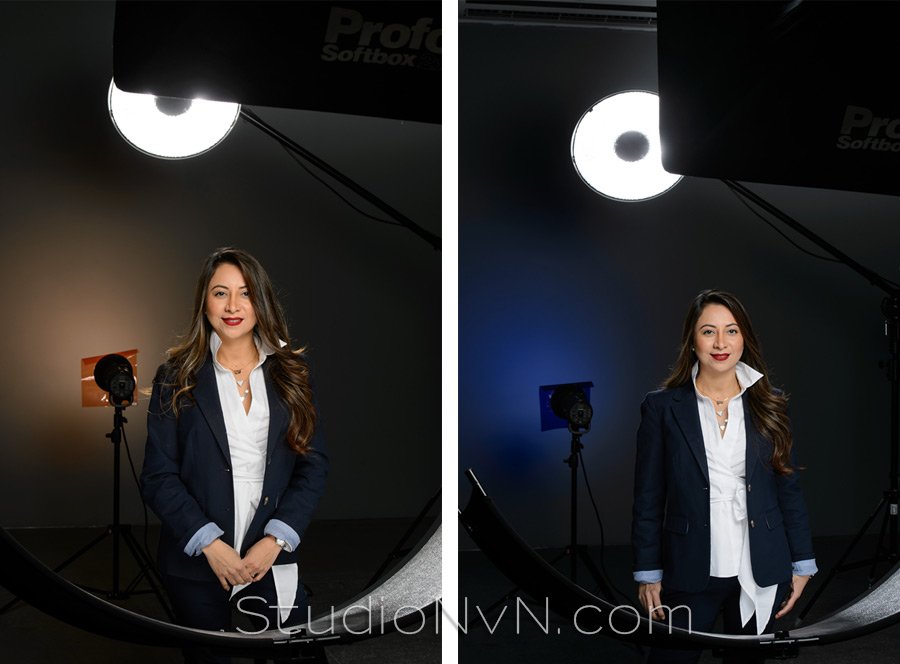
Photo gear (or equivalents) used during this photo session
- 1/160 @ f/11 @ 100 ISO
- Nikon D4
- Nikon 70-200mm f2.8 AF-S VR II /equivalent Canon EF 70-200mm f/2.8L IS II
- (3x) Profoto D1 Air 500Ws studio lights
- main light: Profoto RFi 2’x3’ softbox (B&H / Amazon)
- Westcott Eyelighter (B&H / Amazon) – for fill light from underneath
- rim-light: gridded Profoto beauty dish for the rim-lighting
- background light: Profoto 7″ Grid Reflector with a Profoto 10-degree Grid
- various gels as needed to change the color of the background
This is one of my go-to setups in the studio, based on clam-shell lighting. There is the main light (a 2×3 softbox in front of our subject, and the Westcott Eyelighter (affiliate) below to give fill-light.
The background can be left dark, as in the main photo above – or I can lighten it with a flash pointed at the back wall. In these two examples, the light is from a gridded flash, which I can then add a gel to change the color if a client wants. If I want the entire area is awash with color – and not just a spot of color behind my subject – I remove the gridded reflector and just point the bare gelled flash at the wall.
The tethering software I use is Nikon Camera Control Pro 2. I have the images download to a folder on the desktop where we then view the photos.
Using the TetherBlock

This is the Mini-B USB connector for my Nikon D4. Fortunately, the camera wasn’t damaged! But the cable was useless after this. I had to resort to load the images every so often via a memory card reader, during the shoot.
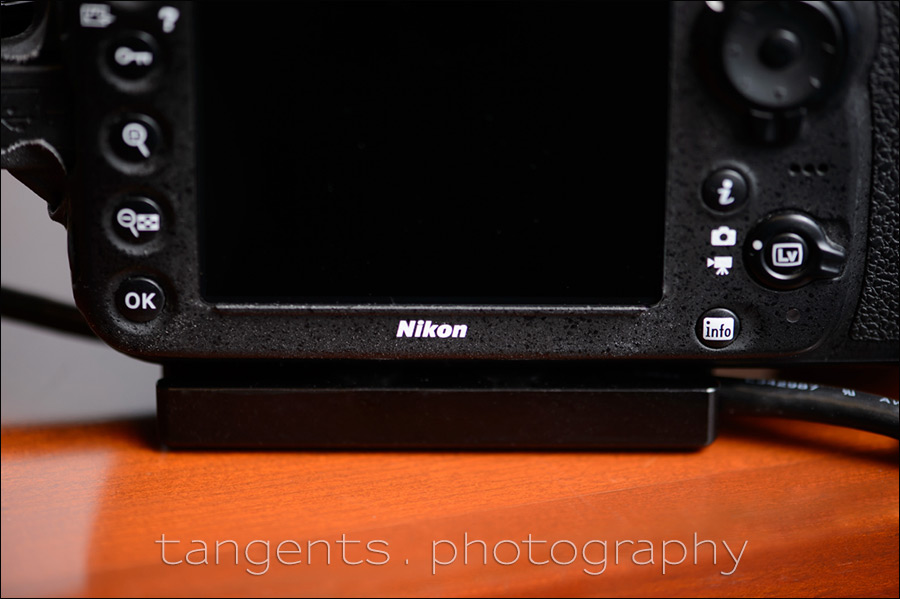


The TetherBlock (affiliate) comes with different quick release options for those who prefer to shoot on a tripod.
This simple device made all the difference for me. While it might seem a little spendy, for me it was well worth it for making my life easier doing a shoot. And it looks so much better than gaffer tape!
Related articles
- Studio portrait lighting ideas (RJ Harper)
- Headshot photography lighting setup
- Headshot photography – Clam-shell lighting setup
- Photo gear & logistics: Corporate headshots
- NJ headshots / NJ headshot photographer
That main image is just beautifully lit together with a very elegant pose – well done!
The simple ideas are often the best, and this looks great. Certainly a bit pricey for what it is, but most accessories are in the photography world, but not too bad for piece of mind.
I think it would be great if you could do something on Head Shots – 1-2 basic lighting setups, a couple of different poses.
David, put “headshots” in the search box above and you’ll find loads of articles.
Neil,
Looks like a nice solution to a common problem.
Not sure about the D4 but certainly with my D810 and D500 there is a plastic piece to be used with the included USB3.0 cable for the camera (also one for the HDMI slot).
This nicely keeps the USB 3.0 cable in place (only that included cable fits), I then attach that to a Tether tools active extension cable giving me 6 metres (1m Nikon USB 3.0 and 5m Tethertools active extension cable).
Having originally used the Tethertools cable, but then the camera start to complain unless I held the camera at a weird angle (and I mean hold it there) I could not shoot tethered.
This free (included in the box solution) together with the extension cable I already had has proved a perfect fit.