
Chuck Arlund is a Fashion photographer based in Nashville whose work constantly impresses me. As a friend, I occasionally have the privilege of getting to interrogate him on his technique. What surprises me every time then, is the simplicity of his lighting. His setups are rarely complex, but always effective. I feel quite fortunate that he agreed to a guest spot this week to explain more about his approach to on-location lighting. (Chuck also offers workshops and mentoring sessions.)
simple and effective on-location lighting techniques
a guest post by Chuck Arlund
Let’s talk about 2 lighting techniques I use a lot:
– a barebulb flashgun very close to subject,
– a small reflector
using a bare flashgun / light-stick
I like to get my flashgun very close to the subject – about 2 feet.
This is what I use – a monopod and a flash being triggered by Pocket wizards or Radio poppers, if needed.
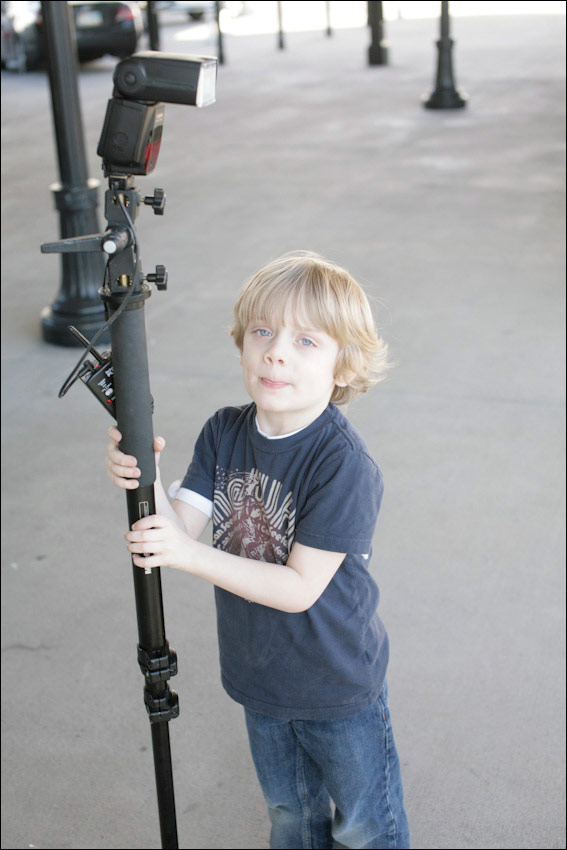
My 4 year old son who was my assistant for the day.
Here is a sequence showing my thought process for using flash.
The first thing I do is determine what my overall exposure will be.
Since I am using flash on a sunny day I will set my ISO to 100.
My sync speed is 1/200
So the only thing I need to determine is my Aperture.
If I was concerned with my depth of field I would use something like Radio Poppers to give me a faster sync speed that would allow me to use a shallower depth of field.
The reason for this is the sun is so bright … and to only be able to use my max sync speed of 1/200 means my aperture is usually something like f-13
The trend these days is to shoot with soft lighting.
I like my fashion styled images to be sharp and edgy looking.
A greater depth of field will give me that, so I am usually ok with a small aperture.
Here is the sequence.
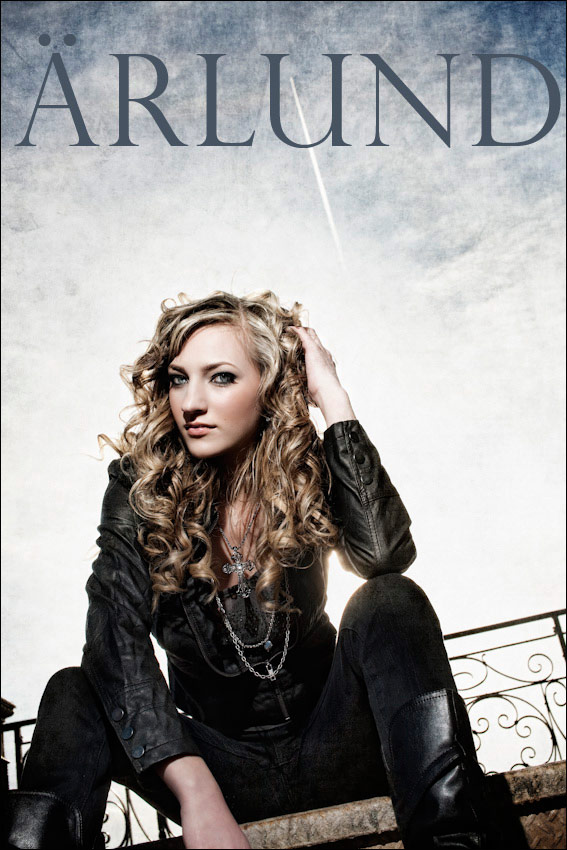
First, get the exposure you want. In this image I wanted the shadows to be dark.
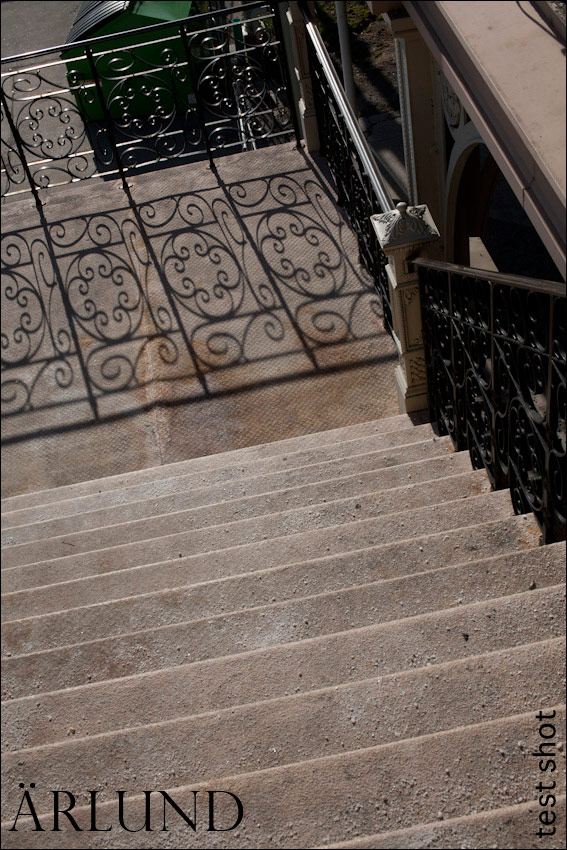
This image illustrates what the subject looks like within the exposure without added flash.
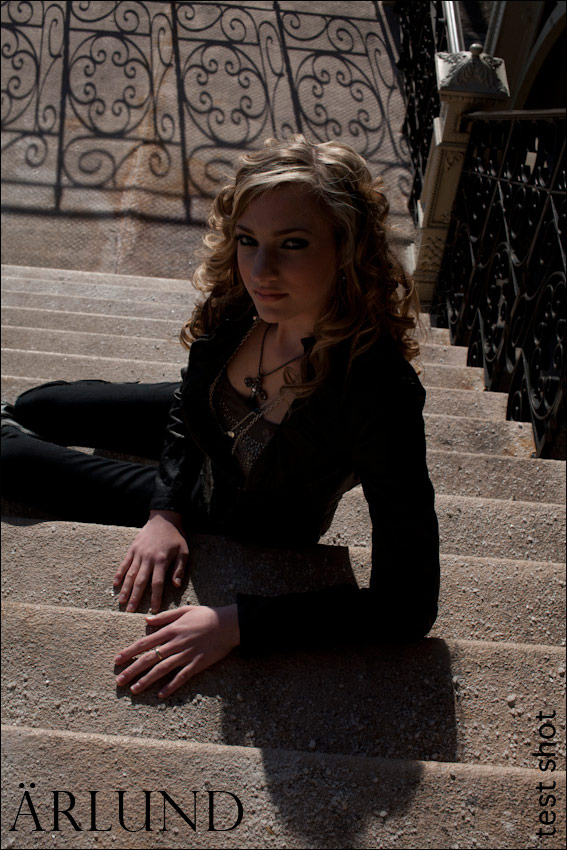
Now the fun part.
Dial in a power level in your flash and find the correct illumination of the subject.
What is the correct illumination? Well what ever you want. For me it is just slightly brighter.
I usually start with 1/8 power on my flash set to Manual.
I find I do not need to use TTL very much for the type of photoshoots that I do.
So let’s look at the process.
1. determine what your background exposure will be,
2. determine the power level of your flash to add to the background exposure,
3. determine the position of the light. I like to usually do from the front.
I feel front lighting with just a slight position to left or right is very flattering.
Look at the shadow under the nose for position.
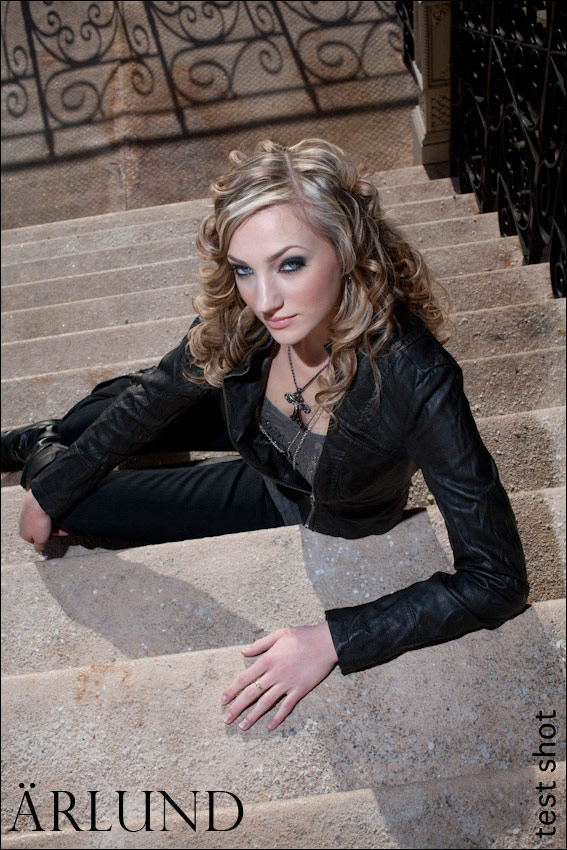
Here is another photo taken with the bare flash.
using a small reflector
What I love about the small reflector is it is sort of focus-able, unlike the large reflectors. It allows me to get much tighter light placement.

Here I am using a small reflector.
When shooting digital I found that using a neutral color. Silver or white gives me the best results. It is hard to get rid of warmth in an image so I do not shoot with any kind of gold. If I need to add warmth it is very easy to do but for some reason getting rid of it makes skin look strange.
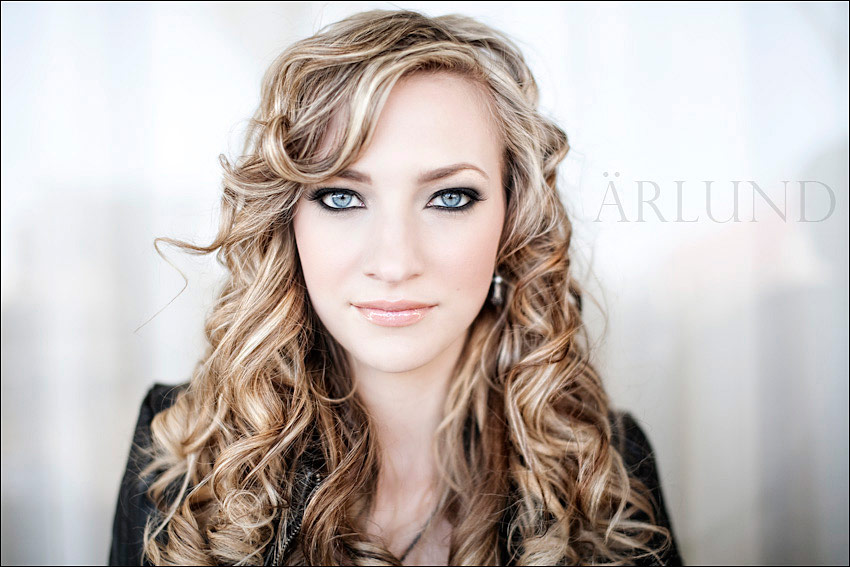
Here are some images I just shot using a small reflector.
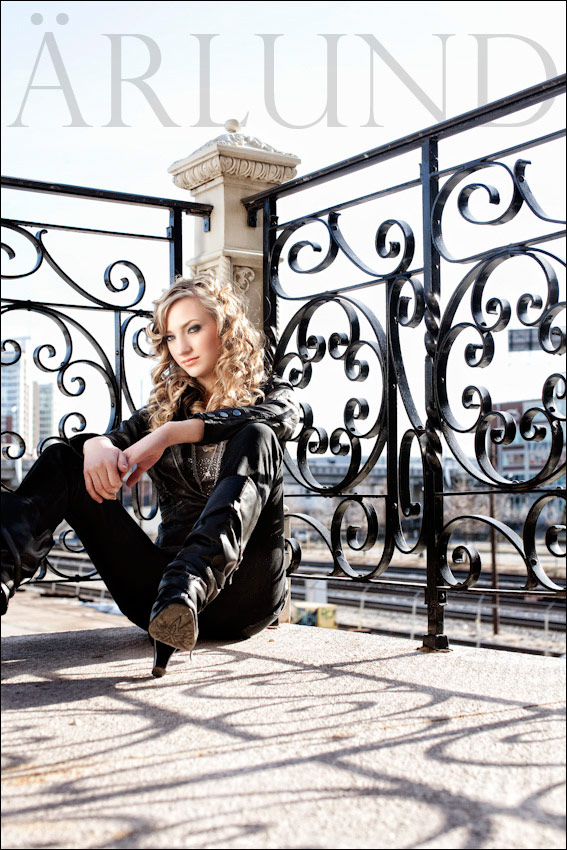
Here face is in complete shadow with the bright sun acting as a kicker off her right shoulder.
The camera’s meter reading here was perfect. There was enough black and white to give me a consistent Matrix / Evaluative reading.
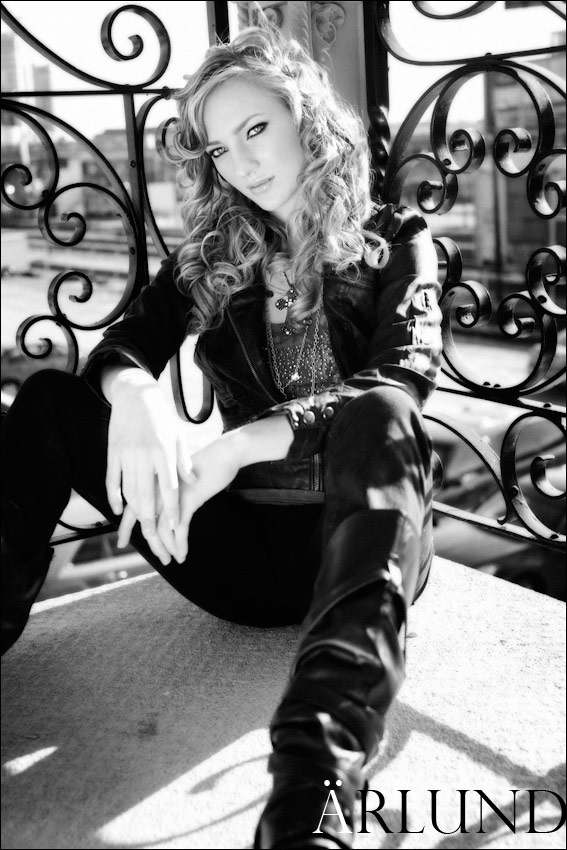
Here are a couple with the reflector providing more fill light unlike the ones above where I used it as the main light to illuminate her face.
The main light here is open shade using the reflector as a fill.
The reflector is popping a little bit of light on the right side of her to make her a bit more evenly lit.
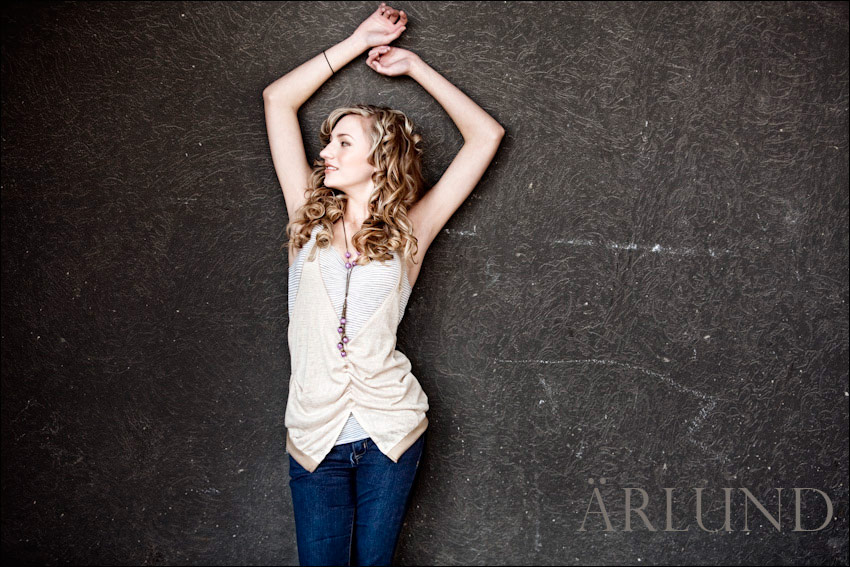
This is just classic Beauty Light, or front light.
The reflector is underneath her filling in any shadows that might happen from a light-source coming from above. Again this is natural open shade in front of sheer curtains on a window.
Thanks for the wonderful insight into your thought processes during a shoot. This kind of post is really very helpful for people who want to take their skills to the next level.
Simply great…I love the simplicity of the setups and how well it’s described. Well done and lovely images.
Thank you Neil and Chuck!
I am amazed at how simple a set up can yield such great images.
Can you tell us why the flash is positioned so close to the subject and what difference it would make if it were backed up a bit?
Secondly, I know Chuck tends to use his/your 50mm quite often. Were all these pics taken with that lens?
Thanks!
Brian
Gorgeous images and wonderful simple explanation!! I can’t believe you can get such nice portrait light from the bare flash! Can’t wait to try it.
Discovered your site a few days ago and I’m now a HUGE fan! Question: I have been trying to understand the relationship and practice of metering outdoors and using flash and reflectors. Do you always meter for the background/exterior light, and then put the model in? Do you meter for both, or do you simply meter for your setting, then just start adding light? Thank you so much!
Chuck n Neil – thanks a lot for great article with simple but effective techniques.
One question – you mentioned “If I was concerned with my depth of field I would use something like Radio Poppers to give me a faster sync speed that would allow me to use a shallower depth of field”
I am struggling a little bit with using Pocket wizards with my manual flash. If I use highter than max synch speed (1/250) wont it partially block my flash. How can i have a shallow depth of field in bright outside sun using Pocket wizard or radio poppers.
Thanks in advance.
-MP
These are the kind of techniques and articles that make photography such a joy. Simple, straight forward and supremely effective. Such gorgeous photographs with such an easy method. I am very grateful to Chuck Arlund for providing this information. I look forward to using the lessons described here.
Also Chuck, the photographs on your web site and blog are absolutely breathtaking. Beautiful, compelling work.
Regards,
Tom K.
Hi Neil & Chuck,
Thanks so much for sharing this information. I’m trying to back into photography after 30 year absence and I really need information like this for using small lights on location. Not like the old days, when you either relied on natural light with some flags and reflectors or mega bucks portable lighting!
Oh, and Nashville was my home-away-from-home. Eat at Sweats for me!
Hi chuck, amazing picture. When you use the flash, you control the amount of light by adjusting the flash power. How do you control the amount of light when you use reflector? Did you change your exposure setting from the initial setting that you get when you meter the scene? Did you meter the scene with the reflector on or off? What brand and size reflector are you using?
how about using a flash trigger like canon’s st-e2?
Chuck – Thanks for the answer.
Neil – can you please provide a brief over using pocket wizard with Q flash or Nikon SB900 in manual mode, and getting over the camera max speed synch bump.
Thanks in adavance.
-MP
MP .. here is the post about using the Q-flash at higher than max sync speed.
Great post. I actually got the chance to shoot and learn from Chuck for a day last summer. It really opened my eyes are basic and inexpensive set ups can give you amazing results. Like I told him that day, he saved me a ton of money!!! : ) I don’t know if he’s still doing those 1 day sessions, if he is I really recommend it. It will only make you better!!
Thanks Neil for the post and all the posts, love what you do for the photo community!!!!
Jim
so, do you meter after or before you have the model and the reflector in position? thanks.
Adi … Chuck answered that question in comment #6. I’ve indented Chuck’s replies now so that they stand out better.
Again a wonderful example of tonal placement and awareness using ambient and flash together :) When will people really understand that when we are doing flash photography we are really doing a ‘DOUBLE EXPOSURE’! First for the ambient light and then for the flash!
It is very nice to see that this appraoch shows it well and thanks for the expose Chuck and Neil :) Well done!
Hi Neil & Chuck!
Thx for this great article.
Chuck, don’t you use any light modifier, umbrella, softbox, lightsphere, etc…
You prefer a raw 24mm speedlight close to the subject rather than a modifier ?
Estelle
Neil,
Thanks for a great site, i have learned a lot and I recommend it to a lot of people!
I have a similar question to Estelle above… Everywhere you read about bouncing flash and never using a direct flash and yet Chuck seems to favor the approach of a bare flash (at least from this article). I know he uses lots of techniques in different settings, but it is interesting that he is so much in favor of a direct flashgun approach!
Great article Chuck!
Thanks,
Rob.
[sorry, posted my comment prior to seeing Chuck’s reply to Estelle]
Chuck and Neil. Thanks for the great article. Very simple explanations. And the great thing about this blog is that you guys answer reader’s questions, even if they are basic in nature.
Chuck, great “tutorial”… Easy to read, understand, and to see beautiful results. I’m passing this on to my students. Many thanks! J.
This was great information, thank you so much for sharing the details. I think the results are so good that it makes me want to rethink and simplify sometimes.
Chuck,
Will the bare flash lighting technique be as complimentary to subjects who have skin blemishes or other imperfections? And does it work as well with dark-skinned models?
Weird question about reflectors:
Everytime I try to use one like you did, with the sun reflecting off your reflector directly into your model’s face, I blind people. Is there some sort of trick to it that I’m not privy to? Or do you just tell them to suck it up and deal with it? Lol
Nice article. Love the simple and effective lighting. Thanks for sharing.
By the way, for those who are interested, the new PocketWizard ControlTL units also allow for high-speed sync flash.
I’ve been successfully firing my Canon flashes and AlienBees up to 1/8000th shutter speed (including rear-curtain shutter)
Clarifying my comment in #31 above – the rear-curtain sync capability in the new PocketWizards is, of course, beneficial only at slow-shutter speeds. I wanted to bring that up because I believe that for off-camera-flash, these PWs are the only units currently capable of supporting both (A) high-speed sync at ultra-fast shutter speeds, and (B) rear-curtain sync at slow-shutter speeds (great for stopping action at the end of the frame during low light events).
awesome, inspiring… thanks!!
I have the pleasure and benefit of being a member of the same photography club (Brentwood Photography Group) as Chuck. It was a wonderful surprise to see his work highlighted here on Neil’s site. Great job Chuck and wonderful images!
The photo shots are perfect. I tried to take picture shot with my family. And when I did it, its too ugly to look at. Now I know that this kind of job is hard.
Thread about this on Flickr: https://www.flickr.com/groups/one_strobe_pony/discuss/72157623514372584/
Just a thought – I know the lighting’s good, but feel the shots mainly look good due to awesome MUAs? People may be disappointed following these techniques and not considering the MU.
Chuck, thank you for taking the time to show your setups and examples, it’s like a breath of fresh air. I have always been a fan of strong directional lighting and this is exactly what I was looking for.
What do you pay your VAL? My neice requires gummy bears in advance.
Hello everybody.
What I think is essential is, in photographing women is a GREAT MAKE UP and a nice light. Without a good make up, there won’t be a good picture.
Have a great day :)
This is a great blog, simple straight forward, logical. Why don’t they ever demonstrate technique in art school? We need you Chuck to come rescue our class with a workshop- the professors there can all talk fine art postmodern theory like there’s no tomorrow, but when it all comes down can’t take a single decent image amongst them!
Thank you so much for such a great insight!
It just goes to show that your techniques and equipment don’t have to be large and complex if you know how to use what you have, to the best effect! The images are fantastic, and have such amazing lighting to them. I can’t believe it was all done with a single strobe and a reflector!
You’ve made me realise I need to master the equipment I have rather than feel the need to gain more! Practise and experiementing makes perfect!
Thanks Chuck!
Dude your work is amazing! Thank you for sharing. I am a friend of Kevin Focht and he had talked about you. Great Work!
Hey Chuck – I think it’s great that you take your kid with you to help. I’ve done the same. My son is now 13 (14 in April) and he shoots with me. He’s become a pretty awesome photographer and 2nd shoots with me at weddings and assists at other gigs. So… keep it up. Not only great bonding time, but he may end up building a similar passion!
Your work is great. Thanks for giving back to the photo community.
Chuck,
This is great. Ihave been a long-time believer and user of as simple a lighting setup as possible, so your technique really resonates with me. Thank you for sharing…
PS My son is now just 4 months old, but as soon as he is well enough coordinated and up and about, I’ll put a camera in his hands ;-)
Thank you for sharing your amazing but easy to follow skills, both you and neil have great skills in simplifing something that looks complicated.