progression of an idea during a photo-session
This post was going to be something entirely different – a mini-review of an Elinchrom Ranger Quadra Set that I got hold of to try out. But a key part was missing. Without the Skyport that allows you to control the output of the unit from the camera itself, a review would be less useful. Having booked Priscilla as our model already, and my friend Richard along to assist, we decided to just go ahead and have fun with a photo-shoot anyway …
So I took my Profoto AcuteB 600R kit (B&H), along with the Profoto beauty dish (B&H). Enough juice to over-power the sun. I thought of a cool place in Brooklyn to do the photo shoot. But then we got stuck in merciless traffic en route to Brooklyn via Manhattan, and the sky became progressively more cloudy. So no ‘overpowering of the sun’ to do with a high-powered flash unit. Eventually I decided we’ll just turn towards Jersey City and give up hope on getting to Brooklyn. A complete change in plans.
We looked around for something interesting to use as a backdrop along the waterfront in Jersey City .. but with the overcast sky, the light was very even and soft. Nothing really grabbed me during the quick test shots I took to see if there was something.
Then I noticed the way that the wall curved along the Path station. That metallic gleam only really stood out with that one section where it curved.

An available light test-shot with Priscilla proved that it would work as a simple but effective backdrop. Zooming to a long focal length on the 70-200mm lens, a tight composition gave an interesting, even slightly futuristic, look to the background.
settings: 1/500 @ f3.5 @ 200 ISO
Now all that was needed was to punch up the light a bit with the lighting kit. I used a sock over the beauty dish to create softer light. I also wanted the light to be fairly symmetrical. In other words, I wanted even light on Priscilla. So I shot nearly in line with the lighting setup.
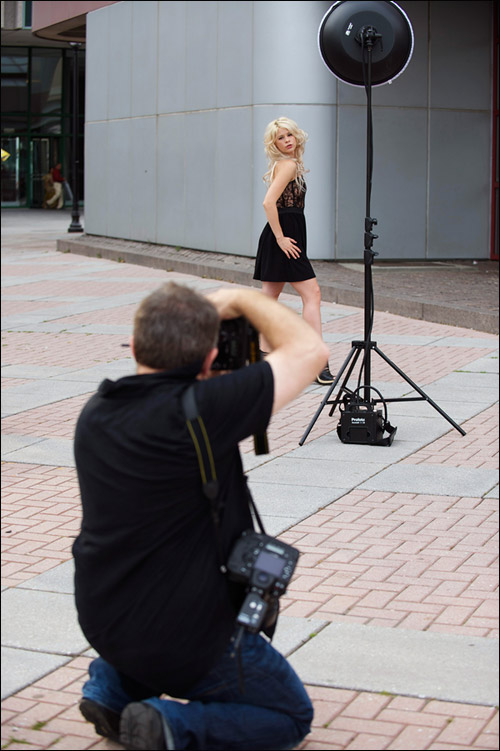
A bit of direction and explanation …
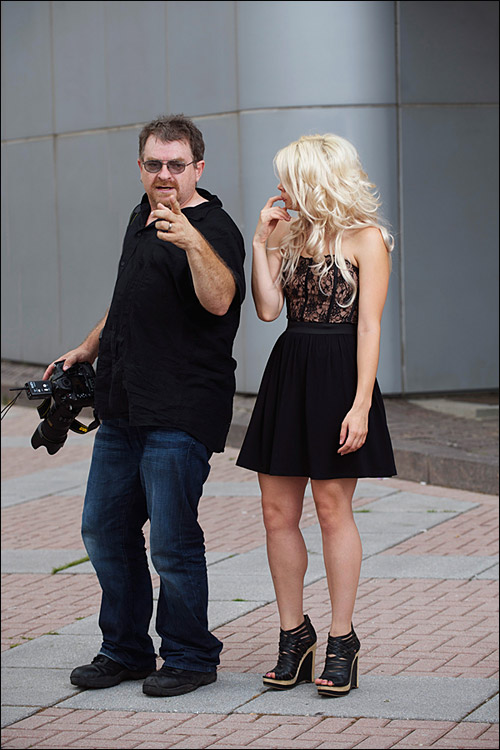
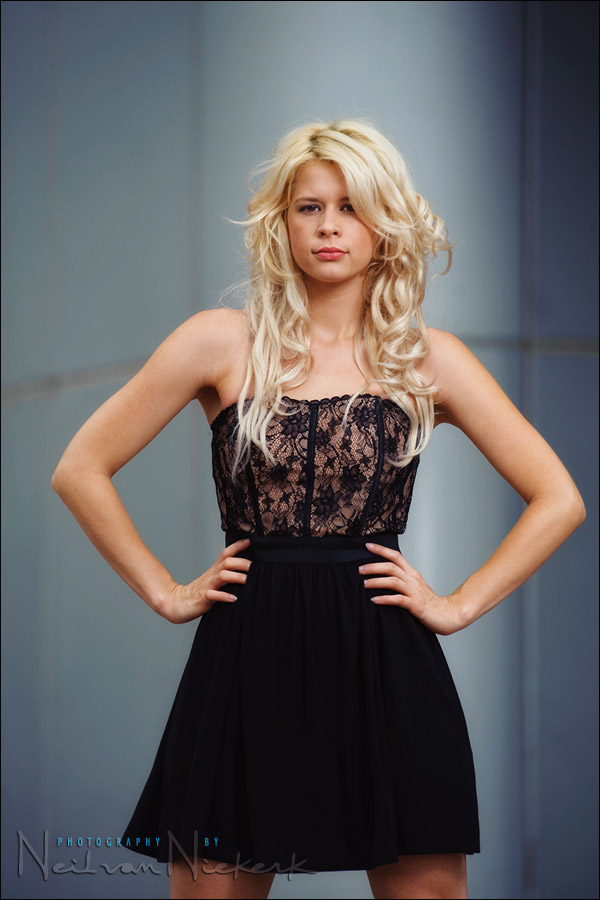
.. and then we have the final image (which is the one that appeared at the top.)
The final image that I chose to post here, is one where I specifically went for a symmetrical pose and composition. The highlighted curve behind her accentuating the central composition.
Final settings: 1/250 @ f4 @ 100 ISO
Lighting: Profoto AcuteB 600R kit (B&H), along with the Profoto beauty dish (B&H)
I used a diffuser sock (B&H) over the beauty dish.
As you can figure out from the settings in comparison to the available light photograph, this was taken at only 1/3rd of a stop down from the other image. But in the other image, her face was a tad under-exposed already. So the flash added somewhere around 2/3 to a full stop of light to the final image. Just enough to give some pop to the photograph.
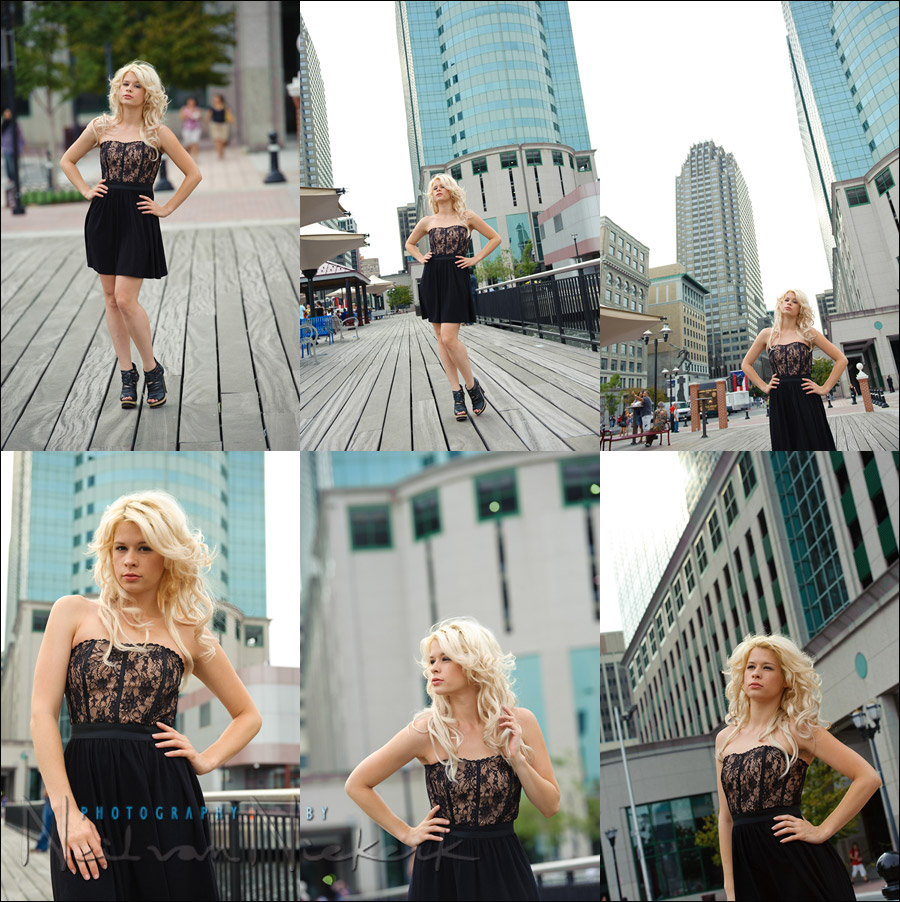
This way of working is consistent with my usual approach when doing on-location portraits. The image above was one from the first successful sequence. Scouting around some more, and playing around with a few ideas with Priscilla, we eventually ended up with quite a few images in other areas that too worked well.
Equipment used during this photo session:
Nikon D3; Nikon 70-200mm f2.8 AF-S II (B&H)
Profoto AcuteB 600R power pack (B&H); Profoto beauty dish (B&H); diffuser sock (B&H).
Manfrotto 1004BAC (B&H); Pocket-Wizard Plus II Tranceiver (B&H)
Hi Neil,one can (more or less) guess the equipment used: the Nikon trademark yellow strap is easily recognizable,and the same goes for the Pocketwizards on top of the camera.And yes,yet another fantastic set of photos ;-).I use now your “underexpose a bit the blackground” technique to great effect!
P.S.: Did you have a spare camera?
Neil,
Once you put a sock on a beauty dish, is there still a big difference in light style, compared to using a soft box, at the same light to model distance you were working at?
Thank you,
David
“If you want to be a better photographer, stand in front of more interesting stuff.“ (Joe McNalley quoting Jim Richardson).
It strikes me that a successful image, like the one above, requires great lighting, a great background and a great subject (model and pose). I have lights and I can find or improvise backgrounds but the model concerns me. My family and friend have only so much patients. Booking an experienced model is problematic. I’m learning and so I’ll be slow and struggle some plus, I don’t have a ton of cash to pay models. I really can’t I afford makeup, hair and wardrobe. I need the poor college kid version :)
Any advice on how to get started photographing models?
Neil:
I have been studying your latest group of photos and wonder what you do regarding “white balance”. This group has demonstrated your technique under various lighting conditions from under a bridge to open cloudy to shade and backlight. Also some reflective situations where light might have been tainted with ambient reflections.
Although Nikon usually does a pretty good job, I find that in low evening light there is occasionally a blue tinge. How do you check and compensate or do you clean it up in photoshop. Do you use a gray card or colour card?
Love your images as usual. Can’t wait for the book.
And no problems with photographing just outside a major commuter thoroughfare? The PATH police didn’t stop you or ask for a permit? What’s your secret? And do you get curious on/lookers along the way?
Hi, I was looking at your pictures and am impress with your work, I want to start my porfolio and I would like to know if your could help me with , with making a photoshoot?
Contact me at my email. Thanks
Hi Neil,
I noticed in a lot of your outdoor shoots, you mostly use 1 lightsource/ softbox, etc. What are your thoughts on using 2 lightsources outdoors in low light conditions – 1 main and 1 fill? Just curious. LOVE the site – btw.
Enjoyed the post and glad to see you are still using the profotos.
I havent had the chance to get mine in daylight yet, but do you need to push that 600 much with the light mod on it to overpower the sun?
I also noticed the 1/500 shutter speed with a wizard triggering it on the beginning shot.
Cheating the sync a bit?
I asssume so and it seems to blend quite well and as usual you eye for composition and background always produce some great results.
Ok, I see where the photos were leading to now if that 1/500 shot was available light. Sometimes hard to see details as I usually read your blog on my phone.