Photography composition – Finding the other angles
At the same photo shoot-out that the stunning Film Noir Fight Scene came out of, I again worked with a model, Jill. Her hairstyle and dress were strongly reminiscent of the flapper era. Therefore a more dramatic and sexy pose and styling was suited. And of course, dramatic lighting. For off-the-cuff / on-the-fly dramatic lighting, a video light is hard to beat.
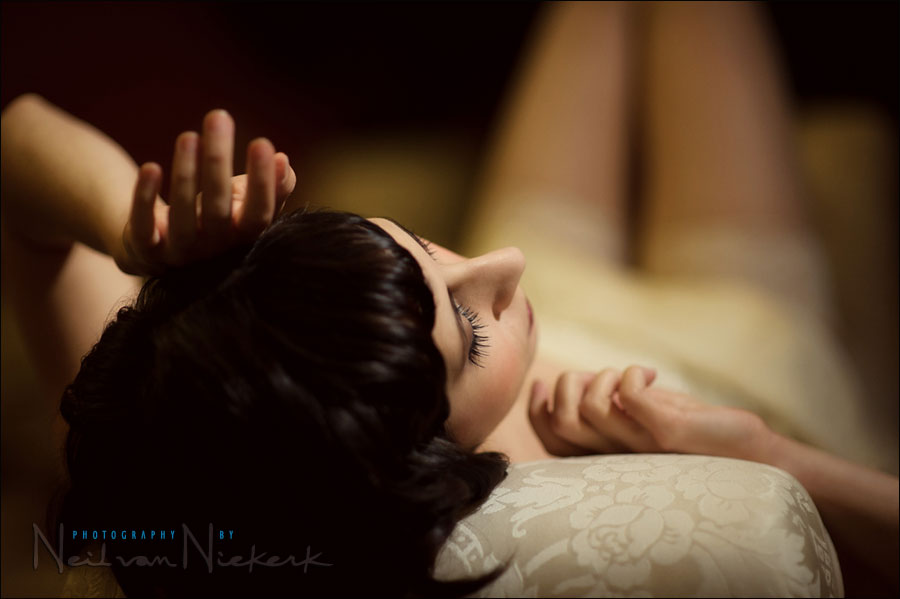
The photo at the top is the angle that my friend Peter Salo found, while I was standing on a short ledge, shooting from above. The irony here is that the first time Peter and I met, was at another photo shoot-out, and I was insistent he find a different angle than just shooting from eye-height. I even pushed him down on the ground to convince him. And here we are, a few years later, with him finding the alternate angle that I didn’t immediately see. Using the 85mm f1.4 lens wide open, gave that shallow depth-of-field.
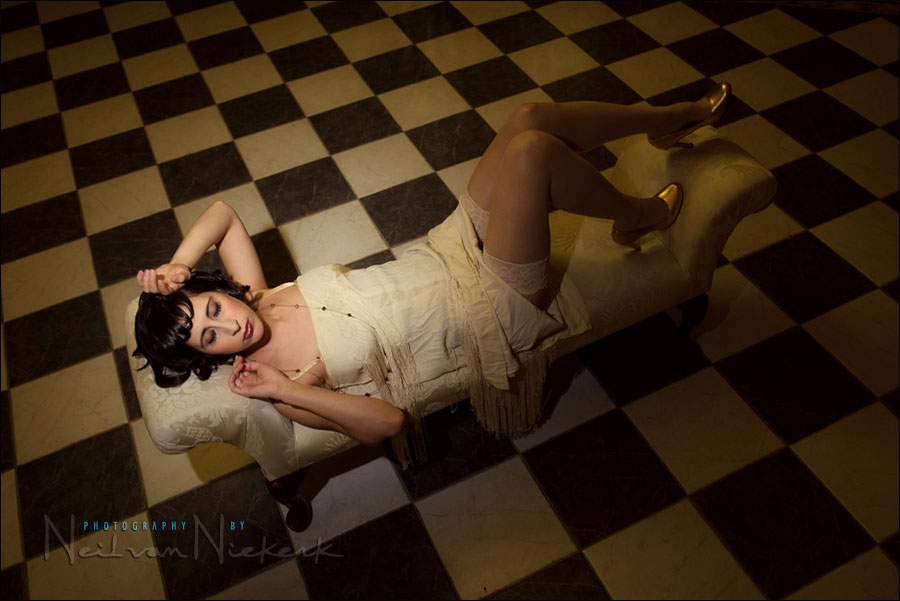
This second image (the wide angle shot from above) is the photograph that was easy to envision. The pattern of the tiles in the lobby immediately drew my attention as a possible idea. In the final image, the way the tile pattern recedes helps draw your eye to our model, helped by the spot-light effect of the video light.
Details for 1st image:
1/500 @ f1.4 @ 1600 ISO
Nikon D3S; Nikon AF-S 85mm f/1.4G
Details for 2nd image:
1/80 @ f5 @ 1600 ISO
Nikon D3S; Nikon 24-70mm f2.8G AF-S
Lighting & Design for Portrait Photography
Lighting & Design is a follow-up of sorts to Direction & Quality of Light. It’s a slightly eclectic mix, discussing the thought-process with various scenarios shooting portraits. The examples use available light, bounce flash, off-camera flash as well as studio lighting.
The idea is that in every one of the 60 sections, there is something to be learnt and applied, regardless of your level as a photographer or where you shoot – all shaped to form a cohesive narrative arc throughout the book.
You can either purchase a copy via Amazon USA or Amazon UK. The book will also available on the Apple iBook Store, and Amazon Kindle.
Both images here were lit with the Lowel ID-Light (B&H / Amazon), held aloft by someone else. The position of the light should be discernible by how the light falls on her, and how the shadow pattern falls under her nose.
Knowing the theme of this photo shoot was Film Noir, I didn’t use flash at all, but decided on only using the video light. Since I knew I might want something stronger than my usual LED video light, I decided on the more flexible and powerful Lowel ID-light (affiliate).
- More articles on using video light for photography
- More articles on composition
a resounding kick to my rear… Note to self *take the time to walk around the scene and look for alternatives*
Brilliant tips as always Neil
I keep trying this with the inanimate objects I shoot, and it generally works out that the better angle is the one you get to last!
I don’t shoot models often, but I will put this tid-bit in the mental locker for the next time I do shoot one.
Thanks for sharing.
Shane.
Great Work Neil!!!
I love these two pics. I’m so honored to have worked with you.
Please don’t take this as a negative. Please just take it as an opportunity to teach me and anyone else who was curious. On the first picture, which was gourgeous, since you were able to achieve 1/500th of a second at 1600, why didn’t you lower the ISO substantially and still have even a 1/250th of a second? Is it because shooting wide open at 1.4 you wanted a high shutter to avoid any shake? I know that you have to be really focused to get the great shot you did, so is that why one would choose that ISO and shutter combo?
Both pictures were beautiful. I can’t wait to start playing with my vid light.
Thanks.
Jerry, I have a tendency for camera shake .. my hands have a slight tremor. It’s a hereditary thing. So I prefer higher shutter speeds, even on stabilized lenses.
With the Nikon D3s, the 1600 ISO images are spectacular. Look at this article where I posted a 100% crop of a 2000 ISO image with no noise reduction applied. I can fix noise, but I can’t fix camera shake in my images. So I will always tend towards the higher shutter speeds where I can.