review: Fuji X100 camera – photo shoot with a model
First of all, for those who haven’t heard of the Fuji X100 (affiliate) yet, it is a beautiful retro-looking rangefinder-mimicking 12 megapixel digital point & shoot camera (with a fixed 35mm equivalent f2.0 lens), that gives remarkable image quality. That about sums it up.
For all those reasons, quite a buzz developed around this camera. Quite unlike anything since … oh, the Leica X1. Or the Olympus Pen EP-2. Or the Sony NEX-5. There was greater excitement building up around the Fuji X100 though than other cameras, specifically for its looks initially. And then when news hit about the incredible image quality, the excitement and interest became more substantial. It’s a hot item right now, and for good reason.
The reason why I bought this camera – well, the way I justify it to myself even though I have several large DSLRs, is that I wanted a Day Off Camera.
My usual day working as a photographer, is where I’m slinging heavy cameras around and running myself ragged. Or else, a working day is where I slump in front of the computer. Because of all that, I’ve felt this need to take a day off during the week. On this mid-week “weekend” day, I would just like to roam around New York with a camera and take photos, and have lunch and relax. But the camera shouldn’t be a heavy Nikon D3 with a zoom lens. That would just be too much physical effort again. (As it is, I have tendonitis in my right elbow from not carefully handling the big cameras with a 70-200mm f2.8 lens.)
So for a while now, I’ve been looking for a light-weight, top quality camera. My Day Off Camera. With the Fuji X100 (affiliate), I finally felt I might have it. A stylish camera that is fun to play with, and gives great images.
Using the Fuji X100 in a photo session
Before I even got to photograph a wedding with the Fuji X100, I had a brilliant idea for a review of this camera. I wanted to do a photo shoot with Anelisa. Now the twist here is that I wanted it to be a play on the idea that this camera is ideal for surreptitious street photography.
The styling of the Fuji X100 is like the classic rangefinder cameras which were the tools of the trade of the street photographers. However, I live in New Jersey. This land of suburbia and shopping malls isn’t exactly the kind of place where you can roam around the streets on foot with a camera, snagging images which are wonderful slices of life. Besides, street photography is tough. You have to pound the city pavements for months on end, looking for those interstitial moments where everything in the frame intersects just perfectly. It is long hard work building up a portfolio of street photography that doesn’t just consist of random boring snaps of stuff and people.
The brilliant idea was to test the Fuji X100 out as this inconspicuous and innocent looking, yet very professionally capable camera … by photographing Anelisa in a shopping mall in New Jersey. Doing this photo shoot without being noticed by the security guards and getting kicked out, would need some non-chalant moves by the photographer and model … and a camera that doesn’t draw attention. If you pulled out a big DSLR with a telephoto zoom and started to direct the model, it will surely be only a minute before security guards accost you and ask you for your permit and proof of insurance. Life in America.
Anyway, as I said, the idea behind the shoot was a tongue-in-cheek reference to this camera being this surreptitious street photographer’s camera. But in a New Jersey shopping mall. I know, I know, it’s not the same. But, just go along with the idea …
With this review of the Fuji X100, I again wanted compare the straight out of the camera (sooc) images with JPGs generated from an edited RAW file. In Bridge / ACR, I created a default for the Fuji X100 RAW files which bumps up the saturation and contrast more than the zeroed defaults of ACR / Bridge. With this review, I will note with each image whether it is the sooc JPG, or is a JPG generated from the RAW file which I had adjusted.
Fuji X100 – gallery of images
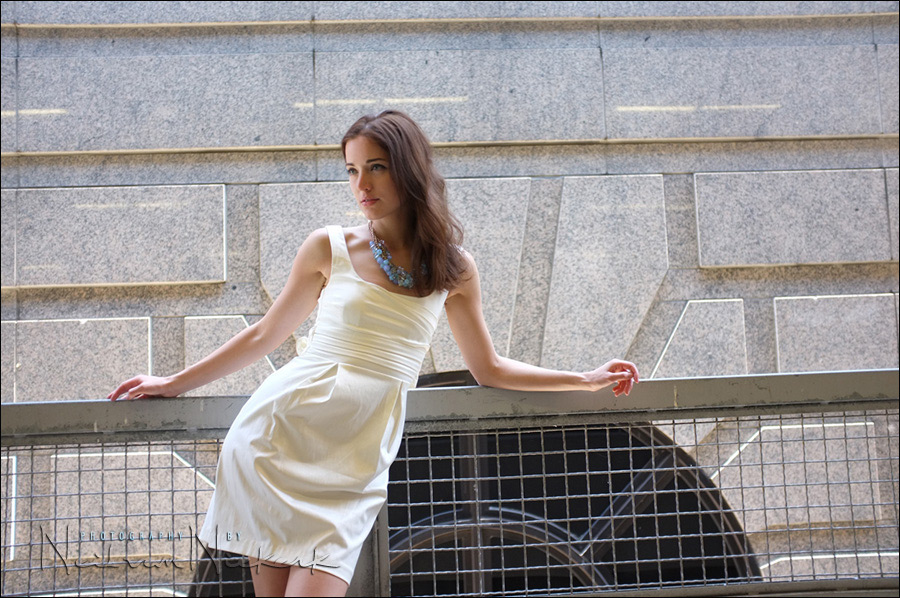
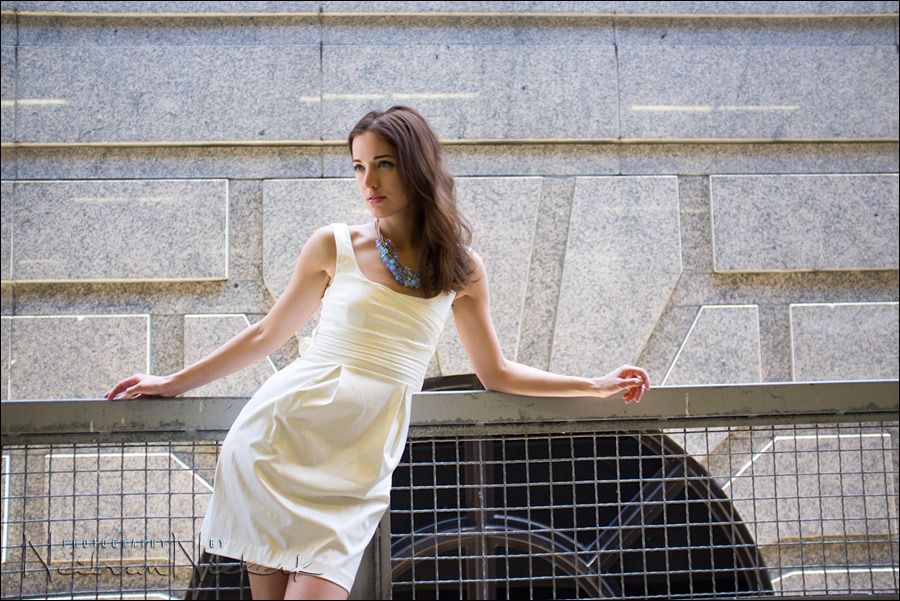
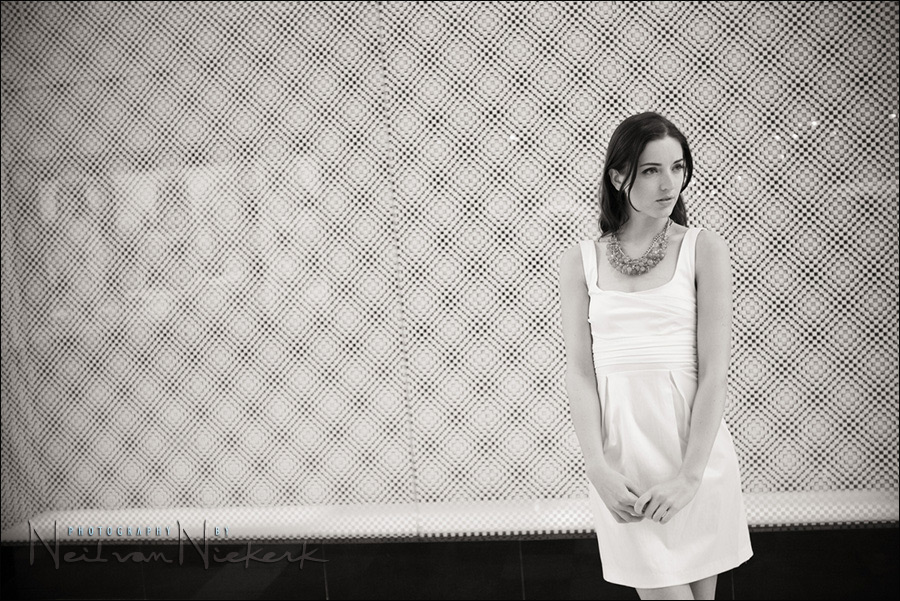
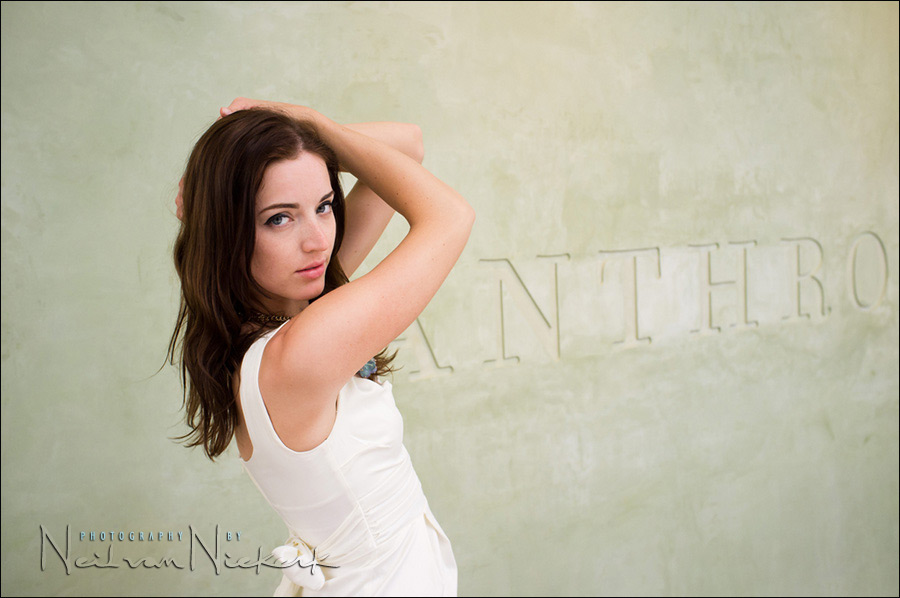
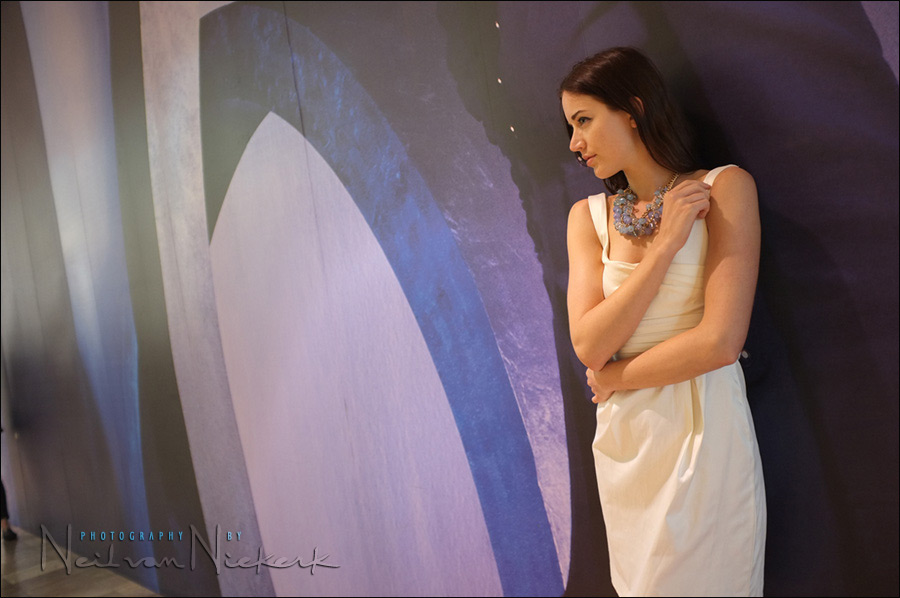
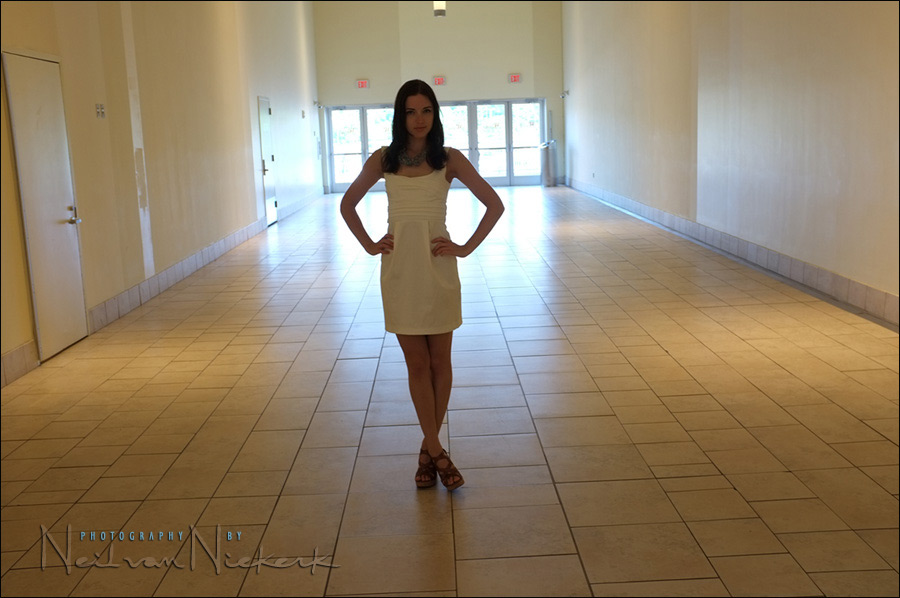
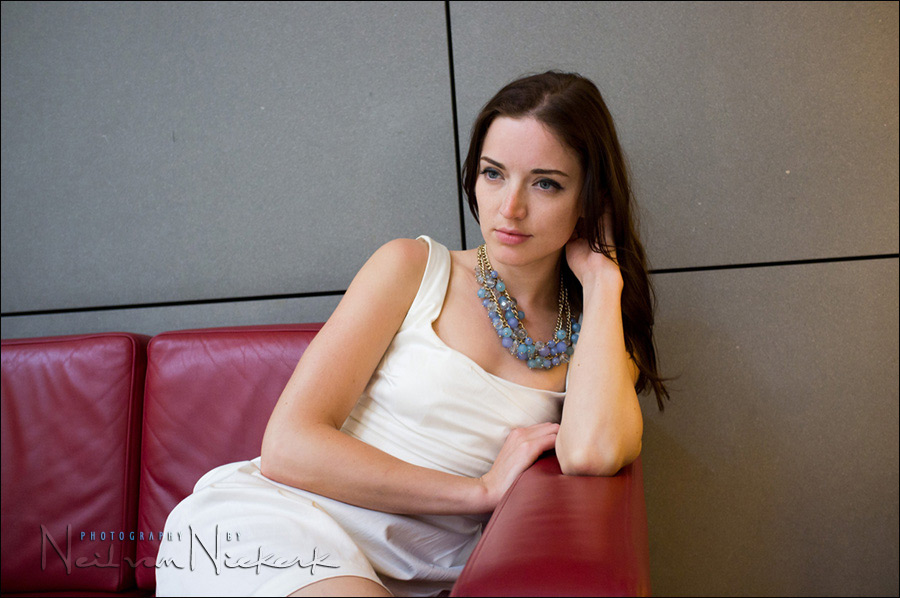
Walking in from the parking lot, I noticed this interesting pattern against the exterior wall, and posed Anelisa there.
Now, the Fuji X100 has a fixed focal length lens which is the equivalent of a 35mm f2 lens. This wide focal length needs some consideration when composing a photograph. You can’t control your background by compressing it like you can with a telephoto zoom. You have a specific angle of view, and you need to frame your subject with a certain economy of composition still in mind. You don’t want to include any extraneous distractions within the frame. This is harder work with a wide-angle lens than it is with a telephoto lens.
1/750 @ f2 @ 800 ISO; Auto WB
Aperture Priority, with +0.33 exposure compensation
image – sooc JPG
1/450 @ f2 @ 1600 ISO; Auto WB
image – RAW file, where I evened the image a bit more.
I somehow found it more difficult keeping this camera level than I do my larger Nikon D3 cameras. There is an Electronic Level / Virtual Horizon display in the Fuji X100, but I find it a distracting element in the viewfinder since there is a lag with the Virtual Horizon line. (More about the EVF and OVF later on in this review.)
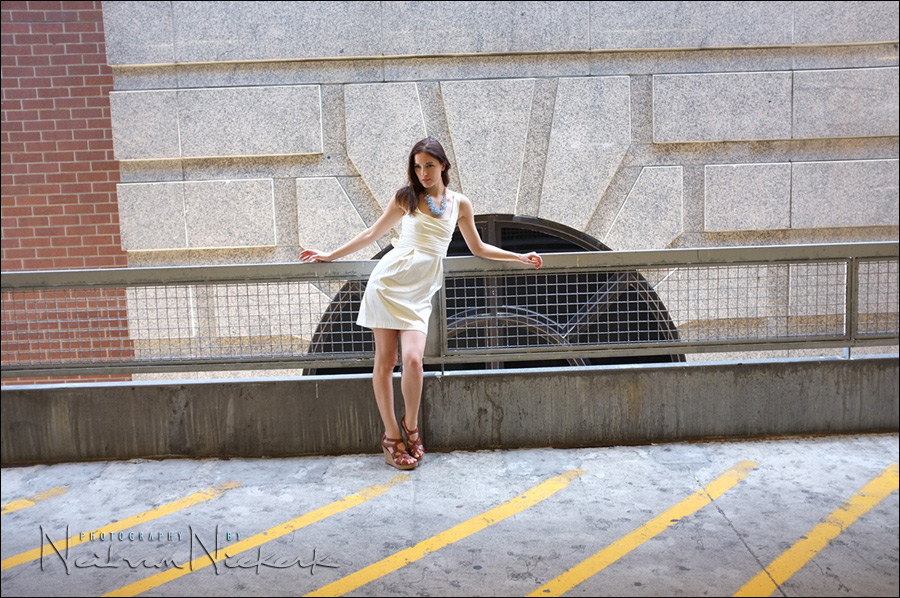
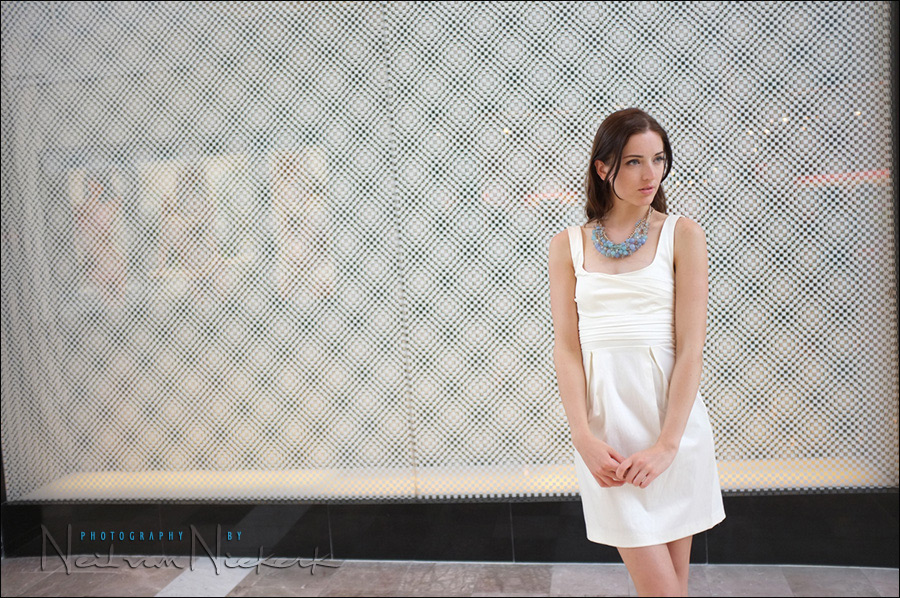
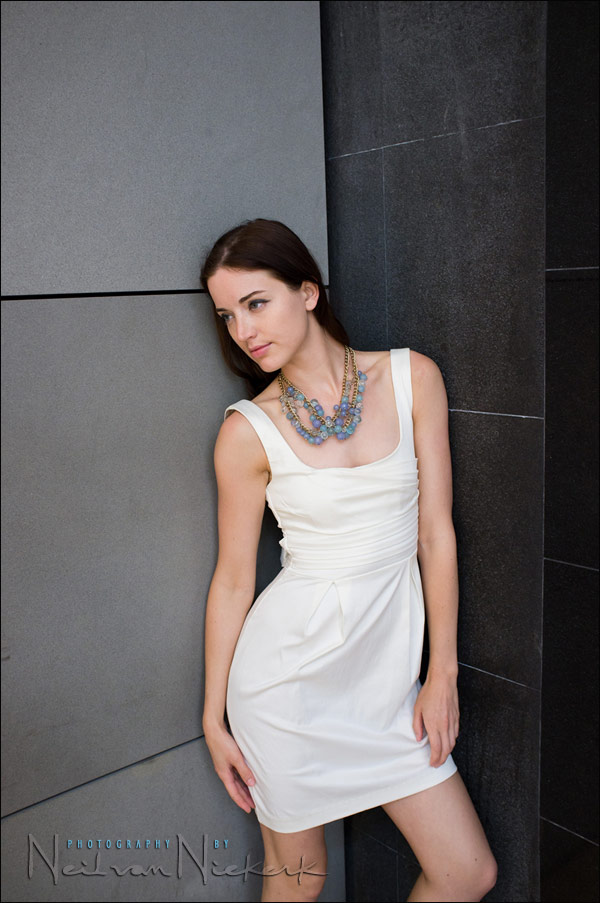
The pull-back shot to show the location:
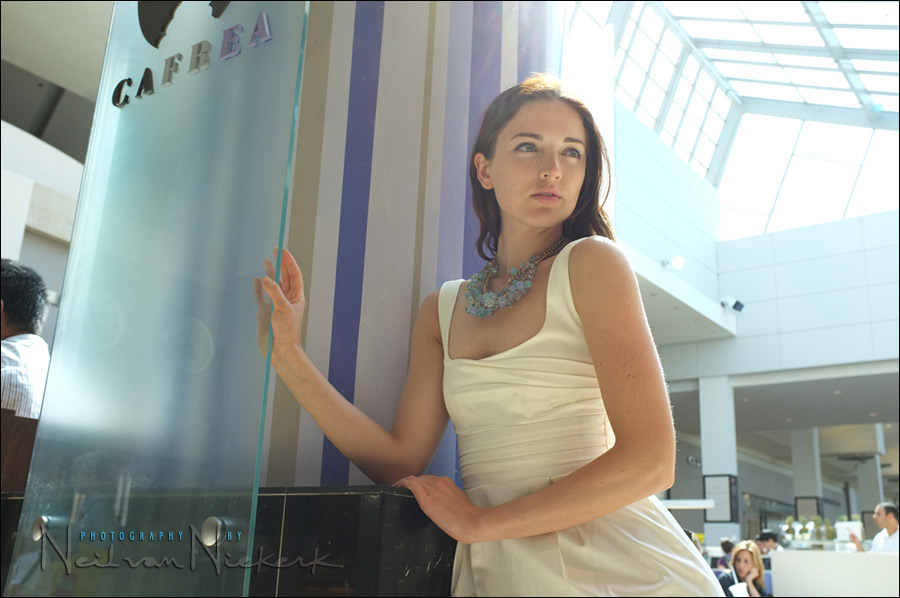
Shooting inside the shopping mall, I was on the lookout for simple backgrounds. The light also had to be even, and there had to be enough light to give me a hand-holdable image at not much more than 800 ISO.
1/320 @ f2 @ 800 ISO; Auto WB
Aperture Priority, with +0.33 exposure compensation
image – RAW file processed in Bridge / ACR; with the image cropped a little.
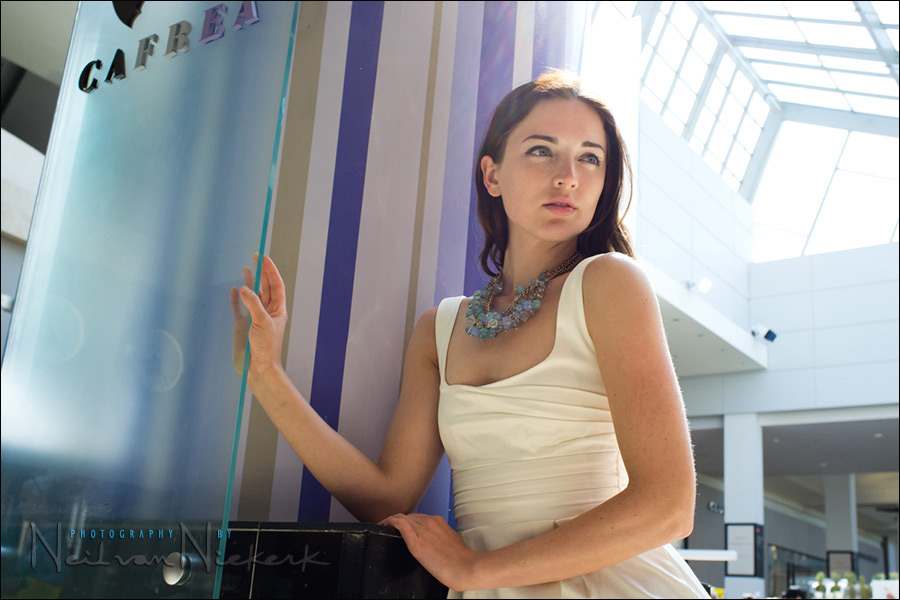
Here is the sooc image, to show how I had missed the exact framing I was after. This was something I learned subsequently – that I need to look at the Electronic Viewfinder (EVF) display if I wanted exact framing. While the Optical Viewfinder (OVF) does show framing guidelines, but it isn’t as exact as the EVF.
The pull-back shot to show the location:

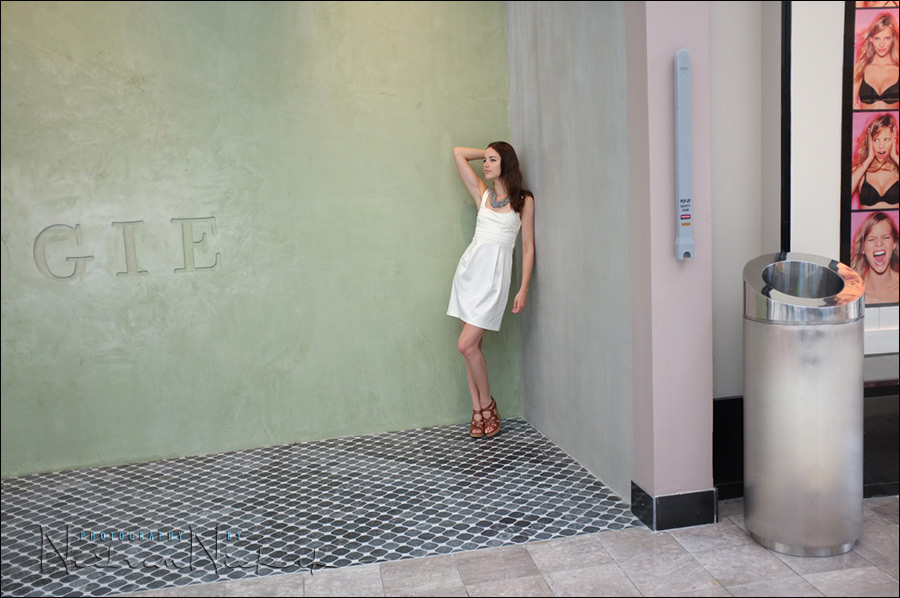
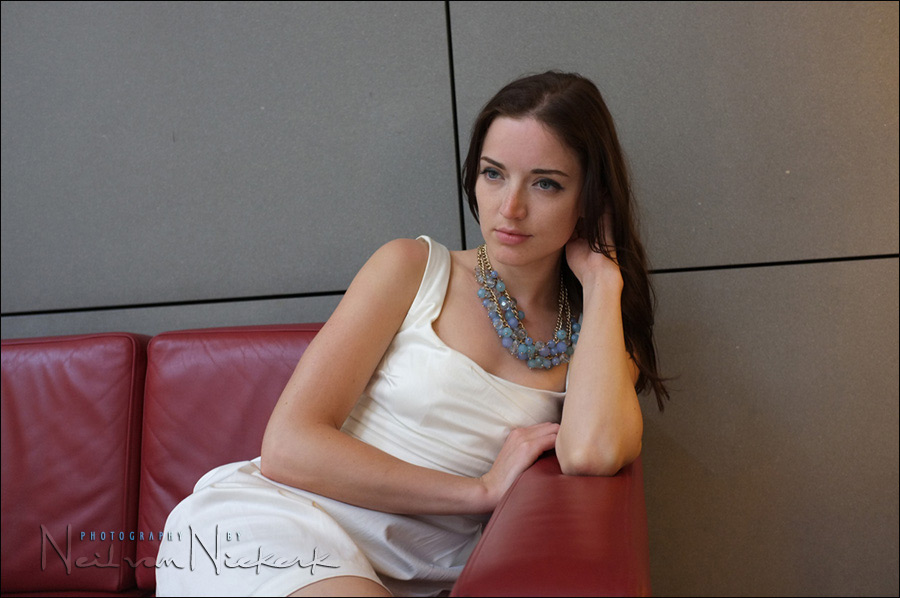
This large green expanse of a wall outside the Anthropologie store looked like it had potential. We had to work with, or work around the spotlights in the ceiling there, to make sure we don’t get uneven light on our model.
1/100 @ f4 @ 1600 ISO; Auto WB
Aperture Priority, with +0.33 exposure compensation
image – sooc JPG
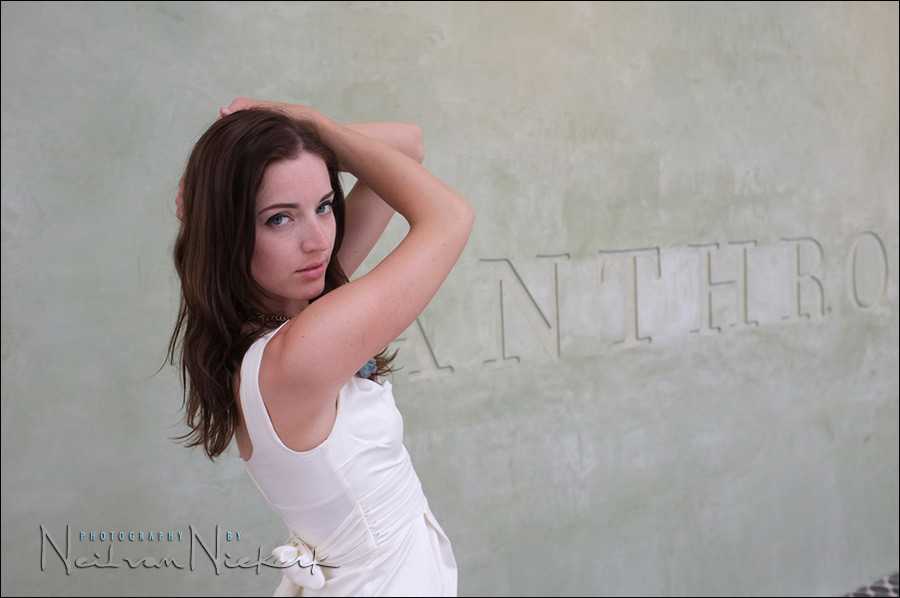
For the sequence of images here, I kept my camera settings to the same, but I prefer the image generated from the RAW file, where I bump up the contrast and saturation, (as well as bring up the exposure a touch). I also changed the WB to bring in a warmer skin tone.
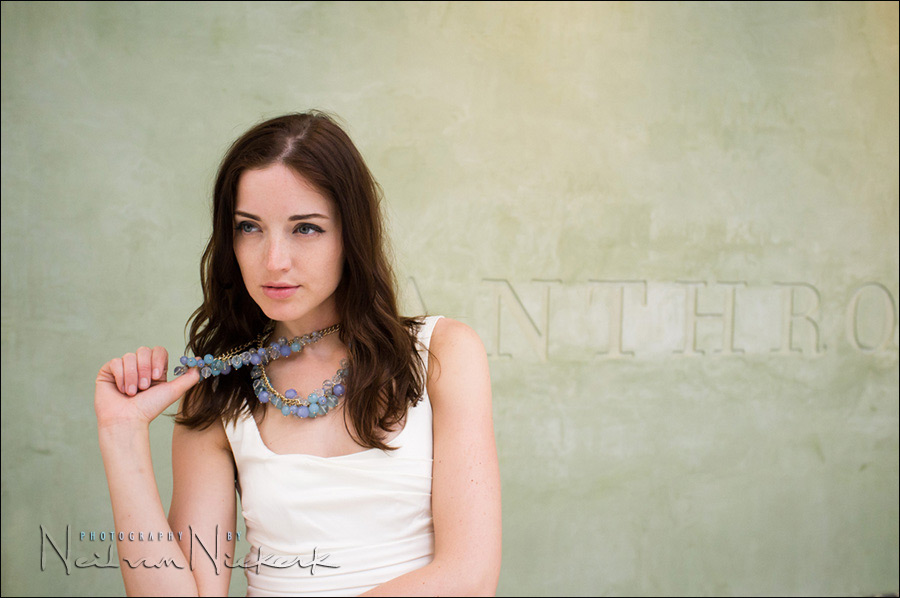
With this last image, I cropped the photograph from the original framing, to exclude some visual clutter.
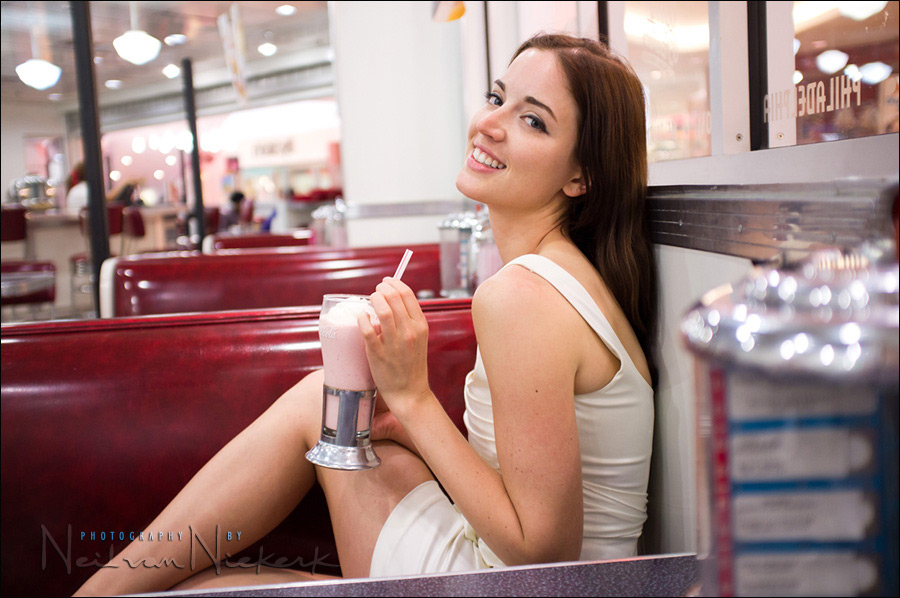
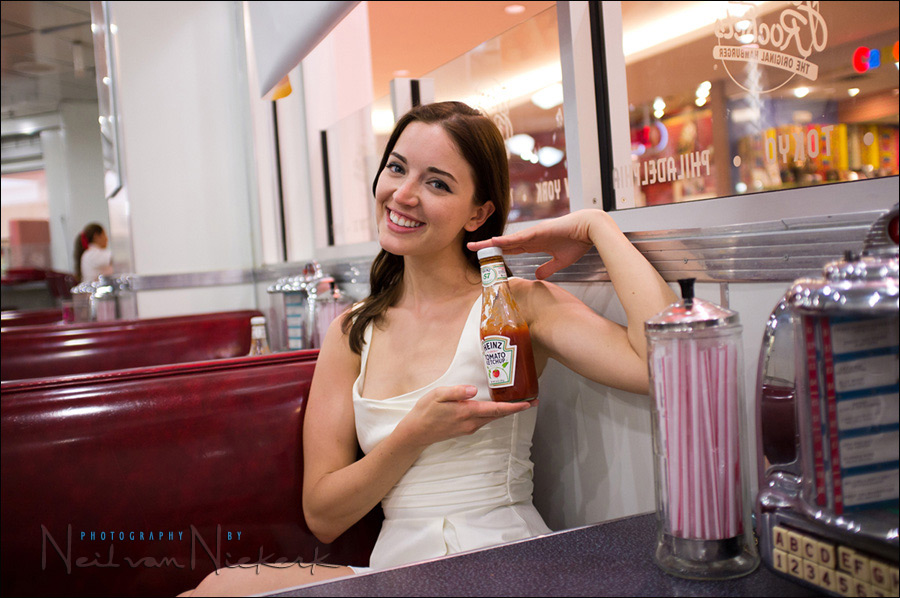
Lunch at Johnny Rockets …
1/140 @ f2 @ 800 ISO; Incandescent WB
Aperture Priority, with +0.66 exposure compensation
image – slight retouching of the RAW image to add a touch more contrast.
What impressed me here was the gentle bokeh of the Fuji X100’s lens. Wide-angle lenses tend to have a harder bokeh .. but the background looks soft. The out of focus areas in the front exhibits some of that harshness. (But that’s how it works … if the bokeh of the background is soft, the foreground will be harsh. And vice versa.) Clicking on the photograph will bring up a larger image.
So the little lens is sharp, and has pleasant bokeh. Nice!
As a side-note here: I directed and posed Anelisa here so that the light fell evenly on her face, and didn’t leave darker shadows under her eyes.
Goofball!

1/110 @ f2 @ 800 ISO; Auto WB
Aperture Priority, with -0.33 exposure compensation (because of the darker tones)
image at the top – sooc JPG;
image below – slight crop, and finessing of the WB via the RAW file.
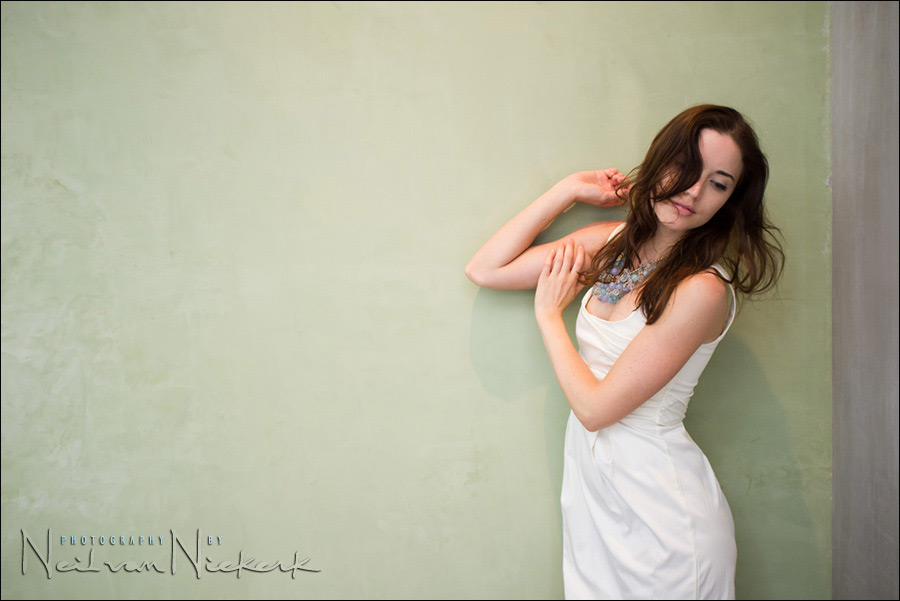
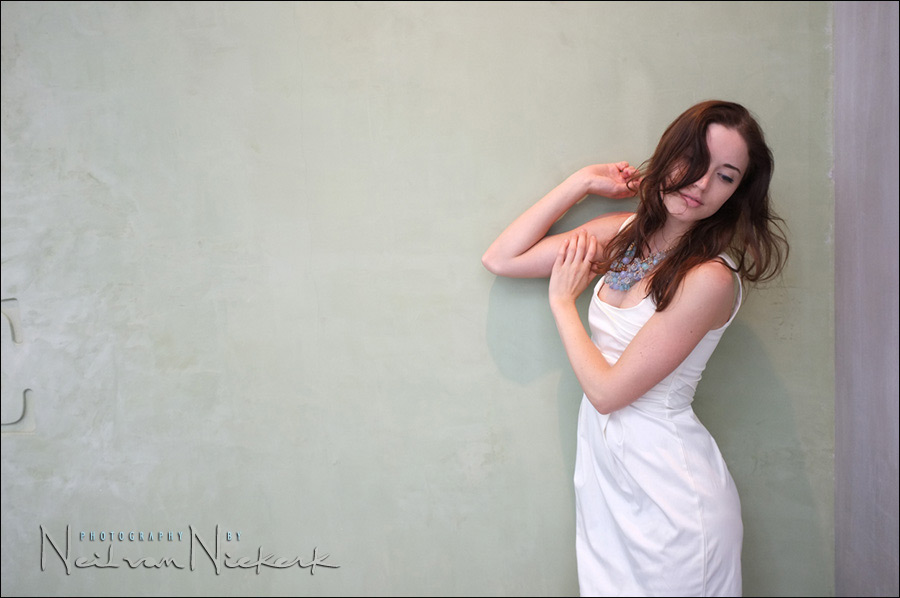
Outside the Abercrombie & Fitch store, with their customary black blinds. The strong leading lines here drew me because it would make for such a strong compositional element.
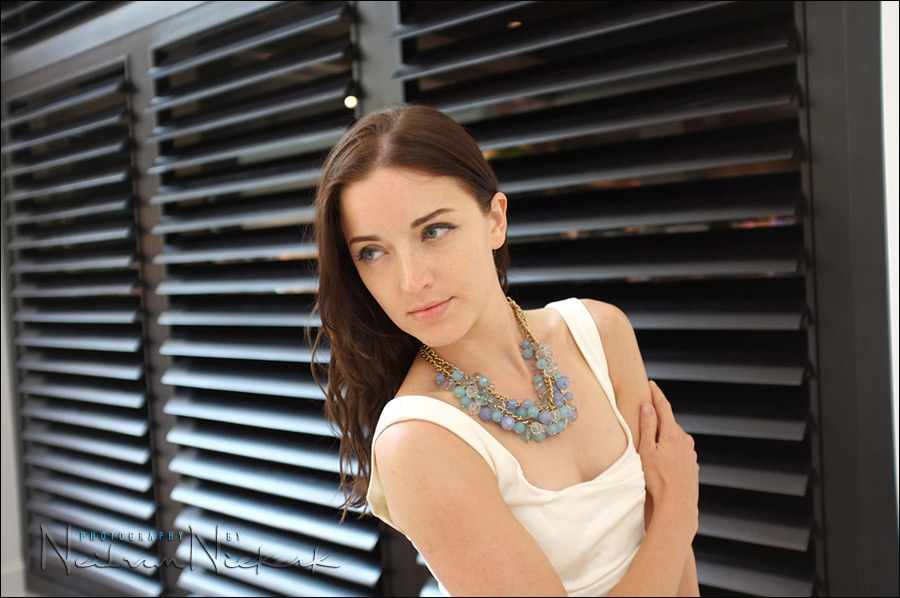
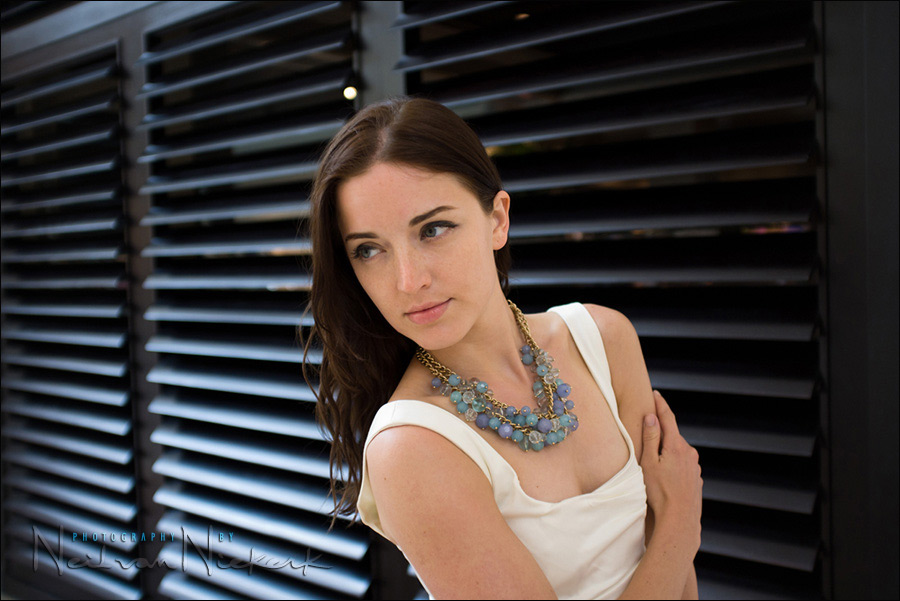
1/150 @ f2 @ 800 ISO; Auto WB
Aperture Priority, with -0.33 exposure compensation (because of the darker tones)
image at the top – sooc JPG;
2nd image – slight crop, and finessing of the WB and exposure via the RAW file.

This photograph has appeared here before, with the discussion on exposure metering.
1/125 @ f2 @ 800 ISO; Auto WB
Manual exposure mode. (The only way to deal with that strong back-lighting, in-camera.)
image – JPG converted from the RAW file, which was edited for WB; vertical corrected.
The wider shot showing the area where we were shooting. For more details about this specific photograph, follow the link about exposure metering techniques.
The lens flares more easily than I am used to with my Nikon lenses. However, flare like this is easily corrected in post-processing.
1/125 @ f5.6 @ 800 ISO; Auto WB
Manual exposure mode, to overcome the strong back-lighting.
image at the top – sooc JPG;
image below – slight crop; and finessing of the WB and exposure of the RAW file.
1/125 @ f2.8 @ 1250 ISO; Auto WB
Manual Exposure mode
image at the top – sooc JPG;
image below – finessing of the WB and exposure via the RAW file.
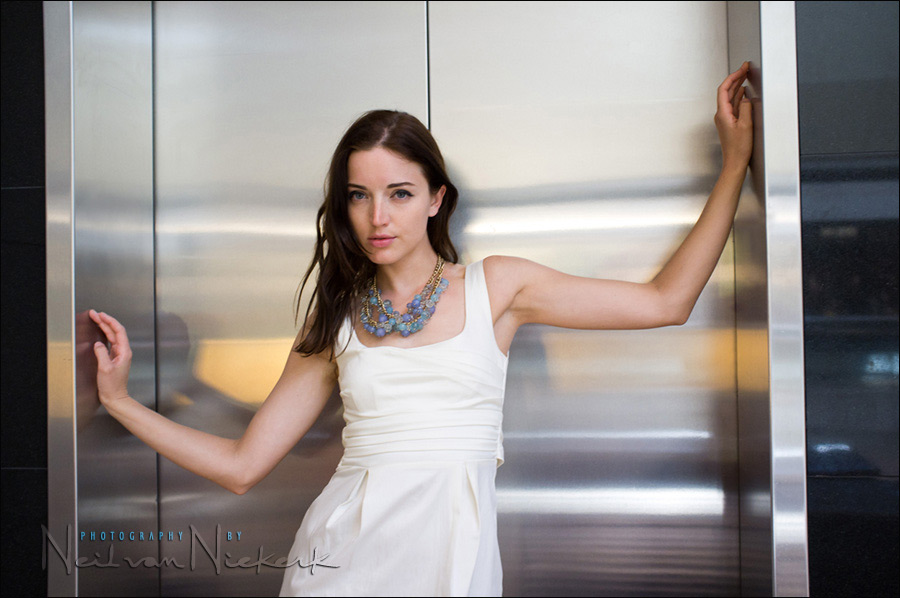
Working in this niche at the one elevator, I was able to get two images that worked:

1/60 @ f2.8 @ 1250 ISO; Auto WB
Manual Exposure mode
image – finessing of the WB and exposure and contrast via the RAW file.
1/60 @ f2.8 @ 1250 ISO; Auto WB
Manual Exposure mode
image – finessing of the WB and exposure and contrast via the RAW file.
I also cloned out two push-button panels that I found distracting.
This last image is softer than I would’ve liked. You won’t be able to discern it from the web-size (and sharpened) image, but the full-rez file is softer than I’d like. The reason – my shutter speed was too slow for how I was working.
Overall assessment of the Fuji X100 during this photo session:
This is a fun little camera!
I do feel I have to adapt much of my way of seeing because of being limited to just the one focal length. So while I miss certain opportunities, it has made me re-learn a few things about visualizing what my angle of view is, and how close I need to be to my subject for a certain framing. In that respect, working with this camera was a trip back to the basics of photography.
I’m very happy with the images I got during this shoot, of which these dozen or so images are a selection.
Obviously, we couldn’t have Anelisa jumping and dancing – the slow shutter speeds (due to the low light, and lack of flash) worked against us. This would also have run counter against the very idea of this being a quiet nearly-unobserved photo shoot.
The camera is very light. I barely feel it on my shoulder, and it certainly doesn’t strain the wrists and hands.
While the Fuji cameras are legendary for great skin tones, I turned to the RAW file most of the times here. The mixed lighting in the shopping mall wasn’t the easiest challenge. The SOOC images look fine, but I do feel I did better in slightly touching up the RAW files in post.
As shown with examples in the two related articles:
– initial impression: Fuji X100
– review: Fuji X100 – photographing a wedding
the high-ISO noise is superbly handled. It wasn’t an issue at all to push up the ISO rating. I don’t have any 100% views of the noise as they appear, but the two linked articles do.
Specification and technical description of the Fuji X100:
More about the Fuji X100:
I don’t want to run through the full specification sheet. This is already available elsewhere, such as Fuji’s X100 site, and DP Review. So if details about the EXR Processor interests you, head on over there.
The things that I would need to know, are:
– the camera is capable of producing remarkably sharp and detailed images,
– build quality is solid and inspires confidence (and more than a touch of pride in this gem of a camera)
– it really isn’t heavy,
– the controls glide effortlessly and speaks of quality.
And you know what? I like my cameras and equipment to look stylish. I know that many photographers will trot out those worn-out photography clichés that they don’t care what the camera looks like, and that the camera is just a tool. Sure. But can’t we also indulge in cameras that look stylish and sexy? I’ll take it.
The one thing that is mentioned all the time with regards to the Fuji X100, is its hybrid viewfinder. The description doesn’t necessarily sound all that exciting, but what it does, is allow you to either look at your scene via the Electronic Viewfinder (EVF), or the Optical Viewfinder (OVF).
The Optical Viewfinder is sheer genius. Everyone I’ve shown the camera to, and have held it up to their eye, have responded with surprise. The optical viewfinder with the information overlay, just looks stunning. Crisp and clear. And all the info is there. Even the focused distance with the appropriate depth-of-field scale for your chosen aperture. Just beautiful.
This image from the Fuji X100 website, will give you an idea:
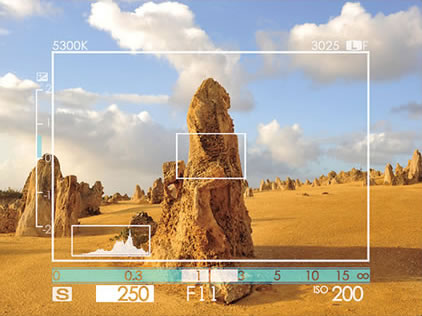
Shutter speed, aperture, ISO and exposure mode. Exposure metering and the histogram (which doesn’t work in Manual exposure mode unfortunately). A whole bunch of information laid over .. and yet not looking cluttered.
Now, in bright sunlight, you may not be able to distinguish this. What I’ve found though, is if I cover the eyepiece with my finger, I can see all the necessary info … even if I momentarily can’t see the scene. A quick-fix bit of help while shooting.
The Optical Viewfinder also shows the parallax correction as you focus closer. It really looks remarkable.
With a press of the button on the back of the camera, the display will either appear permanently on the back LCD, or permanently in the viewfinder … or best of all, flip between the outside LCD and the in-camera display – depending on whether you have your eye to the camera or not.
Then, in addition to the optical viewfinder (OVF), there is also the Electronic Viewfinder (EVF). As mentioned earlier, this will give you the exact framing. However, since it is an electronic display, there is some lag between what you see and your subject’s actual movements. The switch on the front of the camera is simple enough to use to engage either the OVF or the EVF.
As mentioned earlier, there is a potentially useful Electronic Level / Virtual Horizon display in both the EVF and OVF modes.
For bright light, the camera has a built-in Neutral Density filter to help in getting to wider apertures in bright light.
As mentioned in the review: photographing a wedding with the Fuji X100, the auto-focus performance of the Fuji X100 is okay. Fairly fast, but not impressive. And doesn’t quite match DSLR speed with auto-focusing. What I also found, is that the camera tended to grab the background if the background was brighter than my subject. Working close to my subject especially, the camera was prone to mis-focusing and grabbing some element of the background or some other part of my subject. The Fuji X100 does need a more careful approach with focusing than I am used to with the Nikon D3. (This shouldn’t be a surprise though. They are entirely different beasts.)
There are a number of features I didn’t check out, such as the Motion Panorama Mode, as well as the 720p Video Mode (24 frames/second). For me, the Fuji X100 is primarily for stills, but it’s nice to know there are further interesting options.
What does all add up to? A camera that is fun to use.
But there are a few quirks.
[update: on June 26, 2011, Fuji announced a major firmware update for the Fuji X100.
Some of the changes in ver 1.10 will affect some of my initial observations in this review, especially my criticism of how the X100 (under firmware 1.0) would retain the ISO setting per mode, instead of retaining an overall ISO setting. This has now been fixed! So please take note that some of the comments about the camera’s menu and behavior might have been affected since the time of the original review’s posting. Instead of continually updating the review with every firmware update in the future, I’m going to let this review stand as it originally appeared.]
Quirks of the Fuji X100
There are a few quirks that the Fuji X100 has, that can be frustrating. Or just confusing. There are firmware updates which are rumored to fix a few of these, so we’ll have to keep an eye out.
– the one thing that drove me nuts during the wedding I photographed with the Fuji X100, was that it reverted to previously held ISO settings when changing exposure modes. (This is one of the things which will apparently be fixed with an upcoming firmware update. That it would be so easy to change between Exposure Modes, but then have to have to use several button pushes to get to your desired ISO again, makes no sense.
– the battery can be inserted the wrong way around! Even though there is a rounded corner on the battery, the battery chamber is square, so you can quite easily drop the battery in the wrong way. Then you have a dead camera, leaving you to think you have a faulty battery. (Yes, I did go through this embarrassing event.)
– the live histogram in the viewfinder is genius too. Except it is static during Manual Exposure mode. It would have been even more helpful in Manual exposure mode so that you could use the histogram to determine and fix your exposure.
– the Fn button can be programmed to do a number of things, but in the end it makes most sense to use it as the dedicated ISO button. Which means you have to delve into the menu to access the Neutral Density filter.
– to enable the ND filter, you have to dig into the menu. I feel this is one of those features which should be a push of a button away.
– because of the design of the X100’s shutter & lens, you can’t access certain shutter speed and aperture combinations. For example, you can’t use a wide aperture at a high shutter speed. The shutter speed is displayed in red in the viewfinder should you go outside the range that the camera’s shutter & lens design is capable of.
Final overview:
The camera is a delight in terms of its build and physical look and design.
The lens is superb as well, despite a tendency to flare easily with back-lighting.
Image quality is surprisingly good. I would say unexpectedly good. Check the review: Fuji X100 at a wedding where there is a full-res file shot at 6400 ISO.
The only downside is the menu system and some firmware / software quirks which affects its behaviour.
My final summary: Fuji really created a camera here capable of professional quality images, in a compact body. It’s a camera that is (mostly) a delight to use, and I can see how this specific camera will get a huge and loyal fanbase.
Related articles:
- Initial impression: Fuji X100
- review: Fuji X100 – photographing a wedding
- Reviews & articles about other Fuji gear
Yes, you can write a few hundred words expertly detailing a new camera’s usefulness and quality in the photographic realm, but the one thing I have to ask is much more local: Is that the Garden State Plaza?
Are you with their security?
I am amazed at how you work slinging around your neck two heavy dslr cameras and lenses such as a 70 – 200 2.8 ( as viewed in a few pull back photos that you infrequently have shown) Even with one such camera around my neck covering professional hockey here in Montreal my neck is quite sore by the end of the evening.As a pharmacist I worry that current abuse will cause problems for you in the years to come.
What I like about living in Canada is that I can obtain the meds you ( we ) will need at a reasonable price and that in general security does not jump on you here and demand permits..and oh yes you can extend a tripod without being bothered by the same security. Canada home of the free. ;-)
Well, this is definitely the Garden State Plaza, some of it anyway. And security would have stopped you with a DSLR in about 45 seconds. Literally less than a mile from my house.
Dennis … aaah, then it’s good to know that the Fuji X100 did in fact allow me to be a ninja photographer, unseen, undetected.
Have you experimented with the x100’s flash sync yet? I understand that it can sync up to 1/1000 or thereabouts. I had picked up an Oly XZ-1 to do this but ended up returning it because the image quality wasn’t up to scratch. I’m guessing the Fuji might do the job far better though.
Zarek, I also read that the flash sync is 1/1000 but I decided not to get a flash for this camera. So that remains untested for now.
Neil, I would still imagine that you could use your SB900s in manual mode with this, with a cord to get it off camera. A good thing to keep in mind I guess, given that you already have the camera.
Is there any shutter lag? Often the smaller cameras have annoying lag between the shutter button being pressed and the shutter actually firing
Anthony, once it acquires focus – and it does focus much faster than the usual compact cameras you find – then there is no shutter delay. It is instantaneous and nearly inaudibly quiet.
Is it smaller than a canon rebel body (1.6 factor) with a 28mm lense ?
Smaller and sexier.
Hello Neil,
a major firmware update is out with the following improvements:
1. The following functions can be rocked during shooting by holding down [MENU / OK] button over 3 sec.
DRIVE / Flash / White balance / Macro (set on the Command Dial – 4 direction key)
2. “CORRECTED AF FRAME” menu is added in “SET-UP” menu (the last line on menu page 6) to display additional AF frame (corrected AF frame for reducing parallax) which can be effectively used for macro shots. (Factory default value is set to “OFF”)
3. Adjustment in1/3 step increment for shutter speed or aperture setting is enabled in Shutter-Priority AE and Aperture-Priority AE mode, on top of those in Manual Exposure mode.
Shutter-Priority AE : Adjustment is controlled by rotating the command dial
Aperture-Priority AE : Adjustment is controlled by moving left / right on the command control lever
4. In the post-view mode (display after shooting), focused area is magnified in the LCD (EVF) display when the command control lever is pressed.
Cf. “IMAGE DISP.” Setting must be set to “CONTINUOUS”,
5. Setting of the role for “Fn” button is enabled by holding down “Fn” button over 3 sec.
6. Actual ISO sensitivity for shooting is displayed just after pressing shutter button halfway, when “ISO AUTO CONTROLL” is set to ON.
7. When “eye sensor” is activated by pressing “VIEW MODE” button, “EYE SENSOR” is displayed on EVF / OVF or LCD just a while to notice the status.
8. Macro mode ISO sensitivity, Drive mode, Dynamic range, Self-timer mode, flash mode is maintained even if shutter speed setting or aperture setting is changed. Also, even after changing viewing mode into shooting mode or turning of the camera, these values are maintained.
9. The size of focus frame set through viewing EVF / LCD is maintained even after changing display mode between OVF and EVF (LCD).
10. When “SHUTTER SOUND” is chosen, each shutter sound is performed in each menu setting.
11. In viewing mode, the last viewed shot is maintained as even after changing into shooting mode.
Cf. After another image is shot after viewing former image, memory of viewing the image is cancelled and the last shot is displayed as the latest image.
12. When the aspect ration of the image size is set to 16:9, the line of bright frame line on OVF is displayed with aspect ratio 16:9.
13. Viewing mode with Photo Information on EVF / LCD is maintained even if another image is shot. On top of this issue, deleting picture directly is enabled even in viewing with Photo information by pressing the command dial up, or MENU operation is also enabled.
14. Occasionally, preview image on EVF / LCD after pressing the shutter halfway might be darker than live view, according to aperture setting or brightness of shooting target. This phenomenon is improved.
15. When “DISP. CUSTOM SETTING” is set to OVF or EVF / LCD, the setting value is maintained even after customizing the menu.
16. Even for only RAW data recording mode, “RED EYE REMOVAL” setting is selectable among ON or OFF.
17. In MF (manual focus) setting with OVF mode, OVF viewing is activated after pressing shutter half way, even if “FOCUS CHECK” (magnifying center of the image) is displayed in EVF by pressing the center of the command control lever.
18. Displaying period after pressing each command dial (Macro / Flash) is prolonged from 1.5 sec into 2.0 sec for confirming correctly.
20. For resuming from AUTO POWER OFF setting, the shutter release button was required to hold down halfway for a few second. For quicker operation, resuming is activated by just pressing the button.
21. Image quality captured by Velvia / ASTIA mode is improved on mainly shadow tone (dark area), when dynamic range is set to 200% or 400%.
22. When “OVF POWER SAVE MODE” is set to ON and “Fn” button is set to “MOVIE RECORDING”, the camera may be unstable occasionally. This phenomenon is improved.
23. Histogram display on OVF during exposure compensation is improved.
I guess you will need to have a small update to this already exaustive review.. ;-)
Sweet! That’s a serious update to the firmware.
I’ll have to adapt my review then to accommodate this then.
Hi Neil,
Very enjoyable post sure looks like an interesting camera, although originally coming from a fixed lens camera when I was young, I’m not sure I would want to go back.
I’ve kind of done that in reverse…
Fixed lens film
SLR
Micro 4/3’s
DSLR K-5 (great picture quality, quite small and whisper quite)
David
PS: I’m quickly coming to the conclusion that it is impossible to take a bad photo of Anelisa? Of course being a great photographer helps! ;-)
David .. Anelisa is my favorite model for good reason. Beauty + tons of personality. So yeah, I don’t think it is possible to take a bad photograph of her.
I’d suggest you to try the s5 pro for skin tone. The x100 doesnt look that good as far as fujifilm’s famous color is concerned.