Time-lapse photography tips: Shooting sequences
After seeing the breath-taking Time-Lapse photography by MindRelic on Vimeo, I was inspired to buy a motorized Dynamic Perception Stage Zero dolly to also shoot time-lapse that has a cinematic quality to it. If you just keep the camera static, then time-lapse can look good … but it is when you bring lateral movement to the camera while it is shooting the sequence, that it can look truly impressive. That movement just elevates it above the mundane immediately.
The way that the new series of Nikon cameras like the Nikon D4; Nikon D800; and now the Nikon D610 (affiliate links), compiles time-lapse sequences in-camera as movie files, makes it so much easier to shoot time-lapse. You can see on the spot whether a time-lapse sequence is working, or whether there might be a technical hiccup. The first time I tried the time-lapse feature of the Nikon D4, I was already impressed with the ease of use, and the final results.
During the past week, I’ve been in New York several times to shoot more sequences. The clip above is a short compilation of my favorite sequences. There isn’t a specific continuing theme to them yet. It’s still a work in progress, but I thought it would be cool to share some of it already … and also share some of the tips that I’ve picked up along the way.
First of all, if you have an interest in time-lapse photography, I would strongly suggest visiting Time-lapse Network. There’s a ton of info there from photographers who are far more experienced.
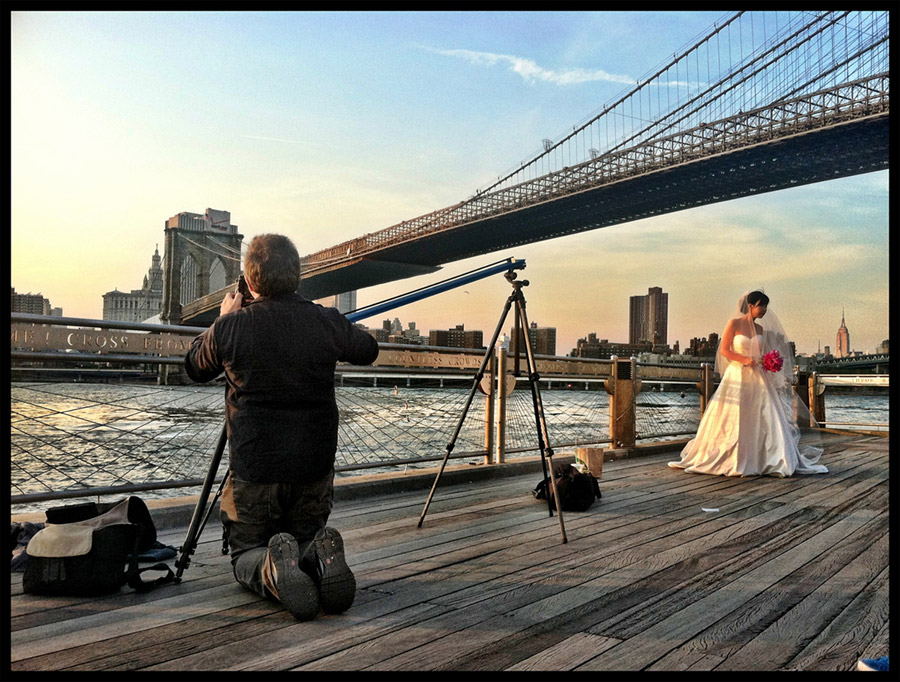
Setting up to shoot a clip of the New York skyline from Brooklyn. The bride is a model being photographed by someone else. She just looked good as part of the composition of this shot.
Here are a few tips on time-lapse photography
1. You need something interesting in the foreground to show the cinematic movement, AND you need something to change in the background.
Both those factors need to be in place for a time-lapse clip to work.
If you just have the camera point at a distant background, with no foreground subject, then you may as well shoot on a tripod, and not hassle with setting up the motorized dolly. However, if you shoot with a telephoto lens, then the foreground need not be very close. But it still has to be there. Conversely, if you don’t portray something changing in the background, you may as well just shoot video on a slider.
If you don’t show something like this in the frame:
– shadows creeping across the frame at a fast pace;
– or traffic zooming around;
– or clouds swirling in the sky above;
– daylight turning into evening light with city lights coming on;
or such … then there is no clue in the final time-lapse clip that time had actually elapsed.
Here is an example:
I wanted to show the Empire State building through trees in Bryant Park. But without clear indication that time had elapsed (in this case an admittedly short 12 minutes), then it pretty much just looks like video with movement.
timelapse NYC 1012-09 from Neil van Niekerk on Vimeo.
2. The camera and dolly has to be securely positioned and not wobbly. Obviously!
Here is a clip where somehow one of the two tripod’s legs must not have been positioned properly, which created a weird wobbly breathing effect in the final clip.
timelapse NYC 1012-09 from Neil van Niekerk on Vimeo.
3. If your shutter speed is too high, you will get a jittery staccato effect.
With time-lapse, you will often end up taking images that are a few seconds apart. That interval between shots will depend on the movement you’re portraying in the frame.
Now, photographers are very aware of camera shake and subject movement, and will tend to want to take the shutter speed higher. While this can be used for effect, it generally looks better – more fluid and more like a continuous event, if the shutter speed is fairly slow (and in relation to the chosen interval that the images are shot at.)
Here is an example: I shot a few clips of the Naked Cowboy in Times Square. The interval (if I remember correctly), was 3 seconds. In the first sequence, my shutter speed was 1/60 and in the second part, I had brought my shutter speed down to 1/2 second. You don’t really need the individual images to be crisply sharp – think video. It’s that fluid movement that creates the sensation of movement. Compare it to a movie like Gladiator, where they used fast shutter speeds to create that staccato effect to movement.
I think you’ll agree the the 1/2 second shutter speed worked better here.
timelapse NYC 1012-09 from Neil van Niekerk on Vimeo.
4. You need to shoot with manual camera settings.
You don’t want to shoot in an automatic metering mode, but rather in manual exposure mode. This will reduce flickering as the exposure changes. Here’s an example where I shot with auto-ISO. The exposure does a kind of “breathing” here as it changes during the duration of the clip.
timelapse NYC 1012-09 from Neil van Niekerk on Vimeo.
This is a complex topic though. You can encounter flickering in a time-lapse clip, as the aperture doesn’t necessarily close down with the same accuracy with every shot. Then there is another complication. As you shoot long exposures, the exposure could very well vary from brighter daylight to evening. This change in shutter speed is difficult to change manually during the sequence. For this, there is a device called a “bramper”, which ramps the shutter speed via the Bulb setting on Canon cameras. Do a search on the two time-lapse photography links provided at the end of this article. The info is in there if you want to investigate further.
Related articles on time-lapse photography
- Camera settings for Time-lapse photography
- More articles on Time-Lapse Photography
- Timelapse photography: project – commercial properties
Photo gear used to shoot the timelapse clip shown above:
Equipment used to shoot the timelapse clip shown above:
- Nikon D4
- Nikon 14-24mm f/2.8G AF-S; Nikon 24-120mm f/4 VR
- Manfrotto tripods & quick releases
- Dynamic Perception Stage Zero dolly
Timelapse photography – a complete introduction
There are several websites that are loaded with information – and then there is this thorough primer on the topic, written by Ryan Chilinski: Everything you want to know about Time-Lapse Photography. (Amazon)


the links under each vid (all you can see via RSS) are all to the same video.
Thanks for sharing!
I don’t want the test clips and the failed clips to appear on my Vimeo feed, so I made these to only be visible on this domain.
So I made the links to the original main clip every time. Which means, if you do want to see the other clips, you’d actually have to visit the Tangents blog and not just view the RSS feed. :)
Let my tell you all that I was so lucky to see live Neil working on this vids at Times Square, I was on my first visit to NYC on vacation and never imaging to meet such a great person and professional. Very thanks Neil for all your interesting posts and for beeing such an accesible person. Glad to know you liked the photo my wife took us at Times Square! Sincerly, Mauricio!
Thanks for showing your “failed” video clips. We all learn from making mistakes!
Echoing Mary-Claire’s thanks for sharing the outtakes – the wobbly-tripod shot made me dizzy :)
Thank you Neil for putting all this out there, I think it is great. My question is not about the time-lapse but about locations in NY. Do you have any problems setting up you Dynamic Perception dolly in Time Square?
I wasn’t ever hassled in Times Square, but I was very careful in setting the dolly up in areas where I am not blocking pedestrian traffic. For example, I’d my back right up against a row of potted plants. This way, where I’m standing wouldn’t impede anyone.
I have been hassled by idiot security guards elsewhere, and even had a homeless person decide to make us his entertainment for the night by trying to ram the dolly with his cart.