
video light vs bounce flash
It’s easy enough getting nice clean open light with a single on-camera speedlight when shooting indoors. By bouncing your flash with the idea of getting directional light from your flash, you can effortlessly get portraits like this. As usual, I used the black foamie thing to flag my flash and get more light on the one side of my subject’s face. In this case, more subtly so than some other examples on this site.
We were working in the same location here as shown in the previous article where I photographed Shawna using only the available light that was found. However, for certain photographs I had in mind, it quickly became obvious that a more contained light source than bounce flash would work better. When compared to a light source like a video light, bounce flash tends to flood an indoor location with light, even if directional when you look at your subject. A hand-held video light gave me the type of lighting I wanted …
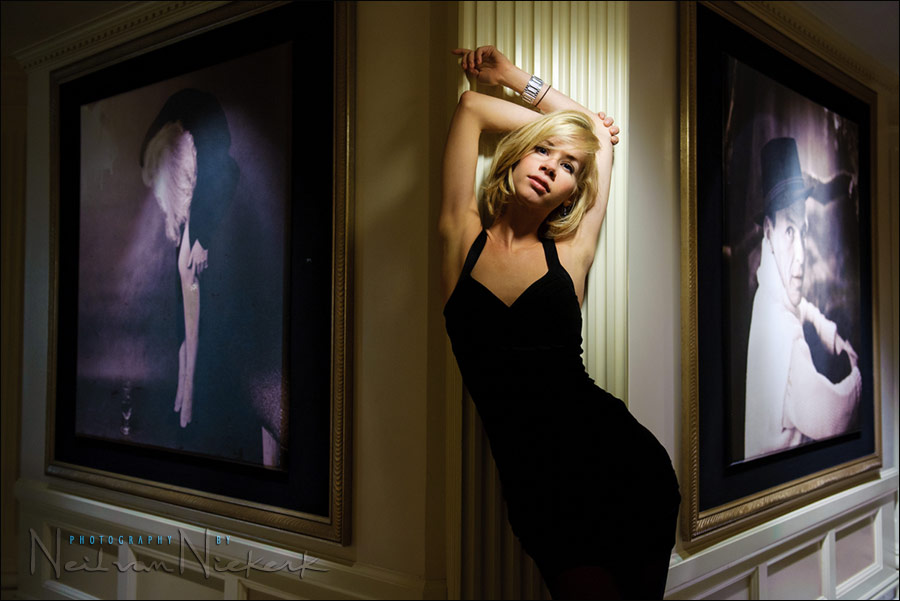
This photo above is what I had in mind …
1/160 @ f2.8 @ 1250 ISO … Litepanels MicroPro LED video light (B&H)
Nikon D3; Nikon 24-70mm f2.8 AF-S (B&H) .. at 35mm, but cropped slightly in edit
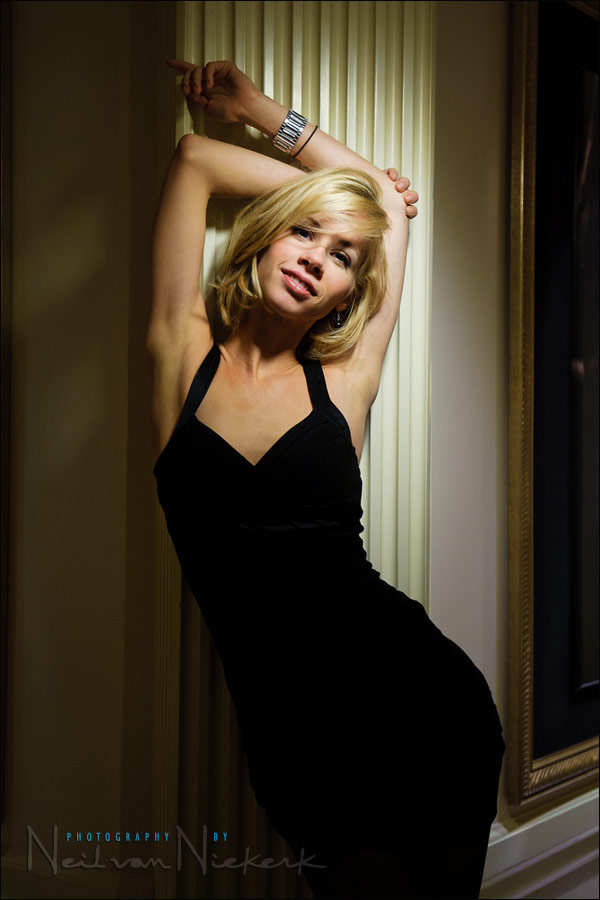
… what I got with bounce flash, was this.

As a portrait, it’s not particularly bad, but not particularly interesting either … even with Shawna in the frame. The bounce flash just opened everything too much with a flood of soft light.
With the video light’s dramatic light fall-off to the edges, the previous photograph is more moody and just looks more interesting.
1/160 @ f2.8 @ 1250 ISO … Litepanels MicroPro LED video light (B&H)
Nikon D3; Nikon 24-70mm f2.8 AF-S (B&H) .. at 50mm, but cropped slightly in edit
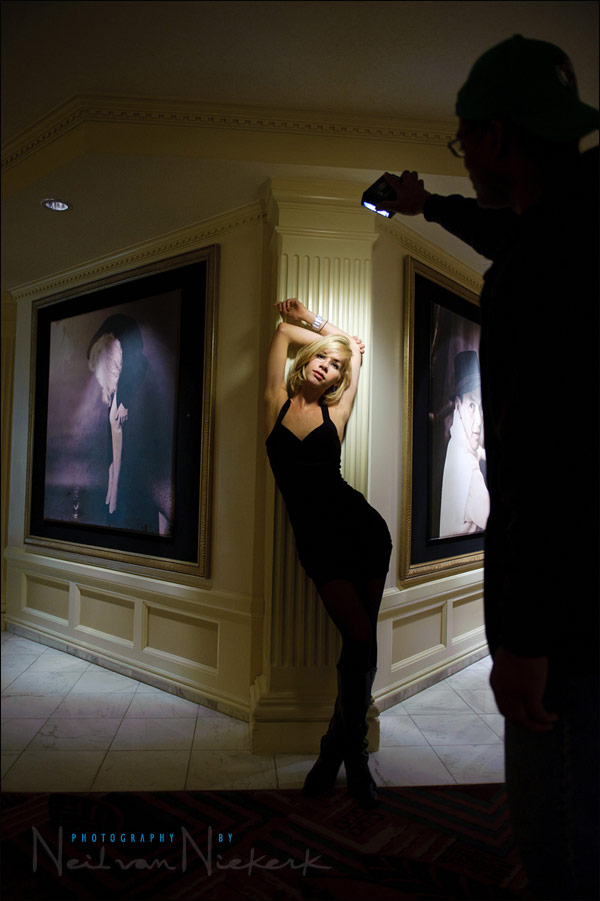
Here is a pull-back shot to show how the video light was held in relation to our model.
Another photograph, taken in the same location, but with a different backdrop. Here I specifically wanted the light to be feathered upwards, forcing there to be less light on her chest. This accentuated her face. This is also part of the appeal of using a video light for photography – the WYSIWYG aspect of video light. You more easily get this kind of minute control over the direction of the light.
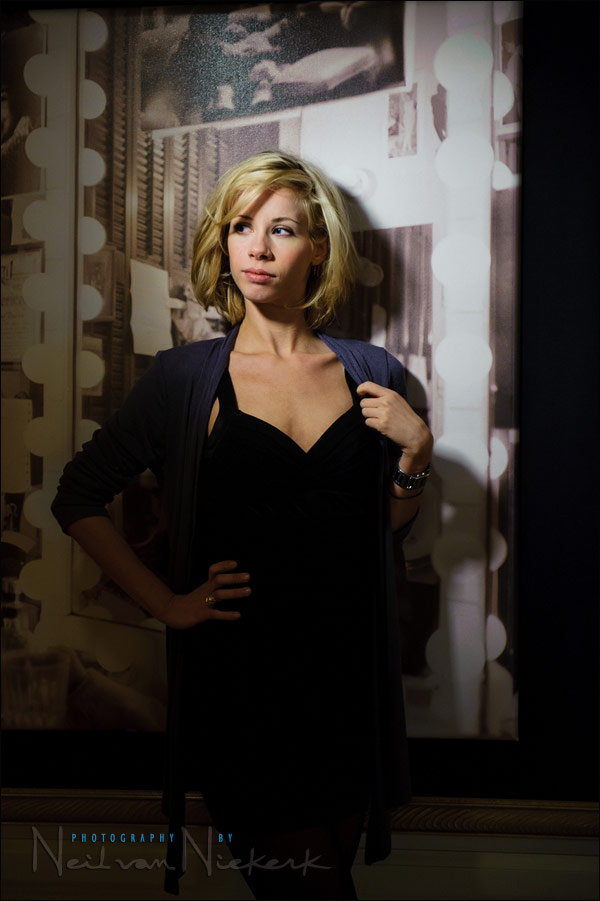
1/100 @ f2.8 @ 1250 ISO … Litepanels MicroPro LED video light (B&H)
Nikon D3; Nikon 24-70mm f2.8 AF-S (B&H) … zoomed to 70mm
summary
In this post we had 3 different types of light that were used in photographing Shawna … each bringing it’s own quality and challenge. But I do like the variety, and for me there is a specific appeal in being flexible with the lighting used, whether flash, video light or found light.
Nice picture – I would have liked maybe a bit more light on her dress.
I wonder, couldn`t you have done the same with a flash and a snoot or your black foam thingy on the flash? I must try my own idea soon!
Best regards
Mark
Great article. Video light is something I’ve never experimented with, and with its growing popularity I feel I’ll need to at some point soon.
It gave you a very dramatic portrait above, love it.
Looking forward to reading your new book Neil, the last one was very helpful.
My thoughts are the same as the above post. You could have snooted or gridded a speedlight.
I do however, like the fact that there is more than one way to “skin the cat”. One of the greatest assets a professional photographer can have is the ability to improvise and use what is at hand.
Before I migrated over to speedlights, I had a set of 2 x 500W, 1 x 250W video lights that I would use for portrait work.
There are times that I would love to have them back and others I’m glad that I run mostly flash now.
Neil –
First of all, “thanks” for an inspiring mini workshop in Vegas. I found much value with the lighting styles and fundementals we discussed and applied. In particular, your visualization of how the light is best applied and used when working with Shawna really helped me “see the light” per se. Thank you for the clear tutorial and really making this simple and fun when broken down. As the pictures above and previous show, I really like your perspecitive and compositions when working with Shawna. BTW, I received notification that Amazon has now released/shipped your “off camera flash” book… should be on my doorstep when I get home today! Take care.
Michael S
Video light is certainly something we will be adding to our repertoire this year, there is so much potential. The only down side seems to be needing an assistant more often!
Love the info on using the new LED video lights, there is almost nothing out there telling us what sort of exposure settings you can get with these lights.
Neil, did you snoot/limit the light-bundle (towards the model’s face) on purpose? In other words: would it have been possible to lit her dress too if you wanted to have done this?
Thanks,
Kris
Neil, I agree, I like the spotlight on her face too.
I was just wondering for when you are in a different situation and you need full body lighting.
Thanks for the feedback.
I often use the Lowel video light and would use more often other than for the requirement for an assistant.
Im also starting to use video lights a bit more in my work, they are nice, portable and directional which can be helpful!