Video tutorial – Using LED video light for photography
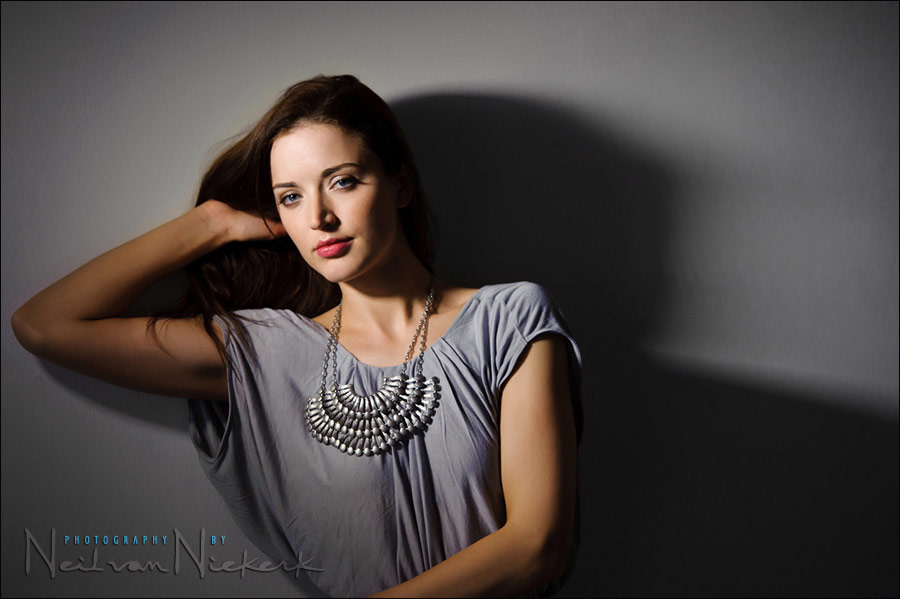
Regular visitors to the this website will know that I favor video lights for dramatic portraits. The what-you-see-is-what-you-get nature of continuous light, makes it really easy to get interesting light on your subjects. But it does need some finessing in how you position it for portraits. Meeting up with Anelisa, one of my favorite models, we created this tutorial video clip to show exactly how I use the video light for portraits. It also explains my starting point in choosing the direction of light, and also shows how I often direct people during a shoot.
As a side-note: during the first part of the shoot, my assistant held up the video light. For the latter part of the shoot, I used a light-stand, as can be seen in the clip.
[ For more videos, follow me on Vimeo / YouTube ]
About the video light itself
There is a huge variety of LED video lights available on the market. The unit that I currently use is this one, which I recommend: LED video light (affiliate). It is compact, yet powerful. It doesn’t run hot and works off a rechargeable battery. The color balance can be continuously changed from Incandescent WB to Daylight WB. I like this unit because I feel it gives me a more neutral color that is easily edited for great skin tones. As mentioned, you can easily change the WB for Incandescent / Tungsten, or warmer than Daylight, which helps in the ever-changing scenarios we find ourselves when we have a photo shoot.
More about the things we need to look at when buying a video light for Photography & Video.
Related articles
- Video light vs bounce flash
- Video light for photography – positioning the light
- Lighting ideas for the romantic wedding portraits
- Buying a video light for Photography & Video
- more articles on using video light for photography.

Technical details about the video clip / equipment used
- Sound recorded via Sennheiser G2 wireless microphone system
- Video clip edited in iMovie ’11
- Music for the video clip provided by Triple Scoop Music
- Equipment used for the HD video:
- Canon 5D mk II
- Canon 24-105mm f4L IS
- Equipment used for the stills photography:
- Nikon D3; Nikon 70-200mm f2.8 AF-S VR II
- recommended LED video light
Fantastic video. Loved it. Thank you for taking the time to put it together. A huge help for me as I begin to explore off-camera lighting.
WOW, Neil it as been said before but let me be the scratch record who says it again, YOU ROCK!!!
This is an amazing tutorial and your model did a really great job, thanks for taking the time to give back. :)
Another great tutorial video. Informative!
Great video, Niel. Thank you! It is very helpful to see how great photographers work. Btw I just love how you mix left and right…makes me feel I’m not alone ;)
K
I have had a life-long problem distinguishing left from right, without first having to think about it. (This even got a mention in the corrections to my first book.)
It was just made worse here because my left is her right. You’d think that my tendency to confuse left & right would’ve balanced out here to the correct instruction, but unfortunately not.
This is also why I mention in the article on posing your subject, that a visual instruction is better, showing your subject how to pose by having them mirror your movements. But it is more difficult with a Nikon D3 and 70-200mm in your hands. Oh well, it made Anelisa laugh.
Funny is as I was watching it and you were saying “bring your left arm to the play” I was like “..but why she is not moving her left arm up??” and then I realised that she WAS bringing her LEFT arm up! :)) I am with you, Niel!
Very interesting and useful tutorial. Thanks for sharing.
Neil video tutorial is fantastic. Help us much, especially about the direction of models. In fact one day you could post a video on the basic tips about the direction of models would be a beautiful experience to receive instructions from a master of photography.
Paulo Leonardo – São Paulo – Brazil
Another great video!
I guess that because the video light is daylight balanced, you have Daylight selected on your camera ? or do you use Auto WB?
Thank you for sharing.
For the stills camera (Nikon D3), I set the WB to Daylight. But I did touch it up as part of my normal RAW workflow.
The video clip was shot with the Canon 5D mk II, and the WB was set to 5600K. We judged this to give us good skin tones, going by the LCD preview.
Anyway, I wouldn’t normally use AWB, although, in using a RAW worflow, it isn’t of much importance in the end.
Neil, thanks for another very informative article. If you have an assistant, is’nt the Lowel light more flexible and powerful, it is dimmable , focusable and more power.Battery power is one issue. On the website of BH they say that bascor battery life with this is 1 hour if used continously.
I am thinking of buying this light but debating. Another point is if it is very dark and you want the video light to overpower , wont the Lowel light be preferred.
Can you please share some thoughts on that.
Thanks.
-MP
Check out my comparative review between the Lowel ID-light and Litepanels MicroPro LED video light and the Dedolight.
The Lowel ID-light is really nice and comes ahead in the comparison. Great light. But the LED video light is faster to use and more compact.
I have both. But the LED video light sees more use since I can easily slip it into my camera bag. Great for use at a wedding for some romantic portraits.
But for a boudoir photo session, I will definitely take the Lowel ID-light along.
thanx for the video
I tried some cheaper LED lights, I wasn’t quite happy. Neil, you are right recommending good quality lights. Thanks for all your clips, always so useful!
Thanks for the clarification Neil.
I recently watched a DVD by Doug Gordon, Shooting Weddings with a Video light, the Video light that he sells seems good to but is priced around $500 now :-(
– MP
I use a battery used in alarm systems to power my lowel light for my videography.
A 50 WATT rated bulb runs for 45 minutes. a lot better than the 15 minutes you stated. How long using double a batteries does the micro pro run ?? What do define as ” for ever “
I define forever as “far longer than your entire photo-shoot, but you have a spare set of batteries anyway”.
what an awesome demonstration, very helpful instruction as always.
Great video again Neil!
The guidelines are excellent for directing model on studio, specially concerning the direction of the light.
By the way, do you see a tendency for wedding photographers using more LED lights?
Cheers!
Hi Neil
Nice video. May I ask if you u normally set your LED light exposure 1-2stops more than ambient or according 2your lens & camera capability?
Another is if you use black foam do you set your camera to matrix metering or some other like center etc?
Thanx in Advance! :-)
Great video Niel, very helpful
Hi Neil – the use of video lights fascinates me – but it seems as if it could be used only for one or two people – what do you do for larger groups, like the entire bridal party? Many thanks
I use flash.
I have used continuous light in the past, but not LED video lights. Along with being very hot, the continuous lights seemed to not put out as much light as I would have thought. So shutter speed was pretty slow unless using higher ISO settings. What settings were you using for aperture, shutter, and ISO on the shoot with the LED video lights? Also, is there any good way to determine how much light a particular unit will put out? I don’t see anything in the specifications that seem to be very useful for actual light output.
P.S. Loved the video….
Rusty .. all the linked articles mention the specific camera settings.
The video lights aren’t very bright compared to flash. But then, there isn’t much to match the power of flash if you look at the size of a speedlight vs output.
There isn’t really a way to state the brightness of an LED light, and it doesn’t seem like manufacturers even want to mention an equivalent brightness or Lumens value.
Great shot and light. I’m currently thinking of using LED because of all your fine examples and blog posts. One question though: can you use this LED for full body portraits? Can the light go that broad or wide?
Thanks Neil.
You could, but then you’d have to move the light further away … at which it becomes a pin-point light-source, and harder / more contrasty.
The power also drops off considerably then. (Think of the Inverse Square Law.)
Ok, I see. But couldn’t you stack two of them together to have a vertical panel, so you can lit full body? Then again, maybe it would produce too much light for your models and it would become uncomfortable for them? What do you think of this? Thanks for sharing your experience with us!
You could definitely stack them together for more light and better spread. I’ve seen some makes which allow you to clip them together to more easily gang these lights up.
Hello Neil,
I have been using LED video lights for couple portraits and portrait session. I have tried and have been non expensive Led lights and love the flexibility of the light and possibility of controlling the light spread on the subject. However, I have a challenge with my set of lights. They have a peculiar yellow and greenish color cast which seems to be messing up the WB of my image. The cast is so strong that sometimes I have to bump up the magenta tint so high that rest of the skin tones turn dark Pink.
Have you faced such issues or recommend few tips on it?
That green color cast is a real risk with the cheaper makes of LED lights.
No other way around it than to somehow get to test a specific model and brand.
This is why I like the Litepanels LED lights.