wedding photography – working with incandescent light sources
As a wedding photographer I obviously shoot all the time in ares lit by tungsten / incandescent light sources. With modern D-SLRs and fast lenses it is no problem to actually use tungsten light as my main light source.
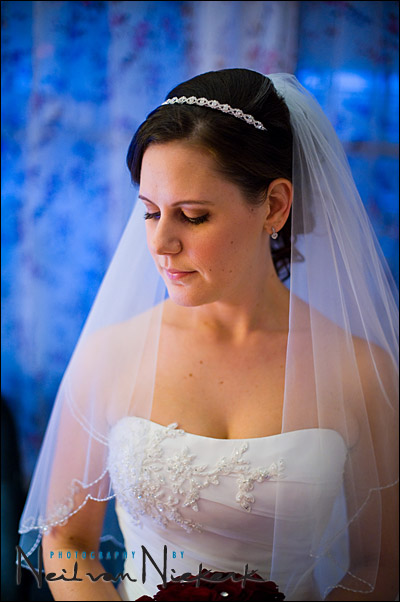
The photo above from a recent wedding, is a typical image where I used an existing incandescent / tungsten light source for a beautiful but simple portrait. Here I photographed the bride by the light of a lamp in the living room. No flash was used – just the lamp and whatever other ambient light existed in the room at the time.
The blue color in the background is the draped window behind her which is lit with light from outside. With the huge difference in color temperature between the tungsten light and the light from outside – should I correct for the tungsten light (ie, regard that as my neutral light source), then the outside light will be much more blue in appearance. With this image, I set my WB on my camera to tungsten / incandescent as would be typical here, but still touching up the WB as part of my regular RAW post-production workflow.
When I need more light though in a situation where tungsten already dominates, then I really hesitate to use unfiltered flash. I nearly always gel my flash for tungsten light in this case – either with a 1/2 CTS filter, or a full CTS filter.
Another option to using gelled flash is to add more tungsten light …
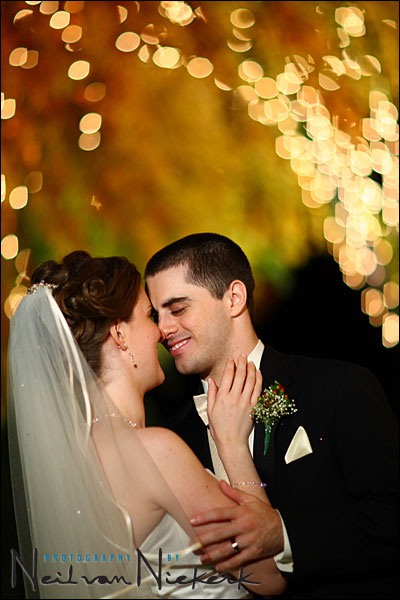
Wedding photographers these days regularly have video lights with them as part of their usual lighting kit. From the same wedding, here are two images where my assistant held up a video light close to the couple, but off to the side. This is to ensure directional light on the couple, adding light that doesn’t look mismatched to the scene. (My assistant on this wedding was my good friend Josh Lynn, who kindly helped me out.) He was just out of shot to the camera’s right in this image …
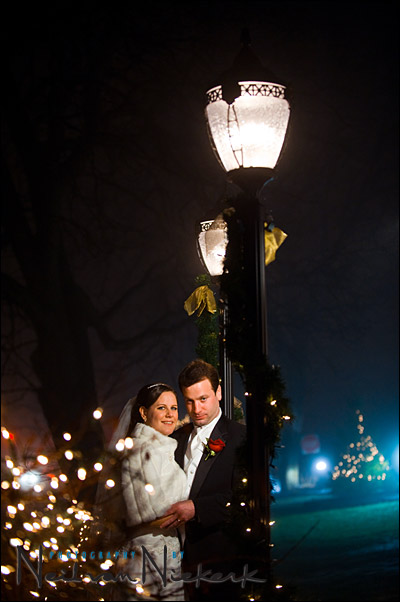
.
… but on the camera’s left in this image.
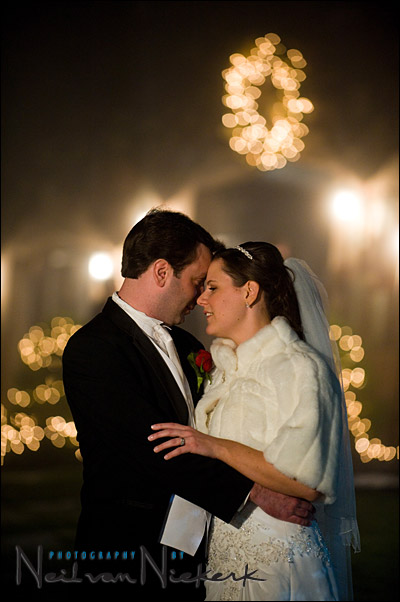
By keeping the light that I’m adding to the setting, very much the same as the existing light, it really does help to enhance the image, and not intrude as a distracting element. Being video light, it’s a continuous light source, and it is an easy matter to direct my assistant to move the light exactly as I need it to be.
Here is a listing of the video light set-up that I use, based around the Lowel ID-light.
![]()
Quite often with the portrait session at a wedding I shoot with the videographer and use his light. In shooting from a different angle than the videographer, I will get directional light. And I also often as the videographer just to move in a little bit to give me more light. See, as a photographer it isn’t necessary to fight with the videographer ;)
Here are two images from another wedding where I specifically asked for the videographer to move his videolight in a specific way to give me the opportunity for specific sequences of images:
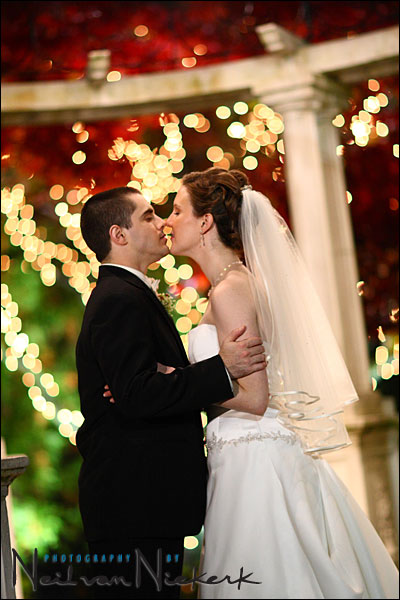
And, as always, I am very careful in placing my subject in relation to the background. The background is an integral part of the final image. When I am working with a couple during the portrait session (or any other time where I can direct my subject), I am very specific in my position, my subject’s position and the background.
![]()
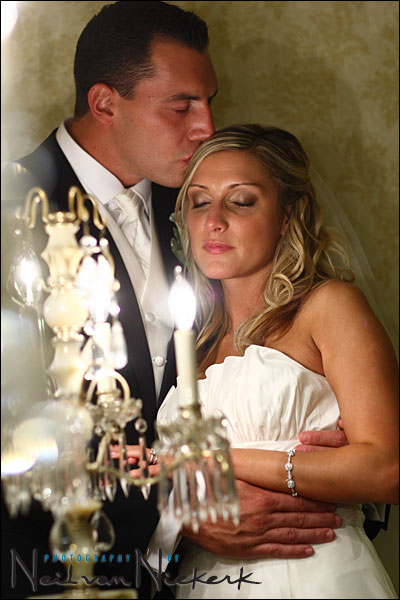
Here is another example where I used the existing lights indoors, without using flash. Fast optics are essential here, as well as cameras that are high-ISO capable. The combination of those two things open up a whole new world of possibilities in embracing the available light.
![]()
When working with these additional tungsten light sources or video lights, I always gel my flash with a full CTS filter .. even if I don’t end up using flash during the sequence of images. Here is an example of how well the flash can blend in with the existing light (from multiple sources). By gelling my flash and carefully bouncing it, I feel I can really enhance the scenario without intruding on it with an overly flashed look.
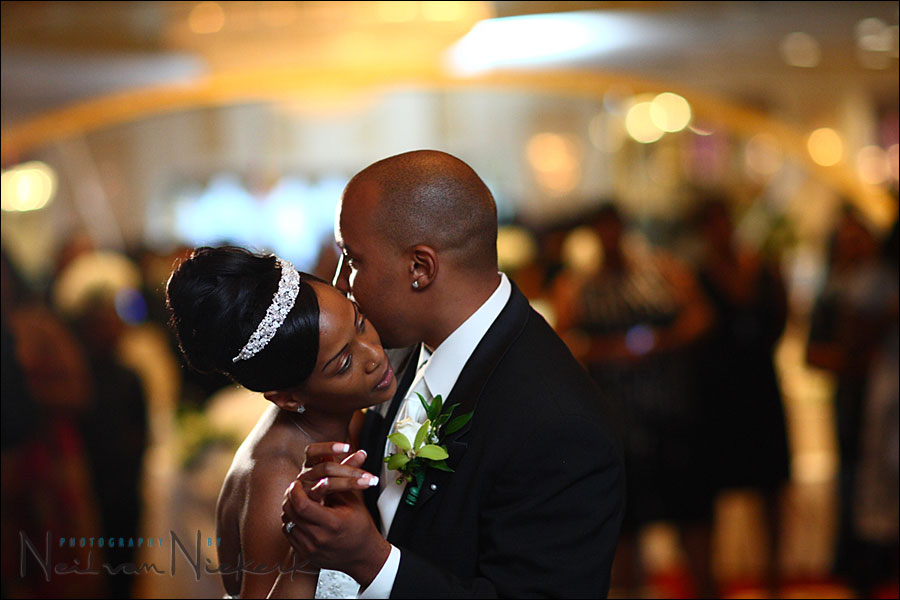
[ click on the photo to see a larger image]
![]()
With all this, the intention is to have a flexible approach to lighting, allowing possibilities to open up in what I can achieve in any scenario.
Gelling your flash
Since I frequently gel my flashguns to turn the WB of my flash much warmer (usually for Incandescent light), I use these gels that I cut up and tape to the top of my speedlight’s head. One of these sheets (which aren’t expensive), will give you a lifetime supply of these filters. For me, these gels are an invaluable part of flash photography.
Tape the gels down on your lens hood when not in use.

All the gelling make absolute sense to me!
If most (amateur) photographers use flash indoors to compensate for low light situations, I wonder why flash manufacturers don’t make tungsten flashes (like they do with video lights)?
Frank
Neil vN
Excellent primer Neil … your lessons are on target as usual!
Amazing shots Neil…..just when I thought I’d seen some of your best work…you surprise me with these shots…..
I’m not knowledgeable about video lights, but don’t they have removable bulbs? Therefore, changing bulbs in video lights to accommodate a situation probably works well. Camera flashguns are smaller products and its bulbs are not replaceable by the end user, so I think companies don’t want to or have the resources to retool their assembly to accommodate a tungsten-based flashgun.
This will make a real difference.
Thanks heaps for your time and effort. Yours are some of the best tutorials out there. Keep up the great work!!!
Superb bokeh, can you please say which lens did you use, particularly on images no. 3, 4 and 5? Thanks.
Great pictures Neil (the first and last are especially lovely) and a very useful lesson too. I’m still learning to use flash well so am at a stage where I possibly tend to overuse it. This is a very timely reminder for me. Thanks.
Great article Neil.
I’ve not used a video light yet but using it to compliment available tungston light worked beautifully with the couple under the street lamp.
Great tip to balance flashgun to the main light source. If the lights are flouresent then green filters will be the ticket. If it gets too complicated B&W fixes all colour casting issues in my book.
I will have to check out your video lighting tutorials now :-)
Hallo Neil
I bought I-Light (w/t a dimmer), so I should to operate with the distance, should I? May I ask (Nikon user) You what setup is best for WB for shoting with video light? Do I need to set my camera for “tungsten” in the night and “sun” in the day? And what about CBL Lens or grey card?
Neil,
Thanks for all your efforts and tutorials.
Would you mind explaining how you work with gels and what gels you use in a sample situation ? I have tried working with the few gels that Nikon supplies with their flash like tungsten and florescent, but I have not been so happy with the results and find that the flash never quite matches the existing light.
Also, when using gels and ambient light, do you find a big difference between the quality of the color and image between the upper priced cameras like the Nikon D3 verses a Nikon D300 ?
Thank you and much success in 2009 !
Neil great advice.
When you use the full ct and 1/2 ct filters do you set your in camera white balance to tungsten as well or do you just leave it on auto and adjust it in your workflow.
thanks,
Mike
Hi Neil,
Thank you for the great tutorial. I was wondering why you use CTS over CTO? What is the advantage for choosing one over the other?
Thanks,
Wayne
Hi Neil,
I’ve always wondered, what exactly is the Flash white balance setting…Should I ever be using it? I don’t know of a situation where I should choose that setting, and yet I’m always switching to it to see what difference it makes!
Liz
Hey Neil, love the images. I tried experimenting with some video type lights at a wedding this weekend. With the Lowell lights, do they have enough juice to keep you from reaching into the higher ISO’s to get the settings you want?
Thank you!!
Jim
Thank you so much for the info, I just wanted to make sure it wasn’t my light. I was the ISO 2000 range as well. Thank you again.
please explain what the CTS gel stands for.
does the CTS gel come with the Nikon 800 speedlight?
Hi Joey,
The CTS stands for Colour Temperature Straw [of course ‘Straw’ being yellowish/warm colour] and CTO stands for Colour Temperature Orange.
CTO is a little too warm for me personally, I use CTS and even then CTS 1/2 Straw mainly.
Supplied with the SB-800 are two filters, being the FL-G1 for taking flash pictures under fluorescent light and the TN-A1 for use with incandescent/tungsten light.
The tungsten filter supplied with the SB-800 is different to the CTS and although having the SB-900 myself which also comes supplied with filters, I also don’t use the supplied filters.
1 sheet of CTS, either full or 1/2 straw from B&H is dirt cheap for a 20×24 inch sheet which would probably last the average user a very long time.
Cheers,
Trev
Oops typing and posting a little late for Neil’s reply.