Photoshop tip – easy effect for more punch to your photos
Here is a well-known Photoshop technique – one that I like and use on occasion. It desaturates the photograph, while also compressing the tonal range. It creates a modern look that also looks quite trendy. It is also quite easy to apply, by dragging the layers from a reference image once you’ve set it up.
Starting with the original image, I add these two layers:
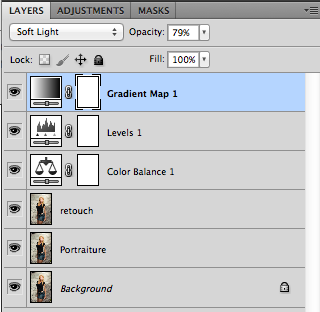
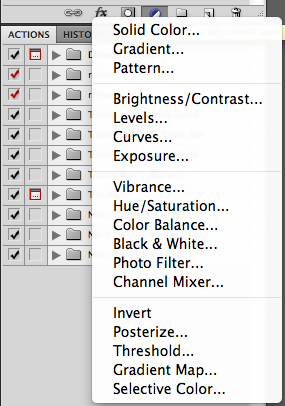
The important layer here is the Gradient Map adjustment layer. You select it by right-clicking on the icon shown below.
The Gradient Map layer creates quite a nice B&W image. But by changing the Blending Mode to “Soft Light”, the color returns, and the image is quite contrasty … and under-exposed. For this, we add another layer – Levels – to help lift the exposure.
Adjust the opacity of both layers.
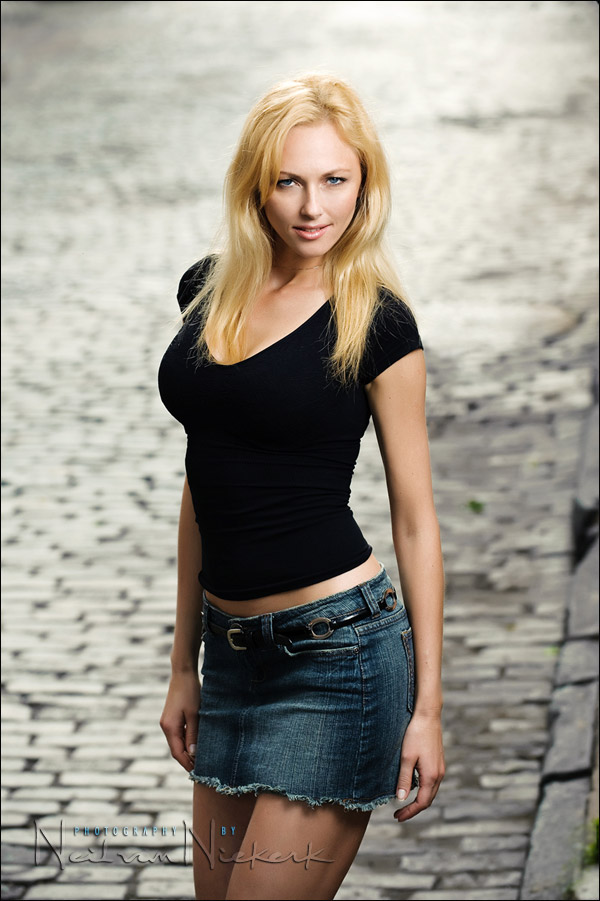
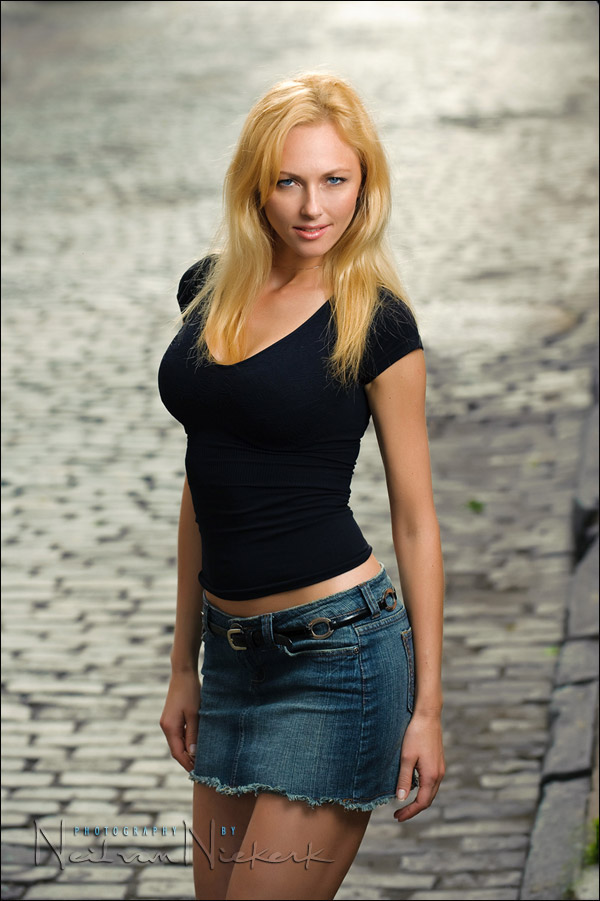
Here are the two images in succession – the original, and the effect – so you can see the change.
As you can see from the screen-capture of the layers there, I did use the Portraiture plug-in for some initial skin softening.
- how I use other Photoshop plug-ins to retouch portraits
- other articles on digital imaging and retouching
Camera settings & photo gear (or equivalents) used in this photo session
- camera settings: 1/250 @ f5.6 @ 400 ISO .. manual off-camera flash
- Nikon D3s
- Nikon 70-200mm f2.8 AF-S VR II / Canon EF 70-200mm f/2.8L IS II / used at 130mm
- Lastolite EZYBOX 24×24″ softbox
- Nikon SB-910 Speedlight controlled by PocketWizard FlexTT5 Transceiver & AC3 Controller
or alternately, the Canon 600EX-RT Speedlite controlled by Canon ST-E3 Transmitter
Related articles
- more articles on Digital Imagining
Good tip, as always.
Thank you, Neil.
Great bit of info Neil, so glad you share with us what’s in your creative mind!!
How does this compare with just reducing saturation?
i somtimes do this in LR by dragging down the vibrance or saturation a bit then and add contrast, and possibly brighten highlights…
could you explain how this could be accomplished in lightroom? Looks like a highlight boost, some black clipping, higher contrast, I’d appreciate some tips!
Thanks! Great site you have here.
Have you tried a gradient map in the Luminosity mode instead? Similar effect but without having to adjust exposure.