Photography with video light and daylight
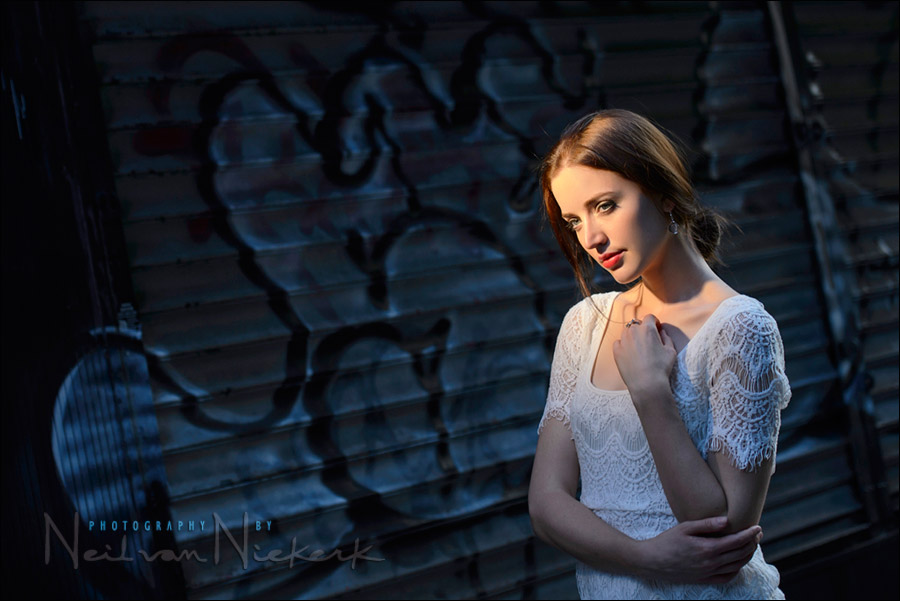
With the recent lighting workshop in New York, we again played with the use of video light … and then took it out to the street. The blue-ish tones of the shady side of the building here, contrasted beautifully with the warm glow of the video light.
As with the article, gelling your flash to get a blue background, this is something that can work very well when we use light sources with different color balance, thereby attaining those complementary colors. The rapid fall-off in light also helped give the photograph a dramatic quality.
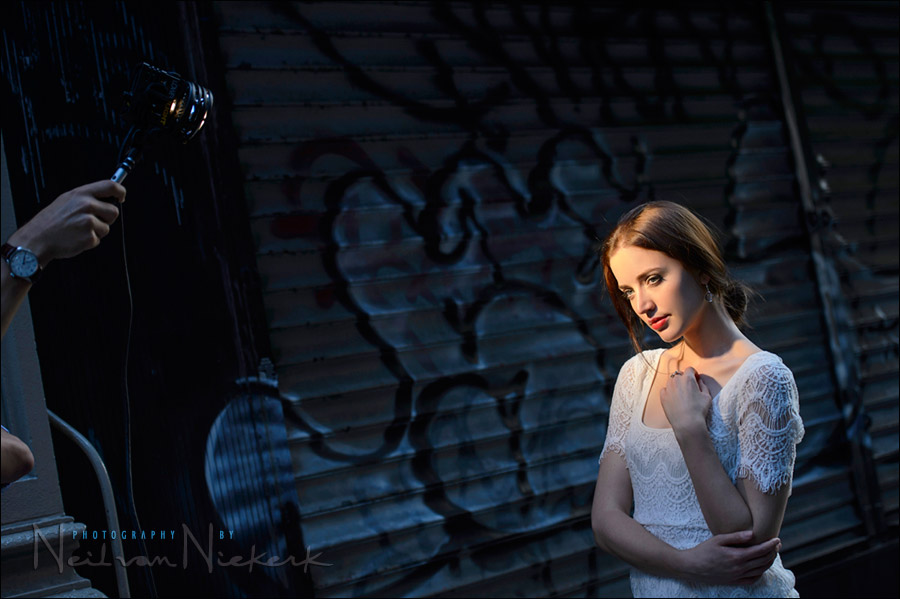
The photo above is a crop of the actual image which is also a pull-back shot then to show where the light was positioned:
Turning into another direction, we had the early evening city as a backdrop. Using a long telephoto zoom helped isolate Anelisa against these out-of-focus colors.
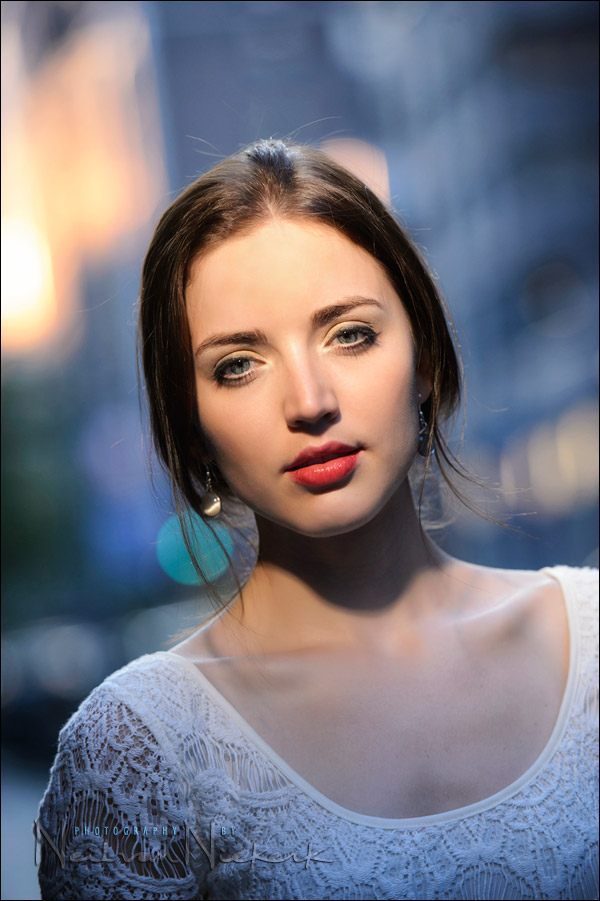
The technique here was to choose a background which wasn’t much brighter than we’d be able to get from the video-light … and then bring up the exposure on her with the video light. It really is the same technique we use with flash – expose for the background, and then lift the exposure for your subject with flash … or, as in this case, a video light.
I used Imagenomic Portraiture and Nik Color Efex 4 filters here to retouch the photograph.
Camera settings and photo gear (or equivalents) used during this photo session
- 1/200 @ f/3.5 @ 800 ISO
- Nikon 70-200mm f/2.8 VR II / Canon EF 70-200mm f/2.8L IS II
- Lowel ID-Light
What are you using to power the light?
Thanks for posting. I looked at the link to B&H for the ID-Light, but is the power supply for the light?
Doug, the link to the power supply is there in the list of video light equipment.
Bescor MM-9 XLRNC battery
Doug,
You need to also purchase a power supply [battery] for the Lowell light.
However, a cheaper and a much longer lasting [but heavier option] is I also purchased the XLR connector which goes into the Lowell’s connector and soldered the other end onto slide clips which fits onto a 12V sealed motorcycle battery, cost me only around $80 and I still have the battery which is now over 4 years old.
It lasts a very long time in power. I also got a little carry bag with it at the same time, $6, with a shoulder strap so my assistant has the light on a mono, and carries the power supply over shoulder.
Trev.
Hi Neil!
Once more, a fantastic shot!
With flash, you can easyly control the background exposure and the flash fill, separately.
How do you do this with video light? Once you have your expouser for the BG, how do you meter it for the subject? Just with the spot metering of the camera?
Regards!
Felipe
Neil,
In your experience, what lux value do you need in an LED light to be strong enough to fill harsh shadows in a bright sun daylight portrait setting? I learned “basic exposure” years ago as a photojournalist, so I’m talking about an “f/16” scene (“Basic Exposure”: ISO = shutter speed denominator), but I don’t have any idea how that f/16 lighting relates to Lux to know how strong a continuous light I need to be sufficient fill with the sun as key light.
Thereza … these kind of video lights (or most continuous lighting that we can afford as photographers), just aren’t strong enough to give you that kind of light to compete with strong daylight. They simply can’t do f/16 … so there’s no way to really answer how much lux it would need to give out.