Bounce flash – Adjusting the black foamie thing to be a snoot
During the day, as I photograph a wedding, I am continually mixing up the lighting, adapting and adjusting. It’s part of the process of giving my clients as much variety as possible, and also just being flexible in adapting to the demands of the various locations. It’s therefore a varied approach in using all kinds of light sources: off-camera flash, on-camera flash, video light and available light. It’s part of the fun, and part of the challenge of being a wedding photographer – thinking on your feet. Of course there’s extra pressure on you as photographer when you’re flown to Melbourne, Australia to photograph a wedding!
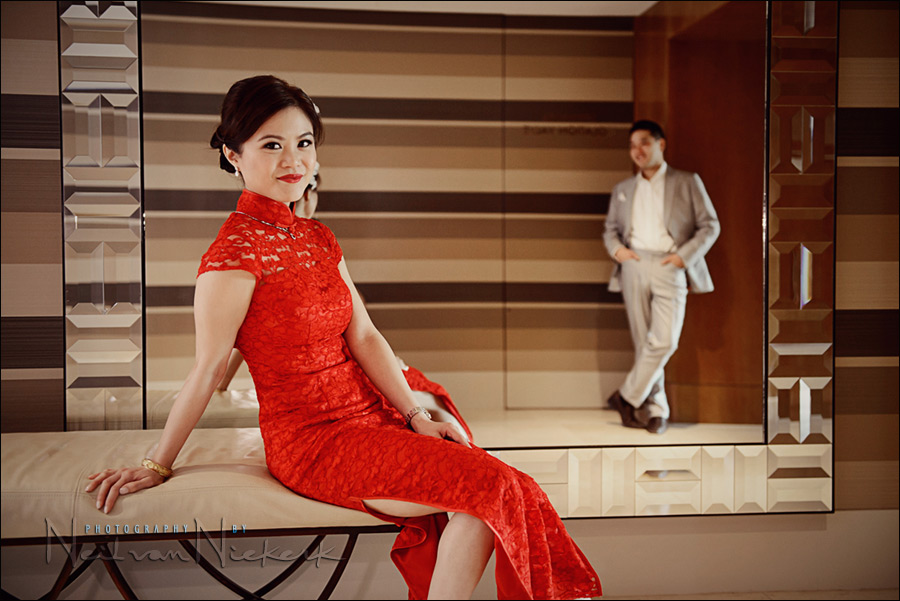
The morning after Peiwen and Eric’s wedding, they had the Tea Ceremony with the parents, and Peiwen was in traditional dress. I just had to get more portraits of the two of them, and with Peiwen in this striking red dress.
In the elevator lobby on their floor, there were these seats and mirrors and wood paneling that looked like it would make an elegant setting for some portraits of the couple. But the light there was uneven, and not very bright. I needed to add some light, but only had a video light with me, and on-camera flash. With that large mirror, someone holding up a video light would’ve involved a lot of Photoshop work. So the next option – bounce flash. But again, that large mirror there was a challenge.
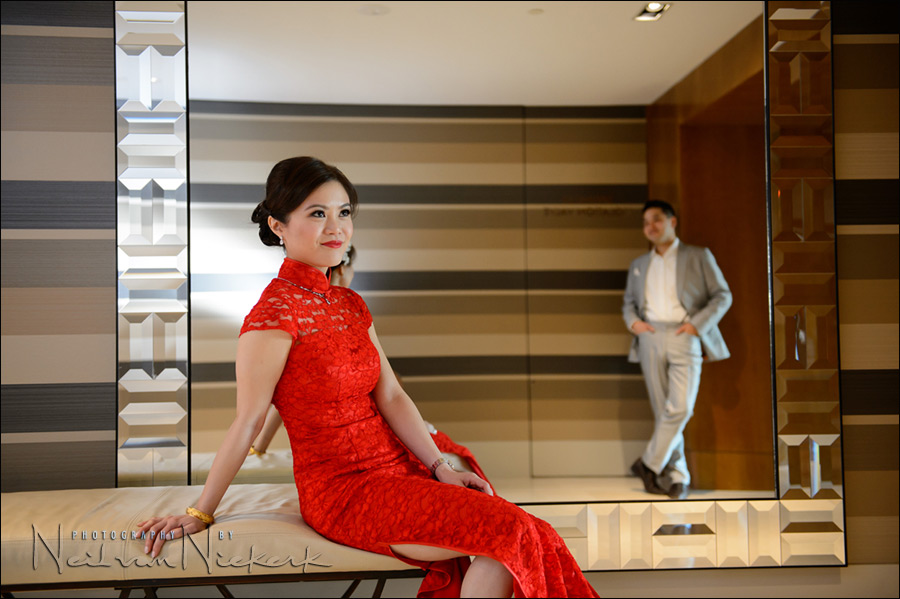
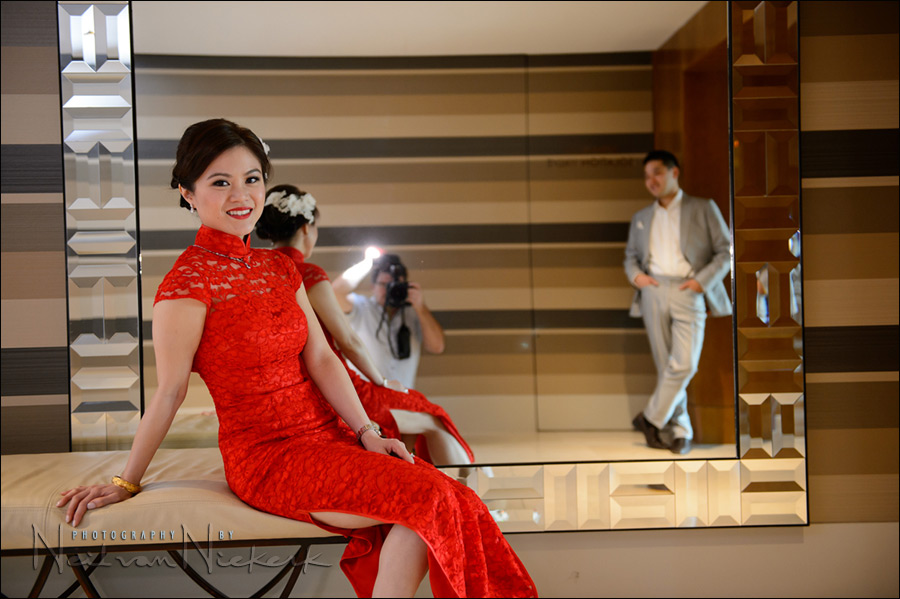
Simply bouncing my on-camera flash to my left (using the black foamie thing), meant a splash of light on the wall behind me. Yes, I was hiding myself behind the reflection of Peiwen. Strange how such a petite woman can hide a burly photographer. (Hint, it’s the perspective.) Anyway, that splash of light had to not be there. It revealed my lighting, and ideally it should just be seamless.

On-Camera Flash Photography – revised edition
This book is explains a cohesive and thorough approach to getting the best from your on-camera speedlight.
Particular care was taken to present it all with a logical flow that will help any photographer attain a better understanding of flash photography.
You can either purchase a copy via Amazon USA and Amazon UK, or can be ordered through Barnes & Nobles and other bookstores. The book is also available on the Apple iBook Store, as well as Amazon Kindle. Also check out the Amazon Kindle store.
Learn more about how the cover image was shot.
To get the image at the top of this article, I simply turned the BFT into a full snoot by cupping my hand around it – no light escaped then to hit the wall behind me. All the light was blasted down the passage, and the reflected light opened up the image.
I popped out for one behind-the-scenes selfie to show my position.
Camera settings and photo gear (or equivalents) used
- camera settings: 1/80 @ f2.8 @ 1600 ISO; TTL flash
- Nikon D4
- Nikon 24-70mm f2.8G AF-S / Canon 24-70mm f/2.8L II
- Nikon SB-910 Speedlight / Canon 600EX-RT Speedlite
- Nikon SD-9 battery pack / Canon CP-E4 battery pack
- a BFT (black foamie thing)
On-camera flash modifier – the black foamie thing

The BFT is held in position by two hair bands (Amazon), and the BFT is usually placed on the under-side of the flash-head.
The linked articles will give clearer instruction, especially the video clip on using the black foamie thing.
Related articles
- The ultimate guide to the Black Foamie Thing
- A wedding in Melbourne, Australia
- Direction & Quality of light – your key to better portrait photography anywhere
- Lighting ideas for the romantic wedding portraits (Melissa & Dennis)
- Wedding photography – adapting the use of light & flash photography (Alesha & Patrick)
- more articles about wedding photography
- more of my work: New Jersey wedding photographer
Were you alone shooting that wedding in Australia?
My wife assisted me. But I was the only photographer.
Good idea to bring a wife/assistant!
Sometimes I have small wedding budgets and that is a nice solution. I’m going to do that! Rs
Thanks
Yet another think-outside-the-box approach to a problem we have all encountered shooting near mirrors. Brilliant! Thanks for sharing, Neil!
Brilliant. Just wondering what power level of flash or TTL needed? ISO used?
Aaah, I’d forgotten to add the techie details. I’ve done so now.
Thank you. Now it all makes sense. The settings and the wonderful explanation. At 1/80, it would be risky on my 70d. It would mean I would have to shoot at a FL of no more than 50mm to prevent camera shake blur if I were in the same position.
Your 70D will adequately handle 1/80th – 1/80th is 1/80th, but if your lens is not image stabilsed you may have more chance of blur, but even then I think you would be fine.
Isn’t it interesting the amount of work and thought that goes into what initially looks like a simple photo.
I have been pondering your comment Valent, and watching Neil work (on here anyway) he does make it look simple – BUT in actual fact it is! We don’t think of driving a car as a lot of work or requiring a lot of thought, in fact it’s quite simple – when you have the experience. Seat belt, mirror, signal, manoeuver, change gear, slow down, turn etc etc…
The individual elements of this image are not complex, ISO & Shutter for ambient, light for fill and a hand for the glare. Place the subjects and – Voila! It’s putting it altogether – that’s where I fall over mostly, confusing myself while feeling pressured not to upset the client. In time it WILL happen. So I agree and I don’t agree. It’s what makes this blog so bloody brilliant!
It reminds us just how lucky we are to be photographing right now, when we can turn to ISO 1600 and not even give it a second thought in terms of noise (grain) etc. Modern photography really is so versatile.
Neil:
As always great article with two aha moments for me, when photographing in front of a mirror.
Using a snoot to eliminate the light on the back wall and hiding your reflection behind the subject.
So simple but I didn’t think of it.
Thanks
Quin
Neil, to your point about mixing it up, do you ever carry two camera bodies during an event, e. g. one with a wider angle zoom and one with a medium telephoto (either prime or zoom)?
Covered in this post, link:
https://neilvn.com/tangents/lenses-for-wedding-photography/
I carry two bodies, each with an f/2.8 zoom lens.
Nikon 24-70mm f2.8G AF-S / Canon 24-70mm f/2.8L II
Nikon 70-200mm f2.8 AF-S VR II / Canon EF 70-200mm f/2.8L IS II (B&H)
These I swap out for a macro lens, or ultra-wide zoom, or 85mm lens, as is necessary. But the vast bulk of what I shoot at weddings are with those two zooms.