Wedding photography – Adapting the use of light & flash photography
When I posted the photographs of a recent wedding in an album on FB, there were a lot of questions regarding my lighting. The answer is an easy one – I change it up as needed, throughout the day. Whatever is needed to give me the best results the fastest. It’s rarely just one thing. So with Alesha and Patrick’s wedding, I used on-camera flash, off-camera flash (with a soft box), Profoto on-location lighting kit, and of course, if it worked, then I just used the available light. The one only lighting option that I regularly use at weddings, that I didn’t use on this day – video light.
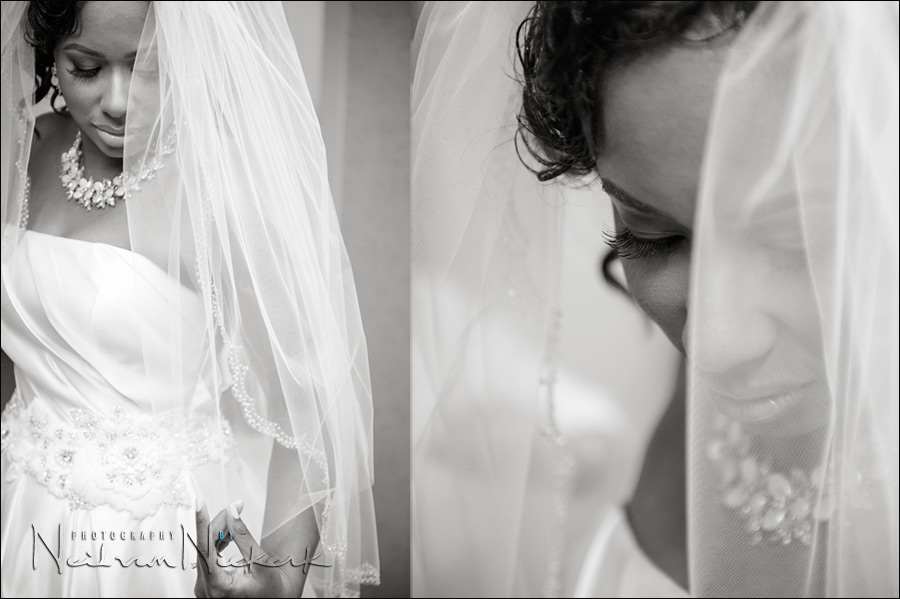
The image at the top, of Alesha just as she finished her prep, was shot with just the fluorescent lights in the room. The color versions look good too, but I really liked the simplicity of B&W here.
Let’s step through a few images, and discuss what I used in terms of lighting, and the how and why …

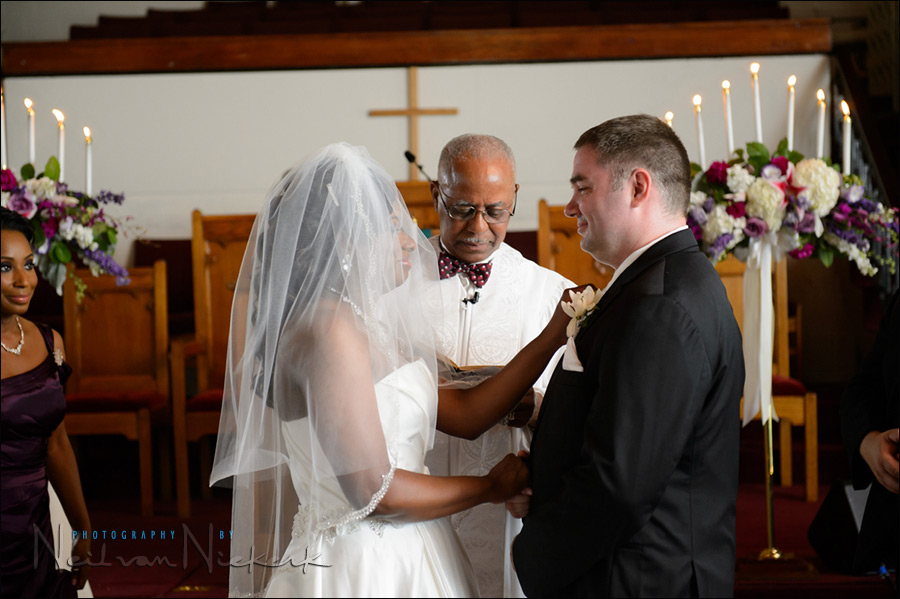
Using on-camera bounce flash
I don’t often use flash during the ceremony. I prefer the less noticeable option of just using the available light. But this church was particularly dark. I used my 50mm f/1.4 for some of the photos, but I had to rely on on-camera bounce flash for a large part of the ceremony. With this, I have more control over DoF and the quality of light.
Using the black foamie thing, my flash is bounced off the church wall to my right. Higher up. I don’t want to blitz anyone in the face.
camera settings: 1/125 @ f/3.2 @ 2000 ISO
I had my flash set to full output in manual, to be sure I had correct exposure. In other words, I set my flash to full output, bounced it … and then changed my settings until I had correct exposure. Doing it this way, meant that I had the optimum between DoF, shutter speed and ISO.
I did my test shots earlier on, before anyone walked down the aisle. So I knew the range of my settings for proper manual flash exposure.
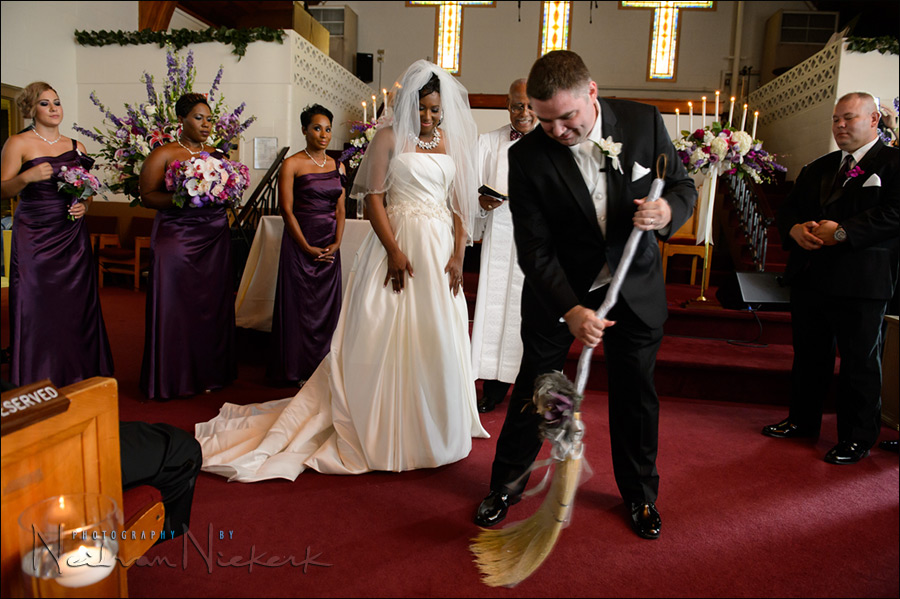
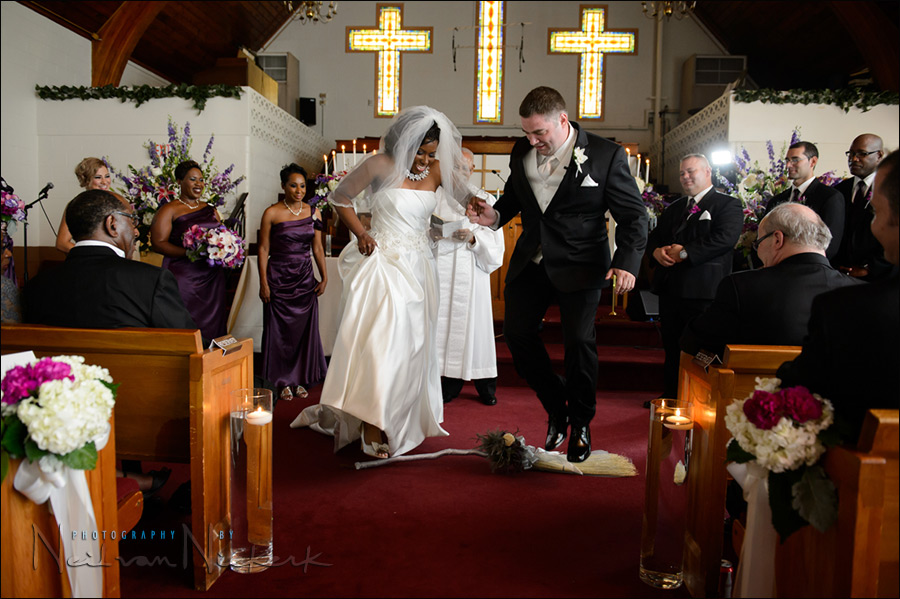
Jumping the broom, an interesting part of wedding ceremonies in some cultures. As Patrick put the broom into position, I pre-focused. So I was ready for the shot.
camera settings: 1/125 @ f/3.2 @ 2000 ISO
All images so far, were shot with just the 24-70mm f/2.8
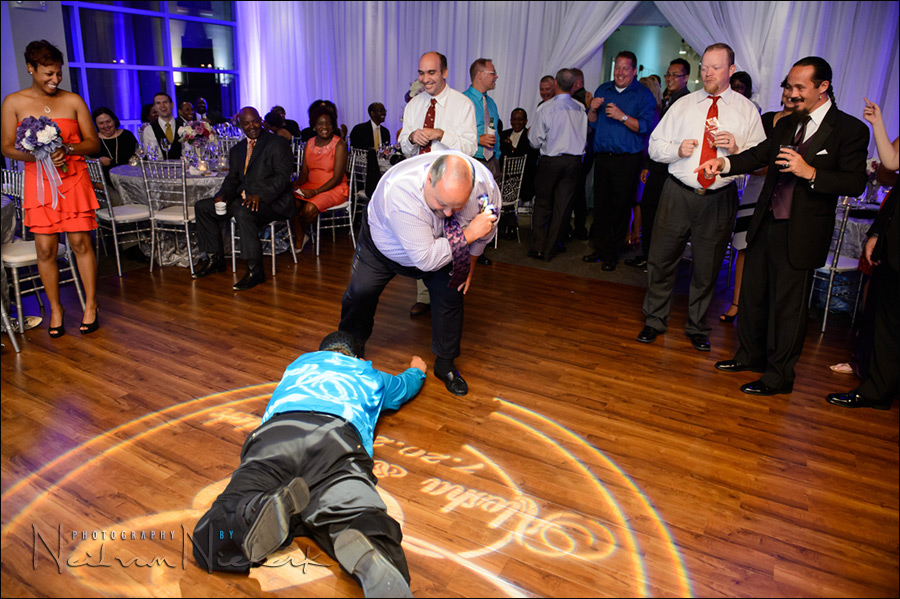
With the reception, I also just used on-camera bounce flash. The uplighting helped in avoiding that very dark background. The ceiling here consisted of light-colored wooden panels that were angled, which made it difficult to get good results everywhere in the room. But, knowing this, I found a few good spots that worked well.
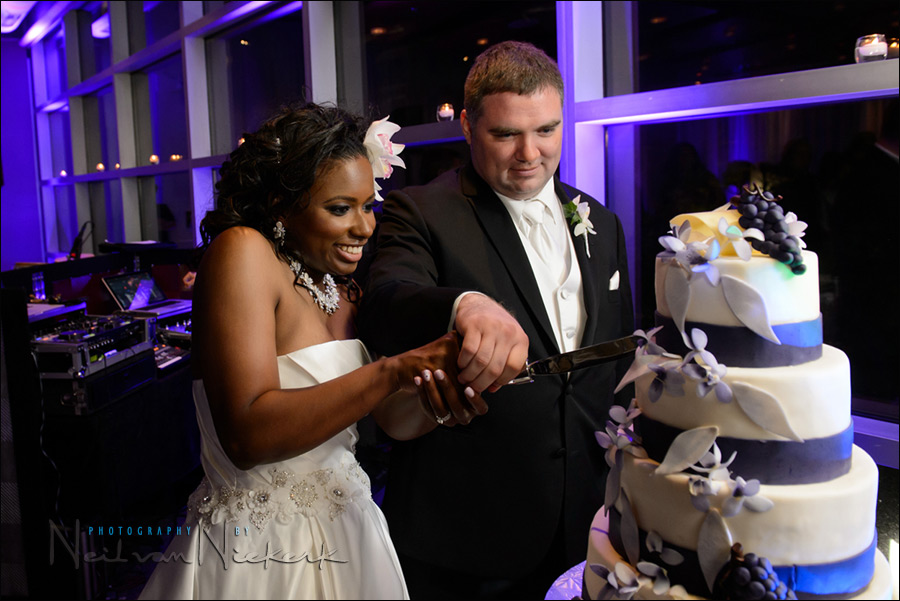
For the cutting of the cake, I bounced my flash over my right shoulder, off the glass and structures. It does work! And I get the typical directional quality to my bounce flash that I like.
Off-camera speedlight and a softbox
For the romantic portraits in the evening, we went out on the street in front of the reception venue. I specifically looked for backgrounds where I knew the out-of-focus lights would help create a great background. But I also had to make sure that the existing light didn’t intrude too much or create odd patterns on the couple. It really is a matter of quickly summing up where to take the images, and posing the bride and groom.
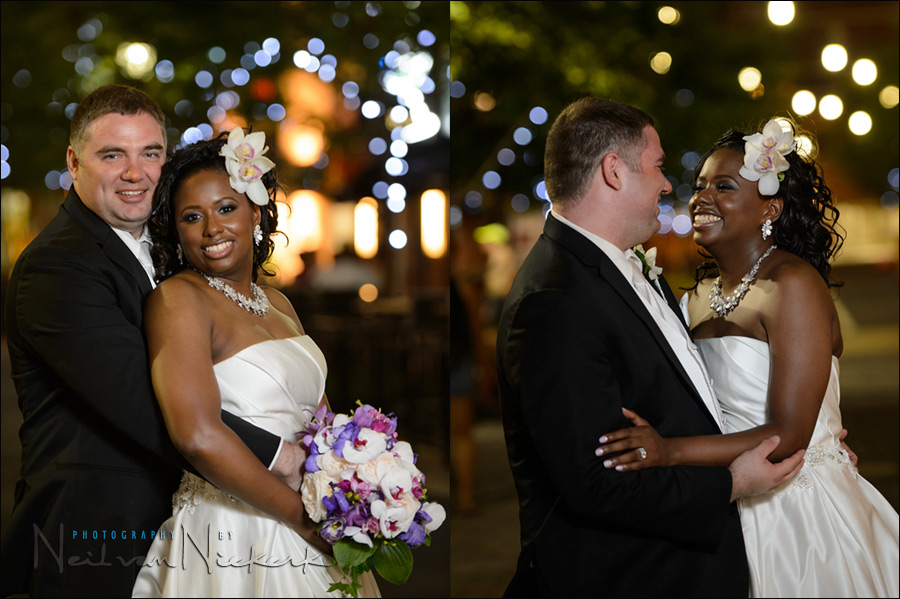
For these images, I used the Westcott Rapidbox – 26″ Octa Softbox (affiliate) with a speedlight, triggering them with my PocketWizard TT5 units. Manual flash.
My assistant on the day, (my wife, Sara!), holding up the softbox on a monopod, knew to keep a specific distance from the couple. I had chosen my camera settings so that I was at the best possible point for DoF, shutter speed and ISO.
camera settings:
shutter speeds ranged from 1/30 to 1/40
apertures ranged from f/2.8 to f/3.2
ISO was set to 1600
I changed the settings (within that very small range), depending on what I saw on the back of my camera’s preview. I also dialed the flash’s output via the PocketWizard TT5. But I had to work super-fast, because I didn’t want to delay the couple from enjoying the rest of the reception party.
I had two cameras that I switched between. One had the 24-70mm f/2.8 and the other the 70-200mm f/2.8
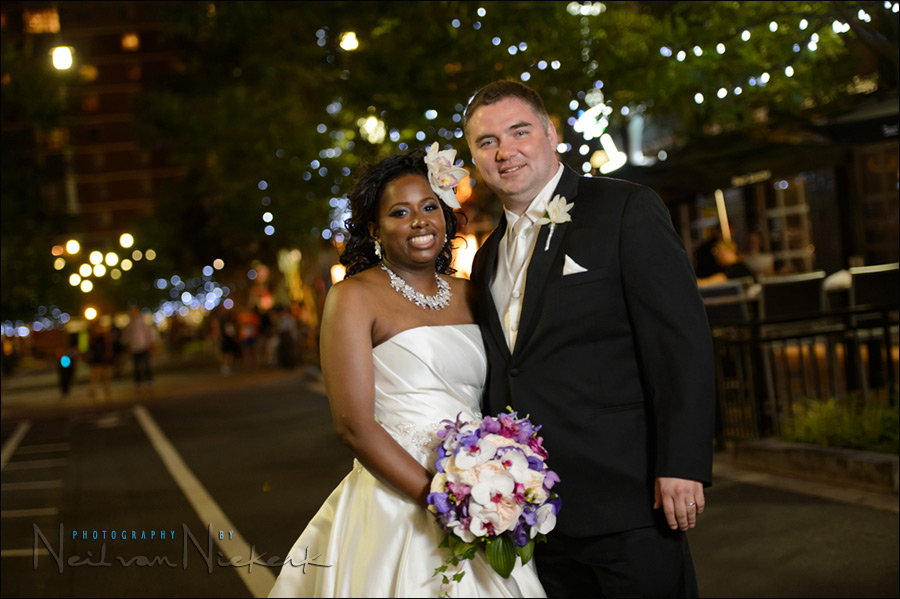


This last image is one of whole sequences that I shot, walking backwards, firing a number of frames. My assistant had specific instruction to keep to the same distance in relation to them, regardless of my position. (Why? A little bit of homework!)
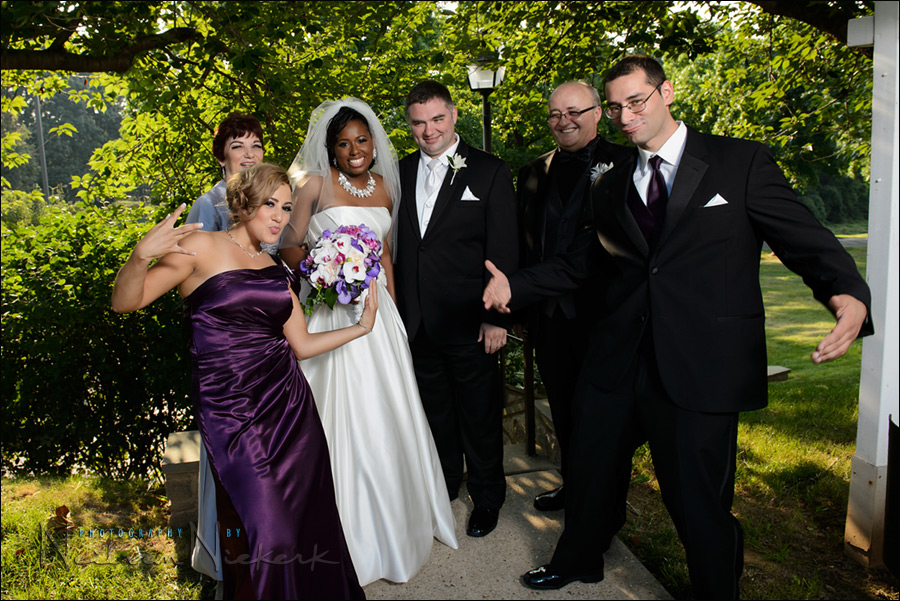
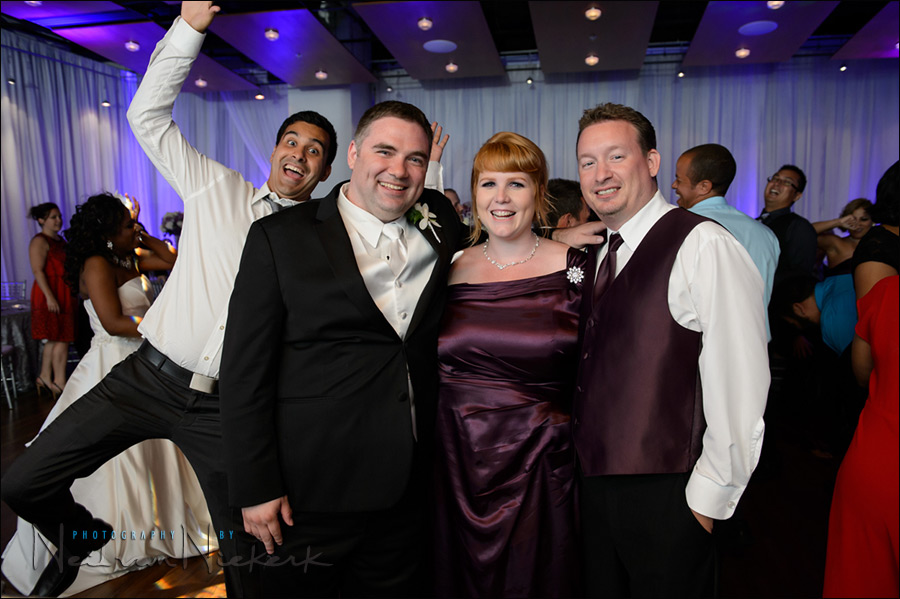
For the family groups, I used the Westcott Rapid Box – 26″ Octa Softbox (affiliate) with a speedlight, because it is easy to set up and light-weight … and the family groups were small. Yup, a fun group. And no, not all my family group photos look like this.
Off-camera lighting with larger studio-type strobes
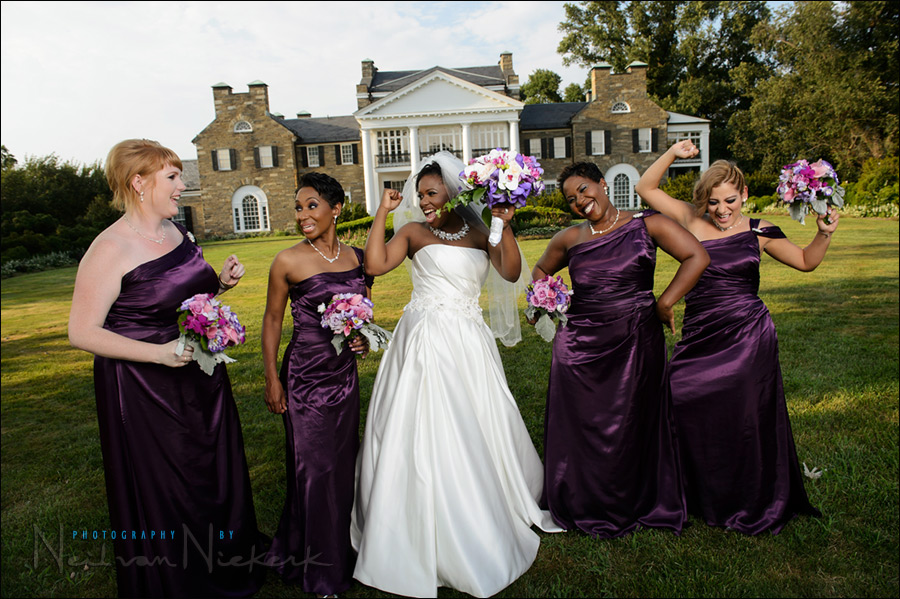
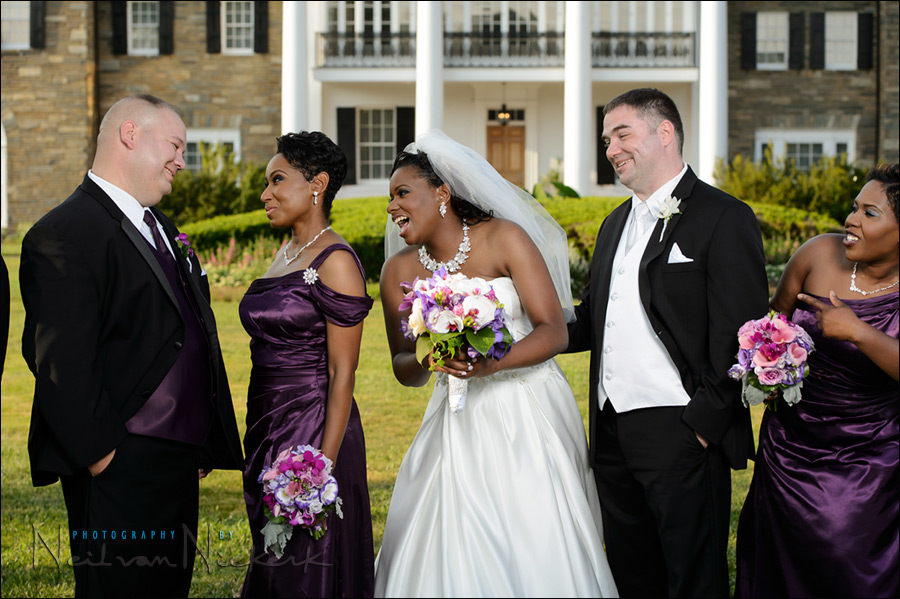
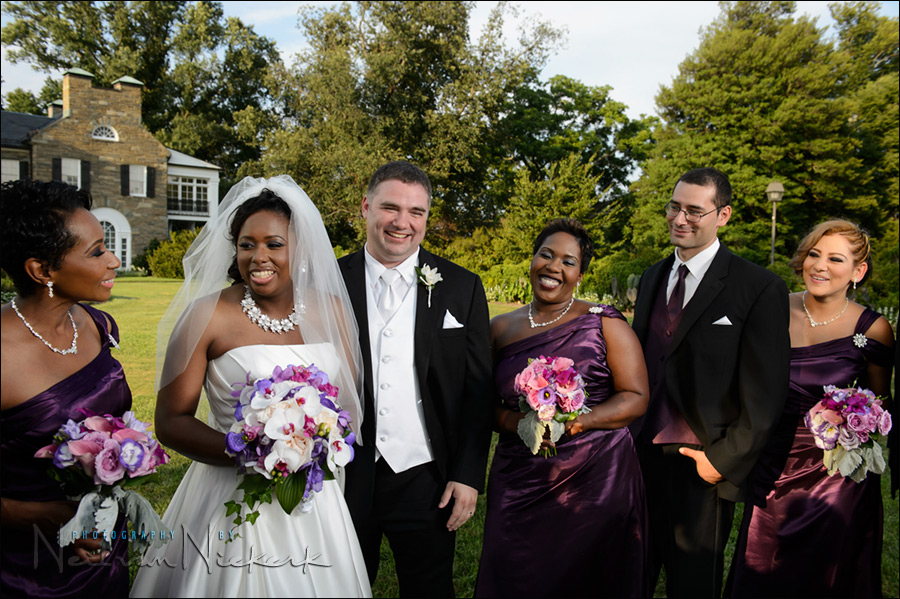
The couple specifically wanted photographs in front of this historic venue. I didn’t want particularly want to directly fight the sunlight. So I moved everyone into the shade of a large tree. But now I had to match the very bright late afternoon sunlight in the background: 1/250 @ f/5.6 @ 200 ISO
I knew the small speedlight in the small softbox was going to be insufficient for this task. This called for something beefier.
So I had my assistant run to the car to fetch the Profoto Acute B2 600 Ws powerpack (affiliate). Currently, it would be the more awesome Profoto B1 flash (B&H / Amazon). The softbox used here was the Profoto RFi 3’x4′ softbox (affiliate). In the meantime, in closer range, I kept photographing the bride and groom, using the Westcott RapidBox. I didn’t want to lose any time, waiting for the larger unit. The RapidBox and speedlight were good for working closer to the smaller grouping (ie, just the couple).
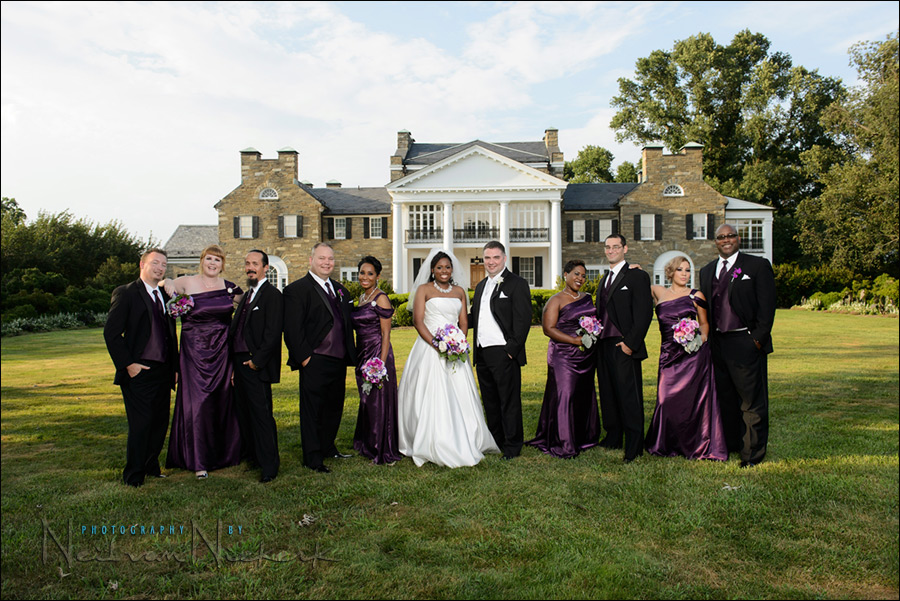
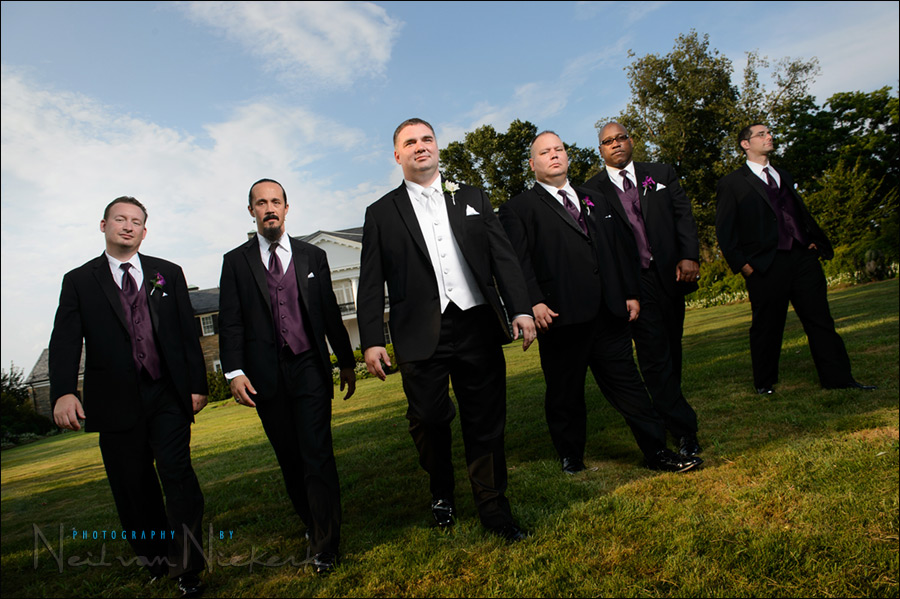
We then very quickly set up the Profoto – and I do love how easy it is to set up – with the large 3×4′ double-baffled softbox, and continued photographing the entire bridal party. The quality of light from this larger strobe (and much larger softbox), is very easy to see in the images of the bridal party.
Summary
When photographing weddings, I have a larger arsenal of lighting gear in my car than just my on-camera speedlight … or just an off-camera speedlight. To give the best results, I have to be flexible, and be able to adapt what I use, to the challenge I am facing. So it rarely is just one way of working, and one way of doing things.
More images from this wedding: Alesha & Patrick – wedding – Rockville, Maryland
Photo gear (or equivalents) used in photographing this wedding
- Nikon D4
- Nikon 24-70mm f2.8G AF-S / Canon 24-70mm f/2.8L II
- Nikon 70-200mm f2.8 AF-S VR II / Canon EF 70-200mm f/2.8L IS II
- Westcott Rapidbox – 26″ Octa Softbox
- Nikon SB-910 Speedlight / Canon 600EX-RT Speedlite
- Profoto Acute B2 600 Ws power pack
or alternately, the Profoto B1 flash (500Ws)
- Profoto RFi 3’x4′ softbox
- Manfrotto 1004BAC – tall light-stand
Related articles
- Lighting ideas for romantic wedding portraits (Melissa & Dennis)
- Shooting wedding formals in the mid-day sun (Aluanda & Clarence)
- Photographing the wedding processional with extreme bounce flash (Alli & Scott)
- Flash photography during the wedding ceremony in church
- Bounce flash photography at wedding receptions (Juana)
- Bouncing on-camera flash in manual mode (Julie)
- Alesha & Patrick – wedding in Rockville, Maryland
A little bit of homework
- Why did I give my assistant (holding the softbox), specific instruction to ignore my own movements and keep to the same position relative to the couple when they were walking?
- How did going to full manual output on my speedlight, (when I bounced flash in the church), give me my optimum settings?
Really enjoyed this article, especially since you tackled a variety of lighting situations, and had to adapt quickly. When I saw your post with these photos on facebook, I suspected you put the Profoto light to use on the large group shots in front of the house. Either that, or lots of speedlights… but that Profoto did a great job of evening out the light. That bright sun in the background is a tough one to overcome. Beautiful!
I’m wondering how well your on-camera bounced flash did at full power during the ceremony in terms of response time. I don’t often use my flash at full power when I need to fire off a lot of shots. Does the Nikon battery pack give you enough boost? Did you run at full flash power during the processional, too?
Thanks for such an informative post — again!
I only need a few key images, so I time my shots to make sure the flash is recycled. The battery pack does help the recycle time. Same with the processional – I get two shots off. More with the bride.
For the 2nd processional, I take one photo because people are moving faster.
I do shoot fewer images like this when I need to use flash, compared to when I shoot available light only.
Neil’s Question: Why did I give my assistant (holding the softbox), specific instruction to ignore my own movements and keep to the same position relative to the couple when they were walking?
Manual flash exposure is governed by four factors.
– Distance
– Flash Power
– ISO
– Aperture
You were using manual flash and all four factors were known. To maintain consistent flash exposure while the couple was walking, the flash has to stay at the same distance from the couple.
Yup, and this is something I have to explicitly explain to every assistant, since their natural tendency would be to try and match my movements.
Homework: What Stephen said! and extending that to the Church scenario of Manual and full power – that then gives you the flexibility to change all other camera settings.
Thanks for responding to our requests on Facebook. You specifically answered my request in terms of photographing the group in front of the house – i.e a much larger and more powerful light source! Brilliant. Thanks Neil.
And yes they do look like they are having fun – and why not!
Does the homework question include a scenario of “direction and quality of the assistant”?
sir.. I was stunned by your B&H video. That video taught me more than any other video or classes I’ve attended. Wish you here in Australia, so I can learn more from you. I’ve been misled about flash photography before. Now I know I’m in good hands. Thanks for all your help.
Hi Neil
Another great article. In using natural light, or even with a bit of fill, you say in your videos that you meter of the brides dress and expose ‘to the right’ ensuring the brightest tones ‘spike’ just before the edge of the histogram.
The bride i am shooting in sept is getting married in a ‘champagne’ coloured dress. Would this technique still work or is champaign to nearer the skin tones. I am taking a hand held meter as well just to be safe….
Many Thanks
Greg
With a bride wearing an off-white / champagne colored dress, I’d still use the same metering technique, metering off the bride’s dress. Any slight error in exposure metering doing this way, is easily covered with the latitude we have with our RAW files.
Neil, you were literally a few hundred feet from my home and I didn’t even know it. You should have put me to work instead of your “poor wife” as the assistant. :D Lovely images as always.
Hi Neil,
Great stuff as always. Being a photographer is not an easy task! Regarding the homework questions:
1.) I suspect you switched from TTL to manual, as you wanted more consistent exposures from shot to shot. In manual, distance is one of the main components along with ISO/Aperture/Flash Power. As long as you had your distance fixed, exposures will be consistent from shot to shot given a fixed set of ISO/Aperture/Flash Power combination.
I assume that you went to manual because the scenes contain lots of whites and blacks, making it hard for the camera to decide on proper exposure had you been in TTL.
2.) With camera settings at “1/125 @ f/3.2 @ 2000 ISO,” the room was likely quite large hence the high ISO and big aperture. In other words, you wanted the most efficiency from your flash and the best way to do that would be resorting to manual flash at full power.
Although TTL-mode would’ve given you proper exposures, you wouldn’t know if the flash is working at its maximum capacity. Using flash in manual mode at 1/1 power ensures that you are using every bit of light your flash can generate. From there, you can drop down to a lower ISO and/or a smaller aperture.
I also highly suspect that the shutter speed at “1/125” wasn’t “random” since that’s the fastest shutter speed in which you get the most range from your flash. Although technically shutter speed doesn’t effect flash power, the flash range does decrease ever so slightly as you go from 1/125 to 1/250 (max sync speed). But it is not until going BEYOND the 1/250 that you witness a huge drop in range.
To sum my words: going 1/1 in manual flash enables you more freedom to choose a lower ISO with an appropriate aperture, and opting a 1/125 shutter speed (whether or not that was a coincidence) gives you the most flash range from the “shutter speed” perspective.
Hope I did well and hope I made sense :)
Charles
There’s the exact answer. By going to 1/1 manual power on my flash, I know exactly where I am in terms of squeezing out the necessary DoF and ISO from my camera settings.
Not quite. This is true for Max Flash Sync Speed when we work in very bright light.
Working in lower light levels, we would have our shutter speed where we allow enough available light in, without getting too much camera shake / subject movement. These are two different scenarios.
Ultimately, when we remain at or below max flash sync speed, our shutter speed does not affect our flash exposure. However, our choice of shutter speed does affect our choice of aperture when we are dealing with ambient exposure … so shutter speed does have a knock-on effect in terms of what happens with our flash.
Just when you thought you have learned everything reading the many articles on this blog, Neil would come up with something new to amaze you once more.
How did you figure out what equipment you need for such and such situation? I am assuming it’s from experience, but do you build on your past shoot? By that I mean, do you sometimes “correct” what was not “right” in your previous shoot?
Kind Regards,
—
Patrick Ng
It was a gradual building up of gear over the years. Initially I had Quantum Q-flashes, along with my “serious lighting” was a set of Dynalites, but they needed AC power. So I sold them and went with Quantums only. As cameras improved in their high-ISO capability, I ended up using Speedlights more and more. Then I got a Profoto 600R as my serious on-location lighting kit … and from there decided to move over completely to just the Profotos and speedlights.
Working with those two different options – the Profoto kit and speedlights – made a lot of sense. They both have different uses, and different strengths.
But it did take time to build up a combination of lighting systems and setups that is powerful. flexible, portable and easy to use. So I switch between speedlights and Profotos as I need to.
Hi Neil,
Just for curiosity, do you remember if you used the profoto with full power?
Thanks
If I recall correctly, I was at 1/2 full power.
Neil, in this situation would you have considered using that rps bar and ganging up 3 or 4 speedlights using the pw flex system? I am also surprised to see you employ flash during a ceremony, even in the toughest of lighting conditions?
It would take much longer to gang up four speedlights, than it is to set up the Profoto. More cables, more wireless triggers, more batteries, more switches. The Profoto makes my life easier when I need a lot of juice.
Hi Neil
Would love to know more about the white balance that you set in-camera for the shots in the church – or were the RAW files altered later? I confess to having some difficulty in getting a good white balance in churches when low incandescent light and stained-glass windows do so much to alter the ambient light…
According to EXIF data, it doesn’t look like I had gelled my flash.My edited version:
The straight out of camera shot:
Cheers Neil…Have just returned the favour by ordering two of your books!
Hi Neil
Fantastic article …..
I have a quick question for you…
I do make my 2nd Shooter carry my speed with light stand , Great…
But Sometimes I have to work alone…….
Sometimes I need a more powerful flash for Group Shots in the Church or Bight Sunny Days Etc ….
so I was wondering what the best way is cart around all the extra lighting gear.Would you use a rolling bag. Any advice would be helpful.
Lou Recine
Matrix Photography
I use the Think Tank Photo Airport Navigator Rolling Bag (B&H), for my extra lighting gear. I like that it is top-loading. I bought a second one just for the times I am out on the street in New York and need to roll more gear with me than I can carry. Since it loads from the top, there’s no chance of anything toppling out.
Hi! Beautiful! So beautifully captured. Can you please share what location this actually was? The place of the wedding I mean.
Read the entire article, start to end.
I appreciate the way you work, very nice, great style.
When it come to weddings, we photographers are always faced with so many lighting conditions we need to know how to quickly asses, and adjust our lighting.. Sharing your experience with flash is much appreciated. Do you use umbrellas as well?
Yes, I do use umbrellas most of the time – check the other articles on wedding photography for examples.
I read all your post and bought your ebook, Neil. what I do not understand is , why do you use manual flash at full power and not TTL? If you change the distance to your subjet or your subjet move, the light output will be not correct? Do I get anything wrong?
TTL flash sometimes doesn’t deliver full output. I was bouncing in a difficult place, so I simply went to manual flash, full output, to make sure I had correct exposure at optimal settings.