
Wedding photography – Detail shots, bounce flash & macro lenses
Macro photography for wedding detail shots is one of those areas where you need a smaller aperture. I know it’s been suggested by some high-profile photographer(s) that you shoot macro at f/2.8 but this is tough advice to follow. If you even breathe, your plane of focus changes for that close distance you’re working at.
That smaller aperture (and I regularly work at f/11 or there-abouts), implies you will need a lot of light. A lot of daylight or lots of flash. When you’re shooting indoors, this means flash, although it is entirely possible to use video light for macro detail photos.
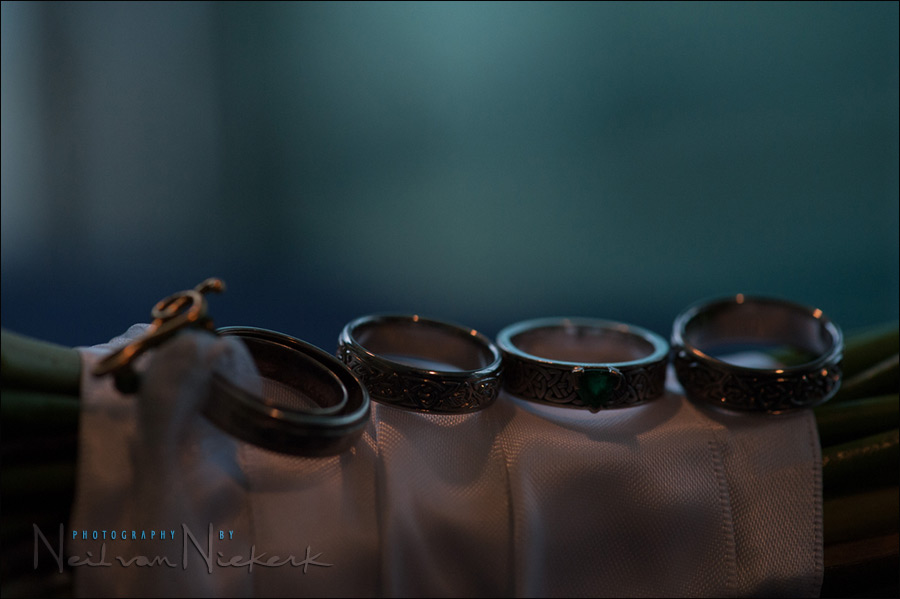
As described in the article, tips for detail shots of the wedding rings, I use the black foamie thing and on-camera bounce flash to create soft direction light. With flash I can more easily get that lots-of-light for smaller apertures.
As with the photograph at the top, with photographing details, I want the light to come from the opposite side than the camera. This creates a kind of wrap-around light as the bounce flash spills all around, but with the shadowed areas towards the camera. In other words, it looks nothing like you’d expect flash to look like.
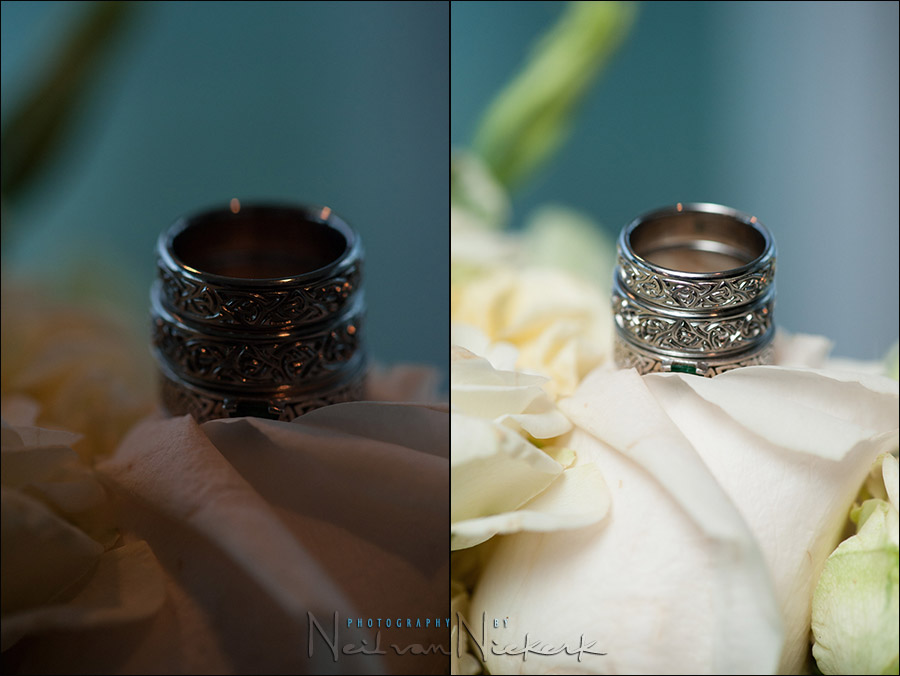
camera settings: 1/250 @ f/5.6 @ 1600 ISO
It’s unusual for me to shoot macro at this medium aperture. And as you can see from the photo, the depth-of-field it already quite shallow.
A pull-back shot to show exactly where I bounced my flash …
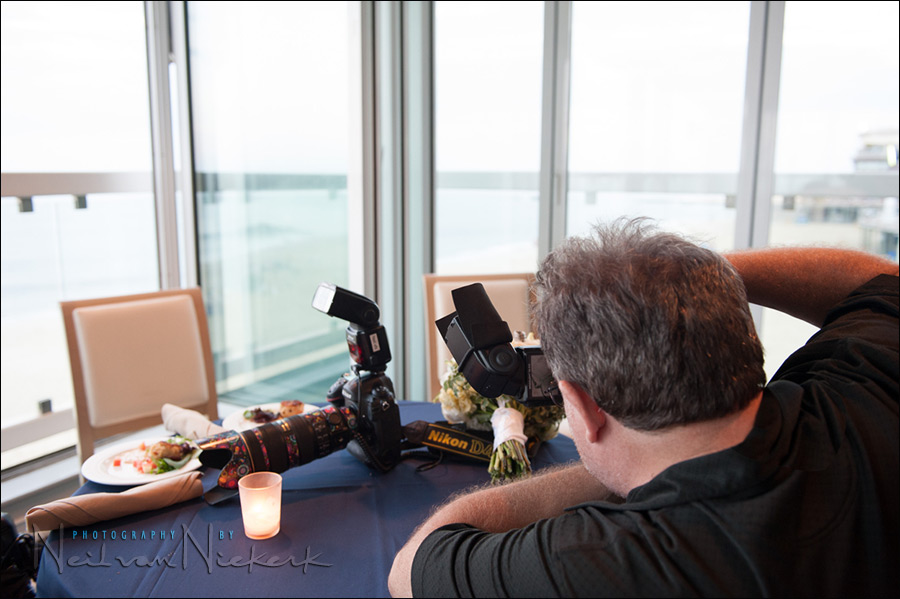
I really did bounce my flash forward from me, with the black foamie thing blocking any direct flash on my subject, the rings.

The BFT is held in position by two hair bands (Amazon), and the BFT is usually placed on the under-side of the flash-head.
The linked articles will give clearer instruction, especially the video clip on using the black foamie thing.
I bounced the flash off the glass and sliding door, and the wall above.
The comparison photos to show the image without flash at those settings … and with the flash bounced behind me. The light looks quite different with the flash bounced behind me. While the light is still soft, it’s just not as interesting as the direction light in the image at the top.
Changing it up slightly to give more variety:

camera settings: 1/250 @ f/5.6 @ 1600 ISO
Bounce flash with the black foamie thing.
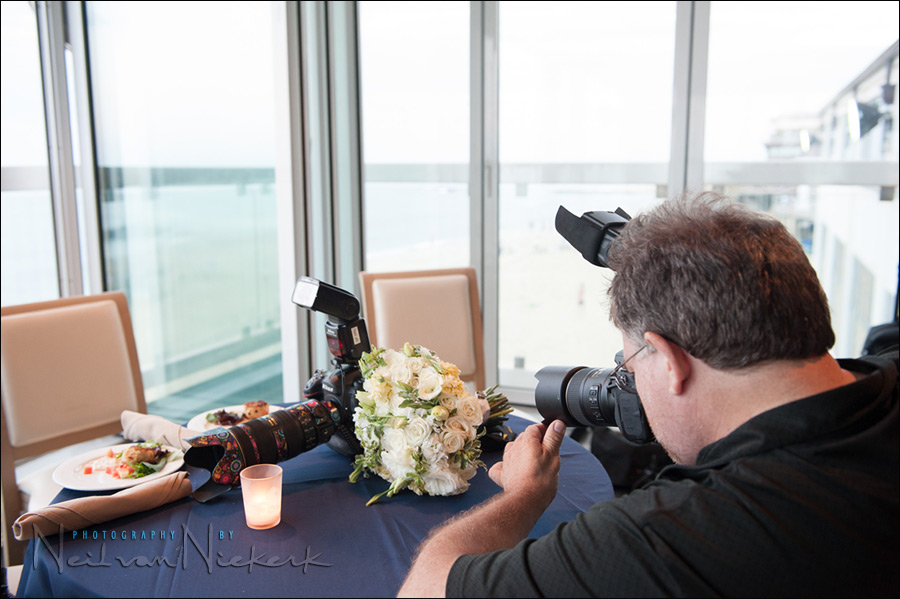
The pull-back photo:
(I used the battery pack of my other camera to level out the flowers for this horizontal image.
For reference again, the comparison image where the flash was disabled, so that you can clearly see what the flash achieved.
Recommended macro lenses for detail photos
I favor the 100 / 105mm focal length when it comes to macro lenses. This gives me a comfortable working distance on a full-frame camera. And it also doubles as a portrait lens if I need to.
The best choice here is the Nikon 105mm f/2.8 AF-S VR (affiliate), or the Canon EF 100mm f2.8L IS (affiliate) macro lens.
If you are using a crop-sensor camera, then there are other good choices which would effectively give you a similar focal length (if you frame the image the same).
Dear Neil,
Can you please clarify how you bounced the light? It looks like you had a window where the flash is pointing. Are you really using a window? The glass will reflect, but hardly defuse the light. I would appreciate if you can give a bit more details. I’m always surprised how creative you are in selecting what to use as a light-source.
Thanks,
Brian
There really are no more details. It’s exactly as described, and shown in the photo.
What I’m trying to understand is how do you pick a surface to bounce against. You just use anything as long as it’s not going to change color by much? In the picture above, you could probably move around the table and eventually find a wall instead of a window, but you didn’t do it.
Thanks,
Brian
Brian .. I (nearly) always work closer to a wall. But this time I was trying to show my 2nd shooter something, and I purposely continued to work where she had set the rings up. In the end, I was actually able to bounce enough light this way … and I liked how the available light that still registered, subtly enhanced the final image.
I love the ring shots, Neil! Backlighting the rings is a great idea, and one that I will now definitely use for detail shots. Seeing the rings stacked up, as well as laid in a row, was also very helpful. Simple, lovely, and a nice variety to offer to the client. Well done!
I just bought the Nikon 105 micro nikkor and I have a D7000… I hope it doesnt turn out to be too long to comfortably work.
Thanks for all this advices, I will try this. I just received my lens a couple of minutes ago :-)
rockstar.
Wow. I couldn’t believe that the polished, rounded lighting in the first photograph came from such a simple setup, Neil. And I’ve been reading your books, following this website and using the black foamie thing for awhile! In your shot of the 4 rings arranged on the bridal bouquet stems, I love how the bounced flash also causes the green gem to glow. Thank you for another non-obvious example of what thoughtful planning and lighting techniques can accomplish.
I’m digging the backlighting as well. It really makes them glow. I just did some ring shots this weekend and while they’re not awful, they’re closer to the “disabled flash” photos. Now, to research this black foamie thing…
hmmm,,, i never considered bouncing off glass windows. did not even think it would work.
i saw a photo in your book where it appeared you were doing the same thing but never clarified. will have to give this a try,, thanks!
Hi Neil,
May I can add 2 pennies worth of comment in an attempt to answer Brian’s question.
First of all, you are right that glass is reflective. However, the angle of incident is also some what play a key role here. Judging from Neil’s photos, the windows are at an 90 degree angle and Neil’s flash was pointing at an angle with respect to the window. It means most of the light will be reflected to the adjacent window and bounced off. As a result of that, the “residues” light that spill over to the rings are the so called “Feather light” which Neil has mentioned many times in his articles. That’s is the kind of soft feathered light that you want on the subject. From what I have learnt from Neil’s class, he most likely set his flash compensation to -0.7 or -1.0 to tone down the flash output.
Not sure this is correct or not but I did come across similar situation in my wedding or event shooting and still managed to use Neil’s bounce flash technique to get that “non-flashy” look.
Hello Neilvn thanks for your teachings. I now use a black computer mouse pad for my black foaming thing (BFT) I bought one and cut it to shape and am amazed how my lights are looking now
Thanks for your directions.
Hey Neil,
That’s a snappy looking 70-200mm. Where did you get the bling for your lens???
Lens Skins stick-on decals for your lenses.
Two posts about Lens Skins:
– pretty up your photo gear
– bling for your lenses
Nice article Neil. No disclosure info about flash setting. Is it manual or TTL with FEC, perhaps?
Thanks
Dustin
As far as I remember here, the flash was set to TTL.
That’s usually what I do when I bounce flash.