
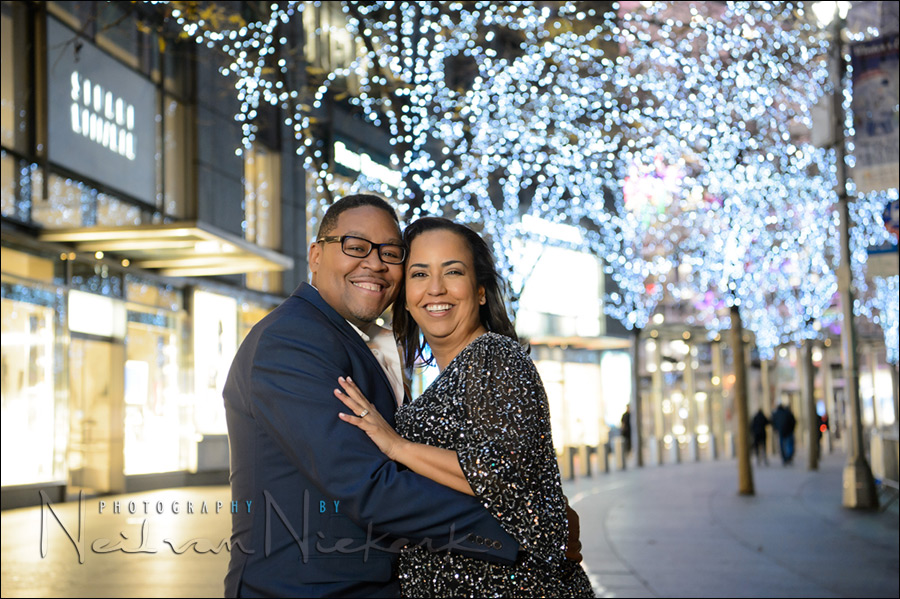
Bounce flash outdoors with a reflector
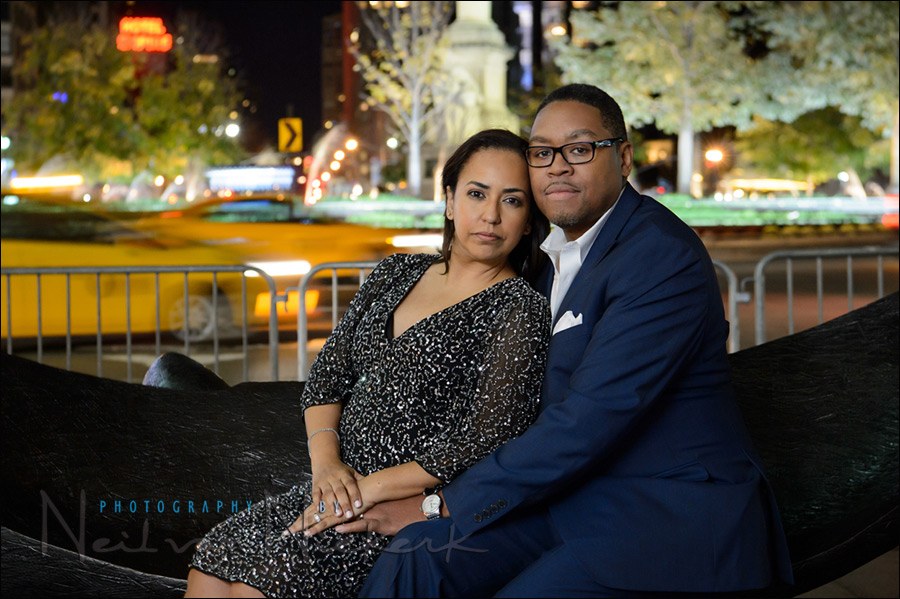
There are occasions where you really need to work fast with flash – time might be tight, or it might just be too cold outside to linger. After photographing John’s surprise 50th birthday party, John and Stacie and I went outside to Columbus Circle for portraits of the two of them. After the high of the party, I wanted to keep the momentum as well by working fast. And since it was mid-November in New York, it was nearly certain that the late night air would be nippy.
I didn’t want to use direct on-camera flash – I wanted that diffused off-camera flash look. However, single-handedly using off-camera flash with a softbox on a light stand, might slow the shoot down. So I made the decision here to use on-camera flash, but to bounce it into a hand-held reflector – the Lastolite 30″ / 75cm Trigrip reflector (B&H / Amazon).
Holding the reflector up in my outstretched left hand, and then bouncing on-cameras flash into it, gave me the look I wanted. Using the new stabilized Nikon 24-70mm f/2.8E VR (B&H / Amazon), gave me more confidence that my one-hand grip on the camera would still give me sharp photos at slower shutter speeds.
Well, doing this gave me the look I wanted to the actual photos … but I’m not sure if doing this made me look super-cool or just dorky.
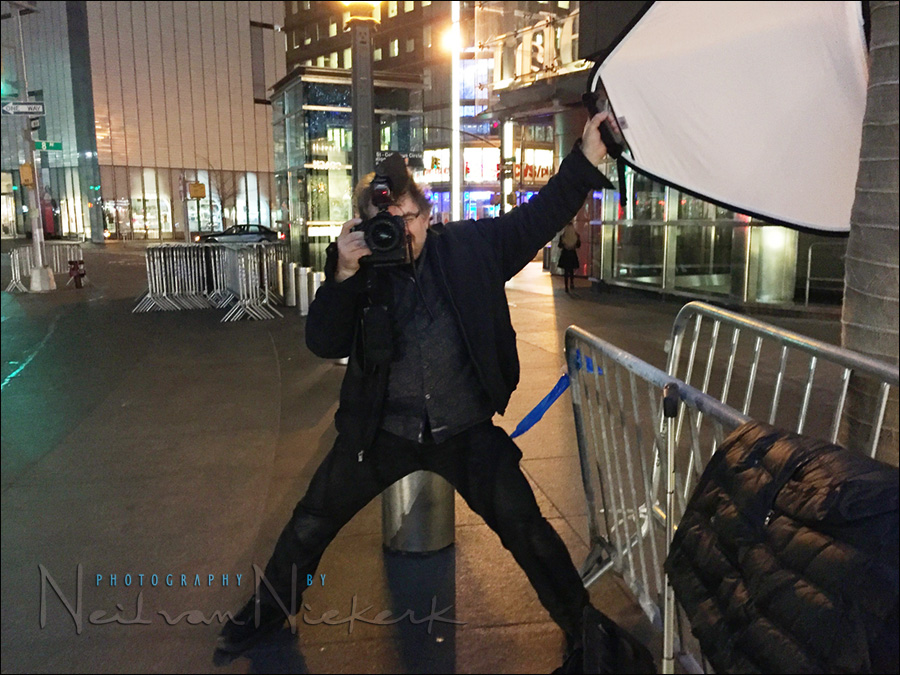
John snagged this for me with my iPhone, so that I can show how I held the reflector. The wide stance was so that I could shoot from a little lower. Also, it made me look … yeah, I’m still not sure if I look all that cool there. But the photos work! Oh, there is a larger 48″ version of that reflector as well.
Here is the comparison photo to show the effect of the flash in the main photo at the top.
- camera settings for main photo: 1/50 @ f/4.5 @ 160o ISO
- Nikon D4
- Nikon 24-70mm f/2.8E VR or equivalent Canon 24-70mm f/2.8L II
- Nikon SB-910 Speedlight /equivalent Canon 600EX-RT Speedlite
- Lastolite 30″ / 75cm Trigrip reflector (B&H / Amazon)
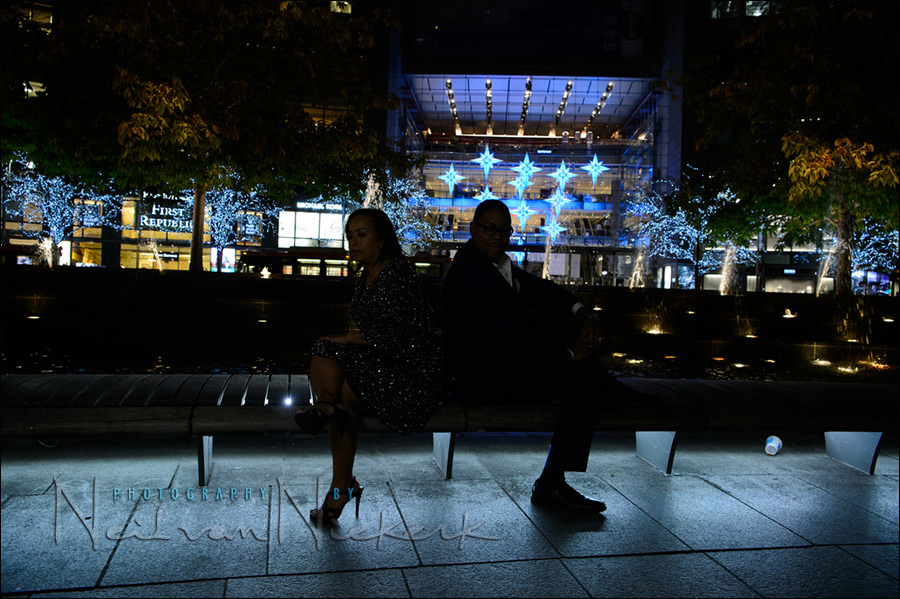
I had a 1/2 CTS gel on my flash, to bring the city lights to a more neutral rendering. I also used TTL flash, because the way the reflector moved in my unsteady hand, I couldn’t rely on manual flash. It had to be TTL flash.
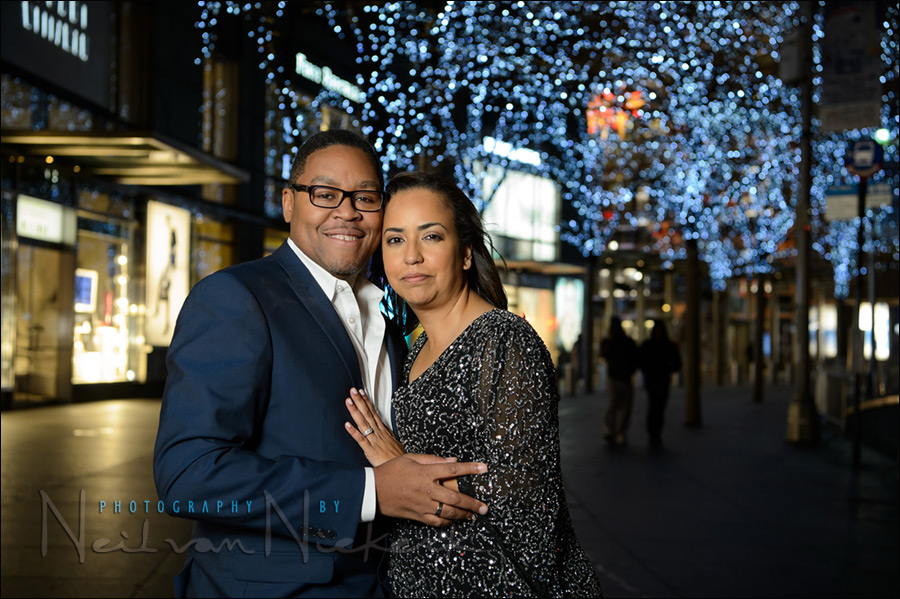
Dragging the shutter to allow more ambient light in, gave the 2nd image a brighter, more airy feel. No right or wrong here – both versions work.
- camera settings for 1st image: 1/60 @ f/4 @ 1600 ISO
- camera settings for 2nd image: 1/30 @ f/3.5 @ 160o ISO
- Nikon D4
- Nikon 24-70mm f:2.8E VR /equivalent Canon 24-70mm f/2.8L II
- Nikon SB-910 Speedlight /equivalent Canon 600EX-RT Speedlite
- Lastolite 30″ / 75cm Trigrip reflector (B&H / Amazon)
To get the streaking movement of the taxis going around Columbus Circle, I pulled the shutter speed down to 1/13 of a second. Even though the flash helped freeze any of my camera shake here, the stabilized lens gave me even more confidence when holding the heavy camera + lens with just one hand.
- camera settings: 1/13 f/5 @ 1600 ISO
- Nikon D4
- Nikon 24-70mm f/2.8E VR /equivalent Canon 24-70mm f/2.8L II
- Nikon SB-910 Speedlight /equivalent Canon 600EX-RT Speedlite
- Lastolite 30″ / 75cm Trigrip reflector (B&H / Amazon)
Summary
Even though shooting this way gave me some mobility, I lost a number of frames due to under-exposure when the reflector swung in my hand. Not ideal. Still, I think this is a work-able solution in a pinch, or when needing to shoot with less constraint, but still wanting good quality light from a speedlite.
Part 2: Bounce flash off a dark ceiling
About the Nikon 24-70mm f/2.8E VR
There will be some skepticism about the use of stabilization on a wide-ish lens like this – the Nikon 24-70mm f/2.8E VR (B&H / Amazon). But the vibration reduction came in useful several times. With this portrait of John, I wanted to use the reflection of the city lights and car lights off this metallic surface.

- camera settings: 1/15 f/2.8 @ 2000 ISO
- Nikon D4
- Nikon 24-70mm f/2.8E VR /equivalent Canon 24-70mm f/2.8L II
For detail shots of the party at the Robert Restaurant, NYC, I used the available light, retaining all the atmosphere. I’m not a fan of using a tripod – it’s extra weight to schlep around, and cumbersome to set up for a variety of photos when time is tight. Usually with this I would shoot with a wider aperture on a prime lens, or machine-gun images to make sure I have a few that are adequately sharp.
Here I used shutter speeds around 1/20th and with this lens, had razor sharp images, hand-held.
Part 2: Bounce flash off a dark ceiling
Related articles
- Bounce flash photography – be bold!
- How far can you bounce your flash?
- Various scenarios: balancing flash with ambient light
- book: On-Camera Flash (revised edition)
- Other articles on Bounce Flash Photography
- John’s birthday party – Robert Restaurant, NYC
Seems like handholding one of the little lastolite soft boxes might be more predictable than the bounce-reflector, especially working alone, but there’s something about that pose which might help ensure good-humoured subjects :)
Yes, but takes longer to set up. The point of this set up was get fast results with minimum set to time.
The pose works for me. It’s what I do.
Now this image makes u look cool. Hehe.
This is a brilliant photo :D
Really nice results there Neil and I love the simplicity of the set up. The colour balance with the background is very appealing too, was that vanilla flash or gelled?
I should have mentioned that in the text – I had a 1/2 CTS gel on the flash to make the city lights more neutral.
I’ve been meaning to try this technique for quite some time now, but poor coordination between hands might spill the light off subject.
Will try though, now that I see that even you use this technique.
I did lose a number of images because the reflector swung out of the way without me knowing – causing those images where quite under-exposed.
Just curious for the D4, what’s your max allowable ISO for this stuff?
For years I’ve saying VR is useful in wide lenses (utilising my ex-Pentax’s with it built-in), can’t believe those that say otherwise.
Great article again, Neil. Love the idea of this quick no-time-to-waste set up. Great to see that it works. I also love the last shot of John against the metallic background: looks super cool :D
I don’t understand your reasons for using TTL though: if the reflector is moving in your hand the camera/flash are unaware of this, so if the reflector gets blown further away from the subject by the wind, for example, would you not get under exposed shots regardless of whether you were using TTL or manual?
Ah, it’s because of the TTL preflash, right? :)
That’s how TTL flash works – it is an automatic exposure mode, and will give you the correct (or close to correct) flash exposure … even when things change on you.
The pre-flash is how the TTL flash measurement is done.
Works in a pinch… But for the most part I prefer shooting at to long of focal leangth for this technique.
I specifically wanted more of an environmental portrait here. Hence, I only worked with the 24-70mm lens.
Hi Neil,
Are you sure it’s the 48″ reflector you’re holding in the second picture? It looks quite smaller than 48″ to me.
Okay, thank you for the confirmation. According to Lastolite the 48″ one weighs 1.83 lbs/0.828 kg so I guess it will be quite tiring holding it for a long time.
You are entirely correct! My mistake. I messed up in mentioning the correct one – the 30″ Trigrip.
I’ve fixed the text accordingly now.
I was going to DIY one of those using foam, and call it WFT (White Foamie Thing).
LOL I love that pic of you holding the reflector Neil, I’ve actually thought of doing just the same but my 5 in 1 circular reflector would be too difficult to hold with one hand.
The trigrip reflector is the answer for fluent solo shooting, I’ve got to get me one of those. I really like the soft light you get bouncing from a reflector, now I can omit the light stand or not badger one of the family to hold it.
OK, your arms (& fingers) have to be sore after a night out like that.
Ah…. So I am not the only one who does this triangular reflector in one hand camera in the other thing, and yes it can make us photographers look strange, and yes you sometimes get the wrong angle, but it usually works great, especially with warm gel on the flash and high ISO or slow shutter….. The results can work well for corporate receptions on hotel rooftops.
Doing this before iTTL and AF infrared beams on the flash was not so easy….
Only once have I really whacked somebody in the head with the reflector.
At weddings, little kids may be fascinated with the reflector popping in and out…
Sometimes I use a westcott double fold umbrella held in one arm almost the same way but for some events the risk of stabbing somebody is too much
Calumet also sells round reflectors with nicer handles I may try soon….
Sometimes I fold up the reflector and put it under my arm inside my suit coat and then forget it’s there and reach out one arm and whoosh, it pops out and people look at me in amusement….
But its not how I look, its how I make my subjects look, eh?
Forgot a few things …
1. If you are shooting a vertical, a battery grip makes it much easier to hold the camera one handed.
2. you have to remember to change the angle of the flash head if you change the angle/position of the reflector
3 You can get different facial sculpting looks easily if you try different reflector / clash head positions the same way you would if you reposition a softbox, so you can compensats of people with deep set eyes, etc
4. If you have an assistant hold another rafio controlled flash behind the subject at an angle opposite from your reflector, aimed at the back and side of the head, that plus this reflector technique and some fast testing can give you “editorial photo” style results in situations with little time and location restrictions on light stands, etc… This required me and an assistant to practice a lot but it can look great.