Bounce flash photography – when to use maximum flash power
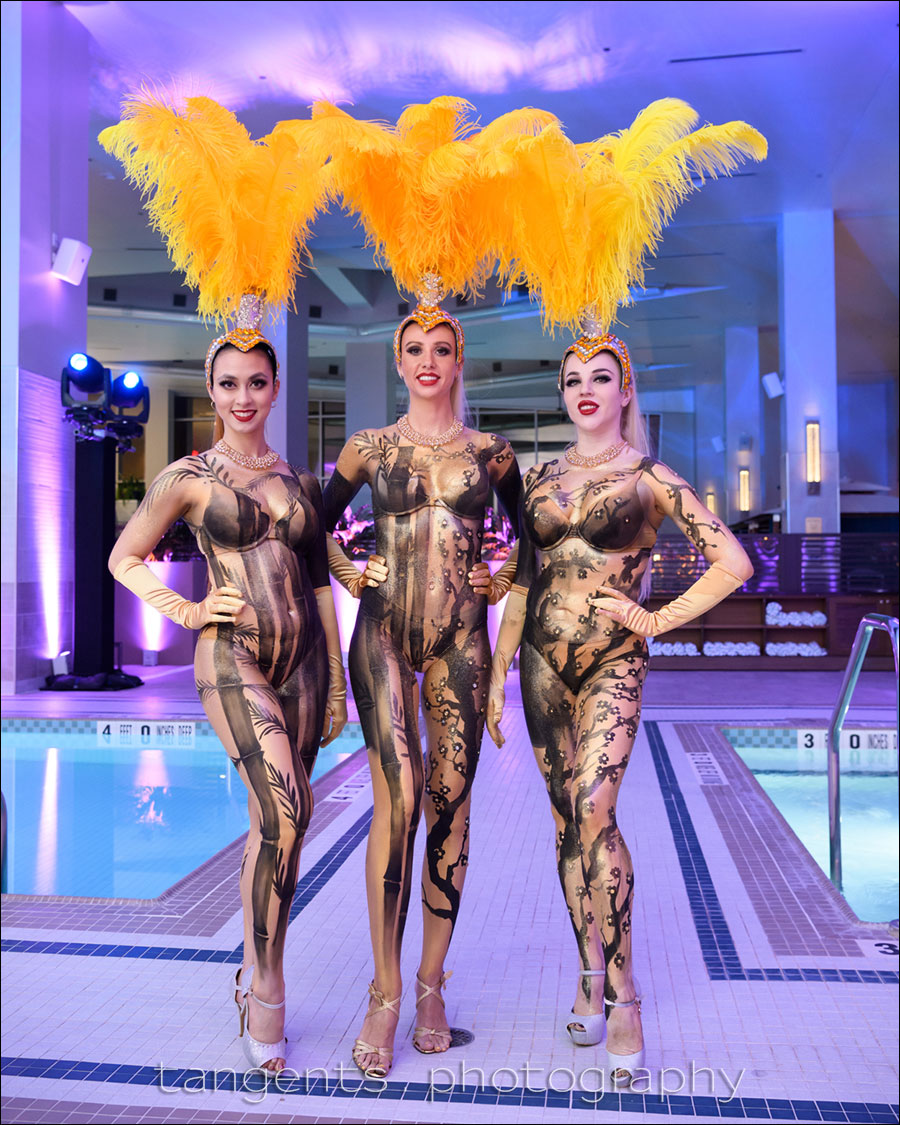
This photo is straightforward enough – the event coordinator here asked that I take a few photos of the models in body paint. No time to fumble or look unsure. Again, there are simple recipes to get us to ideal settings.
The reception area around the indoor pool is really large with a super-high ceiling at this casino. There’s enough light to see, but it is all tainted with this strong purple and blue uplighting. Therefore flash becomes a necessity.
I need cleaner light – more neutral light – on my subjects. Skin tones have to look good. Clean open light that bounce flash can easily provide … if there is the possibility of using flash.
This is where many photographers become unstuck with bounce flash photography – they are intimidated by the sheer size of the place they are photographing in. Then the instinct kicks in to shoot direct flash, or plonk a piece of plastic on the flash. By the way, this rarely helps. But a few things are on our side for proper bounce flash here – the interior of this place is white. White walls. Disregard the uplighting because it isn’t going to discolor your flash’s color balance like a non-white painted surface would.
Now the challenge is to quickly get to the best camera and flash settings without fumbling in front of the client.
On-Camera Flash Photography – revised edition
This book is explains a cohesive and thorough approach to getting the best from your on-camera speedlight.
Particular care was taken to present it all with a logical flow that will help any photographer attain a better understanding of flash photography.
You can either purchase a copy via Amazon USA and Amazon UK, or can be ordered through Barnes & Nobles and other bookstores. The book is also available on the Apple iBook Store, as well as Amazon Kindle. Also check out the Amazon Kindle store.
Learn more about how the cover image was shot.
In my experience, TTL flash tends to pull the exposure down when you get close to maximum output. Then you have to push the FEC higher just to force the flash to give more juice. The simpler option then would be to switch to manual flash — and since this is a massive place, I switch to maximum flash output immediately, and set approximately reasonable values for my aperture and ISO.
That’s it – a simple algorithm for this challenging scenario:
- Set maximum flash output in manual, (or a stop below maximum output.)
- Set an approximate aperture and ISO combination.
- Bounce flash over your shoulder into the direction you want the light to come from.
- Adjust to taste, according to the cameras’s LCD. Quickly!
Keep in mind when your subject and yourself are in static positions, it makes manual bounce flash an easier option than if either were moving.
Check the related articles at the bottom here for more info on the same topic.
In this instance, I was using the Profoto A1 flash (B&H / Amazon), and I was able to move my settings down to a where I still had two stops of light in reserve from my flash. I ended up not going to maximum power, because at f/4 and 2000 ISO, I had enough light at two stops below maximum flash output, even when bouncing light behind me like that into the massive area.
Camera settings & photo gear used during this photo session
- 1/40 @ f/4 @ 2000 ISO
- Nikon D5
- Nikon 24-70mm f/2.8E VR (B&H / Amazon)
- Profoto A1 flash for Nikon (B&H / Amazon)
for Canon users: Profoto A1 flash for Canon (B&H / Amazon)
I didn’t need to use a gel because I didn’t need to balance my flash’s color balance with that of the background – I liked the purple colors that came from the uplighting, since it complemented the warm tones very well.
I use gels when my subject is bathed in the same light (incandescent) for example. In this case, there was no particular light source on them, other than the flash. And I didn’t have to balance the color balance on them since I was happy with how the background rendered.
On a side note, I still use my two SB-900 speedlights depending on the occasion. At high ISO settings, with a more delicate kiss of light from my flash, the Nikon flashes are more consistent. But when I need more power and the ability to hammer the flash hard, I use the Profoto A1. They are workhorses when it comes to this.

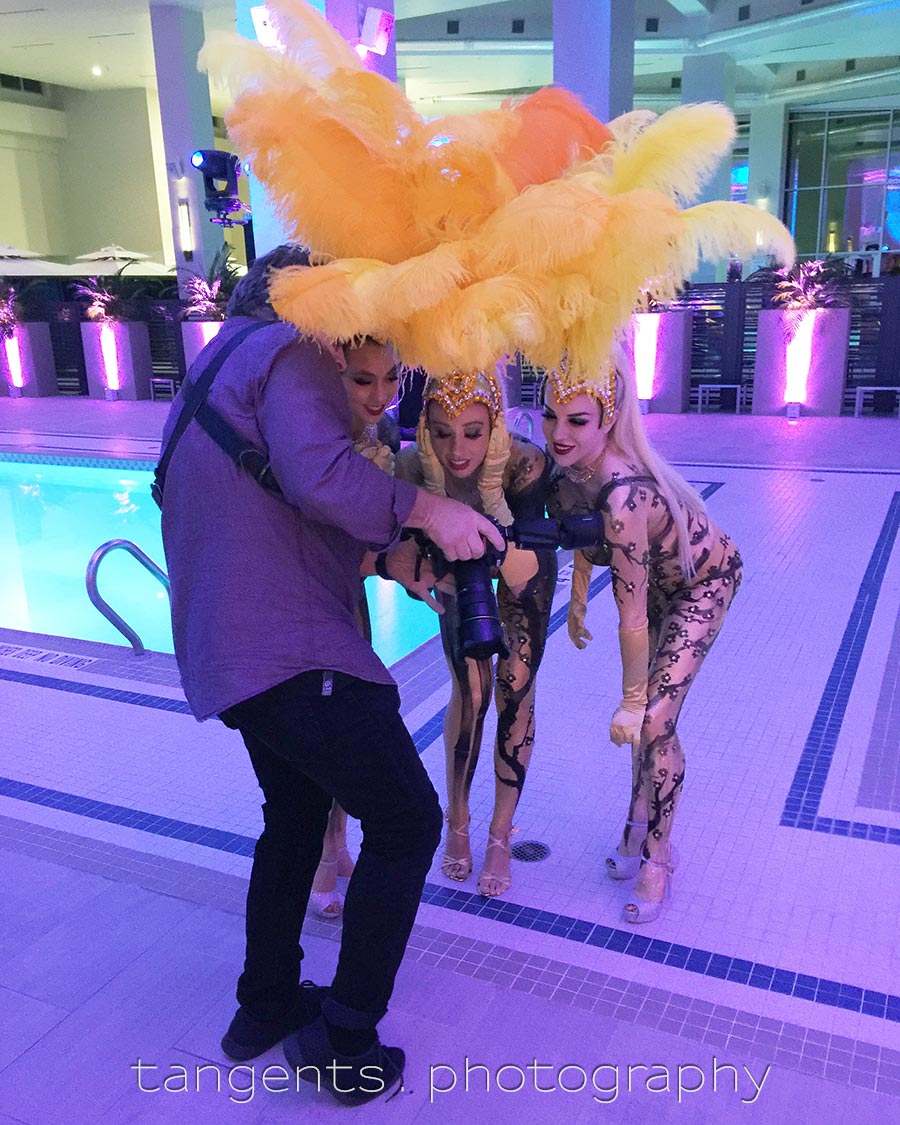
“Dammitt, will you get that thing out of my face?!” … is definitely not what I said.

Nice fine points on the technique. Thanks. Do you use the little Profoto bounce card or wrap a BFT around the A1?
In this case, no bounce card or BFT — I didn’t need to control how the light from my flash spilled. Nor did I have to block the flash from blasting people in the face, who might be around me at this point.
Although I haven’t read this book, I’ve read a couple of Neil’s books back when I was teaching myself to use flash. They were all excellent and I have no doubt this one is as well. If you’re on the fence about buying this book just do it. I guarantee you’ll learn stuff.
So, Neil, was your bounce flash the dominant source of light? Can you tell me what your in-camera exposure meter was showing? I’m really interested in this.
David, yes, the flash was the dominant light source. I didn’t take a comparison photo to show how under-exposed the models were at those camera settings, but if memory serves me, they were 2-3 stops under-exposed.
Thanks, Neil.
Hi Niel
Just a question out of curiosity , Why you didn’t go with a Higher Iso to increase Shutter Speed.
Lou
Hi there Lou — I easily could have, and it would have been the safer option in terms of movement and camera shake.
But the lens does have stabilization, and my focal length on the zoom was around 35mm, so I was fairly safe in terms of camera shake. The models were static too.
I wasn’t sure of the final use the client wanted the images for – most likely just website, and social media, but just in case they wanted to go larger, I went with the more conservative ISO choice.
Hi Neil,
“This is where many photographers become unstuck with bounce flash photography…”
I feel like “unstuck” should be “stuck” here, because a novice would get stuck (i.e. panic) and then try to throw the flash forward.
I have a SB-900, so admittedly, I probably would have raised the ISO and open up the aperture and used fill flash, but it would no way have the same effect as your photo. I am amazed at the amount of light that returns from a bounced surface in an open space like this. Then again, I never think to go manual in a situation like this.
I clicked the link to Amazon for the Profoto flash. What about this flash makes it worth a grand? vs my SB900?
Paul – Here is myreview of the Profoto A1 flash.
The Profoto A1 is about 1/2 stop or more brighter than the bigger speedlights. The operation is really straight-forward. It looks and feels slick. The way you can flip between TTL flash and Manual flash (and lock your TTL flash exposure), is different than any other speedlight. So there are advantages in how it operates when you shoot.
One other thing to keep in mind, is that it can act as a controller for any of the other Profoto flashes, including studio flashes. This makes it a flash that seamlessly fits into the rest of the eco-system. But do check out that video review – it’s all explained in there.
Whether this all adds up to make the cost worth it, is up to the individual to decide. Enough photographers think it is worth it, which means the Profoto A1 is popular and sold very well.
Hi, Niel.
A quick question on the post-processing: Was anything done to fix the colour of the feathers? I sometimes have issues with red and yellow when it comes to post-processing (Canon shooter).
And when I compare the image above with the BTS photo, the feather colours are way different.
No problem with the brightness yellow feathers – they didn’t seem to have that out-of-gamut look you often get with deep red colors.
The difference with the BTS photo – it was taken on one of the guest’s phones. It was quite under-exposed, so I had to bump it up in Photoshop. So it will inherently look different than the proper photograph.
“Dammitt, will you get that thing out of my face?!” … is definitely not what I said.
Oh, yes you did! I heard it. I heard it all! Recorded it, sending it to the ladies, asking for a donation (or a new camera).
Blackmail. It’s just horrible, isn’t it!
…I’m kidding. I’M KIDDING!
Hi Neil and readers,
Can you offer tips/advice or just link me to an article I may have missed which would help with the following scenario.
A7R3 firmware v3
Not as the official wedding photographer, but as a guest+photographer, I need to shoot at an indoor cocktail party wedding with dancing.
I’lll likely need to use my Godox 685 flash (off camera with the Xt1 tigger). At least some of the time. Bounced off wall/ceiling where possible, otherwise through a diffuser.
Here are my guesses but I’d appreciate some settings tips for –
(Eye-af and multi meter with face detection on in all cases)
1. When the bride & groom make their entrance.
I assume continuous auto focus and a lock-on focus mode as their distance will probably change rapidly. + Expand flex spot or Zone focus area.
Probably single shooting because the flash is unlikely to keep up with continuous shooting.
2.. For when there’s dancing. Probably a slow shutter to accommodate ambient + flash. Front curtain/sync to get any ambient light ‘trail’ behind the subjects. Also single shooting (same reason as above) and Expand flex spot or Zone area.
Thanks in advance
Hi Neil, you said :
In this instance, I was using the Profoto A1 flash (B&H / Amazon), and I was able to move my settings down to a where I still had two stops of light in reserve from my flash. I ended up not going to maximum power, because at f/4 and 2000 ISO, I had enough light at two stops below maximum flash output, even when bouncing light behind me like that into the massive area.
My instinctive choice would have been to raise flash power to 1/2 maximum and bring down iso to 1000 (or shutter speed to 1/80) or even max power to bring down ISO even more. Why did you stick to ISO 2000 ? I suppose it is because you know that at this ISO the D5 will give you good quality ?
Thank you for your ever very interesting articles!
Hi there Claude!
You are entirely correct — shooting with a stop lower ISO, and bumping the flash power up a stop to level 9, would have been the more sensible and logical choice. With the Nikon D5, I had the ability to shoot at a higher ISO without much penalty.
Great getting the skin tones while not washing out the colored lights in the back!