Bouncing flash forward without getting that direct flash look
When bouncing my on-camera flash, I rarely point the flash straight-up. Most often the flash is pointed behind me or to the side to a certain extent. This way I get directional light. I want that off-camera soft-box effect. However there are those times when it just isn’t that practical.
With this recent wedding, the indoor ceremony was held in this large room. As you can see here in this test shot, the ceiling isn’t white, but is a light brown, with wooden beams. The thick cross-beams have the effect of blocking flash when bounced, containing the spread of light.
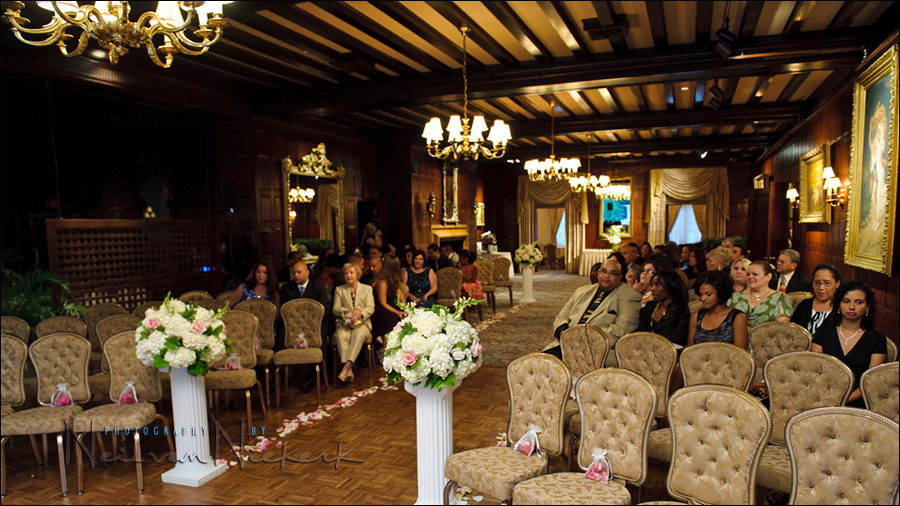
Bouncing flash behind me just about killed the light from my flash, so little of it returned to light my subject. So for the ceremony, kneeling down in the center aisle, I had to get light onto the bride and groom. The most logical way to do this, and still get good soft light on the couple, was to point my light forward at an angle to get enough light there … but I still needed to block direct flash from hitting them.
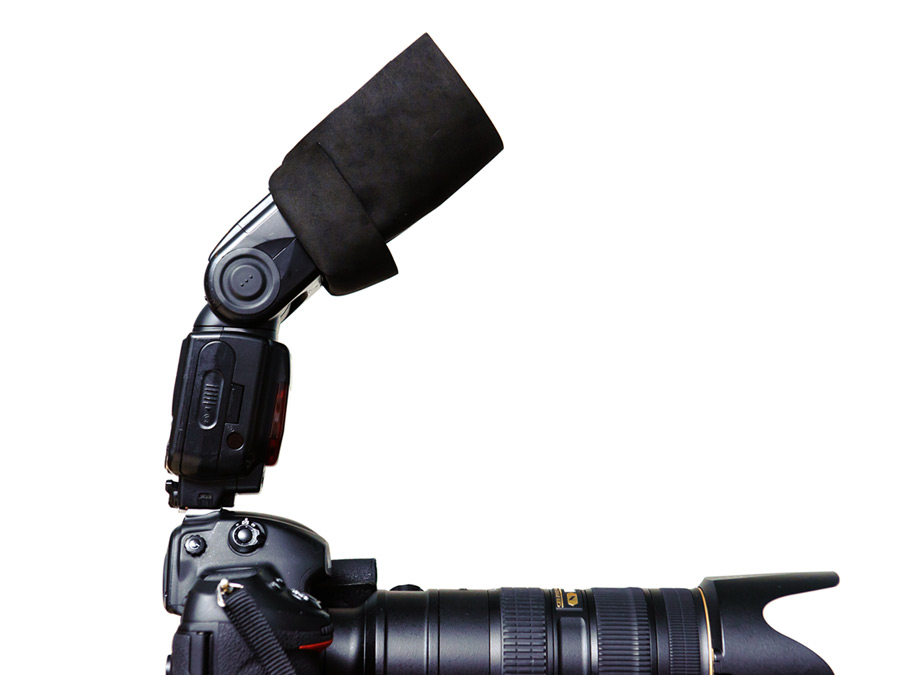
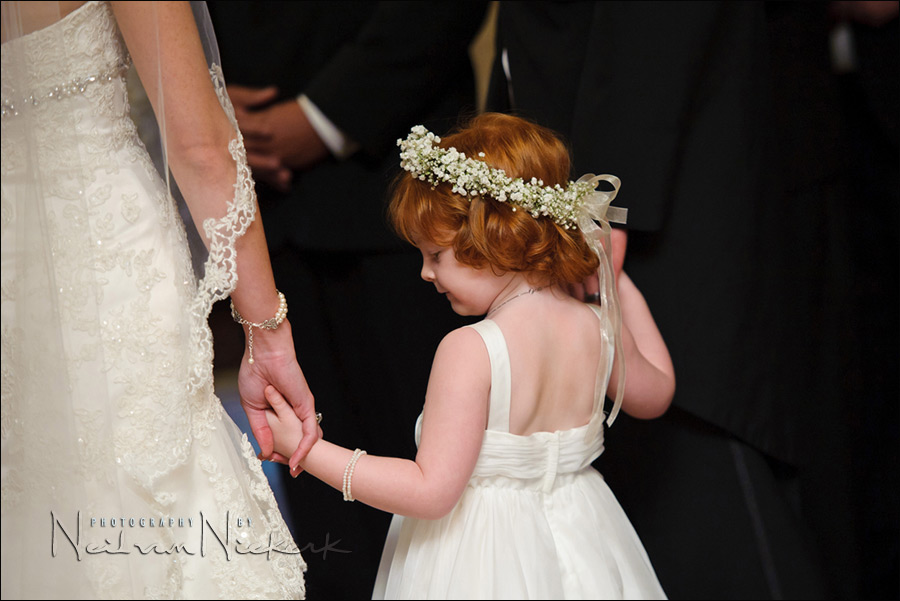
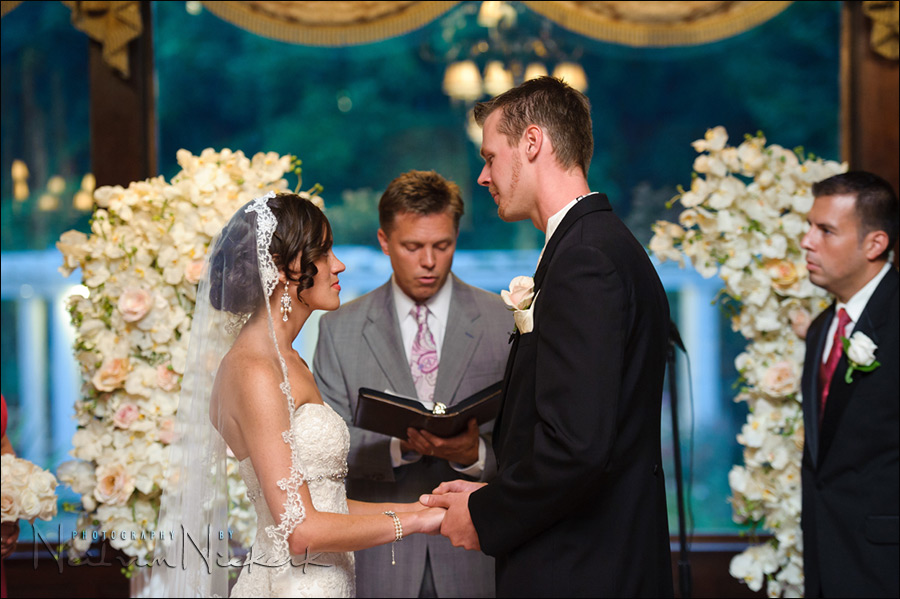
To do this, I kept the black foamie thing (BFT) rotated so that the open side was at the top, and the BFT was closed on the under-side of the speedlight. This way I could point my flash forward at an angle, but flag the light so that there is no direct flash. This gave me soft light from my flash. Since the light is coming from the same axis as the lens, the light will be even and quite flat … but there won’t be harsh shadows.
This photo (which appeared at the top of this article), shows just how soft the shadows where, while still getting enough light onto them. Even then, I had to bump my ISO to 2000 ISO and was shooting at full manual power.
1/100 @ f2.8 @ 2000 ISO
Nikon 70-200mm f2.8 AF-S VR II /equivalent Canon EF 70-200mm f/2.8L IS II — zoomed to 200mm here.
The process of getting to the correct exposure here – full manual flash output … and I had f2.8 … so I changed my ISO up until I got correct exposure from where I was positioned.
Remember, manual flash exposure is determined by:
– aperture … I’m maxed out at f2.8 on the 70-200mm zoom
– distance … my position is relatively fixed by how I don’t want to be too intrusive
– power of the flash … full manual power, but the amount of light is affected by how the flash is bounced
– ISO … I’m going to have to gradually move this up until I get correct exposure
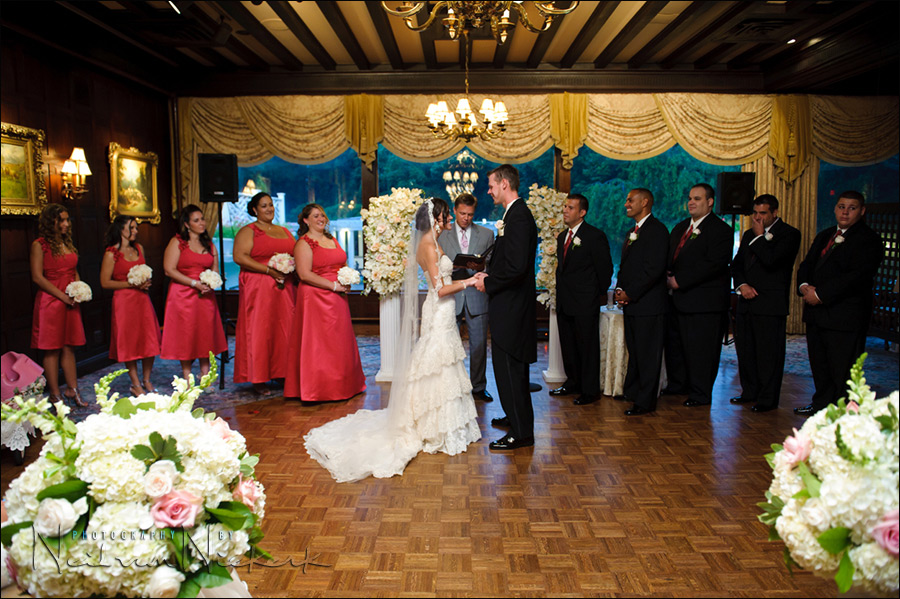
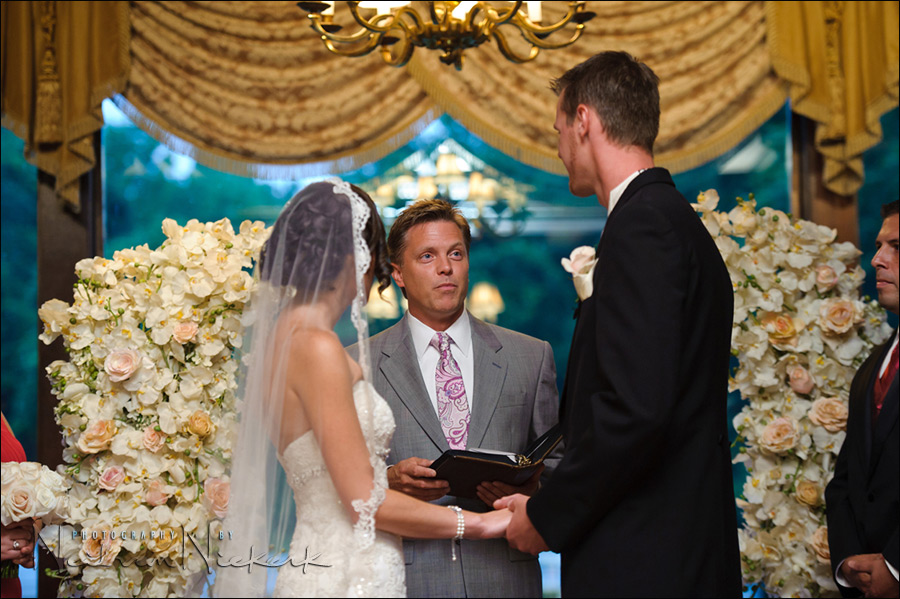
A wider shot, showing just how the wooden beams were containing the spread of the bounce flash.
Two more images of the actual ceremony. My camera and flash settings remained the same, except from zooming a little wider than I had for the photo of the little flower-girl.
With this, I wanted to show how adapting my usual technique in bouncing flash, still gave me the soft light that I want.
Related articles
- Video clip – using the black foamie thing
- How to bounce your flash
- The black foamie thing
- Why use a light modifier that is black?
- Using bounce flash to mimic window light
- How to get ‘short lighting’ with bounce flash
On-camera flash modifier – the black foamie thing

The BFT is held in position by two hair bands (Amazon), and the BFT is usually placed on the under-side of the flash-head.
The linked articles will give clearer instruction, especially the video clip on using the black foamie thing.
Hi Neil
In these circumstances you’ve used the flash on manual. Would/could you have gotten exactly the same result using TTL? In this situation I wonder why you would favour manual flash over TTL.
Great post – as usual
Roy Barnes
Hello Neil
great article and great work.
I can not understand how the flash will bounce off the ceiling with wooden beams.
I have the feeling that the flash bouncing off of them can stop or be reduced to zero his power.
By what angle did you work? From the picture the flash mounted on the machine seems to about 60 °.
Sorry … I did not understand even if you used the flash off-camera or on camera.
I wanted to ask whether in future there will be a Italian translation of your books you’ve already bought.
Big Neil, my compliments
Edy Trigona
Genoa, Italy
wish I had seen this a week ago :) I look forward to trying this out for sure.
At times like these, I usually bite the proverbial bullet and reluctantly pull the “tupperware” into service…
That ceiling is a killer…
If you don’t want the BFT absorbing too much flash output, one could try the white foamie thing (white foam instead of black). Neil used it in one photo in his on-camera flash book.
Hmm, would TTL mode help a little more, since TTL doesn’t take ambient into account as much? (In any case, since TTL is automatic, I know Neil has mentioned that you never get full flash power in TTL/TTL-BL mode, so it probably would not work here.)
I’ve added a WFT, a DIY bounce card, for similar situations. Also, I’ve glued white foam over 1/2 of a BFT, when bounce and flag are needed. I have enjoyed and been enlightened by (no pun intended) your website and books, but have adapted as well as adopted your teachings to my shooting. My BFT, WFT and B/WFT work wonderfully, again, for my specific shots. Often I’ll use a, ahh, piece of tupperware, with the forward facet blacked out as a flag, utilizing the upward light to bounce off the WFT as well as any ambient ceiling surfaces if any.
Looking at the above wedding photos, I can plainly see the excellence in implementation. But that is why I’m here, learning from a master.
The BFT and its variations are essential equipment, as important as the flash itself.
Neil – thank you for your contributions to my improved techniques.
I used the BFT for the very first time last week to very great effect indoors but was flumoxed as to how to achieve soft direct light out of doors without a wall to bounce from. Now I know…and am vowing never to create the horror images that came out last week again!! Thanks so much for your priceless advice!
Hi Neil…just so I understand, the images shown in this post are as you shot them in the camera, i.e. RAW, converted to JPEG for posting to web, without any post-processing modifications, correct?
Also, would you have had to switch to TTL versus manual flash if you found yourself moving around that room to capture shots from different distances to the subject(s)? If so, would you likely have needed to input some flash exposure compensation (FEC)? As always, thanks for the great info.
Neil, I’m starting to use the BFT myself now and I may need to use this particular “forward” technique on Saturday at an event I’m shooting. It all depends on the colour and obstructions in the restaurant ceiling.
The ceiling in your shots must have created a gold-brown color cast which you had to remove in post. Is that correct? I assume you did that with the basic white balance and tint adjustments.
In general, when the bounced surface creates a strong color cast, do you ever find it difficult to fix this in post? Perhaps the wall is a deep red and washes your subject in red. If you remove the extra red the foreground, the background suddenly looks off as it was not hit by the bounce flash (extra red removed when it wasn’t necessary for that part of the image). How have dealt with this type of situation? Do you avoid bouncing off deeply coloured walls entirely?
Thanks!
Thanks Neil – that helps. Much appreciated.
Hi Neil, loved this post.
Just out of curiosity. Did you kill your SB-900 full power on it? Any overheating problem?
Thanks.
I had a problem the other day boucing the light. I was shooting a kids party and there was in some small areas pink or almost magenta baloons. When the flash hit those areas the light came back magenta. When correcting skin tones in post I added some green and the skin tones were fine but obviously the background that wasnt lit by the flash turned a little green. With lightroom it was easy to do a little mask and add some magenta in the background.
Bouncing the light off colored rooms is something that we should be aware sometimes.
Hello Neil,
With your experience, you probably got the correct exposure with fewer test shots than I would have. In a situation like this one where you’re using max power, and need try a few test shots on top of catching the moments of the ceremony, what is your approach to preventing the SB900’s tendancy to overheat?
Regards,
Matt.
Hi Neil, another great post! You had mentioned this technique before and I utilized it for many food shots. Just like shooting people I did not want the light to hit the food straight on but bounce from the ceiling behind the food to give me some pleasant back lighting. Using the BFT worked wonderful and produced great results.
Beautiful color on those B&G shots. You always knock me out with your stuff.
Neil when you gel your flash what White balance do you set your camera to.
Here are couple links re flash.
https://neilvn.com/tangents/flash-and-tungsten-lighting/
This one is a full index on articles about flash photography, so you can pick what interests you.
Trev
Hi Neil,
I saw this wedding on your blog (well.. other blog). In some instances, you use a backlight during recessional and during dancing to make that nice rim lighting. So did you have a TT5 between your SB900 and camera? What kind of setting I have to do for the on-camera, and off camera flashes? Obviously, if you have the on-camera flash on top of your TT5, you won’t be able to set the intensity of your off camera.
Leo Dj
So…just tobe clear, you were still bouncing your on-camera Flash off of the ceiling with colored beams ? right ? But you were bouncing it forward ? i.e. the bounce spot on the ceiling you aimed for was beyond you and the subject ?
I’m so in love with the BFT. I’ve been using this a few times for the indoor shoots and it just gave a beautiful shadow and cheap and sooo portable. thank you for sharing this brilliant idea, Neil.
Thank you Neil !!!! I hope I can schedule one more private Flash/Filter use Photo session with you in October ? I will send you an email to check on available dates.
You recommend using a stofen at times. When you can’t bounce well (as is the case here) is that not a good idea? Yes we both want directional lighting but we can’t always say stop and let my assistant hold the reflector of point the umbrella quickly.
Is this a good time for a large bounce card? Take a shot of the bounce card in a mirror and you see a large light source (softer light). A local church has dark ceiling, dark red brick walls and little window light. After the service I have my assistant use the quantum with a shoot through umbrella (great directional light. A little fill from the camera may also be required.
If you write it, then I read it. Thanks