
Exposure metering when using video light for photography
In response to the article on how to shoot romantic wedding portraits, using video light, someone asked about exposure metering with the video light.
“Much in the same vein as using flash, do you establish the ambient exposure first (to your taste) and then add the video light to expose ‘correctly’ for your subject? How do you meter for this video light and therefore adjust the light power to the right level? By chimping on test shots?”
While this would certainly be a correct way of doing it, the practical way of doing it, (for me at least), is slightly different. I simply add the video light to the ambient light …
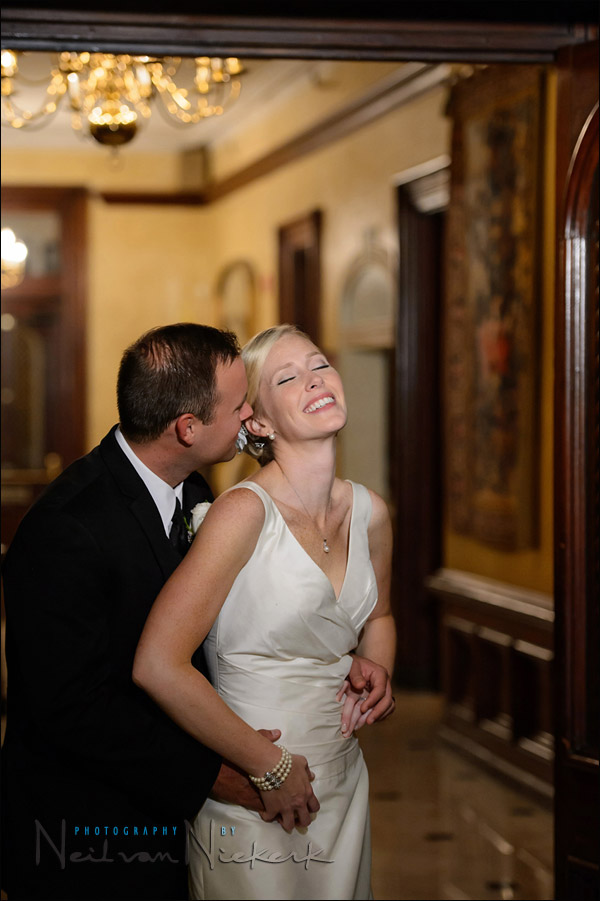
Video light can be quite effective in giving a dramatic “Hollywood glamor” look to photographs. The distinct light fall-off to the edges, means your subject has a pool of light on them, with the rest of their body going progressively darker. It can look moody and romantic. Great!

Now, in terms of exposure metering, if we went about it the same way we would add flash to ambient light, we would first find the correct exposure for the ambient light, and then add video light to help match your subject’s exposure for the background. However, in a practical way, I do it differently than that.
I start off with the video light, exposing correctly for it, or as close as I can while shooting fast. From experience, I know a range of settings where my video light will be correctly exposed when used at a certain distance and in a certain way.
The video light that I used here at Amy and Clark’s wedding, is a system based around the Lowel ID-Light (B&H / Amazon). From experience, I know how much I want to focus the beam, and how much I generally would want to turn the power up. This gives me a range of settings that I know I would be working in. We’re talking high ISO settings (around 1600 ISO), and fast apertures, and not-that-fast shutter speeds of around 1/60 to 1/125. A stabilized lens is essential here.

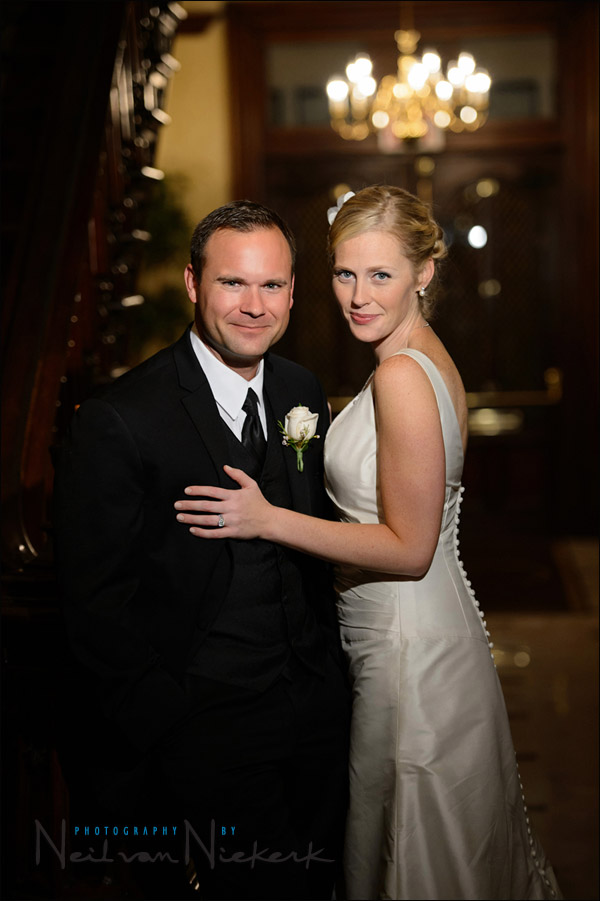
Looking at these images – all taken around 1/60 to 1/125 @ f3.2 at 1600 ISO – I knew that at those settings, the ambient light would register. I don’t necessarily need correct exposure for the background. Interiors such as wedding reception venues, are usually quite dark with odd patches of light. Since we’re not photographing the interior of the building per se, we just need some of it to register in the final image.
We don’t even need exact exposure for the background. We’re interested in the background here providing us with an interesting backdrop for the photos. It provides us with context. The background just has to be there and be discernible for the most part. This gives us a fair amount of leeway usually as to what would be good exposure for the background.

While I would obviously position my subjects somewhere where the surroundings are complementary to the mood I want to achieve, I don’t specifically meter for the ambient light at this point. I want correct exposure for the video light. That’s it! Getting correct exposure for the video light can be a little tough to get right with great precision. This is because of factors such as the light fall-off, and because we’re most often shooting with real time constraints.
We could spot-meter off our subject’s face. That would work. Especially as with these examples where I had the video light on a light-stand. It’s in a fixed position. However, when you use someone to hold the light up for you, the light will waver and be different from shot to shot.
To summarize:
1. Position your subjects in a place where the background is complementary.
2. Switch the video light on.
3. Position the video light accordingly, or instruct your assistant.
4. Double check that your exposure settings for the video light is good.
5. Now, for a range of settings, the background will register to some extent when working indoors.
That’s the simplicity of it … we just need some of the background to register to give us a good photo. But make sure your video light exposure is good, and the placement of the video light is good. The exposure for the background will fall where it may .. and this usually works well if we chose our backgrounds well in terms of the camera settings we know that we’ll be using.
Or in other words, chose places to shoot which works for you. Add awesome light, and make sure it is correctly placed and correctly exposed for.
- More articles about using video light for photography.
Photo gear (or equivalents) used
- Nikon D4
- Nikon 24-70mm f2.8G AF-S / Canon 24-70mm f/2.8L II
- Nikon 70-200mm f2.8 AF-S VR II / Canon EF 70-200mm f/2.8L IS II
- Lowel ID-Light (B&H / Amazon)
Related articles
- Bounce flash vs video light (model: Shawna)
- Video tutorial on using an LED video light
- Posing and lighting – aiming for a consistent style (Nicole & Brad)
- Positioning the hand-held video light (model: Anelisa)
Interesting article… very instructive.
Love the site and content .. .keep it coming !!
Wow, thanks a million for your very detailed explanation to my question!!
Since reading your articles 2 or 3 years back (and your books) my photography has improved immensely. A huge thanks for all your excellent work and sharing your wealth of knowledge!
I’m off to buy a video light…..
Hi Neil,
You write above that “a stabilized lens is essential here” but in your gear list, you have the venerable 24-70mm. That is not a stabilized lens. Are you only using that lens in shots where the shutter speed can be set fast enough, or are you taking extra precautions to stay stable, since that lens has no internal stabilization?
Stephen, your summary is correct. In my text it is implied that the stabilization is most useful for lenses with a longer focal length. As much as I would love to have stabilization on my 24-70, it is essential on the longer lens.
Neil, If I shoot with a snooted speedlight with small power instead of a video light would that be a big difference visually?
Thanks
Hi Neil,
Just wondering if you feel that a speedlite that was manually zoomed to a “smaller focal length” than the actual lens focal length would produce a similar effect to using a video light? (in essence, a variation on Eduardo’s question above).
Cheers,
Colin
I haven’t tested this, but I imagine the way the light fall-off of the snooted or gridded flash would appear, would be different from the video light. Of course, you would lose the WYSIWYG aspect of video light if you use a snooted / gridded flash like that. This might be a good idea for a future Tangents post.
Hi, Neil! Thanks again! Very instructive article as usual. Everytime that I have a question, a doubt, I always come here first! As I live in Brasil, I really hope I can see u soon in Creative Live….why not? Thanks!
Artur .. thank you! And the best way to get Creative Live’s attention is to contact them with the suggestion. : )
Hi, Neil! I ve already done this since I ve known CL, about 6 months ago, but I will do it again, for sure! It would be like a dream cause I feel like I know You for decades! Thanks for everything You have been doing for all of us!
Hi Neil,
Valuable information on your blog. Earlier I was averse to using speedlights, now I just love them.
As for exposure metering with video light – it would have to be metered in the “usual” manner? This will be a “single” exposure, unlike flash – and hand held camera shake due to slow shutter speed will be recorded? Also, changes in shutter speed will affect the entire exposure, and not solely ambient light?
Thanks very much.