a favorite image – before & after (and the how to)
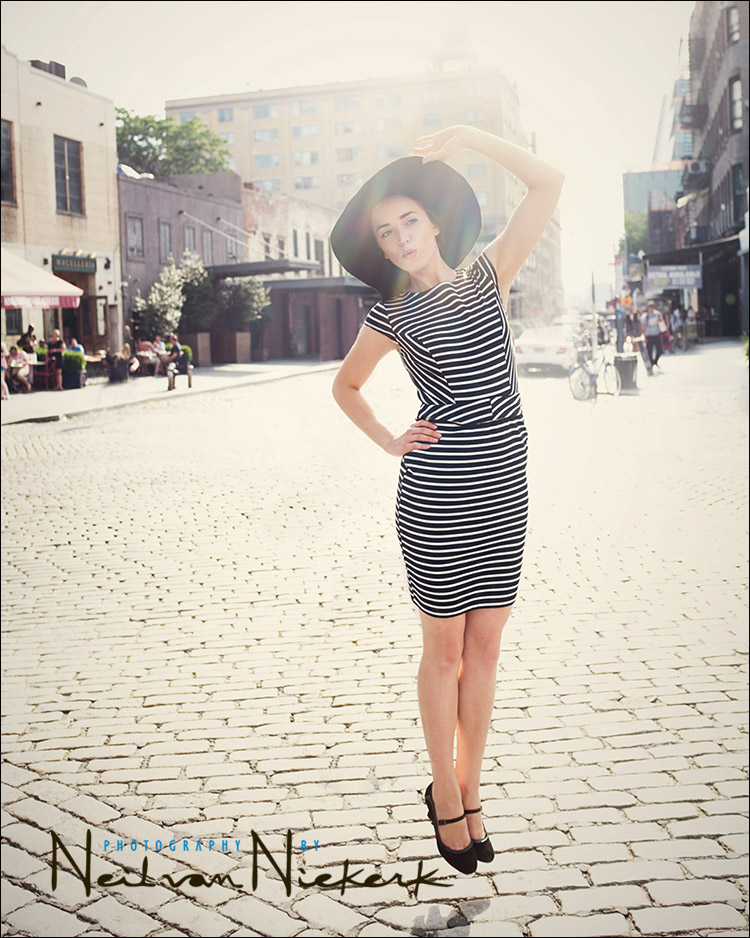
There’s something about this photograph that I really like … aside from Anelisa being one of my favorite models. It is slightly surreal with Anelisa’s apparent levitation. The dress and hat is reminiscent of a 1950’s Fashion, and Anelisa’s mid-air pose is also reminiscent of Philippe Halsman’s iconic jumping images. All that, combined with the sun flaring across her face and the washed-out background, all adds to this wonderfully nostalgic mood.

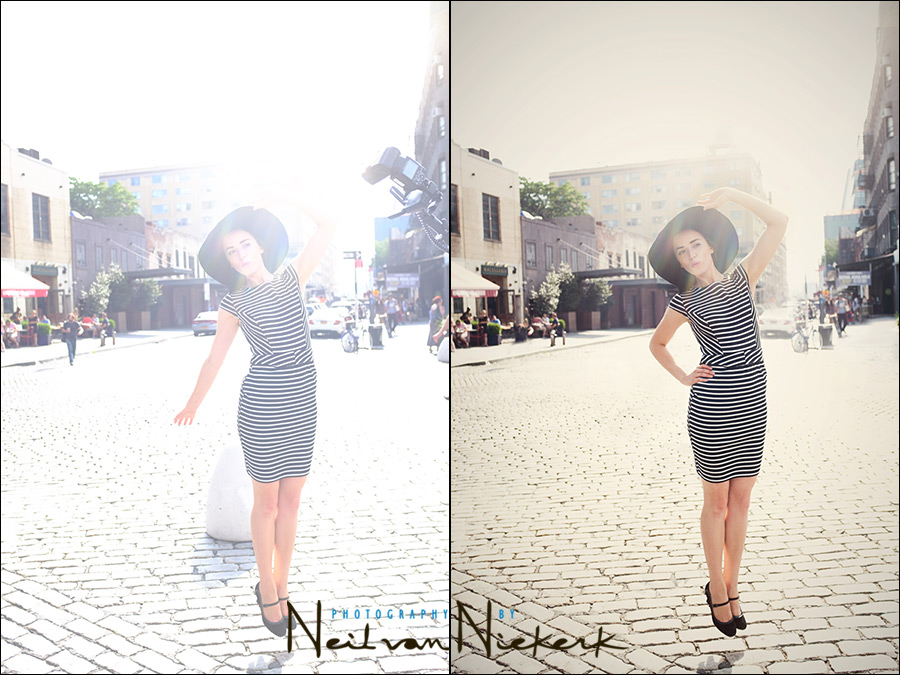
The comparison images – the straight-out-of-camera (SOOC) photo on the left, vs the final image. First thing that you might notice is that her hand changed position!
One of the things I didn’t quite have exact control over – although I suppose in deciding to show the image, there is control – was how Anelisa’s right hand was held. I liked everything else about the image – her movement and gesture. But not her hand, which looked awkward. So I used her arm and hand from another image but where other elements didn’t fall into place. In blending those two images, and removing some clutter, the final photograph is an improvement.
The comparison will also show just how much detail I was able to pull back with the RAW file. Then, to simplify the image somewhat, I cloned out a few distractions in the background, as well as the off-camera speedlight peeking in from the side.
In terms of lighting and exposure – it is an available light photo of Anelisa during a recent personal photography workshop in New York. The other photographer was working with off-camera flash in high-speed flash sync to freeze her movement. So while the other photographer was down on the paving to get the photo of Anelisa against the sky, I leaned over him to get a few frames. Without off-camera flash though, I happily let let the background blow out to get proper exposure for my subject.
- camera & lens: Fuji X100s
- camera settings: 1/500 @ f/2.8 @ 200 ISO
To give the final image that sun-drenched hazy look, I used a Photoshop filter.
final thoughts
There’s a certain beauty to using a camera like the Fuji X100s (affiliate). It is fiddly enough with enough dials and options to satisfy the geekiest of photographers … but with the single lens, there is a simplicity in using it as a general camera. You need to make images work by finding the interesting angles and compositions. Of course, not all subjects are suited to such a simpler approach, but in that challenge in using just this camera, it makes you work just that little bit harder in making a scene work. In the same sense, that’s why I think the best walkabout camera is the iPhone … except that a camera like the Fuji X100s gives much much better image quality, and offer a lot more control in terms of focus and exposure.
Just a quick question Neil. How did Anelise manage to get into the air whilst looking so natural: in such a way that it doesn’t appear she jumped?
Regards
Roy
She’s just that kind of awesome.
I’m guessing a springy toe-jump rather than a launch from the knees! Nice result given all of the fiddling you had to do!
Brilliant as always. Neil, do you feel brides also go for this look? Are you doing this just in fashion, or weddings as well?
Neil,
I’m impressed with how much detail was recovered from the raw file. If possible, I would enjoy seeing the final raw file added to the comparison of the SOOC and the finished product. Always enjoy your posts.
Justin
The other missing things? The flash, the big boulder-resembling thing behind her, the person to her right, the people to her left & the car next to her shoulder. Good job, man.
It is such a fun shot to look at! You can almost hear her giggle after the shot. Very cool Neil!
Hi Neil
Do you use a manual flash with the fuji x100s or ttl
I purchased one of these babies after reading your review by the way, so thanks for opening my eyes.
What’s striking about this shot is the levitation, and it shifts from jumping to levitation by shifting her arm position.
Great job!
THANK YOU! I was getting to feel like a idiot for not noticing “this and that” in the background and spending time cloning out junk and blurring out items. Now I don’t feel so bad not getting it perfect in the camera (still the goal) and having to resort to Photoshop to make the imagine the way I “saw” it. To get in the camera what we pre-visualize seems to be the ultimate challenge.
Ed