Flash brackets vs Bounce Flash
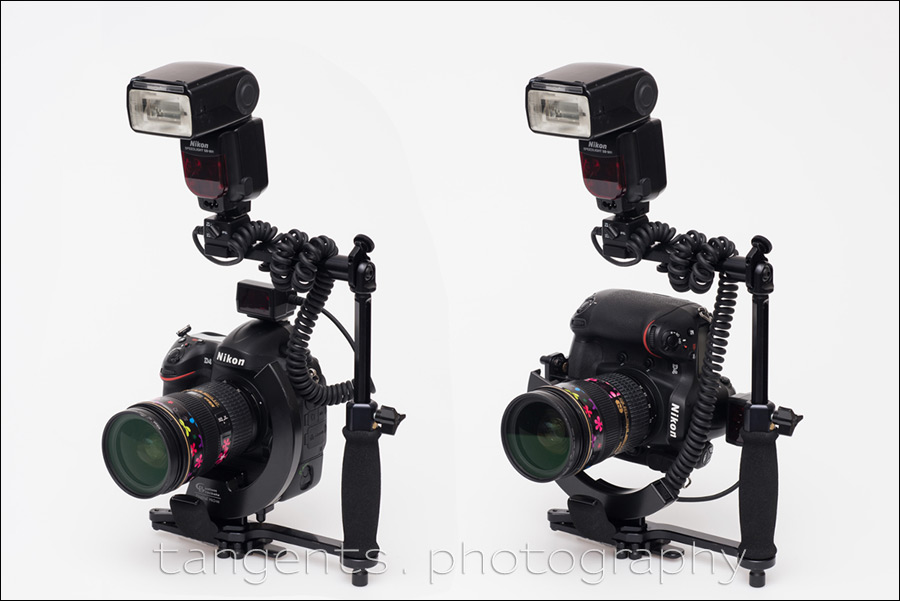
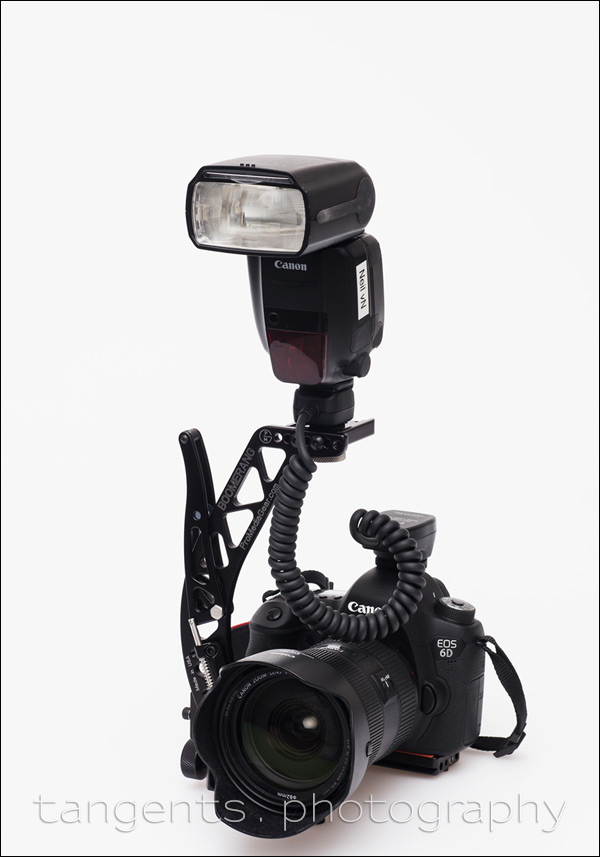
A flash bracket, such as the the Custom Brackets Pro-M rotating flash bracket (affiliate), is useful in keeping the flash’s orientation above the camera & lens axis, regardless of how the camera is rotated. You can see in the photo that the camera, whether horizontal or vertical, has the flash above the camera.
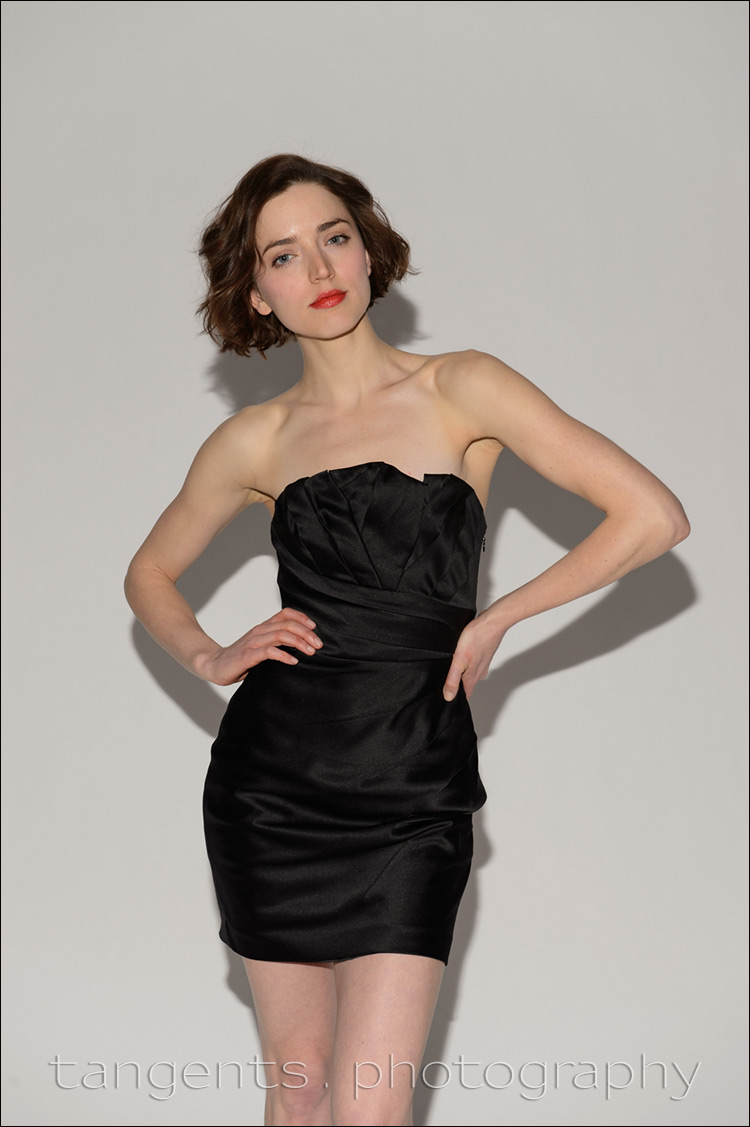
The two photos below show the difference in results. On the left – if you just hold the camera vertically, with the flash in the hot-shoe, you get that sideways shadow. It is distracting. With a flash bracket, the flash shadow always falls behind your subject when you use direct flash. This is often necessary with red-carpet events, and other similar fields of photography that doesn’t allow you to finesse your lighting with off-camera flash.
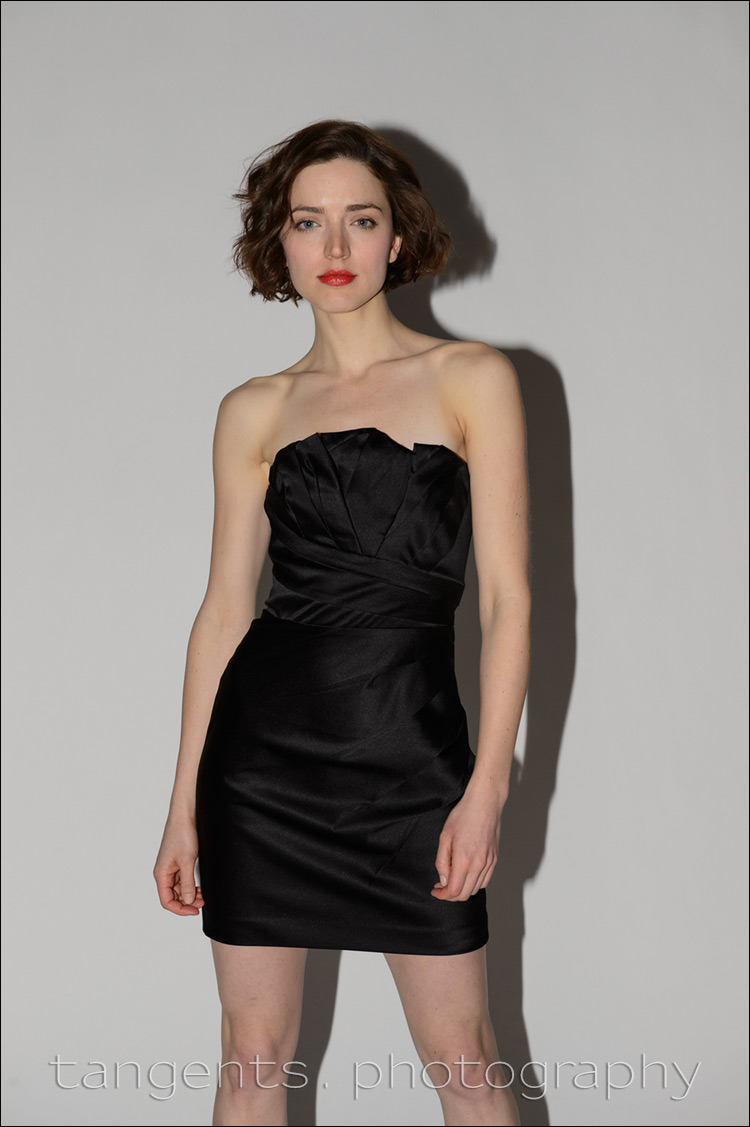
Here I purposely photographed Anelisa against a white background so that the shadows can be easily compared. Shooting with direct flash like this in the studio (or on location) is often done in Fashion photography, purported to lend a more immediate snapshot aesthetic to the photographs. Photographers like Terry Richardson made it a popular defined style, albeit with the flash closer to the lens axis.
I’m not particularly fond of this kind of look, and avoid it wherever I can. Okay, to be honest, I hate that look – especially when more flattering light could easily have been achieved.
This is where on-camera bounce flash can give much better results when working indoors. Here is the same setup, but with the flash turned around in the camera to bounce upwards and to the side of me in the large studio. To my eye, the results are far more pleasing.
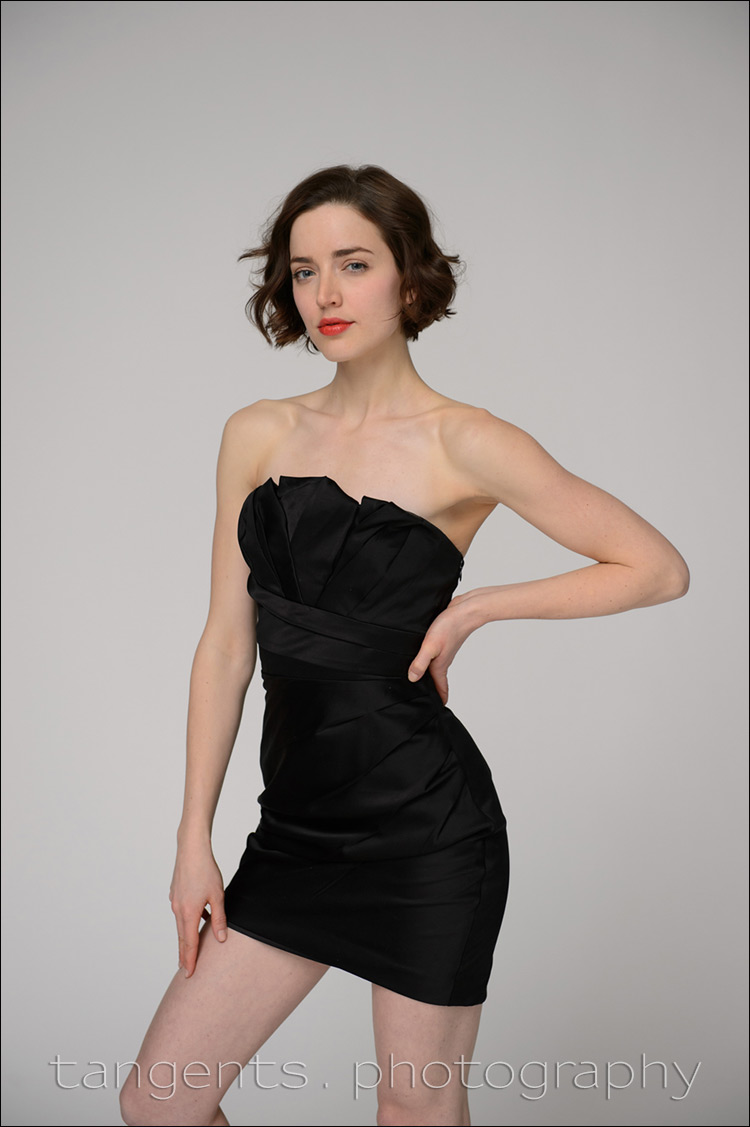
With bounce flash (and no flash modifier), there is no light thrown directly forward from the flash itself. The light is all indirect. This means there will be no noticeable shadow regardless of how my flash is positioned on top of my camera.
Here are a few tutorials covering the topic of on-camera bounce flash:
- Bouncing your flash
- Tutorial: Bounce flash photography
- On-camera bounce flash for natural looking light
I also have this book which can be ordered via Amazon (or any other bookstore), which covers the topic thoroughly.

On-Camera Flash Photography – revised edition
This book is explains a cohesive and thorough approach to getting the best from your on-camera speedlight.
Particular care was taken to present it all with a logical flow that will any photographer attain a better understanding of flash photography.
You can either purchase a copy via Amazon USA or Amazon UK. Also check out the Amazon Kindle store.
Learn more about how the cover image was shot.
Flash brackets
The flash bracket shown at the top is the sturdy and easily adaptable Custom Brackets Pro-M rotating flash bracket (affiliate). It is bulky though. Here is a review: Custom Brackets Digital Pro-M rotating bracket kit.
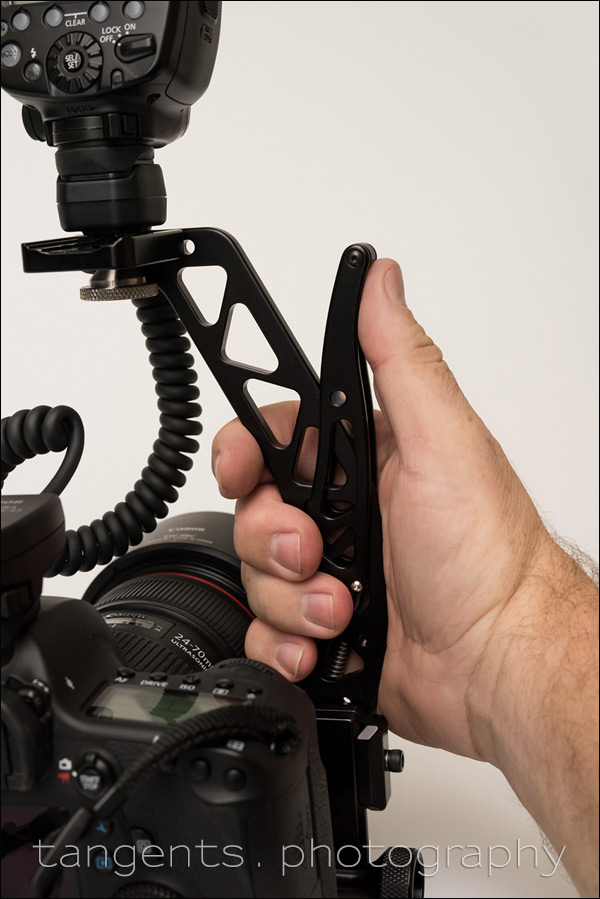
Another really nice option that is much more compact, is the ProMedia Gear Boomerang flash bracket (B&H). It has a release latch which allows you to flip the flash over. Super easy to use.
While I don’t often need a flash bracket, they are a useful accessory to have. Just in case you are limited to direct on-camera flash. Where I can though, I will easily default to on-camera bounce flash.
Related articles
- Flash brackets
- Bouncing your flash
- Tutorial: Bounce flash photography
- On-camera bounce flash for natural looking light
- review: Best light modifiers for on-camera flash
- More articles on Bounce Flash Photography
My question:
I understand the concept, but I’m wondering how you handle photographing a group of 10 inside a hall with high ceilings? I find myself in that situation periodically and I usually resort to my (bulky and quite obtrusive) flash bracket.
Thanks for sharing your knowledge – it’s GREATLY appreciated.
Cheers,
AJ
Hi there AJ ..
In the scenario you describe there, unless you’re using additional off-camera lighting, and just staying with a single on-camera flash … then you’re going to have to accept the limitations you’re shooting within. And then you will have to throw enough light forward from your flashgun – which you most likely won’t be able to do by bouncing off the ceiling or some wall somewhere.
So in that case, you’d better be off shooting with your flash in some bounce position where the flash is throwing a fair amount of light forward. And if you want to do vertical shots, then the flash bracket is going to be necessary if you want to avoid sideways shadows.
But in the situation you describe there, I’d most likely revert to using off-camera Q-flashes (Quantum flashes) with umbrellas.
Neil vN
Allow me Neil to post a tip, or what I think it is, of the problem that Ford has with hight ceilings.
As far as I know, I think that to “handle photographing a group of 10 inside a hall with high ceilings” depends a bit on the equipment you have in hands. I mean, if you have a MK III is very different of having a Digital Rebel or a G9. We are much more at ease with high level equipment that with low one.
Of course, if you give a MK III to someone who doesn’t know what aperture is, than…
But these are extremes, and I am not in the extremes. I am nor a naive nor an expert, just a concerned amateur.
That said, I think the issue is on changing the ISO of the camera until you get the right result for the right EV. Than we can bounce the flash to the ceiling or wall with or without full power and make two or three test shots to obtain the right settings.
May be these are the reasons why some cameras have automatic ISO.
Thank you.
Regarding the high ceiling scenario, I’m in the process now of editing photos from a recent conference I photographed, and the exhibit hall has those high ceilings that also are black. In this situation bounce flash is simply not a viable option. You can raise the ISO, as I do, but some amount of flash is generally required to avoid the ugly ambient-only lighting. In that situation I will frequently use a flash bracket (though I’m partial to the less expensive Stroboframe flip bracket with a padded grip), or will use on-camera flash with a bounce modifier or diffuser (which also can be used with the flash on the bracket). This type of event photography, given all that the photographer has to cover (general sessions, smaller break-out seminars, exhibit hall, etc.), is not conducive to using off-camera flash.
Hi Neil ! I’m confuse dabout the use of a flash bracket. I have the idea that using a flash bracket would not prevent to bounce your flash if you want to do so but at contrary would help find more angle and offers just more possibilities. I also have the idea that it would allow you to still be able create a nice light when you can’t bounce the flash on anything without being force to use your flash wireless.
I’m asking that because I’m bouncing and flagging my flash but I’m thinking about buying a flash bracket though. Don’t you think that using your bounce techniques with a flash bracket would add even more creative possibilities ?
Nathalie .. the idea with a flash bracket originally was to make sure that the flash shadow always falls behind the subject and not next to the subject when you do vertical shots. That ‘sideways’ shadow is just ugly.
The flash bracket is nice then in keeping the shadow behind your subject.
In the way that I bounce flash now, I very rarely get a flash shadow. So I don’t need a flash bracket for that anymore. However, it would make my life simpler with bounce flash, since I wouldn’t have to twist the flash head around when I change from vertical to horizontal.
But that is offset by not working with the extra weight and bulk. Especially the bulk.
Neil vN
Bounce flash rulez!
And I learned it from you, but I am still learning and practicing, because, it is not an easy thing to do.
Well, on second thought, —at least in my eyes—it might be the most difficult lighting I know. :-)
all the best Tilo
I guess an alternative to a bracket is one of those flash reflectors like the demb or the rogue bender. I haven’t seen anyone use any of these things for a very long time, until last week I saw someone using a really old scratched up fong dong at an event! I guess that stuff still exists…
The Demb device or Rogue Benders aren’t the same solution as a flash bracket, because with them you still don’t have the flash above the lens’ axis like you would with a flash bracket.
Or you could just hold the speedlight in one hand and the camera in the other with a radio transmitter :)