Headshot photography lighting setups in the studio
As with most photography, lighting setups and diagrams are more suggestions than absolutes. There are ‘best practices’ that will help you get constantly good results – such as getting enough light on the eyes so there is a twinkle. Okay, call it a catchlight then. Other than a few guidelines, there is a lot of flexibility in the style of lighting, and also the gear used. In the accompanying article, headshot photography lighting on location, I showed a few examples of how I varied the lighting while out on location. This depended on limitations of the location, as well as requirements of my clients. Similarly, in the studio, I change the lighting configuration, depending on what my client would need.
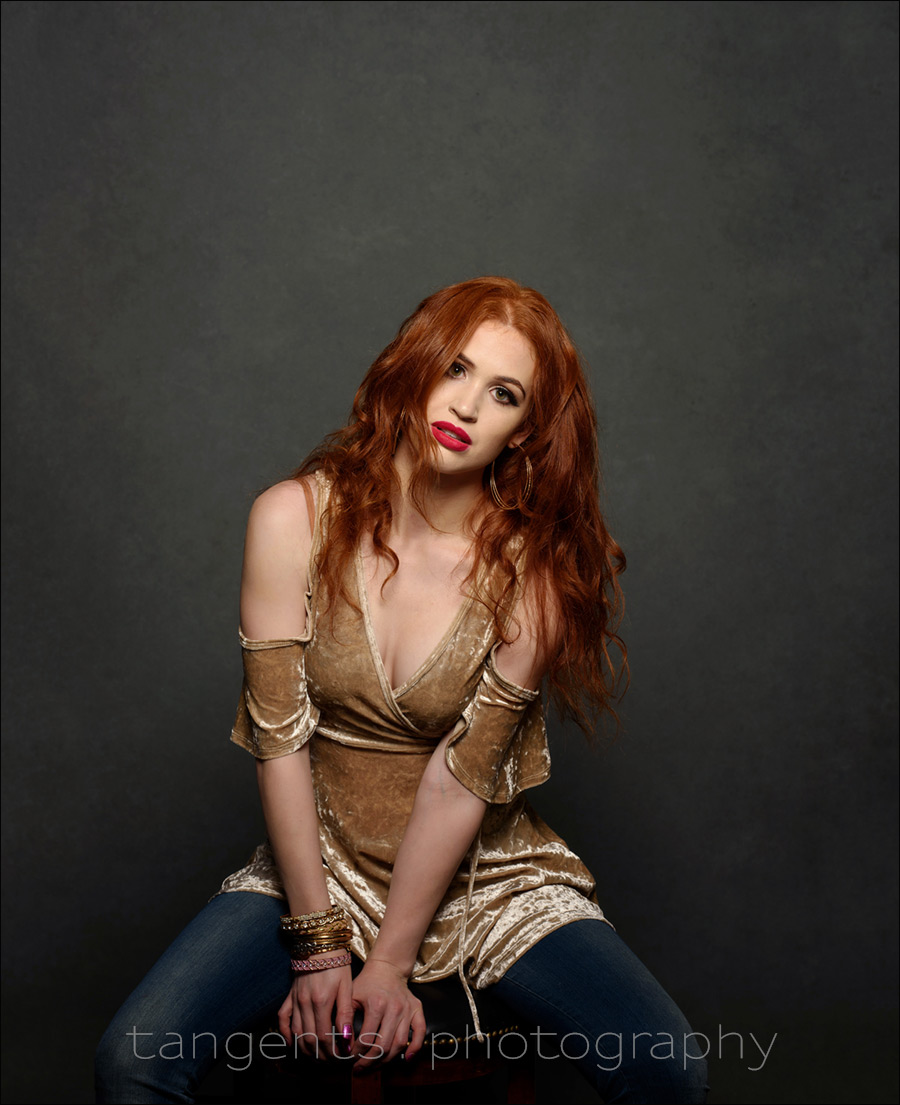
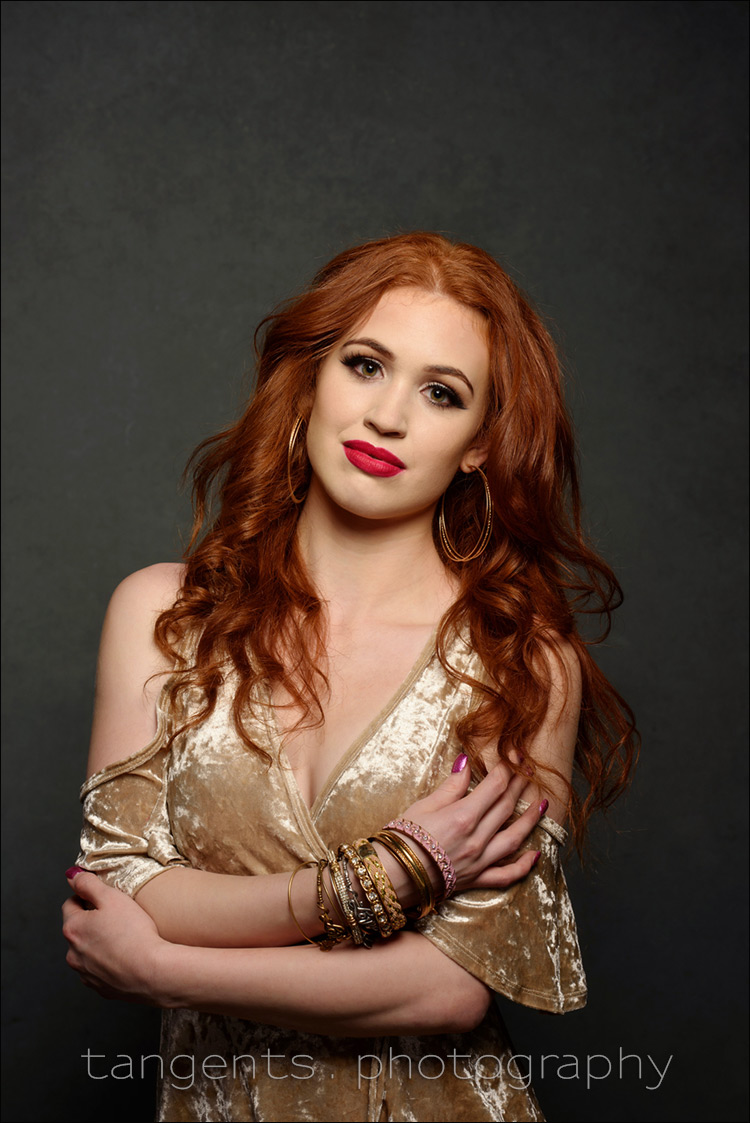
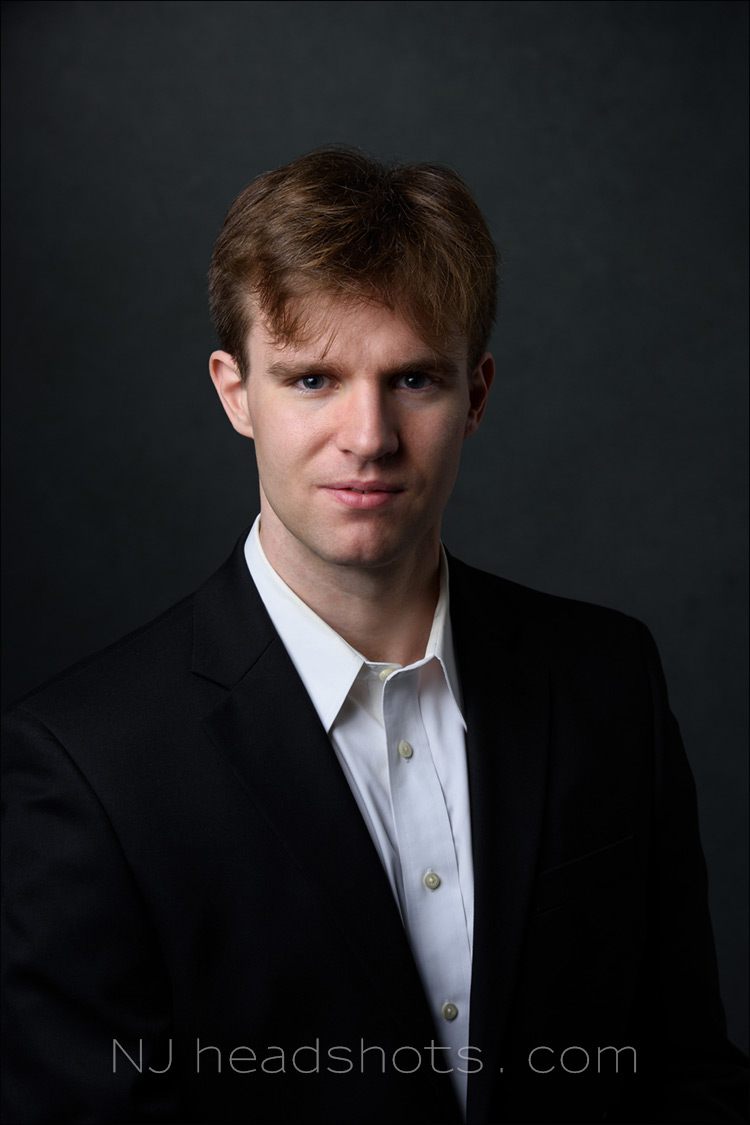
With this article, I want to show one of the setups I use regularly, and then show an example of where I changed it up for more dramatic results with a client that wanted a more moody look. The point is, we should not be locked in one way of doing it, but be able to improvise a little bit. Similarly, you will notice that the main photo isn’t merely a tight headshot – I included the hands. I don’t particularly like the idea that headshots should just be tightly framed, and that including the hands are a no-no for headshots, and that makes them more a portrait. It’s too sharp a definition for me. If a client wants a half-length shot as well, am I going to refuse?
- More articles on Headshot Photography
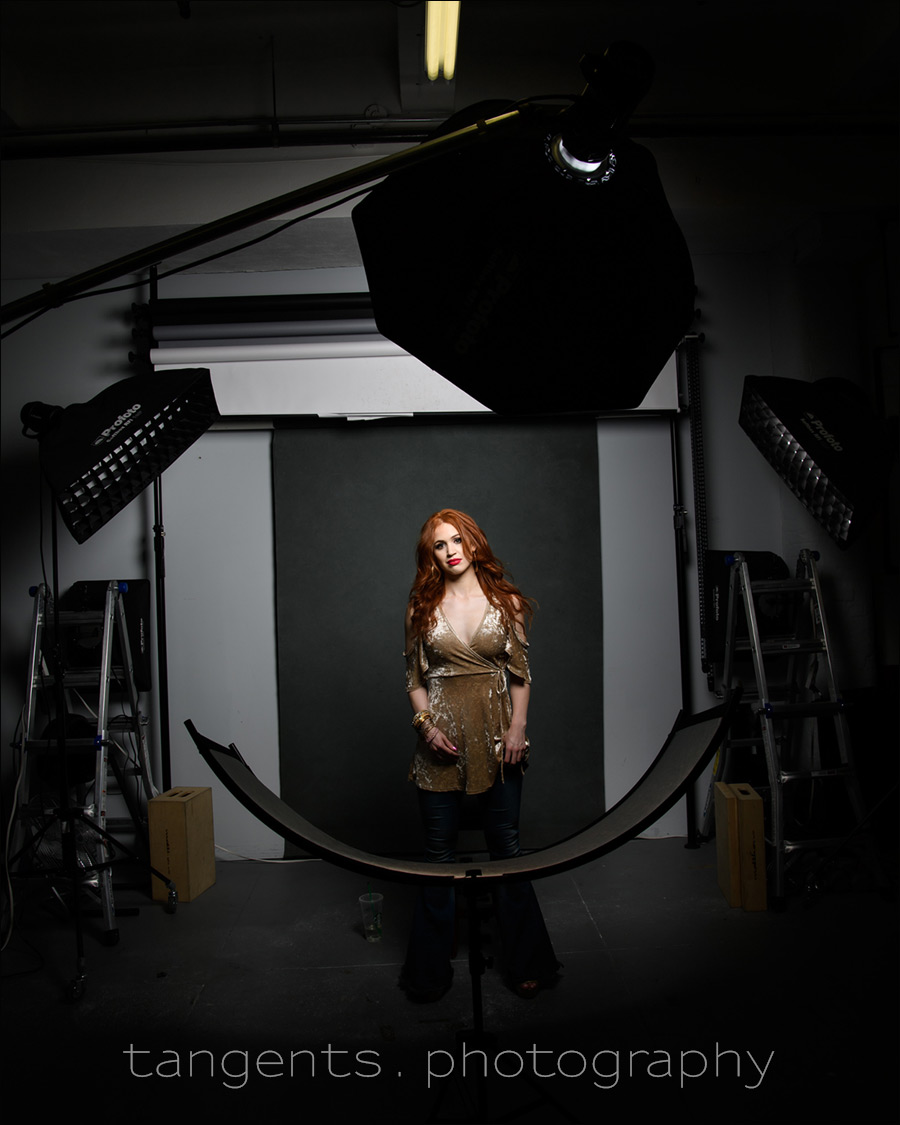
Photo gear (or equivalents) used during this photo session
- 1/160 @ f/8 @ 100 ISO
- Nikon D4
- Nikon 70-200mm f2.8 AF-S VR II /equivalent Canon EF 70-200mm f/2.8L IS II
- (3x) Profoto D1 Air 500Ws studio lights
- main light: a gridded Profoto 3′ RFI Octa Softbox (B&H / Amazon)
- (2x) gridded Profoto RFi 1’×3’ softbox (B&H / Amazon), for a bit of rim-lighting.
- Westcott Eyelighter (B&H / Amazon) – for fill light from underneath
This is one of my go-to setups in the studio, based on clam-shell lighting. There is the main light – a gridded Profoto 3′ RFI Octa Softbox (B&H / Amazon) in the front. I usually have a larger, ungridded softbox for the main light, but this time I wanted that dramatic light fall-off to her hands. Below, you can see the Westcott Eyelighter (affiliate) for fill-light.
I didn’t add a light to the backdrop with this session, but as you can see in the other session shown below, I added an accent on the backdrop for that one. We have choices, as long as the results look good.
The lighting setup used here is something I saw in one of the tutorials in the Profoto newsletter. Different lighting gear that I normally use, but I had the same items, so I thought I would set it up the same way.
This is another instance where the exact gear isn’t necessarily of any consequence – you could use any large light source close to your subject, with a reflector to the other side.
Keeping to the same setup though, I used a Profoto B1 flash with a Profoto Deep Silver Umbrella Large (51″) (B&H / Amazon), softened with a Profoto Umbrella Diffuser Large (B&H / Amazon). As a fill-light, I moved the white V-flat in.
For an accent on the painted backdrop, I positioned a gridded Profoto 3′ RFI Octa Softbox (B&H / Amazon), to create a gradient with fall-off.
Here is the pullback shot to show the exact lighting setup:
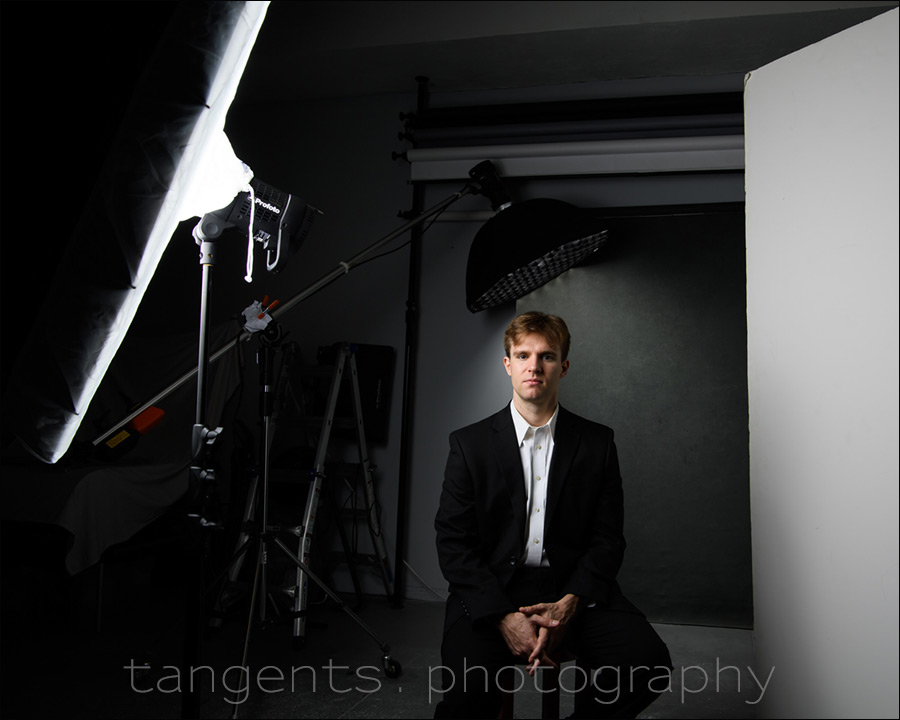
Photo gear (or equivalents) used during this photo session
- 1/200 @ f/8 @ 100 ISO
- Nikon D4
- Nikon 70-200mm f2.8 AF-S VR II /equivalent Canon EF 70-200mm f/2.8L IS II
- (3x) Profoto D1 Air 500Ws studio lights
- main light: Profoto Deep Silver Umbrella Large (51″) (B&H / Amazon)
diffused with a Profoto Umbrella Diffuser Large (B&H / Amazon) - white V-flat as a reflector
- gridded Profoto 3′ RFI Octa Softbox (B&H / Amazon) on the background
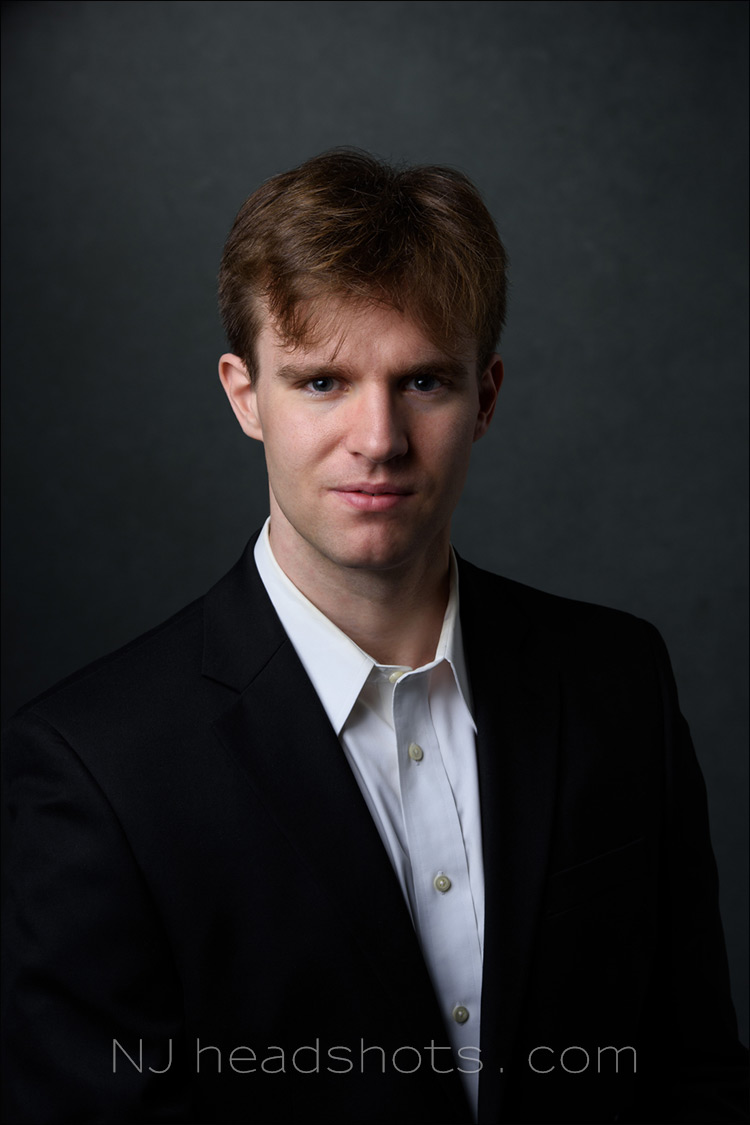
If you want consistency in lighting from shot to shot, then the best option would be to use a tripod. Even a slight shift in my position, subtly changed the way the lighting appears on his face and the background. Remember, it’s the shape of that triangle between your main light, your subject, and yourself, that will (amongst other things), help determine how much contrast you have – or how soft your light will appear.
Related articles
- Studio portrait lighting ideas (with RJ)
- Headshot photography lighting setup
- Headshot photography – Clam-shell lighting setup
- Headshot photography: What makes for good head shots?
- Working with a large Octa Softbox (John C.)
- Headshot photography lighting on location (various setups)
- More articles on Headshot Photography
- NJ headshots / NJ headshot photographer
That’s one neatly starched / ironed white shirt! If he was in the army, he’d get a weekend pass ?
Thanks Neil – excellent articles as always
Do you find people better standing vs sitting? I find people tend to slouch if they sit
Valent – my preference is for a stool with a rotating top, with them sitting more towards the front edge of the stool. Then I ask them to have one foot on the rest, and the other on the floor. This helps with the posture, as opposed to sitting deeper into a chair.
I see. My stools aren’t adjustable so I tend to use them for other purposes. Maybe I’ll look into a rotating one
Hi, Can you tell me what the color and type of backgrounds are used in this post. Thank you.
The backdrop here was made by Kate Woodman.
Here is her Etsy Store.
Also check out her website, where she has a tutorial on making your own backdrops.