Bounce flash and huge venues – how to double your flash power
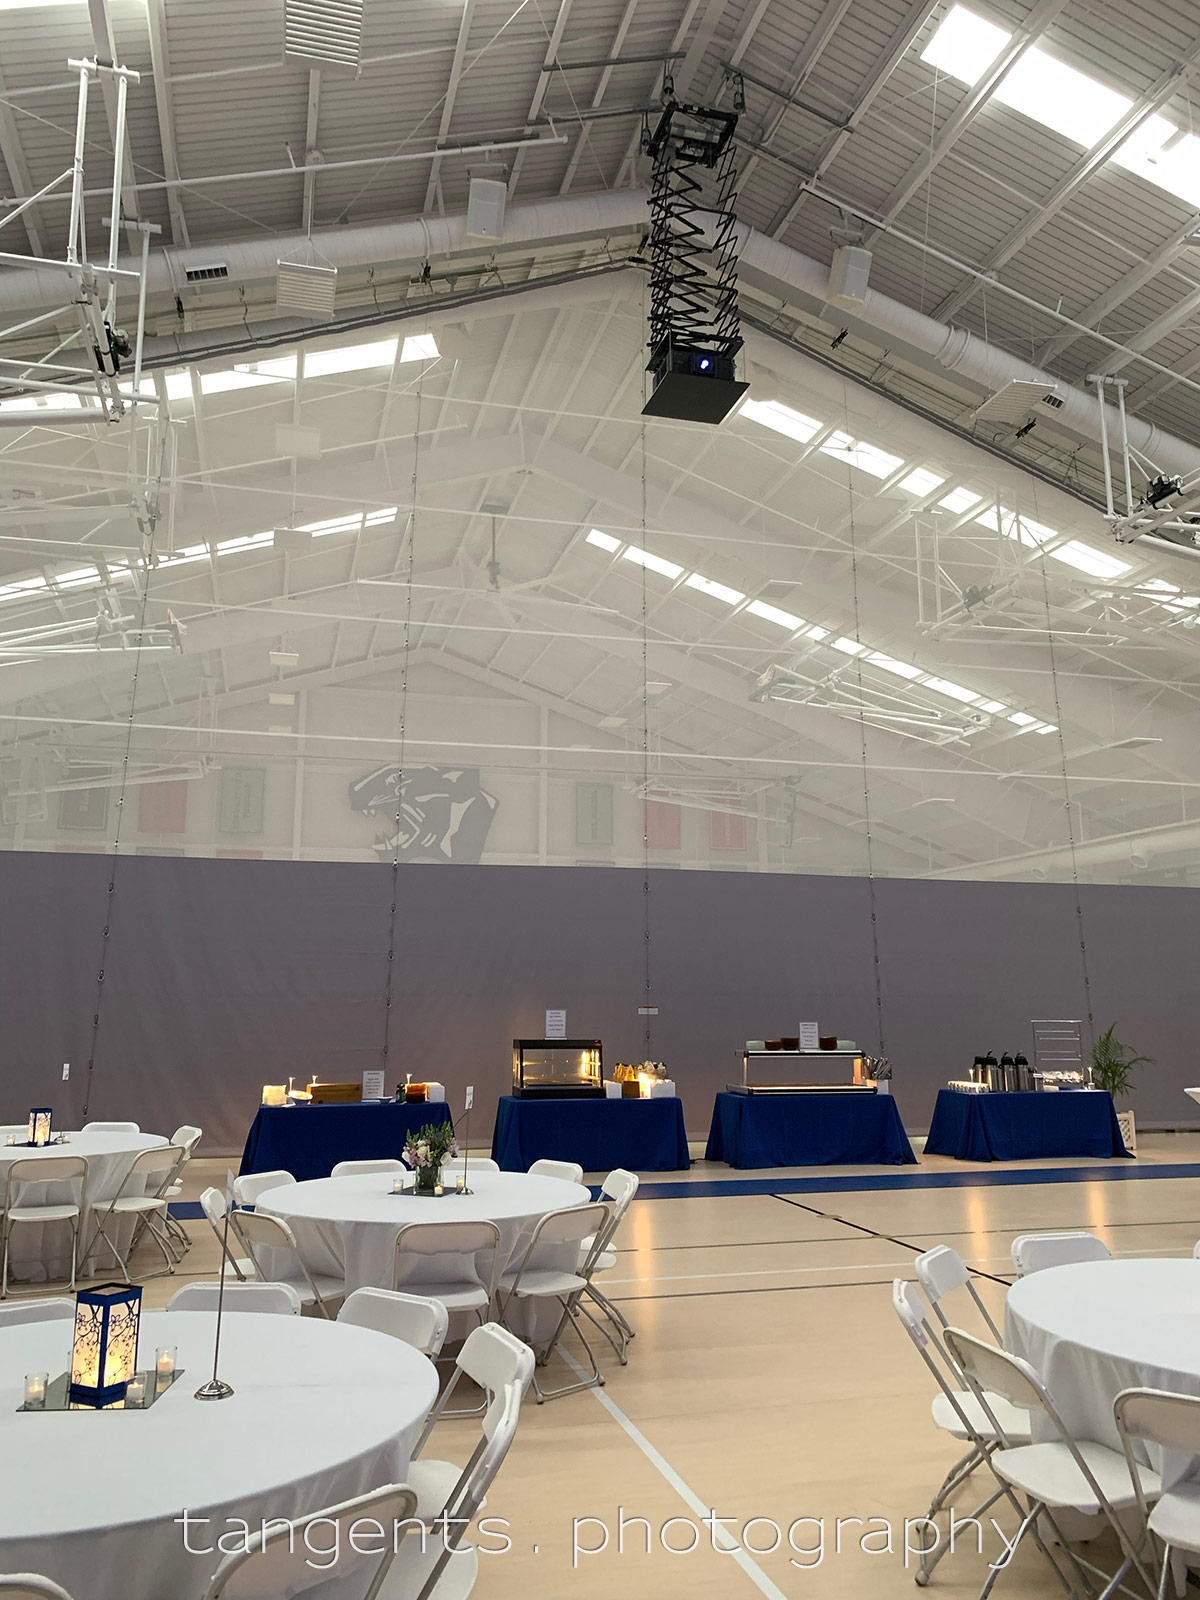
A spontaneous moment with two of the lovely people at an event I photographed. Perhaps technically unremarkable until you consider the size of the venue, and that I used bounce flash. If you look at the photo below, you’ll see that it was a huge indoor basketball / sport court. Now, if you’re familiar with the tutorials on this site on bounce flash photography, you’ll know that I try to avoid direct flash as much as possible. Even flash attachments that throw light forward — I avoid using those. Instead, I much more prefer proper bounce flash photography – where I bounce the flash off surfaces inside a venue. Even large venues.
The ideal for me in terms of the method of bounce flash, is that I bounce my flash into the direction that I want the light to come from. NO diffuser cup, or any other device on my flash, other than the BFT. I want to create a large light source, and as far as possible, I prefer that indirect bounce light to the directional. Soft, directional light.

Some photographers will say that with modern cameras you can always rack the ISO higher. But if you double your flash output, you will always be that one stop ahead.
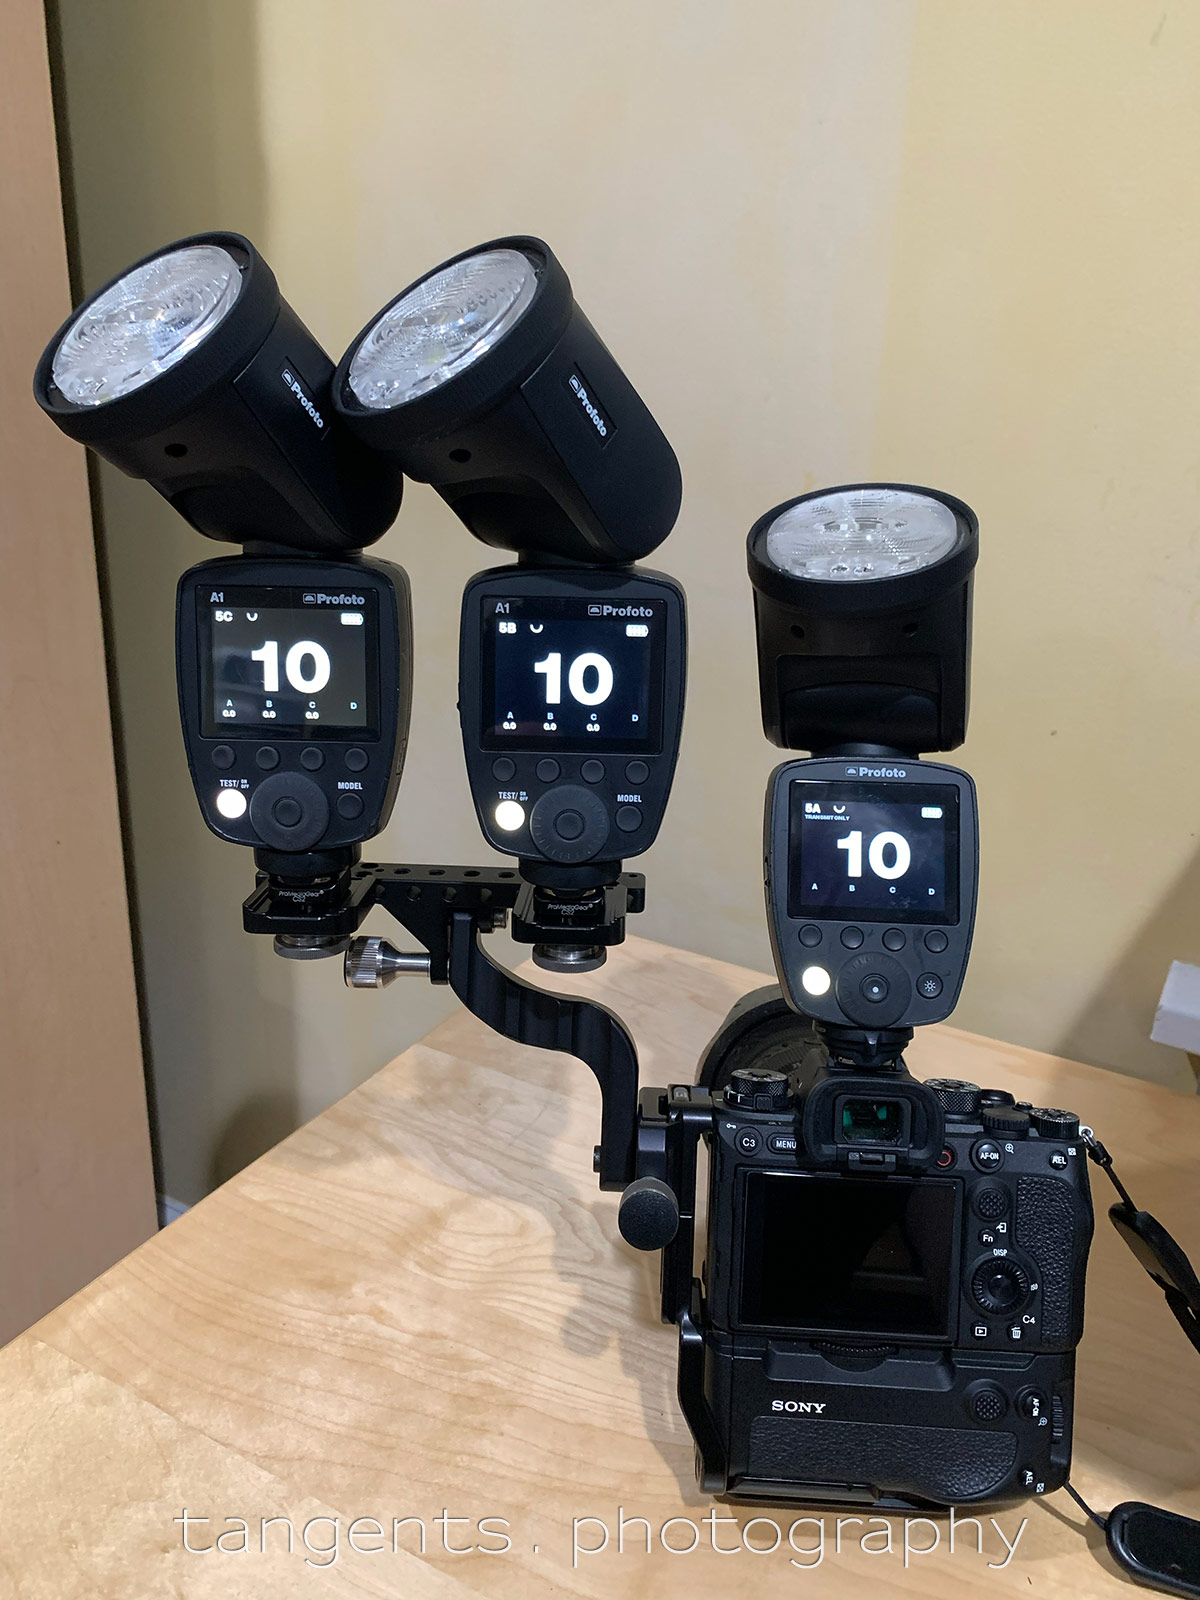
For those rare situations where I’m in a massive venue and I want to bounce my flash … and I don’t want to, or can’t put up additional off-camera lighting … and my on-camera Profoto A1 flash doesn’t boast enough juice to give me the aperture that I want, at the ISO that I want … but I still need extra juice from my flash, I bring out this ProMedia Gear GF2 Gimbal Head Flash Doubler (B&H).
It allows you to add an additional two flashes to bounce, more than doubling your output. Crazy stuff!
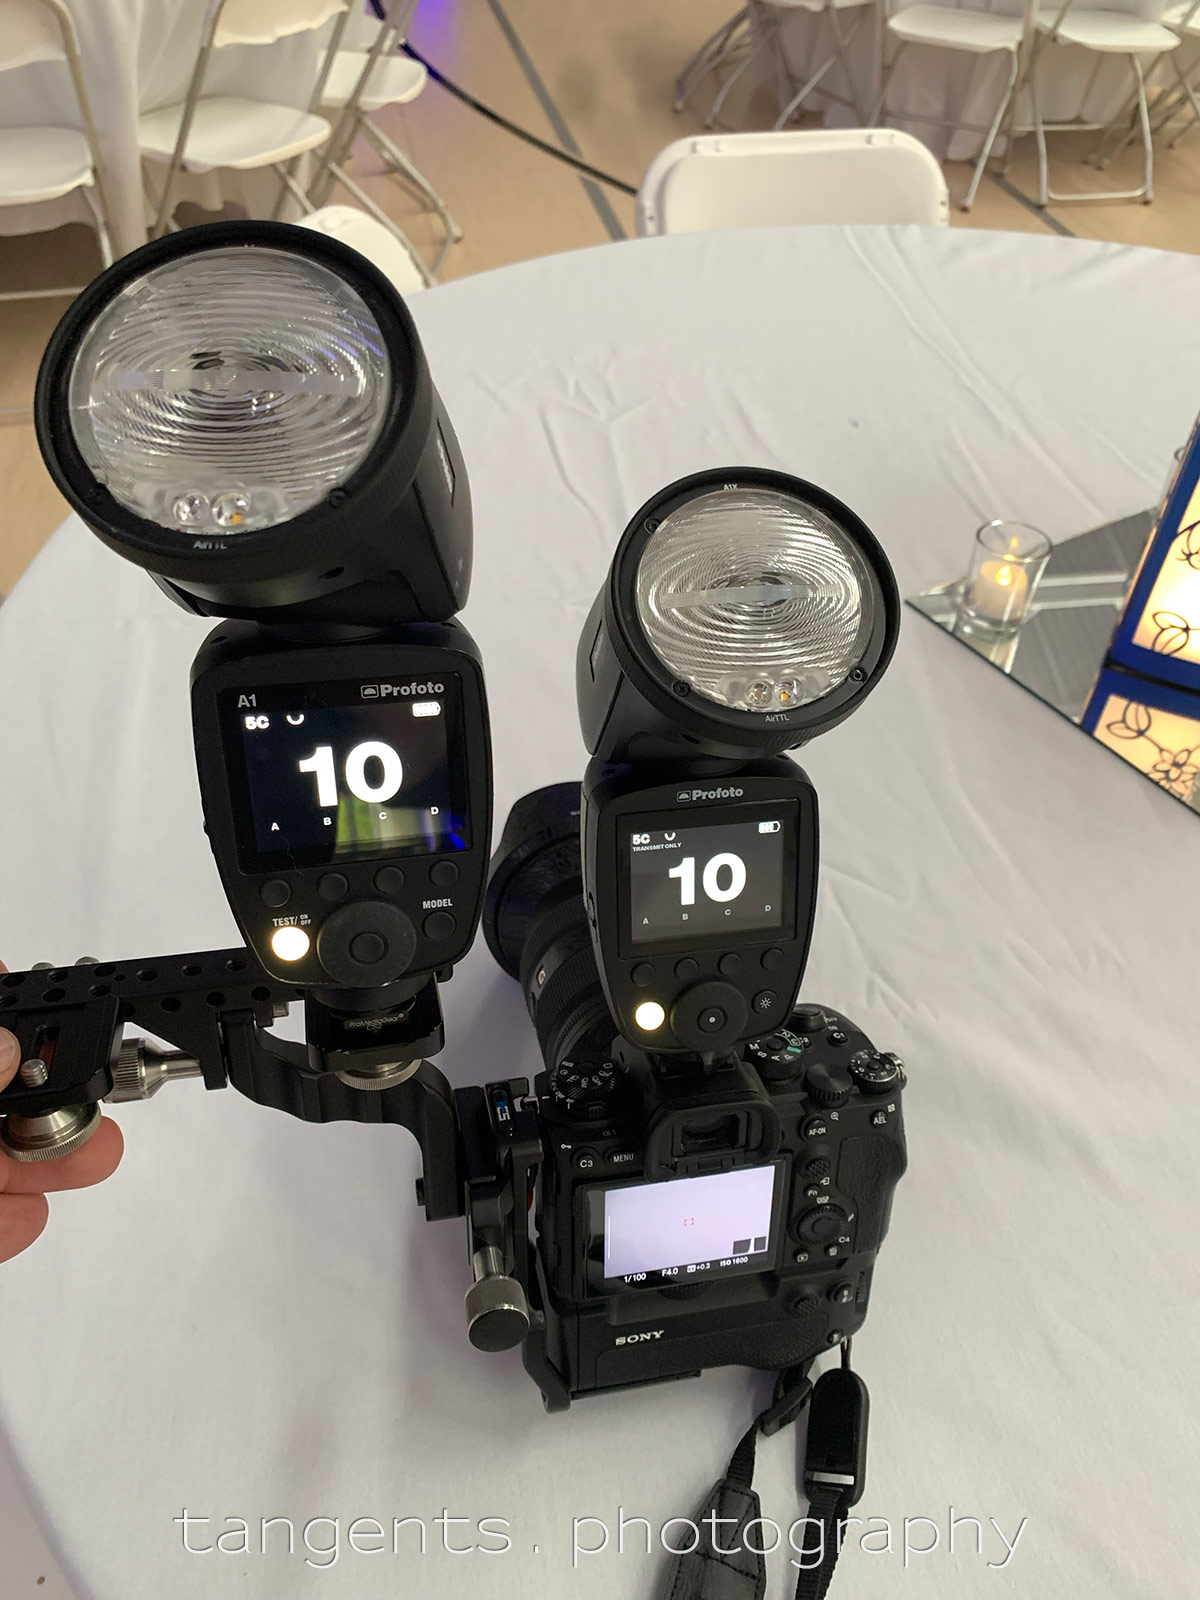
And yes, it is heavy, and the torque on your wrist is tough. Which is why I only use it with an additional flash, as shown in the 2nd image. The slight increase in power from the 3rd flash isn’t worth the physical endurance test.
How well does this work (if you have the physical stamina to carry this)? Well, look at the top image as being typical of the results I got here at this event.
The camera settings for the image at the top was 1/80 @ f/4 @ 2000 ISO. You might argue that the flash doubler bracket wasn’t necessary here since I could easily have squeezed a higher ISO and a wider aperture for the same result with just one flash. Keep in mind though that I was doing impromptu group photos as well, and sometimes needed f/5.6 aperture for the group. I was also bouncing flash in different directions that might not have been as “efficient” as with this example.
The on-camera flash is obviously the main flash that controls the other flash(es) via wireless radio signals. And it actually works this way. Sometimes howeverwhen a radio controlled trigger is too close to the flash, the flash misfires, but this setup appears to work. It’s heavy. My left hand will have to do a lot of the balancing of the weight.
There’s no stopping me now, except for tendonitis in my wrist and elbow.
I didn’t weigh it. But I seriously think you will get some kind of strain injury in your wrist because of the torque to the one side with the 3rd flash added.
As a side note — the Profoto flash mounted on the bracket is the Nikon mount Profoto A1 — because the Profoto hotshoe foot is far more sturdy than the idiotic Sony hotshoe with the delicate pins.
The 2nd flash would double my power. A 3rd flash would only add 1/2 a stop. Diminishing returns. I only rarely (2, maybe 3 times a year) hit a situation where a 2nd flash on my camera would be useful. So no big ordeal for me. And if I NEVER have reason to use this, then that’s ideal too. But if I need this, I have it. It’s like insurance. The ideal is that you never have to call on your insurance.
Photo gear used with this photo session
- Sony A1 (B&H / Amazon)
- Sony 24-70mm f/2.8 GM ii (B&H / Amazon)
- Profoto A10 flash for Nikon / Canon / Sony (Amazon affiliate links)
Profoto A10 flash for Nikon / Canon / Sony (B&H affiliate links) - ProMedia Gear GF2 Gimbal Head Flash Doubler (B&H)
Related articles
- Video tutorial: On-camera bounce flash photography
- Tutorial: Bounce flash photography
- Video tutorial: Bounce flash photography & The Inverse Square Law
- My preferred bounce flash modifier : the BFT
- Flash Photography tutorials
- Wedding reception lighting with one flash


Hi Neil. You can use Nikon Profoto flashes on a Sony camera? Or are you using a Sony Profoto flash on the Sony camera as the main flash while the two Nikon Profoto flashes on the bracket as secondary.
I respect your resourcefulness in finding ways to get the job done!
Here the flash on the camera is a Sony mount flash, which then controls the Nikon mount flash which is on the cold shoe of the bracket.
I am using the Nikon mount Profoto A1 flash as the secondary flash, because the hotshoe connection off the Sony flashes have those ridiculously flimsy pins which are too delicate to have in the bracket’s cold shoe.
My arms hurt just looking at that weight!
Hi Neil,
what a great solution to allow yourself to carry your style of photography in large venues. Were you using TTL or does the large 10 mean that your flash was at full power ….. and then I guess you just know what you might get because of experience
With big venues like this, the exposure is fairly consistent in every direction. So Manual flash exposure works really well because of that consistency.
I would have to be at full manual power, for if I had the two flashes at half power (level 9), I might as well have only used the one flash at full power. SO with anything less than full power, there isn’t really that need to double up the flashes.