Lighting an on-location Fashion shoot
Bringing just the necessary photo gear and lighting gear to an on-location shoot, is balanced by the need to bring enough to cover any eventuality and possibility. A tough balance between risking not having the right gear, and being laden down with too much gear. I had the interesting opportunity to work with my friend Daniel Featherstone, and collaborate him with him on the lighting during his photo shoot for New York Fashion designer, SR1990. (The day-long photo shoot was at Opus 40, where I shot also some B&W infrared images during down-time.)
Fortunately, this location meant that I didn’t have to pack frugally, I could jam my SUV with as much lighting gear as I could fit. Yup, a mild case of over-bombing, as I brought two Profoto B1 heads, and two Profoto D1 heads (to be powered with the Profoto Batpack), and a wide range of light modifiers. I also brought Litepanels 1×1 bicolor LED panels along, just in case continuous lighting would work better.
Here I wanted to show one of the setups, and discuss the decision about which light modifiers to use:

Setting up the lighting style for this scene
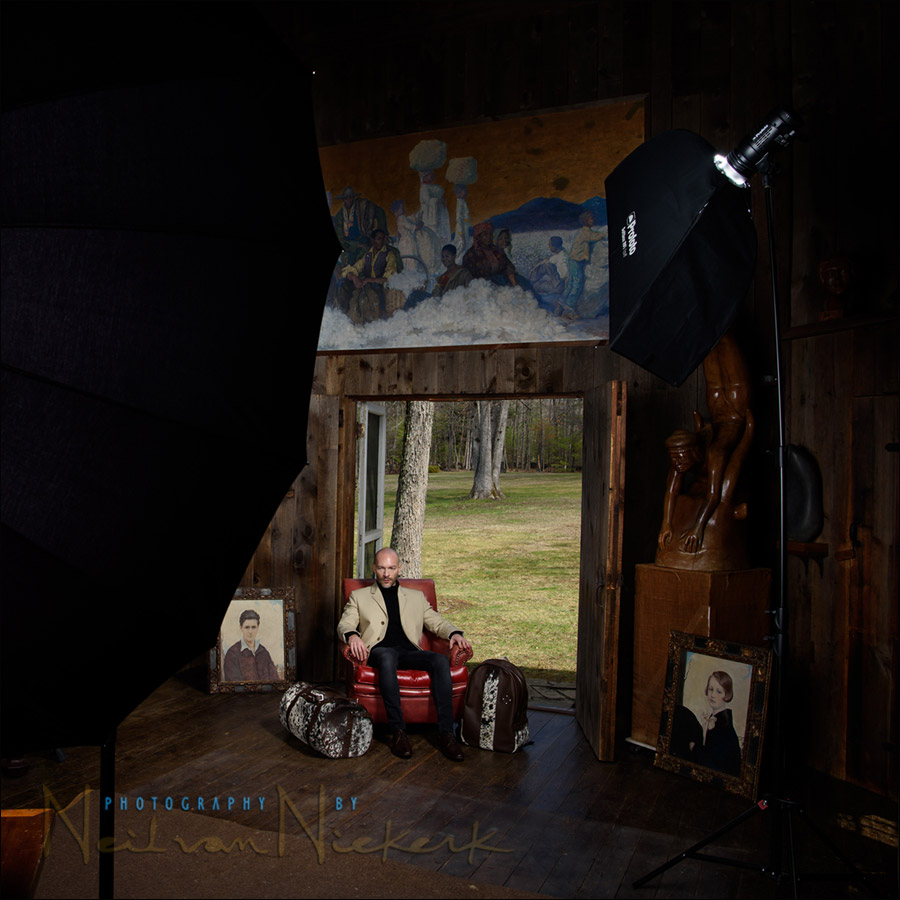
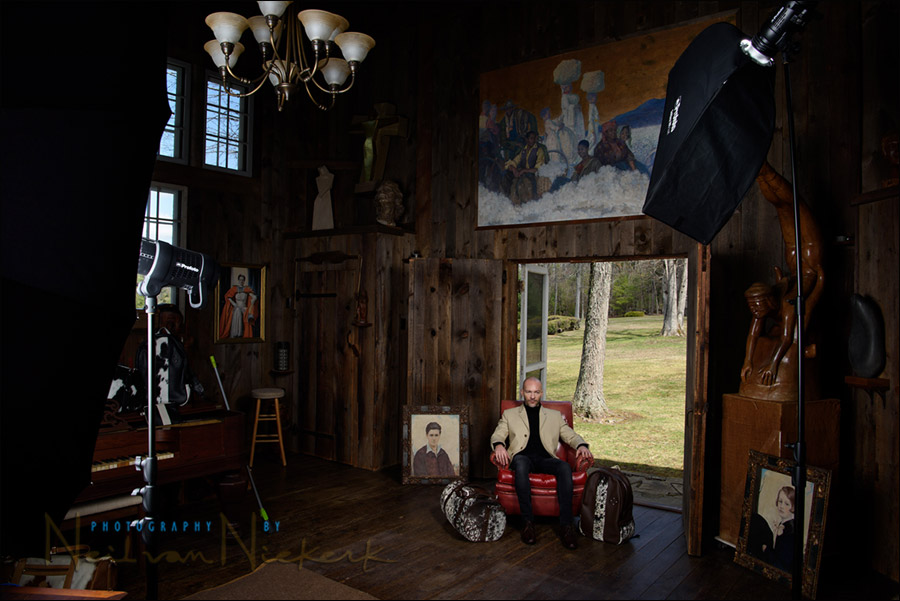
The lighting style that we decided on, was to balance the model with fashion accessories, with the outside scene. We didn’t want to over-light the rest of the scene indoors – the light had to have a mild spot-light effect on our subject, and then fade out to a natural vignette around him to give some context, but not too much distracting detail.
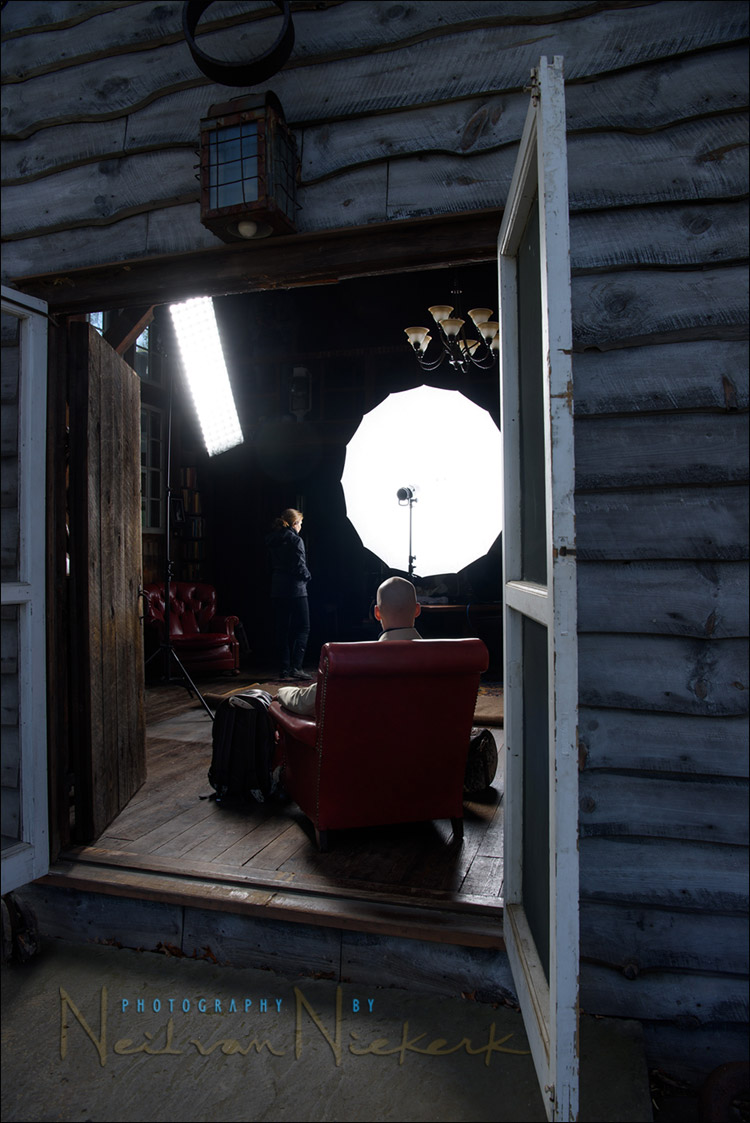
As you can see from these two pull-back shots of the same set-up, two light were used – my trusty Profoto B1 TTL flashes (B&H / Amazon).
To the right in the frame, you can see the one Profoto B1 high up on a light-stand, with a gridded Profoto 1’x4’ gridded strip-box (B&H / Amazon). The light came from higher up, and since it was gridded, we could control the light fall-off pretty well on our model and the luggage that we were illustrating. This technique in controlled lighting with a gridded stripbox, is also described in a related article – dramatic portraits of kids – Lighting and intent.
The second light (to the left in the frame), is a Profoto b1 again, bounced into the huge Westcott 7’ Parabolic Umbrella (B&H / Amazon). I had this light at power level 7, while the main light (with the gridded striplight) was at power level 10. This larger light source just had to create enough fill light for the rest of the room, and we could range the power up or down for more or less fill.
Regular followers of this blog will already know the exact algorithm to get to optimal settings for the camera and flashes here. As described in this related article – controlling bright daylight with direct off-camera flash – the decision about settings revolve around maximum sync speed (1/250 for the Nikon D810), and a low ISO (we settled on 100 ISO instead of the minim 64 ISO possible on the D810). Then it was a matter of finding the appropriate aperture … in this case, f/8 looked just right. Then it was a matter of adjusting the positioning of the main light to control the spread of light, and then adjusting the fill-light.
The lighting setup here is quite simple, but was effective in giving us the exact look we visualized when we saw the room and the furniture.
Related articles
- Dramatic portraits of kids – Lighting and intent
- Portrait lighting setup – Chiaroscuro (model: Frankie)
- Using a gridded stripbox as the main light (model: Claudia)
- Using a big gridded strip-box / soft-box (model: Anita DeBauch)
Lighting gear used during this part of the photo shoot
- (2x) Profoto B1 TTL flash (B&H / Amazon)
- Profoto 1’x4’ gridded strip-box (B&H / Amazon) with a Profoto 50 degree soft-grid
- Westcott 7’ Parabolic Umbrella (B&H / Amazon)
Hi Neil,
I love that image. The lighting is perfect.
You should use the same lighting for a group of 10 or 12 people in the same place?
The gridded striplight would be too directional in this case for such a group shot. More ideal would be to just have the large umbrella, and have that at full power to give even light on the group. Or, alternately a shoot-through white umbrella.
Hey Neil, any chance you could show us the resulting shots ?
The photographer, Danny Featherstone, kindly allowed me to post this example, with his signature post-processing.
(More images here.)