
using a variety of lighting techniques for wedding photography
This recent post on lighting ideas for the romantic wedding portraits, showed that I like to mix it up a bit, and not rely on one specific technique. Not every situation we’re going to encounter can be solved with one specific approach only. Mixing it up in terms of lighting also helps to provide my clients with more variety in the look of the final selection of images. In addition, it also keeps it interesting and fresh for me. Constantly adapting to challenges is part of the process of growing to be a better photographer.
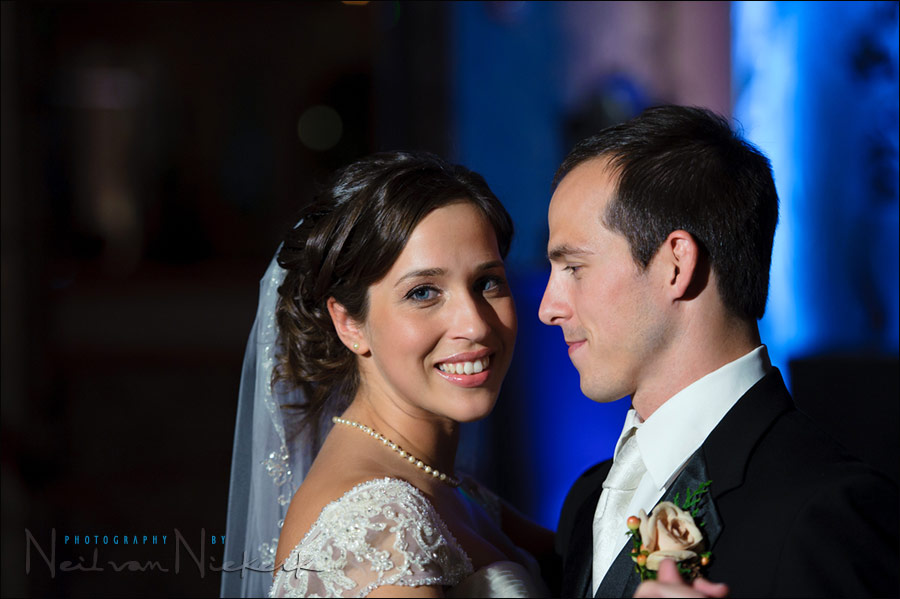
With the image at the top, I wanted something with a sense of the dramatic. I only had my assistant there with a softbox on a monopod. Just the one light. We were freezing, and had to move fast. So no time for more lights. To get this kind of separation between my subjects – the bride and groom – and still get even light on them, I simply made sure that my light was at an equal distance to both of them. This way there is no light fall off and one of them brighter or darker than the other …
Because of the inverse square law to how light spreads, there is always significant fall-off in light to the background. To overcome this, I made sure that in where I posed the groom, that he wasn’t too far from the softbox. Then I angled the bride into the light. To work fast, I used the slaved flash in TTL mode. I wanted the technology to help me. My on-camera flash was the Master speedlight, and had its own output disabled.
camera settings: 1/80 @ 6.3 @ 800 ISO
Nikon D3; (B&H); Nikon 24-70mm f2.8 AF-S (B&H) .. used at 5omm
Nikon SB-900 (B&H); Nikon SD-9 battery pack (B&H);
Lastolite EZYBOX 24×24 softbox (B&H)
Another wedding on a freezing cold late-November night. I knew I wanted some kind of kicker light behind them, so I carried a speedlight with me, already hooked up to a PocketWizard Plus II unit. These are not TTL capable, so I had to use it in manual. (Auto mode on the speedlight might be an option sometimes .. but not this time). I had the diffuser dome over it since I wanted it to be an omni-directional light source. I think I had it set it to 1/8 of full power, or perhaps 1/16th … anticipating how much would be juuust enough light behind them.
As the main light, I once again had my assistant hold a softbox up on a monopod .. but this time close to, and nearly above me.
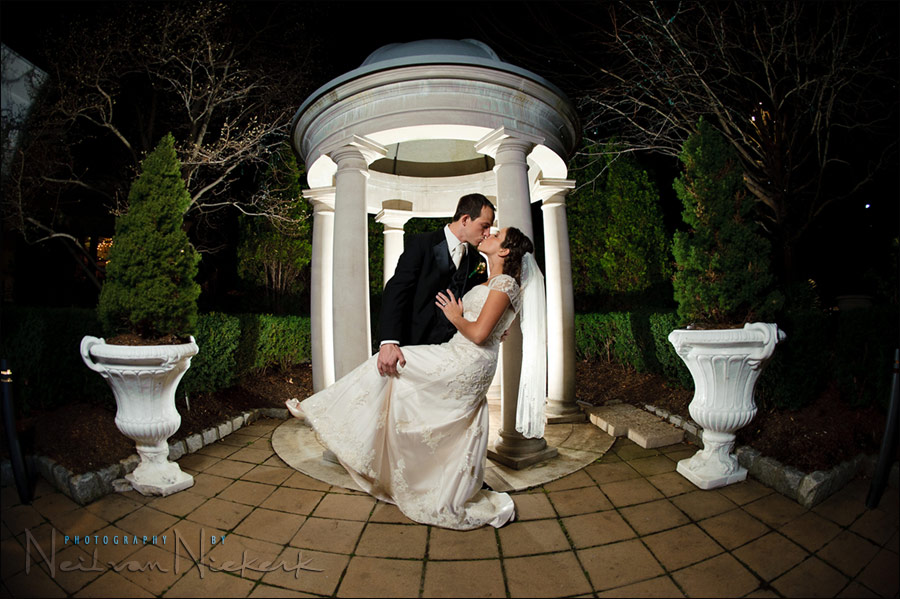
The speedlight in the softbox was set to TTL, and controlled via my on-camera speedlight which was the Master flash. Once again, its own output was disabled, so that only the Slaved flash in the softbox added the main light. The flash in the background was in manual mode, and fired via a PocketWizard unit attached to it. This PocketWizard was tripped by the PocketWizard connected to the PC socket on my camera.
I used a fish-eye lens for the curviness of the image. Since a fish-eye lens distorts so much to the edges, it had to be a very centered composition. I think that centeredness helps the final image.
Nikon D3; (B&H); Nikon 16mm f2.8 fish-eye (B&H)
Nikon SB-900 (B&H); Nikon SD-9 battery pack (B&H);
Lastolite EZYBOX 24×24 softbox (B&H)
While I sometimes still use additional off-camera lighting at wedding receptions, it is less necessary now with high-ISO capable cameras. Especially when the reception venue has up-lighting, the use of additional off-camera lighting has a tendency to destroy the mood. Also, some reception venues are oddly shaped or have low or irregular ceilings, making placement of these additional lights a problem. That’s not even taking into account that the room might be crowded, or that a lone-standing light might be risky to leave where guests can bump into it.
The simplest technique then for me, is to allow as much of the available light in as I can, without risking too much ‘ambient smear’. I don’t want subject movement to be so pronounced that there is noticeable subject blur or camera shake. While I use a low-ish shutter speed then, I still favor a high ISO and wider apertures.
For the next two images, I used a single on-camera bounce flash to get (slightly) directional bounce flash on my subjects … while using a combination of camera settings to allow much of the ambient light in to still give context. I’d rather not have that ‘black hole’ background.
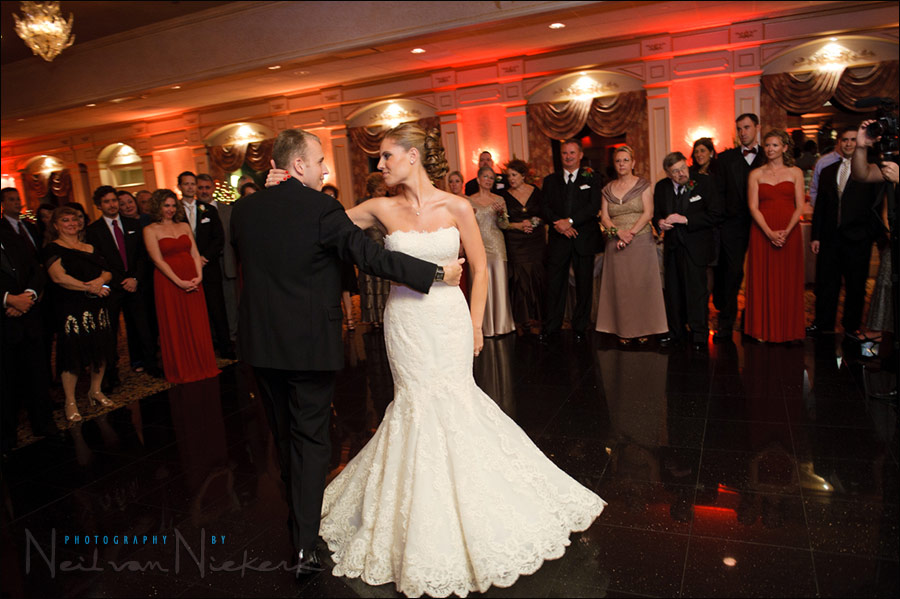
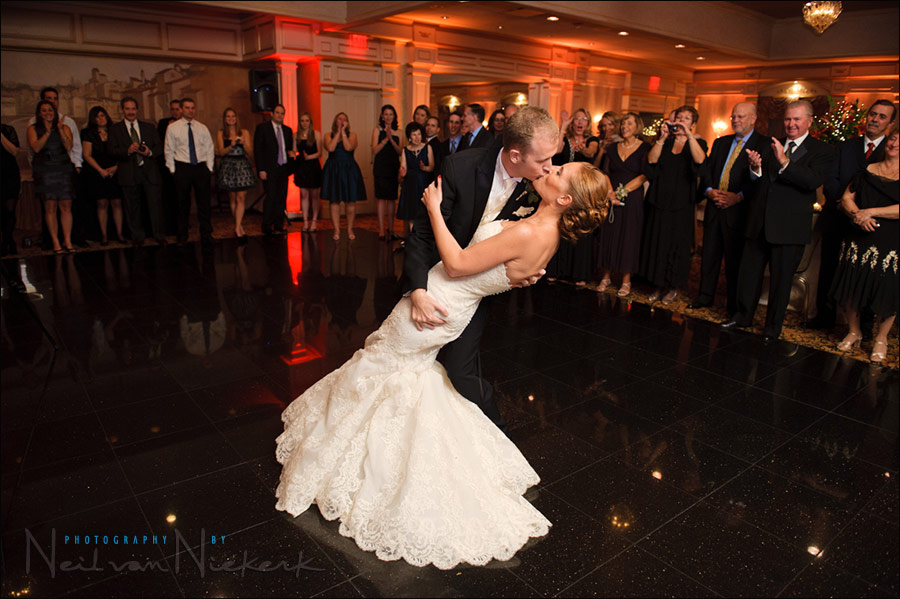
camera settings: 1/60 @ 3.2 @ 1600 ISO
Nikon D3; (B&H); Nikon 24-70mm f2.8 AF-S (B&H) .. used around 24mm
Nikon SB-900 (B&H); Nikon SD-9 battery pack (B&H);
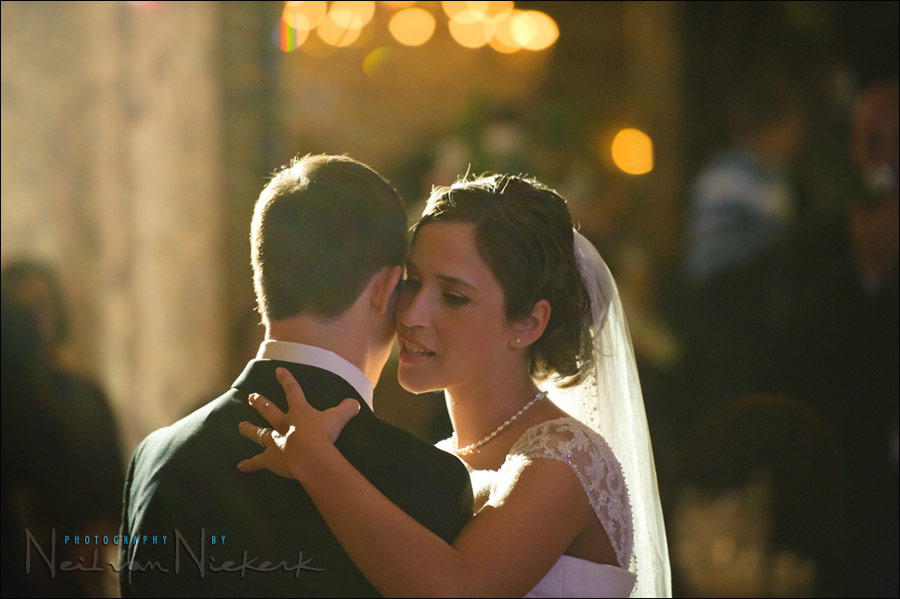
I do look out for other opportunities so that I am not just limited to using bounce flash. Here is an example of where I switched off my flash, and used the videographer’s light for a few of the images.
Shooting against the videographer’s light, I cranked up my ISO to get a romantic look. Here I am not aiming for ‘correct exposure’ of the bride’s face as she is turned to my camera. My exposure here is very much about the mood of the moment. The rim-lighting and suggestion of her expression and gesture is all-important here.
camera settings: 1/30 @ 2.8 @ 2500 ISO … no flash, just the video light
Swinging around, I had more direct use of the videographer’s light. I could’ve used some bounce flash here to ease the contrast, but I liked the strong light on them.
camera settings: 1/100 @ f2.8 @ 1600 ISO … no flash, just the videographer’s light.
Nikon D3; Nikon 70-200mm f2.8 AF-S VR II (B&H);
As I showed in the article already mentioned earlier on, switching it up like this gave me more variety. Not every photograph will work, therefore the ‘decisive moment’ is something I decide on during the editing process.
The key is to be flexible and be very familiar with the camera and flash’s controls. No fumbling!
This in a way reminds me of an article I read many many years ago in a photography magazine. Unfortunately, I can’t remember the author, but I seem to recall it was one of the entries in the regular ‘The 37th Frame’ column in the magazine? (American Photo?) Anyway, the author mentioned how news photographers would practice loading film in the dark while running. That idea really stuck with me. We need to be *that* familiar with our cameras. It’s much easier with digital of course, since there is no loading of film, but you get the idea. We need to know where every control is, and have it fall naturally under our fingertips in order for us not to have to think about the camera.
other articles on wedding photography
Great tips Neil. I love the first two wedding images, especially the fisheye image.
Couple of quick questions:
– when you mentioned using a diffuser dome on your speedlight, was this simply a Stofen or something similar?
– the wedding dance pics remind me of a broader question I’ve been struggling with. When shooting a wedding reception and bouncing off of multiple surfaces that vary in color, etc., how do you get such good color balance and color results in post processing? There’s never enough time to shoot a gray target under every lighting situation, and I find that white dresses, shirts, and the like are not very predictable for setting WB in post.
Thanks. LOVE your blog.
Mark
Just a quick big thankyou Neil for the information you share with these posts.
After getting to the part where you said that you lit the first image with just the one light, I thought how’s that again? Then before reading on my mind went straight to the section in your book where you bounced flash to evenly expose the couple seated some distance from each other in the reception venue….I read on and yep that’s it…its a good feeling to ‘get it’.
I tip my hat to you as your tangents and teachings etc are now becoming part of my still green ‘photographic thought process’.
I keep reading and learning which inturn motivates me to be thinking while practicing… all so that I don’t have to (think that is).
Thanks again.
Chris
On the money again, Neil. But do enlighten me – how does one disable the output on your onboard flash and still trigger the off-camera unit? Can this be done with a D700/SB800 combo?
Jaco,
1) If your D700 flash is the master flash, you need to go to custom setting e3, and set the built-in flash for Commander mode (it’s an icon with the letter “C” with a lightning bolt). In the Commander Mode menu, set the Built-in flash Mode value to –. Group A should be set to TTL.
So, it looks like this:
Commander Mode
Built-in Flash: —
Group A: TTL
Group B: —
Group C: —
2) If your SB-800 is mounted on the D700 and is the master flash.
You’ll need to consult the SB-800 manual. You can get a copy here.
http://cdn-10.nikon-cdn.com/pdf/manuals/Speedlights/SB-800.pdf
On page 68, there are instructions on going into custom functions. Get into the custom function menu and select the wireless flash mode icon (listed on page 69). Once you are in that menu, you need to set the “M” to –.
So, on your SB-800, when you look at the wireless flash mode menu, you need to set the modes to look like this.
M: —
A: TTL
B: —
C: —
M is your master flash, which is the SB-800. “A” is the off-camera flash unit.
Thanks Stephen. I’ll try this. What I wanted to clarify is whether as Neil says, the onboard flash output is disabled, the D700 would still fire the off-camera flash wirelessly. I thought that’s what he meant with the posting – eliminating the light from the camera so that only the off-camera flash(es) influenced the picture.
When Neil says his output flash is the “Master speedlight, and had its own output disabled,” you are correct that its flash output is disabled, and will not add to the flash in the picture.
A speedlight set to Master does fire a very short “pre-flash” to fire all the off-camera flash units. The Master doesn’t fire any more flash after this, allowing the off-camera flash units to do their job.
Because of the pre-flash requirement, you need to ensure that any off-camera speedlights can see the pre-flash coming from the master speedlight.
The rule of thumb is that if you can’t see your off-camera speedlights from your position, those off-camera speedlights will probably not detect the Master speedlight’s pre-flash.
Thanks Stephen, that makes sense now. So it is not true wireless, like with a Pocket Wizard, but still needs the burst to trigger the slave units.
Jaco, the flash on the D700 is a bit wimpy and it may struggle to control SB800 or 900 flashes in some conditions even with good, short distances and good line of sight. You’re better off either have a SB800/900 as commander or an SU-800 command unit for this to work better. The fact you can’t orient the on-board flash sometimes complicates things further. In short triggering from D700 flash works, but it is not 100% reliable.
Just my two cents.
Cheers!
Bogdan
Mark,
A “diffuser” on your flash will make it work like a bare bulb, that’s why Neil’s choice of word was “omnidirectional”.
In terms of reflected bounce colour… ummm… well… even a grey card reading will not help you much but what I’m usually aiming for is as natural as possible skin-tone rendition and if natural is not possible (which is more often than not) “believable” would be my next stop.
Warmer coloured surfaces may work in your advantage at times.
Cheers!
Bogdan
I can imagine the “runner” changing the film, in the dark…. Thanks for this, I’ll practice more.
While neither a pro or a wedding photographer, I’m completely mesmerized by your posts regarding shooting such.
The attention to such details must be what separates the likes of rank amateurs such as myself from folks like you.
”The speedlight in the softbox was set to TTL, and controlled via my on-camera speedlight which was the Master flash. — The flash in the background was in manual mode, and fired via a PocketWizard unit attached to it. This PocketWizard was tripped by the PocketWizard connected to the PC socket on my camera.”
Neil, if you already have a speedlight in your hotshoe, where do you place the PocketWizard who is connected to your PC socket??
Adoro seus post…aprendemos muito com eles e somos muito gratos.
Está aqui diariamente é muito gratificante.
Sempre uso uma determinada tecnica que “aprendi aqui”.
Meu muito obrigado
Ricardo Carvalho – Ilha Grande – Piauí – Brazil
Thanks Neil, I tried the velcro but that didn’t really work, but now I found something else: the PocketWizard Hildozine Caddy. Google for that ;-)
Hi Neil,
First, thank you for posting all your great info.
I am just not understanding how in your images with high ISO, you have so little noise. I seem to get a lot more noise than you do when I use high ISO.
I’m struggling with this still.
Thanks for all your help and comments
Frederic
In the top pic where do you focus to get both of them in focus?