
Another photograph from the recent NYC photo shootout. We were a group of photographers working with Lea during this part of the afternoon. There are several parts in what makes an image successful – the subject, the setting, lighting and then the post-processing.
There are limitations in working as a group with a model. So where I would’ve preferred shooting with a longer lens to compress the perspective more, you sometimes have to accept the situation. In this case, the setting wasn’t ideal, and there was a fair amount of background clutter. Therefore this might be a good time to to show some of what I might do with post-processing of an image. Especially since with this image there was, for me at least, a fair amount of post-processing involved.
Before we get there, just a note about the lighting. It was the same light as I used in this previously posted photograph of the NYC photo shoot-out. The lighting set-up was similar to the one mentioned here, where I explained some of the metering involved in using manual flash with a softbox.
In this instance I wanted to expose for the sky, and then use flash to lift the model to the same exposure level. Starting point was 200 ISO and max flash sync speed. (1/250th for the Nikon D3). Metering for the sky with my camera’s meter, and taking a few test shots, checking the preview image on my camera’s LCD, I was happy with f6.3
I then had to move the softbox close enough, and set my flash power high enough, to give me f6.3 at that distance for that ISO. For this, I used a handheld flashmeter.
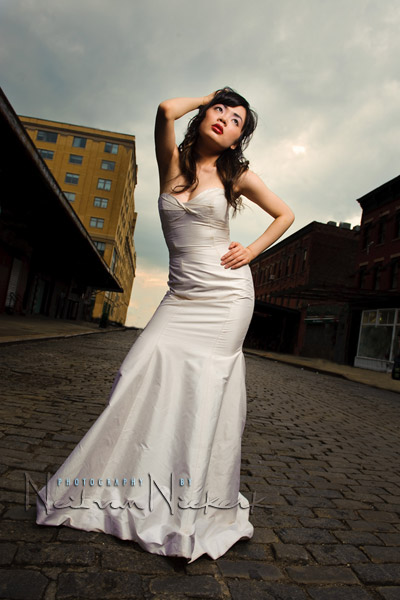
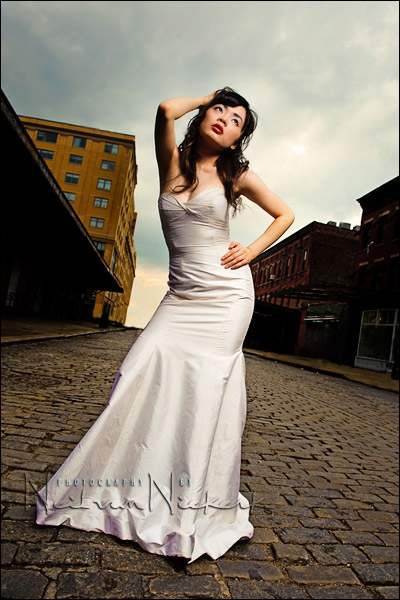
This then is the photograph as I took it, and this is also then my starting point in editing the image afterward …
The original image, with no adjustments other than my default settings for ACR / Bridge in CS4. There’s a lot of clutter that should be eliminated. My camera’s sensor wasn’t as clean as it should be and you can see at least one large dust bunny there. The image also lacks punch. So we can systematically improve on the image ..
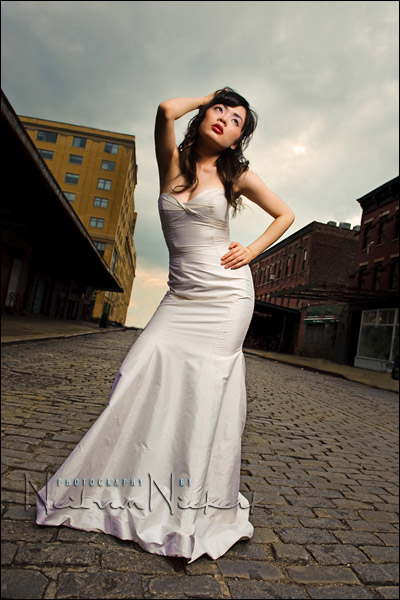
First of all, I adjusted the color balance to give me a slightly warmer tone overall. My preference is definitely for warm skin tones. I also punched in a bit more Contrast and Vibrance. Then, still editing the RAW image in ACR (CS4), I made the sky darker and more brooding by pulling the exposure down and increasing the contrast, using the local corrections feature. I used the Auto-Mask setting. (Thank you for that hint, David!) I then convert this edited RAW file into a JPG. This then gives me a very good JPG to edit further in Photoshop.

.
Working with the JPG now in Photoshop, the first thing I did was to get rid of the dust bunnies. The people in the background also had to go. And the lamp light and all kinds of extraneous things in the background. The simpler, the better.

.
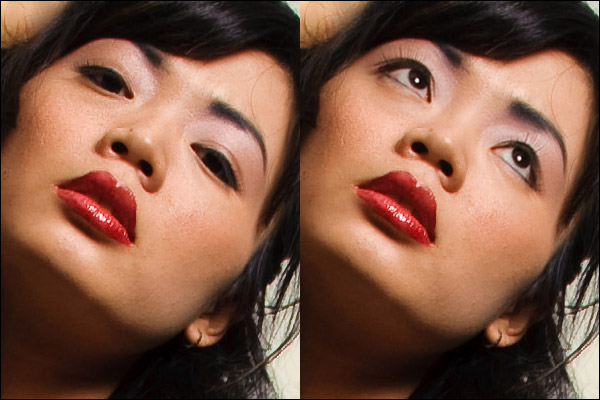
I like this image, but I would’ve preferred if Lea had looked up for this specific image. So I copied her eyes from another image in the sequence, and pasted it over this image. This gives a more dramatic look to the image, and also gives me catch-lights in her eyes.
.
Okay, now we’re getting somewhere! But that van and building in the background still bothered me. They had to go. I cloned them out, using various parts of the building and sidewalks around that area. This part of the edit is a little sloppy, and if you were able to look at the full-res image, you’d see it. But this is where I had to decide on the trade-off between keeping the clutter (at no additional time invested), or get rid of them with a little bit of time invested (but slightly sloppy work there), or spend a lot more time in finessing that. I decided I could live with that little bit of sloppiness there for showing on the web. Very few people would’ve picked it up from the image posted at the top. I could live with it.
.
The next step for me was to give more detail in the paved road. It’s looking a little too somber in the image above. I used the Shadow / Highlightsfeature in Photoshop to bring back a lot more Shadow detail. The rest of the image was masked with a layer mask so that only the paving was affected.
.
Now for the next two steps are interesting, although I am going to gloss over the specifics. In essence, the idea behind what I do for the next few steps are similar to what I wrought for the other photo of this session that I posted … but the specific way I implemented the edits and the specific actions and plug-ins that I used, are different for this image than I had used there. But the approach is the same …
… and the idea is that I use a technique / action(s) / plug-in(s) for Photoshop to over-smoothen detail … but on another layer I use different action(s) or plug-in(s) to really boost the local contrast and saturation and detail. By blending the layers between those two extreme ways of editing the image, you then end up with an interesting look, where there is a lot of detail, but the image looks like it might have been air-brushed. And that’s as much as I am going to give away here. Play around with that idea and see where you end up. There’s a whole variety of ways that can be implemented.

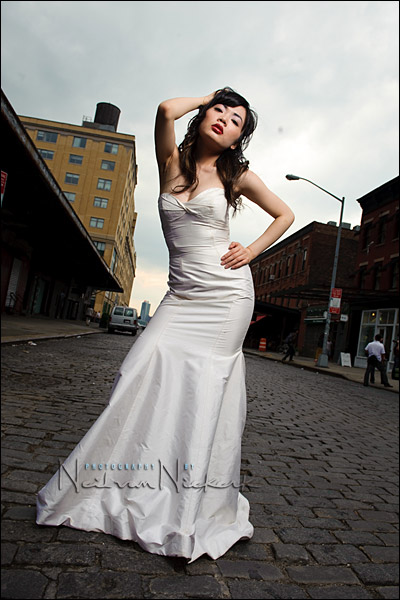
And there’s the final image .. a combination of having a great model, an interesting setting, solid lighting, and some finessing in Photoshop.
I have to underline that word there .. finessing. You can’t save a pitiful image, but you can make a good image even better with some Photoshop fairy dust. But your original photograph needs to have everything in place already, or else the time you spent in editing the image will be needless polishing.
Hey, great picture and gread description, thanks for that!
But one question: why did you leave the grey door or whatever it is in the right middle of the picture? Does it look too “loneley” there without the door?
WOW! Great stuff as always Neil.
Love the blog and the new “recent comments feature”.
I could view your images all day long – they are truly inspirational. I think I speak for everyone when I say it is greatly appreciated that you are willing to share your skills & knowledge with us.
Now, If I could just get over the “demoralized” feeling I get every time I see your work I’d be much happier… ;) Oh well, one of these days maybe I’ll be able to put it all together and create an image 1/2 as nice as yours…
Neil, thanks for sharing all of your knowledge in lighting and your processing techniques. I’m hoping to catch your workshop on September 16th in Boston. Your blog is a daily read!
Hi there again Neil,
I can see from this post that too much would have ruined this image. I think that the thought of less being better was used here. Not only is there a certain x factor added to the original, the end result does not look overdone.
Really nicely explained too.
Thanks so much for all your efforts in helping us to see the potential that exists in an already great out of camera image.
Wow Neil, very nicely done on the image. Thank you for sharing how you got the ending result. I still remember what that day was like… Fun Time!!!
Amazing stuff Neil, thanks for sharing!
Keep up the good work! :)
Wow, you guys keep copying and pasting ppl’s eyes around pics, I’ve never had the courage to try. Even a small change in posture would make it really hard!?
Thanks Neil for the description and added jpegs of the process.
Do you ever post pull back shots of your set ups, i think those are very helpful in lighting.
Neil,
WHen you talking about blending, are you refering to the different ways to blend layers such as soft light, multiply, etc… or are you talking about masking and changing opacity on different layers?
Hi Neil
Really nice post! Again!
I’m really feeling the process you go trough when editing this photo, but I don’t really know photoshop that well to play with it like that. I usually just fix WB and exposure a little and maybe crop a bit too, but never dared to start messing with it like you did.
I really like to learn it! Can you give me some pointers to where I can learn this? Maybe some website or book you used? I especially would like to know how the removing of the ‘clutter’ is done. The cloning thing you mentioned above?
A big thanks for the great content here I allready learned a lot from your website!
Jonas
Nicely created and explained. I really enjoyed the other poster posting the opposite angle. Really funny how selecting the framing of a photograph can so dramatically alter reality.
Hi Neil,
You mentioned in this blog entry that “Metering for the sky with my camera’s meter…” When you do this, where are you setting the exposure needle? Is it 0 or something else.
You written in the past that via the histogram method, the brightest relevant tone (white gown) usually ends up around +1.3 to +1.7 exposure on a Nikon. You also wrote that if you were metering off light skin tones, the exposure needle usually ends up around +0.7.
However, my problem is understanding how to meter for things that are not white gowns and light skin tone (i.e. the sky, the ground, general objects). I just tried to take a picture recently of some buildings and electronic billboards in Times Square (i.e. lots of lights and darks), but I was at a loss how to expose for this. If I exposed for the sky or electronic billboards to get a 0 reading on the exposure needle, the buildings seem a bit underexposed.
Thanks.
Hi Neil,
Thanks for that explanation. Next time, I will try to get the exposure as close to where I would like it to be and then do a little post-processing. I’ve been worrying too much about getting the exposure correct for scenes of extreme brightness and darkness in the camera. (For other scenes, I normally do some post-processing, but I get tripped up on non-people scenes.)
I just realized (doh!) that these scenes of extreme brightness and darkness are excellent candidates for the local adjustment brush in Photoshop CS4/Lightroom 2 to modify exposure locally, as in your other past examples.
Thanks!
Neil you’re the best!